| Base Damage | 10, 10, 20 (40) | |
|---|---|---|
| Startup Frame | 15F | |
| Damage Type | Physical | |
| Priority | Melee Low | |
| EX Force | 30 | |
| Effects | Wall rush | |
| Cancels | ||
| Assist Gain (Hit) | ||
| CP (Mastered) | 20 (10) | |
| Unlocked at level |
Mastered at AP |
| General | Starter Guide | Combos | Strategy | Frame Data |
|---|---|---|---|---|
| Matchups | Builds | Match Videos | Gallery | Resources |
| Info | |
|---|---|
| |
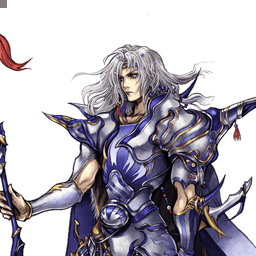
| Name | Cecil Harvey (セシル・ハーヴィ) |
| Original game | Final Fantasy IV |
| Base ATK (LV100) | 109 (Low / +2 as Dark Knight, High) |
| Base DEF (LV100) | 111 (Average / +2 as Paladin, Very High) |
| Run Speed | 9 (Dark Knight, Slow) 5 (Paladin, Above Average) |
| Dash Speed | 81 (Dark Knight, Below Average) 77 (Paladin, Average / Good) |
| Fall Speed | 81 (Dark Knight, Average) 89 (Paladin, Below Average) |
| Fall Speed Ratio After Dodge | 39 (Dark Knight, Average) 40 (Paladin, Average) |
| Fastest BRV | 15F (Valiant Blow) |
| Fastest HP | 13F (Shadow Bringer) |
| 1-Hit HP | Yes (Dark Flame, Luminous Shard) |
| HP Links | Yes (Combos only) |
| Command Block | No |
| Weapon | Axes, Greatswords, Swords |
| Armor | Gauntlets, Heavy Armor, Helms, Light Armor, Shields |
| Exclusive weapons | Dark Sword, Mythgraven Blade, Lustrous Sword Lightbringer, Cimmerian Edge |
| Unlock | |
| Alignment | Cosmos |
| Voice Actor (JP) | Shizuma Hodoshima |
| Voice Actor (ENG) | Yuri Lowenthal |
Cecil Harvey is a close / mid-range character who functions with two different movesets - Dark Knight and Paladin. Due to the risky nature of changing jobs and their distinct strengths, it is often recommended to focus on one job over the other. Cecil can whiff punish effectively from a variety of angles, has decent assist synergy and bravery damage output.
However he struggles to generate assist meter on whiff due to long start-ups, animation length and late cancel opportunities. EX generation is good for Paladin, but weaker in Dark Knight. With less than ideal speed and tracking, limited effective angles, difficulties staying safe and keeping up in meter economy, Cecil often takes relatively high risks for a lower return.
His arguably safer repertoire is restricted to ground (Dark Knight), which also does not often force his opponents to play into his strengths.
Cecil has been primarily a bottom tier character, with some hope for low tier status. Temper your expectations and you may discover a fun character for yourself.
Build styles:
| Strengths | Weaknesses |
|---|---|
| Base Damage | 10, 10, 20 (40) | |
|---|---|---|
| Startup Frame | 15F | |
| Damage Type | Physical | |
| Priority | Melee Low | |
| EX Force | 30 | |
| Effects | Wall rush | |
| Cancels | ||
| Assist Gain (Hit) | ||
| CP (Mastered) | 20 (10) | |
| Unlocked at level |
Mastered at AP |
| Base Damage | 1 x 4, 2 x 4, 3 (15) | |
|---|---|---|
| Startup Frame | 41F | |
| Damage Type | Magical | |
| Priority | Ranged Low (forward), Ranged Mid (backward) | |
| EX Force | each 3 | |
| Effects | Block (Ranged Low) | |
| Cancels | ||
| Assist Gain (Hit) | ||
| CP (Mastered) | 20 (10) | |
| Unlocked at level |
Mastered at AP |
| Base Damage | 8, 7 x 6 (50) | |
|---|---|---|
| Startup Frame | 35F | |
| Damage Type | Physical | |
| Priority | Melee High (close), Ranged Low (far) | |
| EX Force | ~20 | |
| Effects | Wall rush | |
| Cancels | ||
| Assist Gain (Hit) | ||
| CP (Mastered) | 20 (10) | |
| Unlocked at level |
Mastered at AP |
| Base Damage | 10, 10 (20) | |
|---|---|---|
| Startup Frame | 23F | |
| Damage Type | Physical | |
| Priority | Melee Low | |
| EX Force | 90 | |
| Effects | Chase | |
| Cancels | ||
| Assist Gain (Hit) | ||
| CP (Mastered) | 20 (10) | |
| Unlocked at level |
Mastered at AP |
| Base Damage | 3, 3, 5, 4, 4, 11 (30) | |
|---|---|---|
| Startup Frame | 43F | |
| Damage Type | Physical | |
| Priority | Melee Mid (first half), Melee Low (second half) | |
| EX Force | 90 | |
| Effects | Chase, Block (Ranged Low) | |
| Cancels | ||
| Assist Gain (Hit) | ||
| CP (Mastered) | 20 (10) | |
| Unlocked at level |
Mastered at AP |
[Mid] Charge, then leap. Good start for midair attacks.
| Base Damage | 5, 10, 1 x 2, 10 (27) | |
|---|---|---|
| Startup Frame | 23F | |
| Damage Type | Physical | |
| Priority | Melee Low | |
| EX Force | 90 | |
| Effects | Chase, job change | |
| Cancels | ||
| Assist Gain (Hit) | ||
| CP (Mastered) | 20 (10) | |
| Unlocked at level |
Mastered at AP |
| Base Damage | 7, 2 x 4 (15) | |
|---|---|---|
| Startup Frame | 37F | |
| Damage Type | Magical | |
| Priority | Ranged Low | |
| EX Force | 0 | |
| Effects | Wall Rush | |
| Cancels | ||
| Assist Gain (Hit) | ||
| CP (Mastered) | 20 (10) | |
| Unlocked at level |
Mastered at AP |
| Base Damage | 1 each, 24 (25+) | |
|---|---|---|
| Startup Frame | 37F | |
| Damage Type | Physical | |
| Priority | Melee Low (falling), Ranged Mid (landing) | |
| EX Force | 60+ | |
| Effects | Chase | |
| Cancels | ||
| Assist Gain (Hit) | ||
| CP (Mastered) | 20 (10) | |
| Unlocked at level |
Mastered at AP |
[Close] High-speed dive. Useful for quick descents.
| Base Damage | 7, 2 x 4, 3 x 5 (30) | |
|---|---|---|
| Startup Frame | 37F | |
| Damage Type | Magical | |
| Priority | Ranged Low | |
| EX Force | 0 | |
| Effects | Job change | |
| Cancels | ||
| Assist Gain (Hit) | ||
| CP (Mastered) | 20 (10) | |
| Unlocked at level |
Mastered at AP |
[Mid] Change job to Paladin during combo.
| Base Damage | 3, 3, 7, 6, 6, 6, 9 (40) | |
|---|---|---|
| Startup Frame | 19F | |
| Damage Type | Physical | |
| Priority | Melee Low | |
| EX Force | 30 | |
| Effects | Wall rush | |
| Cancels | ||
| Assist Gain (Hit) | ||
| CP (Mastered) | 20 (10) | |
| Unlocked at level |
Mastered at AP |
| Base Damage | 3 x 5, 5, 10 (30) | |
|---|---|---|
| Startup Frame | 21F | |
| Damage Type | Physical | |
| Priority | Melee Low | |
| EX Force | 90 | |
| Effects | Chase | |
| Cancels | ||
| Assist Gain (Hit) | ||
| CP (Mastered) | 20 (10) | |
| Unlocked at level |
Mastered at AP |
| Base Damage | 3 x 5 (15) | |
|---|---|---|
| Startup Frame | 95F | |
| Damage Type | Magical | |
| Priority | Ranged Low | |
| EX Force | 0 | |
| Effects | - | |
| Cancels | ||
| Assist Gain (Hit) | ||
| CP (Mastered) | 20 (10) | |
| Unlocked at level |
Mastered at AP |
| Base Damage | 4, 2 x 5, 6 (20) | |
|---|---|---|
| Startup Frame | 39F | |
| Damage Type | Physical | |
| Priority | Melee High | |
| EX Force | 30 | |
| Effects | Wall rush | |
| Cancels | ||
| Assist Gain (Hit) | ||
| CP (Mastered) | 30 (15) | |
| Unlocked at level |
Mastered at AP |
| Base Damage | - | |
|---|---|---|
| Startup Frame | 53F | |
| Damage Type | - | |
| Priority | Ranged High | |
| EX Force | 0 | |
| Effects | Wall rush | |
| Cancels | ||
| Assist Gain (Hit) | ||
| CP (Mastered) | 30 (15) | |
| Unlocked at level |
Mastered at AP |
[Long] Summon dark fire. Slow speed, strong homing.
Dark Flame is reactable, but stays on the field for a few seconds and has decent tracking throughout the active period.
Dark Flame can adjust it's tracking, so if Auto Assist Lock On is enabled, it can protect Cecil against slower ground assists
| Base Damage | 10, 10 (20) | |
|---|---|---|
| Startup Frame | 13F | |
| Damage Type | Physical | |
| Priority | Melee High | |
| EX Force | 30 | |
| Effects | Wall rush, Dark Knight BRV damage +3%, Paladin BRV damage -3% | |
| Cancels | ||
| Assist Gain (Hit) | ||
| CP (Mastered) | 30 (15) | |
| Unlocked at level |
Mastered at AP |
[Ultra-close] Dark sword slash. Dark Knight BRV damage +3%, Paladin BRV damage -3%.
| Base Damage | 1 x 3, 2, 1 x 2, 3 (10) | |
|---|---|---|
| Startup Frame | 53F | |
| Damage Type | Physical | |
| Priority | Melee High | |
| EX Force | 30 | |
| Effects | Wall rush | |
| Cancels | ||
| Assist Gain (Hit) | ||
| CP (Mastered) | 30 (15) | |
| Unlocked at level |
Mastered at AP |
| Base Damage | 2 x 5, 5 (15) | |
|---|---|---|
| Startup Frame | 43F | |
| Damage Type | Both | |
| Priority | Ranged High (first hit), Melee High (other hits) | |
| EX Force | 30 | |
| Effects | Wall rush | |
| Cancels | ||
| Assist Gain (Hit) | ||
| CP (Mastered) | 30 (15) | |
| Unlocked at level |
Mastered at AP |
[Close] Holy sword magic. Effective against any height.
| Base Damage | - | |
|---|---|---|
| Startup Frame | 63F | |
| Damage Type | - | |
| Priority | Ranged High | |
| EX Force | 60 | |
| Effects | Paladin BRV damage +3%, Dark Knight BRV damage -3% | |
| Cancels | ||
| Assist Gain (Hit) | ||
| CP (Mastered) | 30 (15) | |
| Unlocked at level |
Mastered at AP |
[Long] Shoot light projectiles. Paladin BRV damage +3%. Dark Knight BRV damage -3%.
Equipping Luminous Shard will lock you out equipping the grounded Shadow Bringer HP for the Dark Knight job.
As Ranged High priority, Luminous Shard will prevent Cecil from staggering during LV2 Assist Change. This relative safety is about all the move has going for it though, only worth consideration for Paladin-oriented playstyles.Effects:
[Activate with R + Square] Bridles light and darkness to instantly change jobs without attacking.
[Always active while in EX Mode] Each attack is 1.5 times as powerful.
A chain of attacks combining the power of light and darkness. Enter the commands that appear on both sides of the screen at the same time.
| Damage multiplier (initial) | Damage multiplier (rest) | Type |
|---|---|---|
| 6, 9 (15, DK) | 15 (PA), 25 (DK), 7 x 2 (DK), 30 (PA) (99 total) | Both |
Cecil has two jobs, but only has access to one of them at a time. To change jobs, use an attack that transitions into the other job. Dark Step or Paladin Arts braveries can only be done Dark Knight and Paladin jobs respectively. HP attacks on the other hand are always available and change Cecil's job depending on if he's grounded or not. Ground HP attacks change to a Dark Knight job, while midair HP attacks change to a Paladin job.
Jobs can be changed freely outside of attack animations during EX mode by pressing R+Square. This means that outside of EX mode, Cecil often makes himself vulnerable in order to change movesets, making this adjustment rather risky for Cecil at times. Not only that, equipping Shadow Bringer or Luminous Shard HP attack locks Cecil out of equipping the other HP, further incentivising dedicated Dark Knight or Paladin playstyle.
Cecil ALWAYS starts a fight in Dark Knight form, meaning Paladin-focused players will have to perform an HP attack as soon as the match starts, or bide their time in Dark Knight form until they have an opportunity to change forms without being punished.
Cecil has a couple combo starters with both jobs, which can lead to bravery and HP follow-ups alike. Most of his attacks can be used as follow-ups, so Cecil has rather flexible combo routing. Cecil's most reliable starters (Dark Cannon & Searchlight) are telegraphed low priority projectiles, so he may need assist to do these combos more consistently.
Dark Knight can combo with either Dark Cannon or Paladin Arts. Dark Cannon leads to other Dark Knight melee attacks, while Paladin Arts leads to Paladin attacks. Cecil gets decent damage with Dark Cannon starters, but its low damage can vary due to how projectiles move. On average, Dark Cannon can deal four hits (3x3, 3 / 9 total).
| ||||||||||||||||||||
|---|---|---|---|---|---|---|---|---|---|---|---|---|---|---|---|---|---|---|---|---|
| ||||||||||||||||||||
| ||||||||||||||||||||
| ||||||||||||||||||||
Cecil's combos expand considerably with Slash and Searchlight. Slash provides a few good Paladin combos on the ground. Searchlight also supports both jobs (and in EX Mode), and Cecil can do more if the opponent is on the ground. With Searchlight, Cecil can also go for the hit glitch with Paladin Force as means to do HP damage in the neutral.
| ||||||||||||||||||||
|---|---|---|---|---|---|---|---|---|---|---|---|---|---|---|---|---|---|---|---|---|
| ||||||||||||||||||||
| ||||||||||||||||||||
| ||||||||||||||||||||
Cecil can convert off of wall rush, first part of a bravery attack or by initiating chase. Dark Knight primarily converts off of the first two, while Paladin can also convert off of chase.
Note that Dark Flame can wall rush in stages with low ceiling such Pandaemonium - Top Floor and M.S. Prima Vista!
* Valiant Blow (1st part) - Jecht - Dark Cannon - Valiant Blow / Shadow Lance / Shadow Bringer / Soul Eater
The same principles apply as with Jecht assist, except ground wall rush off of Gravity Ball requires a wall for follow-ups. Yuna holds for a shorter amount of time as well.
Due to the assist's knockback, ending combos in Paladin Force is often most reliable. Shadow Bringer can help in safely transitioning back to Dark Knight, however.
Chase sequences allow Cecil to trap the opponent inside Aerith's Seal Evil or brute force an HP attack via chase. What Cecil loses in EX depletion on assist hit, he makes up for it with opportunities to set up solo combos and accumulate bravery or inflict HP damage.
Any grounded wall rush Aerith combo can be followed up with a Searchlight solo combo or an HP attack. This creates a lot of variance, but they all do the same things as they normally would - The Slash solo combo adds bravery damage or EX depending on the ender (Radiant Wings or Sacred Cross respectively), but landing an HP is also an option with Paladin Force or even Shadow Bringer.
Note, that if an opponent does not evade a chase HP attack during an Aerith setup, they can get wall rushed when close to a wall or a corner. This will net Cecil HP damage on top of the assist combo.
Slash solo combos also serve as assist combo starters for Aerith, so the damage and EX gain differ with the starter. Slash > Free Air Dash > Radiant Wings is more damage, while Slash > Free Air Dash > Sacred Cross is more EX.
| Starter | Combo | Damage | EX Force | Notes | Video |
|---|---|---|---|---|---|
| Lightning Rise | -- | 30 (3, 3, 5, 4, 4, 11) | 90 | Not often used due to Lightning Rise's shortcomings, but Cecil can follow up after setting up Aerith assist with a chase HP. | -- |
| Aerith > Chase > Chase HP > opp dodged > Searclight > Paladin Force | 60 + HP WR (30 > 3x5 > 2x5, 5) | 135 (90, 15 chase, 30) | Chase setup. Call Aerith before the chase prompt appears, then proceed to enforce an HP attack on the opponent. | video | |
| Slash > Free Air Dash > Radiant Wings | -- | 60 (10, 10, 3, 3, 7, 6, 6, 6, 9 + WR) | 120 (90, 30) | Higher damaging starter combo. | -- |
| Aerith > WR > Searchlight (right before landing) > Land > Searchlight (hit) > Slash > Free Air Dash > Radiant Wings | 135 + WR (3x5 > 10, 10 > 40 + WR) | 240 (120, 0, 90, 30) | Bravery damage. | video | |
| Slash > Free Air Dash > Sacred Cross | -- | 50 (10, 10, 3x5, 5, 10) | 180 (90, 90) | No wall rush, Sacred Cross ender prioritizes EX Force generation. | -- |
| Aerith > Chase > Chase HP > opp dodged > Searchlight > Sacred Cross | 95 (50 > 3x5 > 3x5, 5, 10) | 285 (180, 15 chase, 0, 90) | EX focused combo with no HP at the end. | video | |
| Aerith > Chase > Chase HP > opp dodged > Searchlight > Paladin Force | 80 + HP(50 > 3x5 > 2x5, 5) | 225 (180, 15 chase, 30) | HP ender sacrifices brv damage and EX. | video | |
| Dark Step | -- | 27 (5, 10, 1x2, 10) | 90 | Chase setup. Call Aerith before Cecil becomes grounded, then initiate chase. | -- |
| Aerith > Land > Chase > Chase HP > opp dodged > Searchlight > Paladin Force | 57 (27, 3x5 > 2x5, 5 + HP WR) | 135 (90, 15 chase, 0, 30) | -- | video |
| Starter | Combo | Damage | EX Force | Notes | Video |
|---|---|---|---|---|---|
| Sacred Cross | -- | 30 (3x5, 5, 10) | 90 | Air combo starter. Doesn't require a wall and Sacred Cross is one of Cecil's better aerial moves, which will see use often. | -- |
| Aerith > Chase > Chase HP > Opp dodged > Aerith (hit) > Searchlight > Paladin Force | 60 + HP WR (3x5, 5, 10 > 3x5 > 2x5, 5 + HP WR) | 135 (90, 15 chase, 30) | Air chase setup into a solo HP combo. Aerith must be called quickly after Sacred Cross' last hit, because of the early chase prompt. | video | |
| Aerith > Chase > Chase HP > Opp dodged > Aerith (hit) > Searchlight > Sacred Cross | 75 (3x5, 5, 10 > 3x5 > 3x5, 5, 10) | 195 (90, 15 chase, 90) | Air chase setup into solo BRV combo. Ending the combo with Sacred Cross generates a lot more EX Force. | video | |
| Aerith > Empty Chase > WR (ground) > Aerith (hit) > Jump > Searchlight > Land > Slash > Free Air Dash > Sacred Cross | 95 (3x5, 5, 10 > 3x5 > 10, 10 > 3x5, 5, 10) | 270 (90, 0, 90, 90) | Air-to-ground assist combo with a solo combo ender. This one has highest EX gain. Must be near ground for empty chase to cause wall rush. Delay the chase a little bit to force the grounded wall rush from higher altitude. | video | |
| Radiant Wings | -- | 40 + WR (3, 3, 7, 6, 6, 6, 9 + WR) | 30 | Wall Rush. Aerith is too slow to convert off of Radiant Wings' first part unless done pre-emptively as a punish. | -- |
| Aerith > WR > Searchlight > Paladin Force | 65 + HP WR (40 + WR > 3x5 > 2x5, 5 + HP WR) | 60 (30, 0, 30) | Wall Rush, basic assist combo into HP. Call Aerith after last hit, but before wall rush happens. | video | |
| Aerith > WR > Searchlight (right before landing) > Land > Slash > Free Air Dash > Radiant Wings | 115 + WR (40 + WR > 3x5 > 10, 10 > 40 + WR) | 150 (30, 0, 90, 30) | Wall Rush. Slash combo that prioritises bravery damage. | video |
* Searchlight - Tidus (air) - BRV / HP
* Searchlight - Yuna (air) - Free Air Dash if at a distance - BRV / HP
| Stats | |
|---|---|
| HP | 9883 |
| CP | 450 |
| BRV | 1623 |
| ATK | 176 |
| DEF | 182 |
| LUK | 61 |
| Max Booster | x3.8 |
| Equipment | |
|---|---|
| Assist | Jecht / Sephiroth / Yuna |
| Weapon |
Piggy's Stick |
| Hand |
Chainsaw |
| Head |
Thornlet |
| Body |
Maximillian |
| Accessory 1 |  Sniper Eye Sniper Eye
|
| Accessory 2 | Dismay Shock
|
| Accessory 3 | Battle Hammer
|
| Accessory 4 |  BRV = 0 BRV = 0
|
| Accessory 5 | Empty EX Gauge
|
| Accessory 6 | Pre-EX Mode
|
| Accessory 7 | Pre-EX Revenge
|
| Accessory 8 |  Blue Gem Blue Gem
|
| Accessory 9 | Miracle Shoes
|
| Accessory 10 | Side by Side
|
| Summon |
Rubicante |
| Bravery attacks | |
|---|---|
| Ground | Aerial |
| HP attacks | |
| Ground | Aerial |
![]() indicates a "Gear" extra ability or the use of CP / Equipment glitch. The total CP cost will assume the glitch is done.
indicates a "Gear" extra ability or the use of CP / Equipment glitch. The total CP cost will assume the glitch is done.
Use the CP glitch with Equip Machines and Bard's Gear.
Blue Gem and Miracle Shoes can be substituted with Together as One, Hero's Seal or Back-Breaking Straw (to offset Thornlet penalties).
Boosters "Grounded" and "BRV = 0" can enhance HP wall rush damage with a higher multiplier at the cost of lower base bravery.
| Stats | |
|---|---|
| HP | 10299 |
| CP | 450 |
| BRV | 956 (1147 with First to Victory) |
| ATK | 178 |
| DEF | 183 |
| LUK | 60 |
| Max Booster | x3.0 |
| Equipment | |
|---|---|
| Assist | Kuja / Aerith |
| Weapon |
Cleaver |
| Hand |
Lufenian Shield |
| Head |
Lufenian Helm |
| Body |
Lufenian Armor |
| Accessory 1 | Hyper Ring
|
| Accessory 2 | Muscle Belt
|
| Accessory 3 | Dismay Shock
|
| Accessory 4 | Summon Unused
|
| Accessory 5 | Pre-EX Mode
|
| Accessory 6 | Pre-EX Revenge
|
| Accessory 7 | Opponent Summon Unused
|
| Accessory 8 | White Gem
|
| Accessory 9 | Tenacious Attacker
|
| Accessory 10 | First to Victory
|
| Summon |
Rubicante |
| Bravery attacks | |
|---|---|
| Ground | Aerial |
| HP attacks | |
| Ground | Aerial |
![]() indicates a "Gear" extra ability or the use of CP / Equipment glitch. The total CP cost will assume the glitch is done.
indicates a "Gear" extra ability or the use of CP / Equipment glitch. The total CP cost will assume the glitch is done.
Use the CP glitch with Ranger's Gear.
"Muscle Belt" basic accessory and "Opponent Summon Unused" booster can be substituted with what the player wants more.
Tenacious Attacker is not essential if Aerith assist is used. Hero's Essence can be used for additional Extra Abilities (critical hit rate). Winged Boots is good for banish trap stages.| Type | Attack | Startup | Position | Spawn | Damage multiplier | Effects |
|---|---|---|---|---|---|---|
| BRV | Shadow Lance | 35F | Ground | Opponent | 8, 7 x 6 (up to 50) | Wall Rush |
| BRV | Radiant Wings | 19F | Air | Opponent | 3, 3, 7, 6, 6, 9 | Wall Rush |
| HP | Soul Eater | 39F | Ground | Opponent | 4, 2 x 5, 6 (20) | Wall Rush |
| HP | Saint's Fall | 53F | Air | Opponent | 1 x 3, 2, 1 x 2, 3 (10) | Wall Rush |
Fast whiff punishes, converts off of Cecil's key moves and wall rush, sets up solo combos and lets him transition into Dark Knight from Paladin on hit as part of a combo.
Whiff punishes and more notably, easy knockback cancels. With assist meter, Cecil won't have to rely on wall rushes for assist conversions.
Ranged Low priority that isn't staggered by LV2 Assist Change, converts off of key moves, wall rush and often works within Cecil's effective range in smaller stages.
Lets Cecil combo Sacred Cross into an HP by initiating a chase at the cost of no EX depletion on hit. As such, can set up solo combos anywhere. Combos safely into Luminous Shard without being staggered by LV2 Assist Change.
Fastest whiff punisher in the air with less air combo potential, but ground assist can wall rush on the ground for extended solo combos.
Air conversions have restrictions, but doesn't stagger from LV2 Assist Change. Works well when playing near the ground.
Please edit this page's roadmap template when relevant additions and changes are made.
31,39 % done
| Page | Completed | In progress | To-do | Score |
|---|---|---|---|---|
| General | 27 / 86 | |||
| Pros / Cons | Write strengths and weaknesses. | / ? | ||
| Overview / Character Data | Rewritten overview and strengths and weaknesses. | 2 / 2 | ||
| Bravery Attacks | Ability info, images and overviews. | 5 / 5 | ||
| HP Attacks | Ability info, images and overviews. | 5 / 5 | ||
| EX Mode | Basic info, images and overviews. | Overview for Inner Strength? | 3 / 3 | |
| Combos | Combo page created. Solo combos listed. Assist combos (Aerith & Tidus) listed. | Categorize combos more appropriately. | Add video examples and other previously written Dark Knight combos on combo page. | 3 / 7 |
| Builds | 2 example builds. | Add overviews, substitutes etc, as seen on Cloud's build page. Leave one general use build on Cecil's main page. | 2 / 10 | |
| Assist | Assist data. | Elaborate on viable assists more? Clean up section. Write overview for Cecil assist. | 2 / 3 | |
| Matchups | Page created. | Matchup analysis and tips. | 0 / 32 | |
| Frame Data | Create page. | 0 / 1 | ||
| Starter Guide | Create page. | 0 / 8 | ||
| Strategy | Strategies, dodge punishment and counterplay added. | Add more if possible. Categorize sections more concisely while retaining coherency. | 5 / 10 |