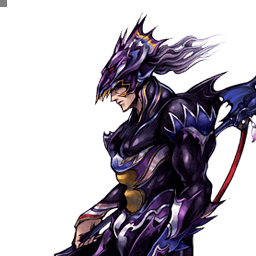
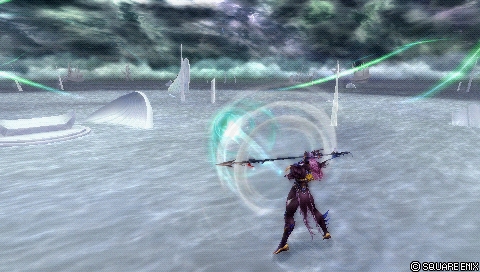
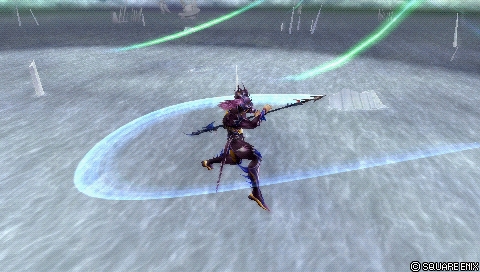
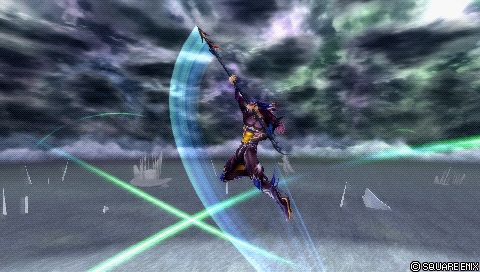
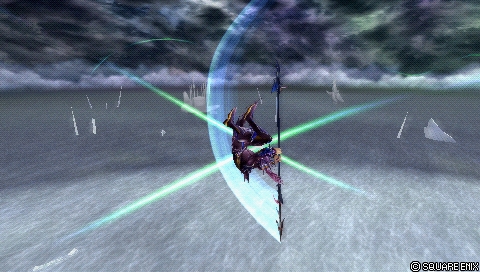
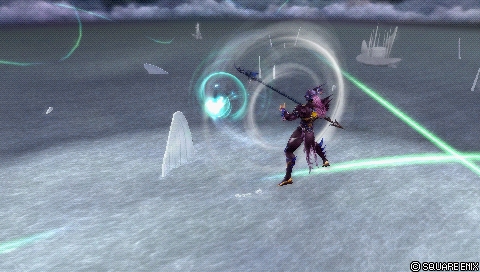
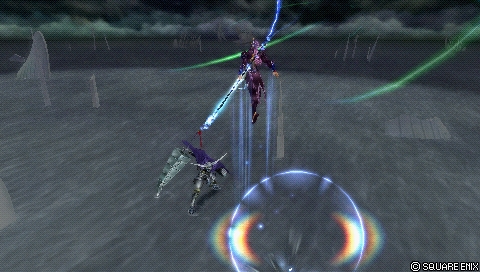
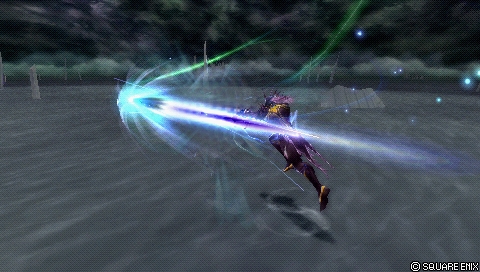
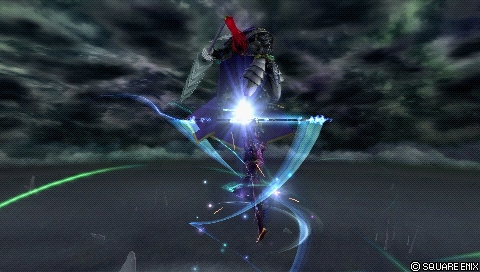
Kain Highwind (Dissidia 012)
| General | Starter Guide | Combos | Strategy | Frame Data |
|---|---|---|---|---|
| Matchups | Builds | Match Videos | Gallery | Resources |
| Info | |
|---|---|
<img style="width: 239px; height: 256px; object-fit: cover; display:block; margin:0 auto;" src=" " alt="">
| |
| Name | Kain Highwind (カイン・ハイウインド) |
| Original game | Final Fantasy IV |
| Base ATK (LV100) | 110 (Average) |
| Base DEF (LV100) | 111 (Average) |
| Run Speed | 8 (Below Average) |
| Dash Speed | 81 (Below Average) |
| Fall Speed | 67 (Fast) |
| Fall Speed Ratio After Dodge | 16 (Very Fast) |
| Fastest BRV | 19F (Spiral Blow, Lance Barrage) |
| Fastest HP | 41F (Dragon's Fang) |
| 1-Hit HP | Dragon's Fang, Lancet |
| HP Links | Yes (Combos only) |
| Command Block | No |
| Weapon | Daggers, Greatswords, Katanas, Spears, Swords |
| Armor | Shields, Gauntlets, Large Shields, Helms, Light Armor, Heavy Armor |
| Exclusive weapons | Black Dragon Spear, Holy Dragon Spear, Abel's Lance, Highwind |
| Unlock | Default |
| Alignment | Cosmos |
| Voice Actor (JP) | Koichi Yamadera |
| Voice Actor (ENG) | Liam O'Brien |
Overview
Kain is a close-range aerial fighter with high vertical movement. He has a unique homing air dash which can be done after melee bravery attacks. Kain excels defensively in the air largely due to his mobility; His air jumps and Precision Jumps are top class, and his fast fall speed makes his air dodges very safe to use. His aerial attacks are fast and cover diagonal angles well, which are effective for defensive {{#tooltip: punish |
Attacking someone when they are recovering from a move and are unable to defend. This is typically guaranteed damage when done right.
}}-oriented playstyles. When Kain gets a hit, he can alter the {{#tooltip: knockback |
The distance travelled after getting hit by an attack. The exact distance varies depending on the attack.
}} direction with his branching follow-ups and few, but rewarding solo combos. His {{#tooltip: wall carry |
The distance travelled when a combo is happening. Longer distance means a combo pushes the opponent closer to the wall. In Dissidia 012, longer distance is better for getting a Wall Rush.
}} has high potential thanks to his Lance Barrage loops and very damaging aerial HP attacks. Even though Kain's base ATK is average, his damage output is much higher in practice due to his combos, critical hits and high base damage on wall rush moves, such as Rising Drive and Sky Rave. And if Kain finds himself on the ground, he can control air space with his signature Jump HP attack and slow down the pace on a moment's notice.
Kain is defensively strong, but he relies on air braveries that aren't best-in-class for {{#tooltip: rushdown |
An offensive playstyle that focuses on getting close to the opponent and attacking them relentlessly.
}}. He can {{#tooltip: poke |
A fast attack that is used to occupy space, start offense and fill assist gauge.
}}, but the attacks are all slower across the board. Kain doesn't move during their {{#tooltip: startup |
The time it takes before an attack can do damage.
}}, and their {{#tooltip: tracking |
Tracking refers to how effectively a move can follow the opponent once it is performed. Similar to "homing".
}} is linear in one specific direction. His relatively slow {{#tooltip: recovery |
The period of time that occurs after an action has finished, but before gaining full control of the character again. For example, many HP attacks in Dissidia 012 have long recovery. This may be occasionally referred to as "endlag".
}} also makes him vulnerable to {{#tooltip: whiff punishment |
Hitting an opponent who missed (whiffed) their attack.
}} in close-range. This puts Kain in an awkward spot; He is defensively difficult to hit, but he has trouble hitting opponents himself. He relies on timing {{#tooltip: mixups |
A situation where a player has several ways to attack, which require different actions from the defending player.
}} to avoid getting blocked, and he can't always stop fast movement either. Kain has few projectiles, but they are all telegraphed or risky for poking through traps, like Ultimecia's charged Knight's Lance or The Emperor's Thunder Crest. He is a close-range character without many standout traits for offense specifically.
In competitive play, Kain has been commonly ranked at mid tier. His defensive playstyle works reliably against a variety of characters, as he is good at avoiding damage in the air or powering through with charged Jumps on the ground. He's an explosive character when he gets a clean combo, but he can struggle to force openings against defensive opponents. His assist meter building is also somewhat slow, but that's mostly a problem in small stages while under pressure. In a game where defensive play is considered strong, Kain is a competent character with a fairly straightforward moveset and high damage.
| Strengths | Weaknesses |
|---|---|
Unique Mechanic: Air Dash Cancel
<img src="
" style="object-fit: none; object-position: 0% 0%; border:3px solid RGB(105,86,160);></img>
When Kain finishes a melee bravery attack, he can {{#tooltip: cancel |
An action that is interrupted early by doing another action.
}} it into a homing air dash by pressing Triangle <img>
</img>. Its main application is filling assist gauge with Assist Gauge Up Dash ability while approaching opponent. This can be useful for optimizing ground assist combo starters, but it sees little use in other situations. The dash and Kain's relatively slow {{#tooltip: startup |
The time it takes before an attack can do damage.
}} speed for his air braveries do not open up solo combo routes for Kain.
This is built-in for Kain, so he does not need to equip any dash abilities to do this. Kain will perform the air dash even when Triangle <img>
</img> is held down beforehand. In practice, it is similar to an {{#tooltip: input buffer |
Pressing a button during another action to ensure the next action comes out as soon as possible. Dissidia 012 does not apply input buffer in most places, so this should not be confused with input latency, or general responsiveness.
}}, which is rare in Dissidia 012.
Bravery Attacks
Ground
<tabber> |-|Spiral Blow=
<img src=" " style="width:250px; height:270px; object-fit: none; object-position: ; border:3px solid RGB(105,86,160); inline-table;"></img>
| ||
|---|---|---|
| The attack's baseline damage value before equipment and stats are considered. }} | 20 | |
| The time it takes for this attack to do damage. Currently this is measured at 60 frames per second (30F would be 0.5 seconds).}} | 19F | |
| Damage Type | Physical | |
| Priority | Melee Low | |
| The amount of EX that can be gained from EX Force. 1000 = Full EX gauge.}} | 0 | |
| Effects | Wall Rush | |
| What this move can be cancelled into.}} | Dodge | |
| Assist Gain {{#tooltip: (Hit) | The amount of assist gauge filled if this attack hits. 5000 = 1 assist gauge.}} | ||
| CP (Mastered) | 30 (15) | |
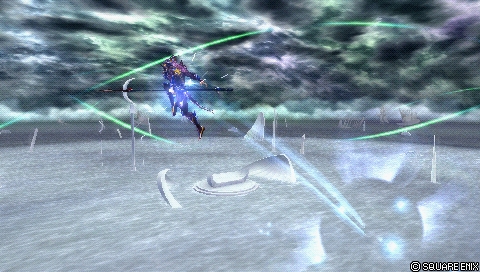
| [Close] Charge at opponent while spinning diagonally upwards. |
Unlocked at level |
Mastered at AP |
Spiral Blow is occasionally used as a {{#tooltip: poke |
A fast attack that is used to occupy space, start offense and fill assist gauge.
}} or a {{#tooltip: punish |
Attacking someone when they are recovering from a move and are unable to defend. This is typically guaranteed damage when done right.
}} tool near walls. Its relatively quick {{#tooltip: startup |
The time it takes before an attack can do damage.
}} and low vertical angle make it good for hitting opponents in front of Kain. The base damage is decent, and it has average {{#tooltip: knockback |
The distance travelled after getting hit by an attack. The exact distance varies depending on the attack.
}} for wall rush. As such, Spiral Blow also works as an assist combo starter.
Kain becomes airborne when using Spiral Blow, so he cannot use this move repeatedly on the ground. It's one of the safer ground moves to {{#tooltip: whiff |
A missed attack that doesn't make any contact.
}}, but it's also low reward without wall rush and assist.
|-|Lance Burst=
<img src=" " style="width:250px; height:270px; object-fit: none; object-position: ; border:3px solid RGB(105,86,160); inline-table;"></img>
| ||
|---|---|---|
| The attack's baseline damage value before equipment and stats are considered. }} | 32 (2 x 6, 5, 15) | |
| The time it takes for this attack to do damage. Currently this is measured at 60 frames per second (30F would be 0.5 seconds).}} | 29F | |
| Damage Type | Physical | |
| Priority | Melee Low | |
| The amount of EX that can be gained from EX Force. 1000 = Full EX gauge.}} | 90 | |
| Effects | Chase | |
| What this move can be cancelled into.}} | Dodge | |
| Assist Gain {{#tooltip: (Hit) | The amount of assist gauge filled if this attack hits. 5000 = 1 assist gauge.}} | ||
| CP (Mastered) | 30 (15) | |
| [Mid] Stab w/lance and kick foe. Deal more damage when close. |
Unlocked at level |
Mastered at AP |
Lance Burst is Kain's strongest ground bravery for damage. Its main application is in {{#tooltip: punish |
Attacking someone when they are recovering from a move and are unable to defend. This is typically guaranteed damage when done right.
}} situations against block or dodge. The base damage is above average, and it starts combos anywhere; Assist can follow up after the stab, and Kain can dodge cancel > Lance Barrage for a solo combo. Both routes are practical for Kain with some practice, so this is often equipped in competitive play.
Lance Burst moves Kain forward, and remains {{#tooltip: active |
The period of time when an attack is capable of doing damage.
}} until Kain stops moving. This is enough to punish ground dodges after a dash.
The main drawback is the {{#tooltip: reactable |
An attack that has slow enough startup that a human can react to it and defend correctly.
}} {{#tooltip: startup |
The time it takes before an attack can do damage.
}}. This is not a huge issue in most {{#tooltip: matchups |
Two specific characters matched against each other. Also refers to the strategy and knowledge surrounding it.
}} though, as Kain does not need to fight on the ground often. He doesn't have many effective {{#tooltip: mixup |
A situation where a player has several ways to attack, which require different actions from the defending player.
}} options on the ground, often defaulting to charged Jumps for safety. Lance Burst also cannot {{#tooltip: anti-air |
Attacking an airborne opponent from below, usually on the ground.
}} opponents.
|-|Cyclone (ground)=
<img src=" " style="width:250px; height:270px; object-fit: none; object-position: ; border:3px solid RGB(105,86,160); inline-table;"></img>
| ||
|---|---|---|
| The attack's baseline damage value before equipment and stats are considered. }} | 10 | |
| The time it takes for this attack to do damage. Currently this is measured at 60 frames per second (30F would be 0.5 seconds).}} | 35F | |
| Damage Type | Physical | |
| Priority | Ranged Low | |
| The amount of EX that can be gained from EX Force. 1000 = Full EX gauge.}} | 0 | |
| Effects | - | |
| What this move can be cancelled into.}} | ||
| Assist Gain {{#tooltip: (Hit) | The amount of assist gauge filled if this attack hits. 5000 = 1 assist gauge.}} | ||
| CP (Mastered) | 30 (15) | |
| [Long] Launch pockets of air at foe to send upwards. |
Unlocked at level |
Mastered at AP |
Cyclone is a homing projectile that is sparingly used on the ground. On hit, Cyclone pulls opponents in and it has enough {{#tooltip: hit stun |
The period of time when a character cannot do an action after getting hit by an attack.
}} to combo into HP attacks, notably Rising Drive. Kain needs to be in midrange to do these combos, so Cyclone is often reserved for assist combos. This is more practical for Cyclone's aerial version.
Kain is considered airborne for a very brief moment after {{#tooltip: recovery |
The period of time that occurs after an action has finished, but before gaining full control of the character again. For example, many HP attacks in Dissidia 012 have long recovery. This may be occasionally referred to as "endlag".
}}, which lets him combo into Rising Drive at a distance. This is easy to miss both due to positioning and strict timing, and Kain becomes grounded if he does not act with precise timing.
Kain's ground braveries are not well suited for long-term ground combat. Cyclone is no exception; It's not very effective for controlling space due to the low priority and slow {{#tooltip: startup |
The time it takes before an attack can do damage.
}}. It travels at medium speed once it is {{#tooltip: active |
The period of time when an attack is capable of doing damage.
}}, but it realigns gradually against vertical opponents. Kain also remains still for a moment after casting Cyclone, so it can lose to homing dashes.
</tabber>
Aerial
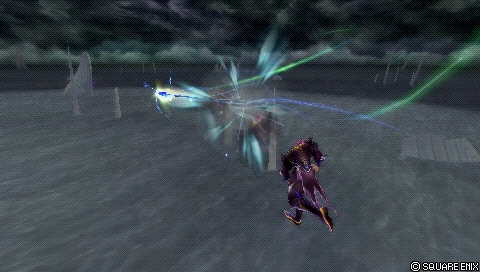
<tabber> |-|Lance Barrage=
<img src=" " style="width:250px; height:270px; object-fit: none; object-position: ; border:3px solid RGB(105,86,160); inline-table;"></img>
| |||
|---|---|---|---|
| Normal + Neutral | Normal + Up / Down | ||
| The attack's baseline damage value before equipment and stats are considered. }} | 35 (7, 8 + 2 x 4, 12) | 30 (7, 8 + 15) | |
| The time it takes for this attack to do damage. Currently this is measured at 60 frames per second (30F would be 0.5 seconds).}} | 19F | 19F | |
| Damage Type | Physical | Physical | |
| Priority | Melee Low | Melee Low | |
| The amount of EX that can be gained from EX Force. 1000 = Full EX gauge.}} | 30 | 90 | |
| Effects | Wall Rush | Chase | |
| What this move can be cancelled into.}} | Dodge | Dodge | |
| Assist Gain {{#tooltip: (Hit) | The amount of assist gauge filled if this attack hits. 5000 = 1 assist gauge.}} | |||
| CP (Mastered) | 30 (15) | ||
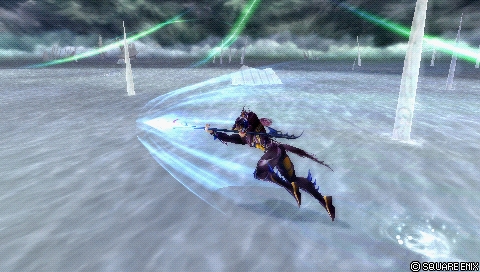
| [Close] Multiple lance thrusts. Change combo with analog stick. |
Unlocked at level |
Mastered at AP | |
-
Up Follow-up ↑+<img>
</img> -
Neutral Follow-up <img>
</img> -
Down Follow-up ↓+<img>
</img>
Lance Barrage is Kain's main {{#tooltip: poke |
A fast attack that is used to occupy space, start offense and fill assist gauge.
}}. It moves Kain forward, which makes it the primary move for hitting opponents in front of him. This is a consistent move for {{#tooltip: punishing |
Attacking someone when they are recovering from a move and are unable to defend. This is typically guaranteed damage when done right.
}} opponents in close-range, whether it's after a {{#tooltip: whiff |
A missed attack that doesn't make any contact.
}}, block stagger or missed block. On hit, Kain can call assist for a combo or go for a directional follow-up. These follow-ups are crucial for Kain's combos and meter gain, but he benefits a lot from them.
- Up Follow-up ↑+<img>
</img> - Up Follow-up does not wall rush, but generates 90 EX. This lets Kain combo into another Lance Barrage after a {{#tooltip: dodge cancel |
Dodge cancel refers to an action that is interrupted with a dodge. Abbreviated as DC.
}}. It is Kain's primary {{#tooltip: midscreen |
Any space in the stage where neither player is in a corner or at a wall. Basically means no walls or ceilings nearby.
}} solo combo and also an infinite combo. The timing for the combo is somewhat strict, but Kain gets plenty of wall carry and assist gauge for successful repetitions. Once Kain is near a wall, he can end the Lance Barrage combo with Neutral Follow-up for a wall rush. As a result, Up Follow-up contributes greatly to Lance Barrage's damage potential. In competitive play, two Lance Barrages are always allowed, so Kain can get good mileage out of this follow-up. Up Follow-up also works in assist combos; Kuja assist connects in corners and Aerith assist can combo via Chase.
- Neutral Follow-up <img>
</img> - Multiple advancing thrusts with lateral pushback. This has good {{#tooltip: wall carry |
The distance travelled when a combo is happening. Longer distance means a combo pushes the opponent closer to the wall. In Dissidia 012, longer distance is better for getting a Wall Rush.
}}, and it can wall rush for assist combos. Kain can use the Air Dash Cancel to get a little bit of assist gauge before going for the wall rush assist combo.
- Down Follow-up ↓+<img>
</img> - This is similar to Up Followup in terms of base damage and EX gain. It is mainly used to confirm assist combos on the ground, because the opponent is forced into a wall rush state near ground. Kain can use the Air Dash Cancel to get a little bit of assist gauge before going for the assist combo.
Lance Barrage is also used to build assist gauge on whiff. The {{#tooltip: startup |
The time it takes before an attack can do damage.
}} is fast enough to be unreactable as it is, but it's one of the slower moves in this regard. What makes Lance Barrage safer to use is the {{#tooltip: dodge cancel |
Dodge cancel refers to an action that is interrupted with a dodge. Abbreviated as DC.
}}. Kain's fall speed makes his (backward) air dodges safer on average. So as long as Kain is not {{#tooltip: whiff punished |
Hitting an opponent who missed (whiffed) their attack.
}} or blocked during the two slashes, Lance Barrage is fairly safe in {{#tooltip: neutral |
The stage of a fight where neither player is blocking or getting hit by anything. Both players are trying to figure out how to approach, or trying to hit each other.
}}. The whiff {{#tooltip: recovery |
The period of time that occurs after an action has finished, but before gaining full control of the character again. For example, many HP attacks in Dissidia 012 have long recovery. This may be occasionally referred to as "endlag".
}} is average, so it's not completely safe from whiff punishes though. Kain also stops during the startup, so it is more prone to missing against moving opponents.
|-|Celestial Shooter=
<img src=" " style="width:250px; height:270px; object-fit: none; object-position: ; border:3px solid RGB(105,86,160); inline-table;"></img>
| |||
|---|---|---|---|
| Normal + Up | Normal + Neutral / Down | ||
| The attack's baseline damage value before equipment and stats are considered. }} | 40 (2 x 4, 7 + 4, 4, 5, 12) | 30 (2 x 4, 7, 15) | |
| The time it takes for this attack to do damage. Currently this is measured at 60 frames per second (30F would be 0.5 seconds).}} | 21F | 21F | |
| Damage Type | Physical | Physical | |
| Priority | Melee Low | Melee Low | |
| The amount of EX that can be gained from EX Force. 1000 = Full EX gauge.}} | 30 | 90 | |
| Effects | Wall Rush | Chase | |
| What this move can be cancelled into.}} | Dodge | ||
| Assist Gain {{#tooltip: (Hit) | The amount of assist gauge filled if this attack hits. 5000 = 1 assist gauge.}} | |||
| CP (Mastered) | 30 (15) | ||
| Quick upward lunge. Change combo with analog stick. |
Unlocked at level |
Mastered at AP | |
-
Up Follow-up ↑+<img>
</img> -
Neutral Follow-up <img>
</img> -
Down Follow-up ↓+<img>
</img>
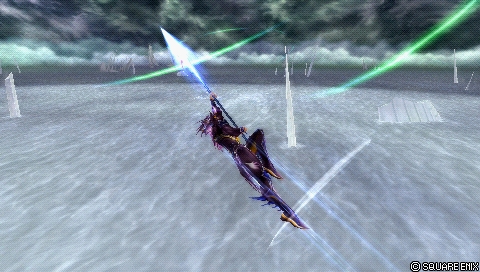
Celestial Shooter is Kain's dedicated upward attack. It's mainly used to build assist gauge on {{#tooltip: whiff |
A missed attack that doesn't make any contact.
}} and {{#tooltip: punish |
Attacking someone when they are recovering from a move and are unable to defend. This is typically guaranteed damage when done right.
}} opponents above Kain. Missed blocks and attacks with long recovery are both good for using Celestial Shooter. The startup is slightly slower than Lance Barrage, but Kain will move at a diagonal angle afterwards. This movement contributes to Celestial Shooter's range and safety in {{#tooltip: neutral |
The stage of a fight where neither player is blocking or getting hit by anything. Both players are trying to figure out how to approach, or trying to hit each other.
}}. By alternating between Celestial Shooter and other air braveries, Kain can keep moving while building assist gauge.
- Up Follow-up ↑+<img>
</img> - Multiple slices with an upward thrust at the end. This can wall rush near ceilings, and it's commonly used to start assist combos there.
- Neutral Follow-up <img>
</img> - This sends opponent forward. The base damage is lower compared to Up Follow-up, but EX gain is higher. It's mainly used in Aerith assist combos, but this move specifically is not often prioritized for that. Other assists can still combo at wall if Kain uses Chase.
- Down Follow-up ↓+<img>
</img> - Kain sends opponent downward. This is similar to Lance Barrage's Down Follow-up. However, because Celestial Shooter moves upwards first, the Down Follow-up cannot guarantee a wall rush reaction on the ground as consistently. Kain can combo into Aerith assist with Chase.
Celestial Shooter has average {{#tooltip: recovery |
The period of time that occurs after an action has finished, but before gaining full control of the character again. For example, many HP attacks in Dissidia 012 have long recovery. This may be occasionally referred to as "endlag".
}}, so it can be {{#tooltip: whiff punished |
Hitting an opponent who missed (whiffed) their attack.
}} if Kain ends up near opponent. It's generally safe against {{#tooltip: assist punishes |
Using assist to hit the opponent who missed an attack, before they can defend.
}} partly due to the movement. But similar to Warrior of Light's Rising Buckler, Kain can only move in this one direction. Kain cannot hit directly upwards from a distance, so it has a blind spot right above Kain. That makes it harder to use Celestial Shooter unpredictably. To that end, timing {{#tooltip: mixups |
A situation where a player has several ways to attack, which require different actions from the defending player.
}} are important, even if this move is borderline {{#tooltip: reactable |
An attack that has slow enough startup that a human can react to it and defend correctly.
}}.
|-|Crashing Dive=
<img src=" " style="width:250px; height:270px; object-fit: none; object-position: ; border:3px solid RGB(105,86,160); inline-table;"></img>
| |||
|---|---|---|---|
| Normal + Down | Normal + Up / Neutral | ||
| The attack's baseline damage value before equipment and stats are considered. }} | 40 (1 x 7, 8 + 1 x 7, 6, 12) | 30 (1 x 7, 8 + 15) | |
| The time it takes for this attack to do damage. Currently this is measured at 60 frames per second (30F would be 0.5 seconds).}} | 21F | 21F | |
| Damage Type | Physical | Physical | |
| Priority | Melee Low | Melee Low | |
| The amount of EX that can be gained from EX Force. 1000 = Full EX gauge.}} | 30 | 90 | |
| Effects | Wall Rush | Chase | |
| What this move can be cancelled into.}} | Dodge | Dodge | |
| Assist Gain {{#tooltip: (Hit) | The amount of assist gauge filled if this attack hits. 5000 = 1 assist gauge.}} | |||
| CP (Mastered) | 30 (15) | ||
| [Dive] A spinning charge. Change combo with analog stick. |
Unlocked at level |
Mastered at AP | |
-
Up Follow-up ↑+<img>
</img> -
Neutral Follow-up <img>
</img> -
Down Follow-up ↓+<img>
</img>
Crashing Dive is Kain's dedicated downward attack. It's mainly used to build assist gauge on {{#tooltip: whiff |
A missed attack that doesn't make any contact.
}} and {{#tooltip: punish |
Attacking someone when they are recovering from a move and are unable to defend. This is typically guaranteed damage when done right.
}} opponents below Kain. Missed blocks and attacks with long recovery are both good for Crashing Dive. Since this is a downward attack with decent travel distance, Kain can use this to occasionally approach grounded opponents. Kain can {{#tooltip: mixup |
A situation where a player has several ways to attack, which require different actions from the defending player.
}} Crashing Dive with dash feints and other braveries to keep opponents guessing, but this only works near ground. By alternating between Crashing Dive and other air braveries, Kain can keep moving while building assist gauge safely.
On hit, Kain gets access to ground wall rush and a strict dodge cancel combo with Lance Barrage. The dodge cancel combo is good for Kain, but not mandatory. The wall rush opens up practical assist combos into Rising Drive for high damage.
- Up Follow-up ↑+<img>
</img> - Similar to Lance Barrage's Up Follow-up. This lets Kain generate 90 EX and combo into Lance Barrage after a dodge. Aerith assist can also combo afterwards with Chase. The two timings for {{#tooltip: dodge cancelling |
Dodge cancel refers to an action that is interrupted with a dodge. Abbreviated as DC.
}} into Lance Barrage are strict (the dodge, and Lance Barrage itself). However, this is still a very rewarding combo route for Kain for its meter gain, {{#tooltip: wall carry |
The distance travelled when a combo is happening. Longer distance means a combo pushes the opponent closer to the wall. In Dissidia 012, longer distance is better for getting a Wall Rush.
}} and independency from walls.
- Neutral Follow-up <img>
</img> - Same as Celestial Shooter; This sends opponent forward. The base damage is lower compared to Down Follow-up, but EX gain is higher. It's mainly used in Aerith assist combos, but this move specifically is not often prioritized for that. Other assists can still combo at wall if Kain uses Chase.
- Down Follow-up ↓+<img>
</img> - This is used for setting up damaging assist combos on the ground. It has decent {{#tooltip: knockback |
The distance travelled after getting hit by an attack. The exact distance varies depending on the attack.
}}, so Kain does not need to be just above the ground to get a wall rush.
Similar to Celestial Shooter, Crashing Dive only travels in one direction. Kain moves downwards at a diagonal angle, and the move is {{#tooltip: active |
The period of time when an attack is capable of doing damage.
}} during the descent. That makes it harder to avoid blocks, especially from a distance. Timing {{#tooltip: mixups |
A situation where a player has several ways to attack, which require different actions from the defending player.
}} are important, even if this move is borderline {{#tooltip: reactable |
An attack that has slow enough startup that a human can react to it and defend correctly.
}}.
|-|Cyclone (midair)=
<img src=" " style="width:250px; height:270px; object-fit: none; object-position: ; border:3px solid RGB(105,86,160); inline-table;"></img>
| ||
|---|---|---|
| The attack's baseline damage value before equipment and stats are considered. }} | 10 | |
| The time it takes for this attack to do damage. Currently this is measured at 60 frames per second (30F would be 0.5 seconds).}} | 35F | |
| Damage Type | Physical | |
| Priority | Ranged Low | |
| The amount of EX that can be gained from EX Force. 1000 = Full EX gauge.}} | 0 | |
| Effects | - | |
| What this move can be cancelled into.}} | ||
| Assist Gain {{#tooltip: (Hit) | The amount of assist gauge filled if this attack hits. 5000 = 1 assist gauge.}} | ||
| CP (Mastered) | 30 (15) | |
| [Long] Launch pockets of air at foe to send upwards. |
Unlocked at level |
Mastered at AP |
Aerial Cyclone is practically similar to ground version. It can be used sparingly as a midrange {{#tooltip: poke |
A fast attack that is used to occupy space, start offense and fill assist gauge.
}} and in assist combos to setup Kain's solo combos. Cyclone adds a little bit of damage and it can even combo into another Cyclone from midrange / long-range. When optimized this way, Cyclone can add more bravery damage than his other air braveries (e.g. Lance Barrage 1st part). [1]
Cyclone is not commonly used in competitive play due to its diminishing returns as a third bravery. It's too slow to work as a threatening {{#tooltip: zoning |
The act of using long-range attacks to try and prevent the opponent from approaching. Usually achieved with projectiles, such as Sephiroth's Shadow Flare. }} tool, and the reward on hit is low without situational positioning. Kain sacrifices important vertical coverage by removing Celestial Shooter or Crashing Dive. Cyclone does not make up for it in {{#tooltip: neutral |
The stage of a fight where neither player is blocking or getting hit by anything. Both players are trying to figure out how to approach, or trying to hit each other.
}} because it is slower to {{#tooltip: punish |
Attacking someone when they are recovering from a move and are unable to defend. This is typically guaranteed damage when done right.
}} attacks in addition to being vulnerable to dashes and incoming attacks.
</tabber>
HP Attacks
Ground
<tabber>
|-|Jump=
<img src=" " style="width:250px; height:270px; object-fit: none; object-position: ; border:3px solid RGB(105,86,160); inline-table;"></img>
| ||
|---|---|---|
| The attack's baseline damage value before equipment and stats are considered. }} | 2 x N | |
| The time it takes for this attack to do damage. Currently this is measured at 60 frames per second (30F would be 0.5 seconds).}} | See table below | |
| Damage Type | Physical | |
| Priority | Melee High | |
| The amount of EX that can be gained from EX Force. 1000 = Full EX gauge.}} | 3 each | |
| Effects | Wall Rush | |
| What this move can be cancelled into.}} | Dodge (Landing) | |
| Assist Gain {{#tooltip: (Hit) | The amount of assist gauge filled if this attack hits. 5000 = 1 assist gauge.}} | ||
| CP (Mastered) | 40 (20) | |
| [Close~Long] Pounce on foe. Charge to change its strength. |
Unlocked at level |
Mastered at AP |
Jump's frame data
| Version | Startup / charge time | Max charge time = 180F | Liftoff | Peak | Landing |
|---|---|---|---|---|---|
| LV1 | 8F | After button release | 7F | 23F~41F | 51F |
| LV2 | 32F | After button release | 9F | 27F~49F | 67F |
| LV3 | 62F | After button release | 9F | 31F~57F | 79F |
- LV1: A quick jump that always comes down. Has some invincibility while ascending.
- LV2: Jump with longer travel distance. Attacks while ascending, can dodge at the apex.
- LV3: Similar to LV2, but travels even further.
Jump is a flexible defensive tool, a must-have for Kain. It's an emergency evasive attack after ground dodges due to its {{#tooltip: invincibility |
A state where a character cannot be hit, fully impervious to damage.
}}. Charged versions can control space and slow down the pace on demand. Jump also strikes quickly with a downward wall rush, which is effective for assist combos and interim hits during them.
Kain can hold Square <img>
</img> to increase Jump's level and change its properties. This is an effective space control tool for several reasons; Jump gets a rising {{#tooltip: hitbox |
An invisible predefined area that determines how an attack can come into contact with a character. If this makes contact with a character, the attack connects. Bigger hitbox means it's easier to land the attack.
}} that crushes guards and guarantees the HP hit if it connects. Kain can hold the charge for a few seconds and assess the situation. Charged Jump comes out quickly once Square <img>
</img> is released, and it remains {{#tooltip: active |
The period of time when an attack is capable of doing damage.
}} until Kain reaches the max height. It can also {{#tooltip: track |
Tracking refers to how effectively a move can follow the opponent once it is performed. Similar to "homing".
}} opponents for medium distances.
The crowning glory is the {{#tooltip: dodge cancel |
Dodge cancel refers to an action that is interrupted with a dodge. Abbreviated as DC.
}}. If Kain charges Jump, he can air dodge at the jump's apex. This allows Kain to charge Jump and react to the situation accordingly with little risk. Only LV2 and LV3 Jumps can be dodge cancelled, but Kain can charge them quickly and threaten on a moment's notice. Dodging out of Jump also lets Kain do solo combos, but only if opponent is at Jump's max height.
Jump excels in defense and assist combos, but the uncharged (LV1) version forces Kain to land on the ground. This leaves Kain vulnerable to counterattacks, and he needs assist to make it safer if it misses. It is also prone to missing against fast attacks with short {{#tooltip: recovery |
The period of time that occurs after an action has finished, but before gaining full control of the character again. For example, many HP attacks in Dissidia 012 have long recovery. This may be occasionally referred to as "endlag".
}}. It's better than not having emergency options at all, but caution is advised.
A charged Jump usually cannot force opponents to approach. If anything, opponents can stay far away and fill assist gauge while Kain charges Jump. This can put Kain behind in the assist gauge race, even if it's safe to do. Jump also loses effectiveness against opponents who {{#tooltip: halo camp |
A strategy which involves a character staying above the opponent, often at a safe distance.
}}. All Jumps have a maximum height, which cannot reach the ceiling in most large stages. However, few low ceiling stages work to Kain's advantage, such as Pandaemonium - Top Floor and M. S. Prima Vista.
Jump deals bravery damage during descent. This happens very quickly, but it does mean Jump is technically vulnerable to EX Revenge {{#tooltip: checkmates |
A situation where a player has no options to avoid losing a situation or a match. For example, hitting an opponent who has a full EX gauge and killing bravery can activate EX Revenge and guarantee a win.
}}.
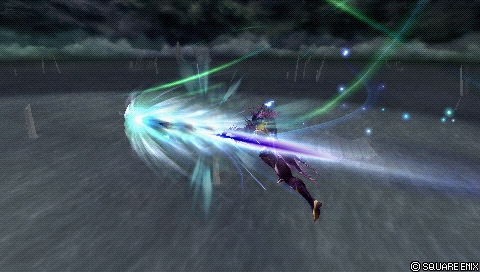
|-|Dragon's Fang=
<img src=" " style="width:250px; height:270px; object-fit: none; object-position: ; border:3px solid RGB(105,86,160); inline-table;"></img>
| ||
|---|---|---|
| The attack's baseline damage value before equipment and stats are considered. }} | - | |
| The time it takes for this attack to do damage. Currently this is measured at 60 frames per second (30F would be 0.5 seconds).}} | 41F | |
| Damage Type | - | |
| Priority | Melee High | |
| The amount of EX that can be gained from EX Force. 1000 = Full EX gauge.}} | 0 | |
| Effects | Wall Rush | |
| What this move can be cancelled into.}} | Dodge | |
| Assist Gain {{#tooltip: (Hit) | The amount of assist gauge filled if this attack hits. 5000 = 1 assist gauge.}} | ||
| CP (Mastered) | 30 (15) | |
| [Close] Stab foe with lance. Effective against any height. |
Unlocked at level |
Mastered at AP |
Dragon's Fang is Kain's 1-hit HP attack, and his fastest HP in general. It's commonly used after block staggers. It's relatively fast and has decent vertical {{#tooltip: tracking |
Tracking refers to how effectively a move can follow the opponent once it is performed. Similar to "homing".
}}. It has short reach, so Kain must be mindful of blocking {{#tooltip: disjoints |
A part of an attack that isn't close to the character's hurtbox. If this part of an attack gets hit by opponent's attack, the character using it will not take damage.
}} from a distance before countering with this.
The ground version is not used often due to Kain's mediocre ground combat outside of charged HP Jumps. The air version is functionally the same, but serves the 1-hit HP niche more reliably.
</tabber>
Aerial
<tabber> |-|Rising Drive=
<img src=" " style="width:250px; height:270px; object-fit: none; object-position: ; border:3px solid RGB(105,86,160); inline-table;"></img>
| ||
|---|---|---|
| The attack's baseline damage value before equipment and stats are considered. }} | 64 (2 x 32) | |
| The time it takes for this attack to do damage. Currently this is measured at 60 frames per second (30F would be 0.5 seconds).}} | 49F | |
| Damage Type | Physical | |
| Priority | Melee High | |
| The amount of EX that can be gained from EX Force. 1000 = Full EX gauge.}} | 30 | |
| Effects | Wall Rush | |
| What this move can be cancelled into.}} | Dodge | |
| Assist Gain {{#tooltip: (Hit) | The amount of assist gauge filled if this attack hits. 5000 = 1 assist gauge.}} | ||
| CP (Mastered) | 30 (15) | |
| [Rise] Spin lance charging upwards until hitting ceiling. |
Unlocked at level |
Mastered at AP |
|-|Sky Rave=
<img src=" " style="width:250px; height:270px; object-fit: none; object-position: ; border:3px solid RGB(105,86,160); inline-table;"></img>
| ||
|---|---|---|
| The attack's baseline damage value before equipment and stats are considered. }} | 74 (2 x 37) | |
| The time it takes for this attack to do damage. Currently this is measured at 60 frames per second (30F would be 0.5 seconds).}} | 49F | |
| Damage Type | Physical | |
| Priority | Melee High | |
| The amount of EX that can be gained from EX Force. 1000 = Full EX gauge.}} | 30 | |
| Effects | Wall Rush | |
| What this move can be cancelled into.}} | Dodge | |
| Assist Gain {{#tooltip: (Hit) | The amount of assist gauge filled if this attack hits. 5000 = 1 assist gauge.}} | ||
| CP (Mastered) | 30 (15) | |
| [Dive] Barrel downwards with lance until hitting ground. |
Unlocked at level |
Mastered at AP |
|-|Dragon's Fang (midair)=
<img src=" " style="width:250px; height:270px; object-fit: none; object-position: ; border:3px solid RGB(105,86,160); inline-table;"></img>
| ||
|---|---|---|
| The attack's baseline damage value before equipment and stats are considered. }} | - | |
| The time it takes for this attack to do damage. Currently this is measured at 60 frames per second (30F would be 0.5 seconds).}} | 41F | |
| Damage Type | - | |
| Priority | Melee High | |
| The amount of EX that can be gained from EX Force. 1000 = Full EX gauge.}} | 0 | |
| Effects | Wall Rush | |
| What this move can be cancelled into.}} | Dodge | |
| Assist Gain {{#tooltip: (Hit) | The amount of assist gauge filled if this attack hits. 5000 = 1 assist gauge.}} | ||
| CP (Mastered) | 30 (15) | |
| [Close] Stab foe with lance. Effective against any height. |
Unlocked at level |
Mastered at AP |
|-|Gungnir=
<img src=" " style="width:250px; height:270px; object-fit: none; object-position: ; border:3px solid RGB(105,86,160); inline-table;"></img>
| ||
|---|---|---|
| The attack's baseline damage value before equipment and stats are considered. }} | 60 (2 x 30) | |
| The time it takes for this attack to do damage. Currently this is measured at 60 frames per second (30F would be 0.5 seconds).}} | 55F | |
| Damage Type | Physical | |
| Priority | Ranged High | |
| The amount of EX that can be gained from EX Force. 1000 = Full EX gauge.}} | 30 | |
| Effects | Wall Rush | |
| What this move can be cancelled into.}} | Dodge | |
| Assist Gain {{#tooltip: (Hit) | The amount of assist gauge filled if this attack hits. 5000 = 1 assist gauge.}} | ||
| CP (Mastered) | 30 (15) | |
| [Mid] Throw energy infused lance. Flies until hitting stage. |
Unlocked at level |
Mastered at AP |
</tabber>
EX Mode: Holy Strength!
Effects:
- Regen
- Critical Boost
- Lancet
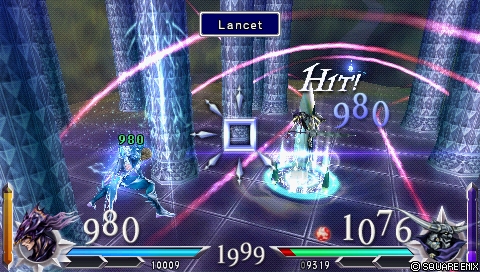
Lancet
<img src=" " style="width:250px; height:270px; object-fit: none; object-position: 36%; border:3px solid RGB(105,86,160); inline-table;"></img>
| ||
|---|---|---|
| The attack's baseline damage value before equipment and stats are considered. }} | - | |
| The time it takes for this attack to do damage. Currently this is measured at 60 frames per second (30F would be 0.5 seconds).}} | 51F | |
| Damage Type | - | |
| Priority | Ranged High | |
| The amount of EX that can be gained from EX Force. 1000 = Full EX gauge.}} | 60 | |
| Effects | EX Burst | |
| What this move can be cancelled into.}} | Dodge, Air Dash | |
| Assist Gain {{#tooltip: (Hit) | The amount of assist gauge filled if this attack hits. 5000 = 1 assist gauge.}} | - | |
| CP (Mastered) | ||
| [Activate with R + Square] Damage dealt absorbed as HP and immediately recovers spent BRV. Cancel action with Air Dash. |
Unlocked at level 1 |
Mastered at - AP |
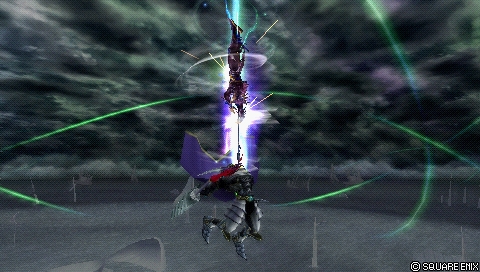
EX Burst: Dragoon's Pride
The ultimate dragoon jump. Repeatedly press command displayed on the screen to raise the gauge. The command will change twice at random
|
The attack's baseline damage value before equipment and stats are considered.
| ||
|---|---|---|
| 20, 10 (30) | 70 (100 total) | Physical |
Combos
Solo
Assist
Builds
<tabber> |-|Side by Side (Damage)=
| Stats | |
|---|---|
| HP | 9971 |
| CP | 450 |
| BRV | 957 |
| ATK | 181 |
| DEF | 182 |
| LUK | 60 |
| Max Booster | x7.4 |
| Equipment | |
|---|---|
| Assist | Player Choice |
| Weapon <img> |
Highwind |
| Hand <img> |
Lufenian Dirk <img> |
| Head <img> |
Lufenian Headband <img> |
| Body <img> |
Lufenian Vest |
| Accessory 1 | <img> </img> Hyper Ring
|
| Accessory 2 | <img> </img> Muscle Belt
|
| Accessory 3 | <img> </img> Sniper Eye
|
| Accessory 4 | <img> </img> Large Gap in HP
|
| Accessory 5 | <img> </img> BRV = 0
|
| Accessory 6 | <img> </img> Empty EX Gauge
|
| Accessory 7 | <img> </img> Summon Unused
|
| Accessory 8 | <img> </img> Pre-EX Mode
|
| Accessory 9 | <img> </img> Pre-EX Revenge
|
| Accessory 10 | <img> </img> Side by Side
|
| Summon <img> |
Rubicante |
| Bravery attacks | |
|---|---|
| Ground | Aerial |
| HP attacks | |
| Ground | Aerial |
<img>
</img> indicates a "Gear" extra ability or the use of Equip Glitch. The total Capacity Point cost assumes the equip glitch is done.
A high damage build utilising bravery damage and wall rush for small stages with low ceiling. The maximum booster value of x7.4 activates with both Large Gap in HP and BRV = 0. x5.3 when Large Gap in HP is in effect, but not BRV = 0.
Substitutes Basic: Hyper Ring for Battle Hammer (assist depletion) or Dismay Shock (enhanced EX depletion)
|-|Hybrid (EX)=
| Stats | |
|---|---|
| HP | 9644 |
| CP | 450 |
| BRV | 1075 |
| ATK | 68 |
| DEF | 71 |
| LUK | 60 |
| Max Booster | x3.5 |
| Equipment | |
|---|---|
| Assist | Player Choice |
| Weapon <img> |
Heaven's Cloud |
| Hand <img> |
Lufenian Dirk <img> |
| Head <img> |
Lufenian Hairpin <img> |
| Body <img> |
Lufenian Vest |
| Accessory 1 | <img> </img> Muscle Belt
|
| Accessory 2 | <img> </img> Sniper Eye
|
| Accessory 3 | <img> </img> Dismay Shock
|
| Accessory 4 | <img> </img> Large Gap in HP
|
| Accessory 5 | <img> </img> Summon Unused
|
| Accessory 6 | <img> </img> Pre-EX Mode
|
| Accessory 7 | <img> </img> Pre-EX Revenge
|
| Accessory 8 | <img> </img> Tenacious Attacker
|
| Accessory 9 | <img> </img> Glutton
|
| Accessory 10 | <img> </img> First to Victory
|
| Summon <img> |
Rubicante |
| Bravery attacks | |
|---|---|
| Ground | Aerial |
| HP attacks | |
| Ground | Aerial |
<img>
</img> indicates a "Gear" extra ability or the use of Equip Glitch. The total Capacity Point cost assumes the equip glitch is done.
A damage build without sacrificing EX absorption. Recommended for medium to large stages. x2.3 booster before Large Gap in HP activates.
Substitutes
Weapon: Cleaver If you intend to use Aerith assist, use Cleaver instead. Heaven's Cloud serves well if you are comfortable doing his aerial bravery loops (in the corner). </tabber>
Assist
Kain Assist Data
| Type | Attack |
The time it takes before an attack can do damage.
}} !! {{#tooltip: Spawn |
}} !! {{#tooltip: Base Damage |
The attack's baseline damage value before equipment and stats are considered.
| ||||
|---|---|---|---|---|---|---|
| BRV | Lance Burst | 29F | Ground | Opponent | 2 x 6, 5, 15 (32) | Chase |
| BRV | Crashing Dive | 21F | Air | Opponent | 1 x 7, 8, 1 x 7, 6, 12 (40) | Wall Rush |
| HP | Jump | 62F | Ground | Opponent | 2xN | Wall Rush |
| HP | Dragon's Fang | 41F | Air | Opponent | - | Wall Rush |
Synergies
Kuja, Onion Knight.
References
Navigation
Wiki Roadmap (012 Kain Highwind)
Please edit this page's roadmap template when relevant additions and changes are made.
17,44 % done
| Page | Completed | In progress | To-do | Score |
|---|---|---|---|---|
| General | Add images for attacks. | 15 / 86 | ||
| Pros / Cons | Strengths and weaknesses. | ? / ? | ||
| Overview / Character Data | Overview. | 2 / 2 | ||
| Bravery Attacks | Ability info. Images. | Overviews. | 5 / 5 | |
| HP Attacks | Ability info. Images. | Overviews. | 3 / 5 | |
| EX Mode | Basic info. Images. | Overview or detailed info. | 2 / 3 | |
| Combos | Add solo and assist combos with video examples. | 0 / 7 | ||
| Builds | 2 example builds. | Add more (niche) builds and overviews for each of them like on Tifa page. | 2 / 10 | |
| Assist | Assist data. | Kain assist overview. Add assist synergies for Kain. | 1 / 3 | |
| Matchups | Create page. Matchup analysis and tips. | 0 / 32 | ||
| Frame Data | Create page. Helpful links related to character. | 0 / 1 | ||
| Starter Guide | Create page. Concise PvP guide with core conncepts and essentials. | 0 / 8 | ||
| Strategy | Create page. Strategies and counterplay. | 0 / 10 |
" alt="">
" style="width:250px; height:270px; object-fit: none; object-position: ; border:3px solid RGB(105,86,160); inline-table;"></img>
" style="width:250px; height:270px; object-fit: none; object-position: 36%; border:3px solid RGB(105,86,160); inline-table;"></img>
</img> Hyper Ring
</img> Large Gap in HP
</img> Side by Side