| Info
|

|
| Name |
Jecht (ジェクト)
|
| Original game |
Final Fantasy X
|
| Base ATK (LV100) |
112 (Very High)
|
| Base DEF (LV100) |
111 (Average)
|
| Run Speed |
5 (Above Avg.)
|
| Dash Speed |
77 (Average / Good)
|
| Fall Speed |
81 (Average)
|
| Fall Speed Ratio After Dodge |
39 (Average)
|
| Fastest BRV |
1F (Jecht Block)
13F (Jecht Rush)
|
| Fastest HP |
31F (Jecht Beam / Ultimate Jecht Shot)
|
| 1-Hit HP |
Yes (Jecht Beam)
|
| HP Links |
Yes (Combo chains)
|
| Command Block |
Yes (Jecht Block)
|
| Weapon |
Axes
Grappling Weapons
Greatswords
Thrown Weapons
|
| Armor |
Bangles
Chestplates
Clothing
Hats
Headbands
Helms
Light Armor
Shields
|
| Exclusive weapons |
Kaiser Knuckles
Sin's Talon
Sin's Fang
|
| Unlock |
PP Catalog
DFF save import
|
| Alignment |
Cosmos (012)
Chaos (013)
|
| Voice Actor (JP) |
Masuo Amada
|
| Voice Actor (ENG) |
Gregg Berger
|
Overview
Jecht is a close range character with innate solo combos into HPs, strong mix-ups, relatively high damage output and wall rush potential. By charging an attack on start-up, Jecht can increase its damage and range, delay the activation as well as break through regular blocks with high priority. When defending, the unique Jecht Block can be used to threaten fast pokes, cover his dodges, prevent assist meter decay and guard against mid / high priority attacks on frame 1. Lingering projectiles are not a problem either, so combined with unreactable braveries and standard-fare mobility, this makes Jecht dangerous to interact with up close.
Due to the nature of Jecht's combo-centric gameplay, he works with a wide array of assists. With high knockback combo finishers and branching combo paths, Jecht can secure an assist combo even when he is far from a wall. Finding an ideal build is hardly a problem either - Jecht can opt for high damaging bravery combos via raw damage or invest into high base bravery for devastating results. Jecht's ability to end combos with an HP attack also means the Side by Side special accessory works very well for him and is often responsible for establishing momentum. EX-centric Center of the World builds work as well, though not having assists is a huge drawback.
Jecht's moveset is self-sufficient in many aspects, which is great for builds and general gameplan. But he also relies on completing his combos to make the most of his interactions. This causes a few problems. For one, failing any of the 3-frame windows locks him out of finishers where he gets most of his damage and meter (depletion). The timings are more strict on average compared to other characters, which is compounded when internet lag is involved. Cancelling combos halfway is limited which, along with Jecht's lack of midrange tools makes it challenging to contest The Emperor's traps, which is infamously one of Jecht's hardest matchups. Jecht is also vulnerable to some assist interruptions when starting a combo, but also has very few ways to avoid staggering by LV2 Assist Change without compromise.
Furthermore, his whiffs -particularly aerial Jecht Stream BRV- are rather committal and can be difficult to work with when building resources and defending at the same time. With only one offensive bravery on the ground and in the air, the reliance on a specific bravery attack also means Jecht must be willing to take risks to keep winning; Moving away from Jecht makes most of his attacks miss. Conditioning defensive opponents to engage differently or at a bad time requires representing threat in situations that open up Jecht for counterplay, such as extended dashes or delayed strikes. Jecht's meter generation is below average without Jecht Beam HP enders (EX) or Side by Side, and EX often provides diminishing returns compared to assist due to lackluster EX Burst damage, EX Revenge combos and EX mode perks.
Historically Jecht has been ranked at lower end of mid tier and then later at high tier in competitive play. His gameplan is fairly straightforward which thrives with momentum, although he can struggle a lot if he has to mitigate disadvantage. Air poking is riskier compared to some other strong characters, but Jecht Block is a fantastic post-dodge defensive option and LV2 Assist Change counters can net him a full combo. The strict input timing presents an entry barrier for new players to overcome and dodge punishing fast fallers will require resources. But when everything comes together, Jecht is capable of competing with majority of the roster.
| Strengths |
Weaknesses
|
- Strong close-range combat thanks to mobility and braveries with high priority and utility to twist interactions.
- Damage - Thanks to high attack stat, brv combo damage multipliers and HP enders, Jecht can inflict a lot of damage with just one combo starter.
- Jecht Block guards high priority attacks on frame 1 and is a rare, excellent post-dodge defensive option for it's frame data and reward on stagger.
- Jecht's dodge punishment benefits greatly from the above. It makes dodges safer on average. Good hitbox / startup on other braveries and added tracking during assist call help punish dodges.
- Solo HP combos allow Jecht to carry the opponent to the wall for a lot of damage and space control in small stages.
- Flexible assist synergy with wall rush potential and quick bravery followups. Few can salvage dropped combos for him too.
- Builds - Jecht works with a variety of builds, including the niche Center of the World. But he is most notably a strong user of Side by Side
![]()  . .
- Because of all the above, Jecht can establish good momentum with a good hit early on. LV2 Assist Change staggers provide a full combo and with Jecht Beam and Jecht Block, bypassing final EX Revenge is also possible.
|
- Limited moveset - While powerful and capable of disorienting opponents, Jecht's gameplan and effective range can make him predictable. His primary air bravery poke Jecht Stream also has considerable recovery on whiff, which poses certain risk for Jecht against characters with safer pokes.
- Input precision - Jecht's solo combos demand multiple 3-frame timings to inflict HP damage at all, which is susceptible to human error and greatly compromised in lag.
- Generating meter on whiff is difficult due to diminishing gains with just one offensive bravery attack on the ground and midair. Jecht's highest meter gain comes from HP combo finishers.
- EX meter economy is weaker on average compared to other characters due to reliance on Jecht Beam and EX Cores. EX Burst damage is slightly below average and while his "Full Combo" EX Mode perk is unique, its benefits are often situational.
- Weakened presence without assist - Jecht's threat is considerably lower when he is at long range and / or without assist. He works best when he can leverage assist meter before or after hitting the opponent and struggles when he has to catch up in resources.
- Area denial with unblockables - Moves like Black Hole can bypass Jecht Block and prevent Jecht from approaching from a distance. And more notably, The Emperor's traps limit approaches, trade unfavorably and limit poking options to telegraphed HP attacks and assist.
|
Bravery Attacks
Check the Combos page to learn more about concepts surrounding Jecht's solo combos.
Ground
Note: Numbers in brackets are skipped when chaining a combo.
Data comparison
| Version |
Damage multiplier |
Startup frame |
Type |
Priority |
EX Force |
Effects |
CP (mastered)
|
| Level 1 |
4, [5] (4, 5) |
13F |
Physical |
Melee Low |
9, [60] |
- |
60 (30)
|
| Level 2 |
5, 5, [5] (10, 5) |
18F (charge), 5F (release) |
Physical |
Melee Low |
12, [60] |
-
|
| Level 3 |
3 x 5, [5] (15, 5) |
34F (charge), 5F (release) |
Physical |
Melee High |
15, [60] |
Wall Rush
|

|
| Base Damage
|
4, [5] (4, 5)
|
| Startup Frame
|
13F
|
| Damage Type
|
Physical
|
| Priority
|
Melee Low
|
| EX Force
|
9, [60]
|
| Effects
|
-
|
| Cancels
|
Dodge, Block, Attack
|
| Assist Gain (Hit)
|
|
| CP (Mastered)
|
60 (30)
|
| [Close] Hold button to start. Combo with timing, analog stick. |
Unlocked at
level |
Mastered at
130 AP
|
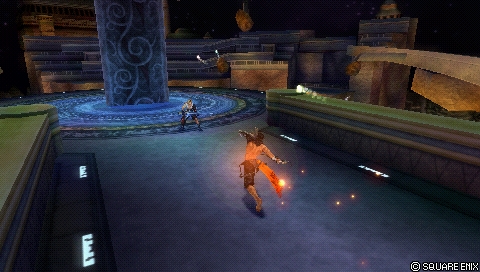
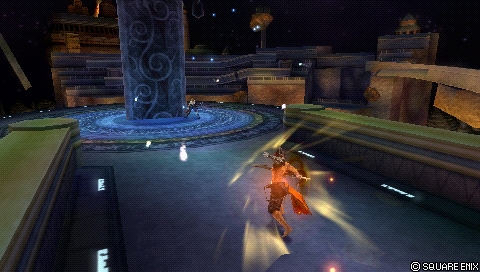
Jecht Rush is Jecht's only grounded offensive bravery attack. Charging up the attack by holding the button will change it's startup, damage and priority (only at LV3). Different combos branch off of this move and carry none of the altered attributes from charging Jecht Rush.
It's a straightforward attack with multiple uses - A poke, combo starter and point-blank anti-air. The fast startup and early cancel windows make it good for building assist meter on whiff and initiating offense without huge risk of whiff punishment. The wall carry and Ultimate Jecht Shot enders make the reward on hit potent and consistent in many stages.
Be careful not to overuse this move. The opponent might not be able to whiff punish Jecht Rush consistently, but they can still look to hit you after you cancel it with a block or dodge. Pay attention to your own habits to keep yourself safe and unpredictable.
|
| Base Damage
|
5, 5, [5] (10, 5)
|
| Startup Frame
|
18F (charge), 5F (release)
|
| Damage Type
|
Physical
|
| Priority
|
Melee Low
|
| EX Force
|
12, [60]
|
| Effects
|
--
|
| Cancels
|
Dodge, Block, Attack
|
| Assist Gain (Hit)
|
|
| CP (Mastered)
|
| -- |
Unlocked at
level |
Mastered at
AP
|
|
| Base Damage
|
3 x 5, [5] (15, 5)
|
| Startup Frame
|
34F (charge), 5F (release)
|
| Damage Type
|
Physical
|
| Priority
|
Melee High
|
| EX Force
|
15, [60]
|
| Effects
|
Wall Rush
|
| Cancels
|
Dodge, Block, Attack
|
| Assist Gain (Hit)
|
|
| CP (Mastered)
|
| -- |
Unlocked at
level |
Mastered at
AP
|
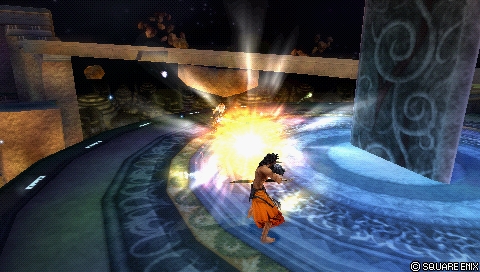
If the level 3 version collides with an opponent's melee low / mid priority attack, they will stagger and Jecht can follow up with a combo branch on his own. Also, because Jecht Rush becomes active quickly after releasing the button, you can use it to reliably reflect HP projectiles even at a close distance.
If a Level 3 Jecht Rush clashes with a lower priority attack, Jecht can continue with a combo. In practice, this can be used to challenge air attacks and transition into Jecht Rush Up 2 to reap the rewards.
|
| Block Frames |
End Frames |
Dodge Cancel Frames |
Priority
|
| 1-16F |
80F |
|
Jecht Block
|
| CP (Mastered) |
Cancels |
Assist Gain (Attack) |
Assist Gain (Hit)
|
| 30 (15) |
Dodge (Whiff)
Anything (Block) |
0 |
0
|
Unlocked at
level |
Mastered at
100 AP |
[Block] Stops blows with powerful backhand. Does not deal damage.
|
Jecht Block is a bravery attack that practically functions as a high priority block. The guarding activates on the first possible frame, meaning with Evasion Boost it is possible to dodge INTO attacks and nullify them during invincibility. Because attacks have the earliest cancel window out of a dodge, Jecht Block is very effective at defending after dodging. Combined with the ability to cancel into any actionable state upon a successful block, Jecht Block becomes a very flexible tool with high reward. It's the adhesive move that ties much of his gameplay together.
Jecht Block's interactions against properties are as follows:
| Priority |
Result
|
| Melee Low & Mid |
Wins (Staggers the opponent)
|
| Melee High |
Tie (Both characters stagger)
|
| Ranged Low, Mid & High |
Wins (Reflect / deflect)
|
| Special & Unblockable |
Loses
|
The block duration is 1-16 frames (at 60 FPS) and the animation can be dodge cancelled much earlier compared to a regular block. This does not invalidate regular blocking as their durations and applicable timings differ greatly. Jecht Block can be performed out of a dodge or as an air recovery substitute, but has shorter block duration. Regular block lasts much longer, only works against low priority moves and can be cancelled INTO from Jecht Rush / Jecht Stream whiff. It is also not available out of air recovery.
As a bravery attack with no built-in offensive properties, Jecht Block does not generate assist meter. However, it WILL reset the assist meter decay which is still good when fighting in the air. Unlike regular blocks, Jecht Block avoids the innate critical hit rate increase for the opponent when hit out of it. It is vulnerable to the extra ability "Counterattack" because it's considered an attack of its own, though that can be nullified with the appropriate "Disable __" extra ability.
Both ground and air versions are largely identical in properties and applications and thus are staple abilities in many match-ups. If you wish to Jecht Block more consistently against airborne opponents on the ground, equipping the ability on a neutral circle input is recommended.
The frame data and block priority also allow Jecht to leverage staggers in a unique way. It is possible to call the assist before staggering with the block and capitalise on the stagger that way. The opponent can attempt to exploit this in turn with their own assist call which does work, but also puts them at risk if they do not have the correct read on the situation.
Make sure to avoid repeatedly pressing Jecht Block when using it. If it blocks something, subsequent button presses can accidentally perform another Jecht Block, reducing the window of opportunity for a counter attack.
Aerial
Numbers in brackets are skipped when chaining a combo.
Data comparison
| Version |
Damage multiplier |
Startup frame |
Type |
Priority |
EX Force |
Effects |
CP (mastered)
|
| Level 1 |
2, 2, [5] (4, 5) |
17F |
Physical |
Melee Low |
9, [60] |
- |
60 (30)
|
| Level 2 |
2, 2, 1, 1, [5] (6, 5) |
18F charge, 11F release |
Physical |
Melee Low |
12, [60] |
-
|
| Level 3 |
1 x 8, [5] (8, 5) |
34F (charge), 11F (release) |
Physical |
Melee High |
12 |
Wall Rush
|

|
| Base Damage
|
2, 2, [5] (4, 5)
|
| Startup Frame
|
17F
|
| Damage Type
|
Physical
|
| Priority
|
Melee Low
|
| EX Force
|
9, [60]
|
| Effects
|
--
|
| Cancels
|
Dodge, Block, Attack
|
| Assist Gain (Hit)
|
|
| CP (Mastered)
|
60 (30)
|
| [Close] Hold button to start. Combo with timing, analog stick. |
Unlocked at
level |
Mastered at
130 AP
|
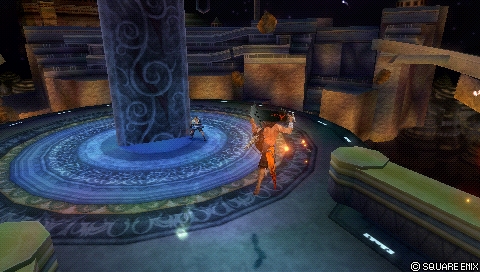
The bronze toes are Jecht's only offensive aerial bravery attack. The slower start-up, longer animation and later cancel windows make it inferior to Jecht Rush on paper, but it is not enough to invalidate aerial combat altogether. For one, Jecht Stream is still fast enough to be unreactable when uncharged. Combos still have potent damage output and wall rush potential. The first kick can scoop opponents from below, making it fairly consistent in dodge punishing majority of the cast. It is also easier to visually confirm a combo on hit compared to Jecht Rush. And just like Jecht Rush, a LV3 version can power through a lower melee priority move and follow up with a combo. A whiffed Jecht Stream can also be cancelled into regular block or another Jecht Stream, but the input window for this is short, and the longer animation compared to Rush makes this less practical for catching opponents off guard.
The reliance on this move causes problems, however. Recovering from a whiff takes a longer than Jecht Rush and leaves Jecht vulnerable to whiff punishment more consistently. Charged versions of Jecht Stream will attempt to close in on the opponent before becoming active, but Jecht is susceptible to damage during that time. In addition to this, building assist meter is rather slow; Many characters can rotate fast pokes to defend and fill the gauge for themselves. Jecht does not quite fit into that mold. As such, it can be difficult and time consuming to come back from situations where he has no meter to combat the opponent's resources.
Because there are not many safe moves to threaten with, players will run the risk of becoming predictable with Jecht. Dodging is effective against this move thanks to movement (backwards air dodge) and invincibility with Evasion Boost. The latter enables close range whiff punishes on reaction, but Jecht can also discourage these attempts through charges and delaying attack timing in general with movement, dash feints and even Jecht Block.
Jecht Stream is a very important move for Jecht and it synergizes really well with its charged variants and other moves, most notably Jecht Block. It is the centerpiece of his competitive viability, so learning how to use this move effectively is one of the most important things for any aspiring Jecht players.
|
| Base Damage
|
2, 2, 1, 1, [5] (6, 5)
|
| Startup Frame
|
18F charge, 11F release
|
| Damage Type
|
Physical
|
| Priority
|
Melee Low
|
| EX Force
|
12, [60]
|
| Effects
|
--
|
| Cancels
|
Dodge, Block, Attack
|
| Assist Gain (Hit)
|
|
| CP (Mastered)
|
| -- |
Unlocked at
level |
Mastered at
AP
|
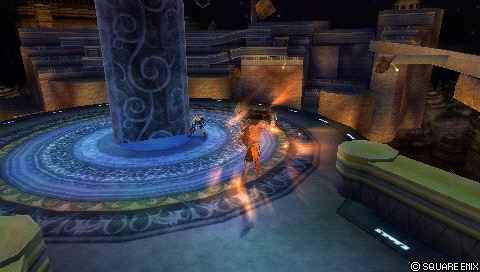
Level 2 Jecht Stream is still low priority, but the additional charge gives it more lateral range than level 1. That makes it good for whiff punishing long recovery attacks after a dodge and calling out whiffs in close range.
Even though the longer startup makes this technically reactable, it occupies a middle ground between uncharged and fully charged Jecht Stream. Both are commonly expected from Jecht, so a level 2 charge can give the illusion of a full charge with a shorter period of vulnerability thanks to faster startup, similiarly telegraphed animations and a subdued red aura that surrounds him. Against players who are expecting other options, such as dash > LV1 Jecht Stream or jump fake outs, level 2 Jecht Stream can be useful for closing gaps as a sort of surprise attack.
LV2 Jecht Stream can also work in dodge punish situations in conjunction with Free Air Dash. Using it from below to catch the opponent on their way down or at the same height are both valid options, but the former is more reliable against fast fallers.
|
| Base Damage
|
1 x 8, [5] (8, 5)
|
| Startup Frame
|
34F (charge), 11F (release)
|
| Damage Type
|
Physical
|
| Priority
|
Melee High
|
| EX Force
|
12
|
| Effects
|
Wall Rush
|
| Cancels
|
Dodge, Block, Attack
|
| Assist Gain (Hit)
|
|
| CP (Mastered)
|
| -- |
Unlocked at
level |
Mastered at
AP
|
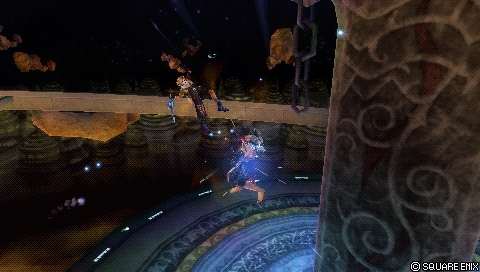
Level 3 is when Jecht Stream becomes melee high priority that is on par with HP attacks. This is what breaks through regular blocks and encourages the opponent to dodge instead. Using it as a mixup against block is a good starting point, which makes his other options stronger when used successfully.
It has the longest travel distance, but the tracking around Jecht is also most prominent here, as he can move towards the opponent regardless of angle. This is great for whiff punishment, assist combo followups and even dodge punishment when used with assists. LV3 Jecht Stream has increased range when used during assist call slowdown, which is important for dodge punishing fast fallers (Kain, Kefka etc.) consistently. The additional hits are not a substantial damage increase by themselves, but hitting an opponent during block's recovery leads to increased critical hit rate, something that is easier to do with a short startup after releasing the button. If Jecht does not transition into a combo chain, the finishing punch from LV3 Stream is also melee high priority.
Contrary to most characters in the game, Jecht can hold his charge indefinitely, which includes Jecht Stream. That means a few things. LV3 Jecht Stream can reactively whiff punish from a distance, including long winded charge attacks that cannot hold their charge forever (e.g. Prishe's One-Inch Punch). If Jecht goes into a charging state when his EX mode is about to end, he can theoretically remain in that state to regenerate health forever. It also means that two Jechts can initiate an endless standoff situation if both charge a LV3 Stream at a safe distance from each other.
The time required for a full charge makes this an even slower attack to connect and finish compared to other Jecht Streams. As such, this is reactable for most players just like HP attacks. Jecht commits to all of his charges and cannot dodge cancel quickly on hit, so opponents can try to react with assist interruptions and disrupt an otherwise guaranteed opening. The longer active frames have an easier time hitting after dodge invincibility ends. But similiar to LV1 Stream, the invincibility from Evasion Boost also makes it easier to evade the move and react with a counterattack. Jecht is vulnerable to attacks when he is charging, but also once he begins moving towards the opponent after releasing the button. It is important to be aware of this, as Jecht can be interrupted by quick attacks and lingering projectiles before he hits anything.
Overall, LV3 Jecht Stream is an important part of his gameplay. But if he cannot represent a threat with Jecht Block or lower charge levels, level 3 won't usually work as a band-aid solution due to how telegraphed and long winded it is. However, as a bravery attack it also won't enable Assist Charge for the opponent despite having risk / reward ratio that's comparable to a raw HP attack.
|
| Block Frames |
End Frames |
Dodge Cancel Frames |
Priority
|
| 1-16F |
74F |
|
Jecht Block
|
| CP (Mastered) |
Cancels |
Assist Gain (Attack) |
Assist Gain (Hit)
|
| 30 (15) |
Dodge (Whiff)
Anything (Block) |
0 |
0
|
Unlocked at
level |
Mastered at
100 AP |
[Block] Stops blows with powerful backhand. Does not deal damage.
|
Aerial version. Outside of shorter recovery frames on whiff, it shares all characteristics of the ground version. As such, it is great at covering Jecht's air dodges, threatening fast air braveries, nullifying projectiles and mid priorities, as well as stopping assist meter decay. Because air combat is common, you will have many opportunities to use Jecht Block. When used well, this is what will make opponents second-guess their approach, if not nullify some of them outright. That means more safe air dodges and more time to establish Jecht's gameplan, so it is important use Jecht Block when an opportunity arises.
Directional inputs for aerial attacks are not influenced by the opponent's relation to your character. However, the neutral input for air Jecht Block can still be beneficial - The absence of movement related inputs means you will not accidentally cancel out of Jecht Block and make yourself vulnerable prematurely. Instead, subsequent Jecht Blocks can be chained together without a gap between guarding frames, which is useful against multiple projectiles such as Ultimecia's Knight's Blade or attacks with long active duration such as Feral Chaos' Lux Magnus.
Jecht Block has slight forward movement, which can be used to guard attacks from outside of their immediate range. This is good when dealing with lingering projectiles such as Lightning's Watera, The Emperor's Flares or Ultimecia's charged Knight's Lance.
Overall, Jecht Block is a very safe and reliable command block. It has very few downsides relative to its strenghts, but it can still be punished on its recovery. That, along with assist clashes and the lack of meter generation put responsibility on the player to avoid overtly linear gameplay.Combo Chains
Jecht Rush and Jecht Stream will transition into different combo attacks when bravery attack has been pressed at the right time. Many properties are shared across all variations of a single chain.
For more information on how these chains work in combos, please refer to the Jecht combo page.
Hits in brackets are skipped when chaining.
Data comparison
| Version |
Damage multiplier |
Startup frame |
Type |
Priority |
EX Force |
Effects |
CP (mastered)
|
| Ground (Neutral) |
1x9, [12] (+9, 12) |
?? |
Physical |
Melee Low |
9, [60] |
Chase |
-
|
| Ground (Up) |
1x5,2, [12] (+7, 12) |
?? |
Physical |
Melee Low |
9, [60] |
Chase
|
| Air (Neutral) |
1x4, 3, [12] (+7, 12) |
?? |
Physical |
Melee Low |
9, [60] |
Chase
|
|
| Base Damage
|
1x9, [12] (+9, 12)
|
| Startup Frame
|
|
| Damage Type
|
Physical
|
| Priority
|
Melee Low
|
| EX Force
|
9, [60]
|
| Effects
|
Chase
|
| Cancels
|
Dodge (recovery)
|
| Assist Gain (Hit)
|
|
| CP (Mastered)
|
| |
Unlocked at
level |
Mastered at
AP
|
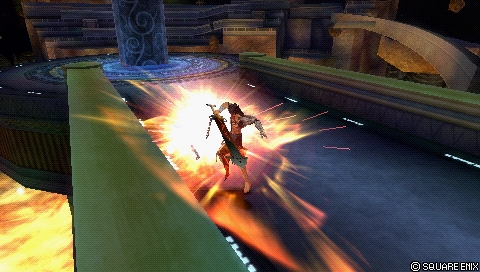
Neutral 2 from Jecht Rush. Ram the opponent in a straight, forward line. Keeps Jecht grounded, but will move along the wall or the ledge if he makes contact with it during this move. If the opponent calls a Kuja assist right before Jecht Rush connects, Jecht can be hit out of this chain. The quick forward movement also lets Jecht close the gap with this chain very quickly during EX Mode, good for surprise attacks and crossing up the opponent during a dodge for the 3rd chain.
|
| Base Damage
|
1x5,2, [12] (+7, 12)
|
| Startup Frame
|
|
| Damage Type
|
Physical
|
| Priority
|
Melee Low
|
| EX Force
|
9, [60]
|
| Effects
|
Chase
|
| Cancels
|
Dodge (recovery)
|
| Assist Gain (Hit)
|
|
| CP (Mastered)
|
| -- |
Unlocked at
level |
Mastered at
-- AP
|
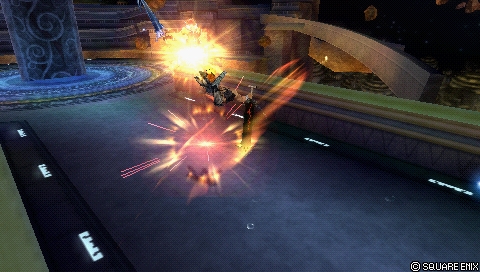
Up 2 from Jecht Rush. A rising flurry of kicks. Lifts Jecht off the ground, making him airborne. If LV3 Jecht Rush clashes with an aerial low priority melee attack, this chain can anti-air the opponent for a combo.
Up 2 is a good chain overall. It has a bit of evasion against ground assists if they were called before Jecht Rush hit. It provides one of the easier combos to learn for new players with the Down 3 followup. It sets up powerful ground assist combos and pressure. And perhaps most importantly, it leads into Jecht's only dodge cancel solo combo - This chain leads to chase, but it causes enough hit stun to enable the notorious dodge cancel Jecht Stream followup.
If Jecht fails the 3rd chain (up 3), Jecht will transition to this chain instead. That provides another opportunity to combo into an HP, though it is not very easy without practice.

|
| Base Damage
|
1x4, 3, [12] (+7, 12)
|
| Startup Frame
|
|
| Damage Type
|
Physical
|
| Priority
|
Melee Low
|
| EX Force
|
9, [60]
|
| Effects
|
Chase
|
| Cancels
|
Dodge (recovery)
|
| Assist Gain (Hit)
|
|
| CP (Mastered)
|
| -- |
Unlocked at
level |
Mastered at
-- AP
|
Neutral 2 from Jecht Stream. A forward dive with a stream of low damaging hits. The forward movement is not particularly strong or better compared to Jecht Rush Neutral 2, which means this chain shares a key weakness with the grounded Neutral 2 chain; being interrupted by assist after getting hit by the first attack. Jecht cannot dodge cancel combo chains while attacking, so once he gets going, he is locked into the animation.
The general theory of timing the 3rd chain in between the "resting period" of hits applies to this chain, but because of the quick multiple hits, getting a bravery break can severely confuse the player's timing afterwards. There is no easy distinct visual cue to work around this, aside from keeping a close eye on when Jecht stops spinning rapidly.
If Jecht fails the 3rd chain (neutral 3), Jecht will repeat this chain instead. There is enough time to visually confirm this chain and then salvage the combo with an assist.Data comparison
| Version |
Damage multiplier |
Startup frame |
Type |
Priority |
EX Force |
Effects |
CP (mastered)
|
| Ground / Air (Neutral) |
1x4, 6, [19] (+10, 19) |
?? |
Physical |
Melee Mid |
9 |
Wall Rush |
-
|
| Ground (Up) |
3, 1x5, 2, [19] (+10, 19) |
?? |
Physical |
Melee Mid |
9 |
Wall Rush
|
| Air (Down) |
5, 5, [1x4, 15] (+10, 19) |
?? |
Physical |
Melee Mid |
9 |
Wall Rush
|

|
| Base Damage
|
1x4, 6, [19] (+10, 19)
|
| Startup Frame
|
|
| Damage Type
|
Physical
|
| Priority
|
Melee Mid
|
| EX Force
|
9
|
| Effects
|
Wall Rush
|
| Cancels
|
Dodge (recovery), HP Attack
|
| Assist Gain (Hit)
|
|
| CP (Mastered)
|
| -- |
Unlocked at
level |
Mastered at
-- AP
|
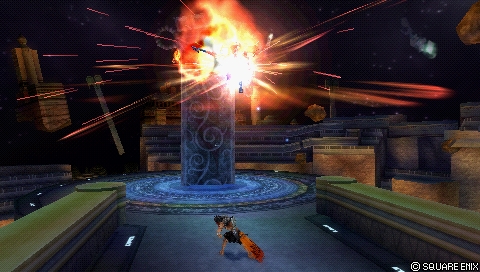
Neutral 3 from Jecht Rush and Jecht Stream. This is a combo ender with wall rush and even more aggressive forward movement than any 2nd chain. Much of Jecht's bravery damage comes from this and the Down 3 enders. Press the HP attack as the last hit in the advancing multi-hits connects. That means choosing between the HP attack or the wall rush bravery ender.
Jecht is considered grounded during Jecht Rush and the Neutral 2 chain, but this 3rd chain will make him airborne, which lets him move over ledges. Not as noteworthy when done during Jecht Stream as he is already airborne then, but it is good to be aware of in stages like Lunar Subterrane and Crystal World that have walls near platforms.
|
| Base Damage
|
3, 1x5, 2, [19] (+10, 19)
|
| Startup Frame
|
|
| Damage Type
|
Physical
|
| Priority
|
Melee Mid
|
| EX Force
|
9
|
| Effects
|
Wall Rush
|
| Cancels
|
Dodge (recovery), HP Attack
|
| Assist Gain (Hit)
|
|
| CP (Mastered)
|
| -- |
Unlocked at
level |
Mastered at
-- AP
|
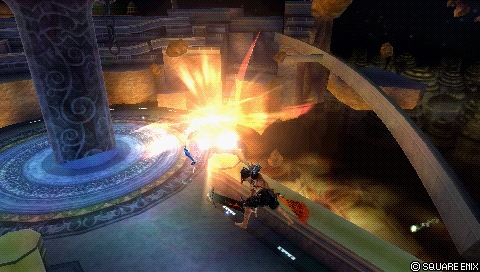
Up 3 from Jecht Rush. An upward spinning sword throw with a powerful rising slash at the end. This is a combo ender with upward knockback that can wall rush. It is the only way to combo into the Ultimate Jecht Shot HP, but the reward is well worth the effort. Press the HP attack as the last hit in the sword throw multi-hits connects. Although the visual cue for timing the HP is a bit obtuse, you do have a 5-frame window to help you. If you get a bravery break with that last multi-hit, it is possible to press HP repeatedly to get the HP finisher with ease.
This is not a particularly outstanding combo chain. Jecht remains stationary until he proceeds to the rising slash, after which he is considered airborne. The base damage is shared with other 3rd chains, which is good for damage builds. But ceiling wall rushes are only possible in a handful of stages and other 3rd chains are often more practical for wall rush purposes. While comboing into grounded LV2 Jecht Blade is possible, Ultimate Jecht Shot is the main draw here. However, if the opponent assumes Ultimate Jecht Shot is coming out, ending the combo with a grounded Jecht Beam instead can avoid an assist change whiff punish altogether.
|
| Base Damage
|
5, 5, [1x4, 15] (+10, 19)
|
| Startup Frame
|
|
| Damage Type
|
Physical
|
| Priority
|
Melee Mid
|
| EX Force
|
9
|
| Effects
|
Wall Rush
|
| Cancels
|
Dodge (recovery), HP Attack
|
| Assist Gain (Hit)
|
|
| CP (Mastered)
|
| -- |
Unlocked at
level |
Mastered at
-- AP
|
Down 3 from Jecht Stream. Hammering blows with a fierce spinning slam at the end. This is a combo ender with downward knockback that can wall rush.
Down 3 can be done after Jecht Rush Up 2 or Jecht Stream Neutral 2 chains. It is his primary grounded BRV wall rush that not only deals good damage (same as other 3rd chains), but also sets up assist followups with little regard for altitude and pressure if Jecht is near the ground. It is the only way to combo into the Triumphant Grasp HP. Just like with the Jecht Rush Up 3 chain, there is a 5-frame window to help with the timing. The big difference here is that the timing is on the second hit that is clearly telegraphed both visually and in sound. This is by far the easiest combo chain for the average Jecht player to try HP attacks with and is highly recommended for players looking to pick up this character.
If no HP is done, Jecht will proceed to slam the opponent to the ground with a swift spinning slam. The downward knockback is so strong in fact, that it can cause a grounded wall rush reaction from the top of Order's Sanctuary. In these cases the wall rush damage does not occur, but still allows assist combos.
Even though the spinning multi-hits happen quickly, they can cause the combo to drop when done near a wall. That means opting for the HP combo ender can be safer in these instances, but it is not a very common occurrence.HP Attacks
Ground
Data comparison
| Version |
Damage multiplier |
Startup frame |
Type |
Priority |
EX Force |
Effects |
CP (mastered)
|
| Level 1 |
1 x 18 (18) |
31F |
Physical |
Melee High |
30 |
Wall Rush |
|
| Level 2 |
1 x 24 (24) |
48F charge, 1F release |
Physical |
Melee High |
30 |
Wall Rush
|
| Level 3 |
1 x 34 (34) |
64F charge, 1F release |
Physical |
Melee High |
30 |
Wall Rush
|

|
| Base Damage
|
1 x 18 (18)
|
| Startup Frame
|
31F
|
| Damage Type
|
Physical
|
| Priority
|
Melee High
|
| EX Force
|
30
|
| Effects
|
Wall Rush
|
| Cancels
|
Dodge (recovery)
|
| Assist Gain (Hit)
|
|
| CP (Mastered)
|
30 (15)
|
| [Close] Hurl meteors from sky. Boost power by holding button. |
Unlocked at
level |
Mastered at
130 AP
|
Jecht summons a meteor from above, ascends with it and throws it to the ground. Multi-hits are applied throughout this entire attack from the meteor spawn all the way to the throw. The HP hit guarantees a grounded wall rush in most areas for extra damage and assist combos.
The meteor can work as an anti-air, but this is pretty risky to do. Not only is this move reactable on startup, the tracking and later range are not very good. Once this move comes out, Jecht travels a fixed distance on the way up and he cannot cancel out of it until he has thrown the meteor down. Most of Ultimate Jecht Shot's lateral range comes from the ascent and the diagonal angle of the throw itself, but the projectile cannot be aimed to hit opponents above him or at his level.
If Ultimate Jecht Shot does not make contact with the opponent on the way down, it will skip the multi-hit braveries and go straight to the explosion. This can be seen in Jecht's combos with Aerith assist who can set up additional Ultimate Jecht Shots for considerable damage.
![]()
|
| Base Damage
|
1 x 24 (24)
|
| Startup Frame
|
48F (charge),
1F (release)
|
| Damage Type
|
Physical
|
| Priority
|
Melee High
|
| EX Force
|
30
|
| Effects
|
Wall Rush
|
| Cancels
|
Dodge (recovery)
|
| Assist Gain (Hit)
|
|
| CP (Mastered)
|
| -- |
Unlocked at
level |
Mastered at
AP
|
A higher damaging version that typically sees use when comboing from the Jecht Rush Up 3 chain. Jecht can charge a level 2 version at the end of his combos and LV2 Ultimate Jecht Shot is arguably the easiest to get and most powerful to use. Not only does LV2 UJS have highest base damage, the 1 frame activation after button release makes this a reliable combo ender to go for in Jecht Rush combos.
Naturally, the longer startup makes this even riskier as an anti-air.
![]()
|
| Base Damage
|
1 x 34 (34)
|
| Startup Frame
|
64F (charge),
1F (release)
|
| Damage Type
|
Physical
|
| Priority
|
Melee High
|
| EX Force
|
30
|
| Effects
|
Wall Rush
|
| Cancels
|
Dodge (recovery)
|
| Assist Gain (Hit)
|
|
| CP (Mastered)
|
| -- |
Unlocked at
level |
Mastered at
AP
|
An even higher damaging version of Ultimate Jecht Shot. This is Jecht's highest damaging HP in terms of bravery damage, but it is not commonly used outside of assist combos. Jecht cannot combo into this on his own and the risk that already comes with this move is not offset by the longer charge time.Data comparison
| Version |
Damage multiplier |
Startup frame |
Type |
Priority |
EX Force |
Effects |
CP (mastered)
|
| Level 1 |
2 x 5 (10) |
41F |
Physical |
Melee High |
30 |
Wall Rush |
|
| Level 2 |
1 x 6, 2, 2, 3, 3 (16) |
48F charge, 11F release |
Physical |
Melee High |
30 |
Wall Rush
|
| Level 3 |
1 x 9, 2 x 6 (21) |
64F charge, 11F release |
Physical |
Melee High |
36 |
Wall Rush
|

|
| Base Damage
|
2 x 5 (10)
|
| Startup Frame
|
41F
|
| Damage Type
|
Physical
|
| Priority
|
Melee High
|
| EX Force
|
30
|
| Effects
|
Wall Rush
|
| Cancels
|
Dodge (recovery)
|
| Assist Gain (Hit)
|
|
| CP (Mastered)
|
30 (15)
|
| [Close] Masterful swordplay. Boost power by holding button. |
Unlocked at
level |
Mastered at
130 AP
|
An advancing multi-hit combo with considerable knockback at the end. Jecht Blade is one of Jecht's staple HP attacks, but the ground version specifically is niche; Only Jecht Rush Up 3 chain allows Jecht to use this move, which unfortunately competes with the much more potent Ultimate Jecht Shot HP. And even then, level 2 charge is required to get the job done.
Jecht will pursue the opponent with a bit of tracking, but he follows through the whole animation even on whiff. That makes it dangerous for Jecht to use out in the open, but this becomes more difficult to contest near walls and corners as he is aggressively occupying space with high priority hitboxes. A panic ground dodge / block can get run over by Jecht Blade. That is something to consider for closing out matches, even though Jecht already has a much safer high priority option in Jecht Rush.
Jecht is considered airborne when using this move, but he gains a minimal amount of height from this. Assists that depend on player character's own positioning like Aerith and The Emperor are affected by this, so stay vigilant if you intend to use their ground moves in tandem with Jecht Blade.
![]()
|
| Base Damage
|
1 x 6, 2, 2, 3, 3 (16)
|
| Startup Frame
|
48F (charge),
11F (release)
|
| Damage Type
|
Physical
|
| Priority
|
Melee High
|
| EX Force
|
30
|
| Effects
|
Wall Rush
|
| Cancels
|
Dodge (recovery)
|
| Assist Gain (Hit)
|
|
| CP (Mastered)
|
30 (15)
|
| -- |
Unlocked at
level |
Mastered at
AP
|
Level 2 Jecht Blade gains more base damage and tracking. Not commonly used, but the increased tracking lets Jecht Blade connect after Jecht Rush Up 3 chain. Generally speaking Ultimate Jecht Shot outclasses this move, but securing a wall rush is an important part of effective Jecht gameplay. If you end up doing a combo where Ultimate Jecht Shot cannot wall rush or leads to worse pressure (e.g. without assist meter to combo afterwards), this may be worth consideration. Grounded Jecht Blade is not usually prioritized in competitive play, so this is better left for minute optimization.
![]()
|
| Base Damage
|
1 x 9, 2 x 6 (21)
|
| Startup Frame
|
64F (charge),
11F (release)
|
| Damage Type
|
Physical
|
| Priority
|
Melee High
|
| EX Force
|
36
|
| Effects
|
Wall Rush
|
| Cancels
|
Dodge (recovery)
|
| Assist Gain (Hit)
|
|
| CP (Mastered)
|
30 (15)
|
| -- |
Unlocked at
level |
Mastered at
AP
|
Level 3 Jecht Blade has the most tracking and deals the most damage, but is better used sparingly to chase after opponents in small spaces like LV1 Jecht Blade.

|
| Base Damage
|
--
|
| Startup Frame
|
31F
|
| Damage Type
|
--
|
| Priority
|
Ranged High
|
| EX Force
|
120
|
| Effects
|
--
|
| Cancels
|
Dodge
|
| Assist Gain (Hit)
|
|
| CP (Mastered)
|
30 (15)
|
| [Close] Fires lasers from eyes. Short range, but fast. |
Unlocked at
level |
Mastered at
130 AP
|
A single-hit HP attack with high EX generation. This is another staple HP attack for Jecht, but once again the ground version's viability differs notably from the aerial version. Jecht is considered grounded when using this move, but he cannot combo into this version of Jecht Beam specifically. The only exception to that is during EX Revenge and even that requires dedicating part of the build to it.
Unlike Jecht Blade though, Jecht Beam can be used as a slower high priority poke to occupy space, stop careless approaches and call out whiffs. The active hitbox stays out for deceptively long, almost matching the visuals. Whiff punishing Jecht Beam from the front is often much easier with longer range tools such as Squall's Thunder Barret or assist. Dodging through the beam, powering through with melee high priority or approaching from other angles also work fine as countermeasures too; Jecht Beam has a generously sized hitbox, but there is no steep vertical angle to its tracking, making it weak for anti-airing or 360-degree coverage. Jecht Beam will not continue to align with the opponent during startup either.
As a single-hit move, Jecht Beam can circumvent EX Revenge checkmates on hit. The above average EX Force output at 120 is great for Jecht's hybrid builds and if Jecht Beam hits in very close-range, it can hit twice for more EX and assist gauge with Side by Side ![]()
 equipped.
Overall it's a good move for Jecht, if a bit niche at times. The laser travels a short distance, but it is enough to work as a disjoint against The Emperor's traps. However, aerial-centric matchups such as Ultimecia and Exdeath won't provide many opportunities to use grounded Jecht Beam, if at all.Aerial
Data comparison
| Version |
Damage multiplier |
Startup frame |
Type |
Priority |
EX Force |
Effects |
CP (mastered)
|
| Level 1 |
1 x 5, 3, 2 (10) |
41F |
Physical |
Melee High |
30 |
Wall Rush |
30 (15)
|
| Level 2 |
2 x 7, 1 (15) |
48F charge, 11F release |
Physical |
Melee High |
30 |
Wall Rush
|
| Level 3 |
2 x 11, 1, 1 (24) |
64F charge, 11F release |
Physical |
Melee High |
30 |
Wall Rush
|
|
| Base Damage
|
1 x 5, 3, 2 (10)
|
| Startup Frame
|
41F
|
| Damage Type
|
Physical
|
| Priority
|
Melee High
|
| EX Force
|
30
|
| Effects
|
Wall Rush
|
| Cancels
|
Dodge (recovery)
|
| Assist Gain (Hit)
|
|
| CP (Mastered)
|
30 (15)
|
| [Close] Grab foe and detonate. Boost power by holding button. |
Unlocked at
level |
Mastered at
130 AP
|
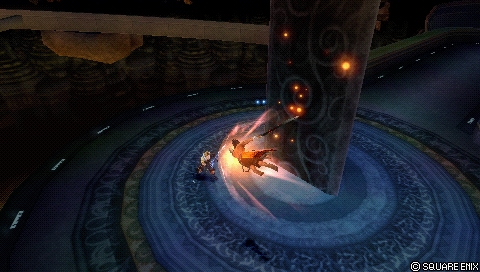
A downward dive with a proverbial explosive grab. Triumphant Grasp is a staple HP for Jecht and his primary HP combo ender for Jecht Stream Down 3 chain. The base damage for level 1 & 2 is lower compared to Jecht Blade, but Triumphant Grasp makes up for it in reliability - It connects from the combo chain with easiest timing (Stream Down 3) and the diagonal knockback wall rushes more consistently near walls, corners and ceilings.
This is also one of Jecht's safer options against LV1 Assist Change. Upon escaping from the combo on reaction, the Assist Change will send the opponent upwards, whereas Triumphant Grasp moves Jecht downwards. The gap that is created by this interaction makes it very difficult to punish Triumphant Grasp afterwards. The opponent can mitigate this by assist changing during the bravery hits, but note that Jecht will only transition to the explosion on hit. Much like his bravery combo chains, if the opponent calls the assist right before getting hit by this move, Jecht can be interrupted by it.
Triumphant Grasp's initial active frames last for most of the dive when the orange particle effect is visible, but it is still punishable at the end. The downward angle makes it good for calling out ground dodges at close range, but dashing and using Jecht Stream is usually safer.
![]()
|
| Base Damage
|
2 x 7, 1 (15)
|
| Startup Frame
|
48F (charge),
11F (release)
|
| Damage Type
|
Physical
|
| Priority
|
Melee High
|
| EX Force
|
30
|
| Effects
|
Wall Rush
|
| Cancels
|
Dodge (recovery)
|
| Assist Gain (Hit)
|
|
| CP (Mastered)
|
| -- |
Unlocked at
level |
Mastered at
AP
|
Level 2 Triumphant Grasp deals more damage than the level 1 version and is typically used to increase combo damage after Jecht Stream Down 3.
![]()
|
| Base Damage
|
2 x 11, 1, 1 (24)
|
| Startup Frame
|
64F (charge), 11F (release)
|
| Damage Type
|
Physical
|
| Priority
|
Melee High
|
| EX Force
|
30
|
| Effects
|
Wall Rush
|
| Cancels
|
Dodge (recovery)
|
| Assist Gain (Hit)
|
|
| CP (Mastered)
|
| |
Unlocked at
level |
Mastered at
AP
|
Max charged Triumphant Grasp travels slightly further and has the highest base damage out of Jecht's aerial HP attacks. Jecht cannot combo into this by himself outside of EX Revenge. Level 3 may be used in situations where the player is trying to call out a specific option against the opponent. The downward tracking and speed is still good for punishing ground dodges on reaction, even blocks if the player is fast enough.
The 11-frame startup after button release makes this move unreactable, so opponents staying in this range after a whiff may have to gamble on Jecht's timing. That is not a good situation, but the longer Jecht holds the max charge, the more time he gives his opponent to jump away and escape. Just like with other charge moves, Jecht cannot cancel the startup and must follow through no matter what. The reward on hit is still good though, enhanced by Side by Side.Data comparison
| Version |
Damage multiplier |
Startup frame |
Type |
Priority |
EX Force |
Effects |
CP (mastered)
|
| Level 1 |
2 x 5 (10) |
41F |
Physical |
Melee High |
30 |
Wall Rush |
30 (15)
|
| Level 2 |
1 x 6, 2, 2, 3, 3 (16) |
48F charge, 11F release |
Physical |
Melee High |
30 |
Wall Rush
|
| Level 3 |
1 x 9, 2 x 6 (21) |
64F charge, 11F release |
Physical |
Melee High |
36 |
Wall Rush
|
|
| Base Damage
|
2 x 5 (10)
|
| Startup Frame
|
41F
|
| Damage Type
|
Physical
|
| Priority
|
Melee High
|
| EX Force
|
30
|
| Effects
|
Wall Rush
|
| Cancels
|
Dodge (recovery)
|
| Assist Gain (Hit)
|
|
| CP (Mastered)
|
30 (15)
|
| [Close] Masterful swordplay. Boost power by holding button. |
Unlocked at
level |
Mastered at
130 AP
|
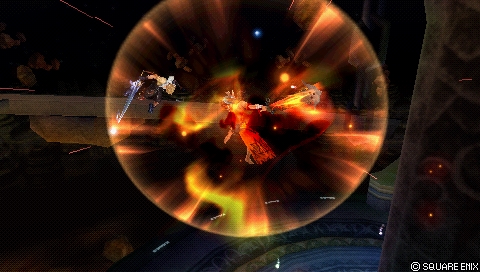
An advancing aerial multi-hit combo that combos from Jecht Stream Neutral 3 chain. Much like Triumphant Grasp, Jecht Blade's aerial version is a staple HP for Jecht. It primarily operates as an HP combo ender but it is essential to Jecht's combo game due to its wall carry. When done at the end of a combo, it can wall rush from across the stage in World of Darkness. Both the opponent and Jecht stay at the same altitude after the wall rush which, along with the dodge cancel window, allows Jecht to fit in a Jecht Beam during air BRV Kuja assist for even more damage afterwards.
By itself, a level 1 Jecht Blade is still risky to use in the neutral. The HP has some tracking, but with all the open space in many stages, it is difficult to take advantage of without good conditioning. In smaller stages like Pandaemonium, a raw Jecht Blade can occupy space for longer than a level 3 Jecht Stream can, but be careful as the animation cannot canceled until he is done swinging his sword.
![]()
|
| Base Damage
|
1 x 6, 2, 2, 3, 3 (16)
|
| Startup Frame
|
48F (charge),
11F (release)
|
| Damage Type
|
Physical
|
| Priority
|
Melee High
|
| EX Force
|
30
|
| Effects
|
Wall Rush
|
| Cancels
|
Dodge (recovery)
|
| Assist Gain (Hit)
|
|
| CP (Mastered)
|
30 (15)
|
| -- |
Unlocked at
level |
Mastered at
AP
|
As with Triumphant Grasp and Ultimate Jecht Shot, Jecht Blade can charged to level 2 for a slight bravery damage increase during a solo combo. The base damage is higher than level 2 Triumphant Grasp (16 to Grasp's 15), but timing it can be more difficult due to Neutral 3's more obtuse cancel window.
![]()
|
| Base Damage
|
1 x 9, 2 x 6 (21)
|
| Startup Frame
|
64F (charge),
11F (release)
|
| Damage Type
|
Physical
|
| Priority
|
Melee High
|
| EX Force
|
36
|
| Effects
|
Wall Rush
|
| Cancels
|
Dodge (recovery)
|
| Assist Gain (Hit)
|
|
| CP (Mastered)
|
30 (15)
|
| -- |
Unlocked at
level |
Mastered at
AP
|
Fully charged Jecht Blade can be used similiarly to a level 3 Triumphant Grasp; To threaten certain actions with stronger tracking and high priority hitboxes. Air Jecht Blade's vertical tracking increases by a decent amount at level 3 and the startup on button release is as fast with level 2 Blade or charged Triumphant Grasps. Because of Jecht Blade's lateral range and vertical tracking from the charge, it can be used more liberally against cornered opponents. Dodge punishing is possible on reaction, but the longer you wait, the more time the opponent has to diffuse the situation by moving away or hitting Jecht out of the charge.
If a raw LV3 Jecht Blade hits, it can force the opponent to quickly use their meter. Some characters may struggle to punish this move after LV1 Assist Change if they react too late. Charging a level 3 Jecht Stream is still safer overall, especially if the opponent is in near death state.

|
| Base Damage
|
--
|
| Startup Frame
|
31F
|
| Damage Type
|
--
|
| Priority
|
Ranged High
|
| EX Force
|
120
|
| Effects
|
--
|
| Cancels
|
Dodge
|
| Assist Gain (Hit)
|
|
| CP (Mastered)
|
30 (15)
|
| [Close] Fires lasers from eyes. Short range, but fast. |
Unlocked at
level |
Mastered at
130 AP
|
A single-hit HP attack with above average EX generation. A combo tool and an occasional poke, Jecht Beam combos from Jecht Stream Neutral 3 chain, which already puts the aerial version in the same league as his other air HPs. Many of the grounded version's traits are shared with this one, including the below average tracking, long active frames and double hits in close range. Ending Jecht's solo combo with Jecht Beam causes the double hit consistently for twice the EX and meter, which complements his meter game very well. With Side by Side involved, a LV2 Assist Change stagger can net Jecht over 1 assist bar with a Jecht Beam ender.
Jecht Beam causes enough hit stun to combo into assists, but wall or a corner is usually required to reduce the knockback. With Kuja or Tidus assist, Jecht Stream Down 3 can also combo into Jecht Beam without walls and still provide another combo afterwards. Doing a combo this way eliminates the double hit from the first Jecht Beam, though.
As a combo ender, Jecht Beam provides the most meter at the expense of wall rush. Against LV2 Assist Change it won't be reflected at Jecht, nor will it stagger him. However, the lack of movement during Beam's startup makes it easier for opponents to LV1 Assist Change and then force a mixup, if not punish him on the spot. Jecht's combo timing is linear and players are often expected to complete the combos, telegraphing Jecht Beam to an extent.EX Mode: Final Aeon!
Effects:
- Regen
- Critical Boost
- Full Combo
Full Combo
[Always active while in EX Mode]
Even if the first hit misses the opponent, combos can be completed.
Full Combo allows Jecht to initiate surprise attacks and extend EX mode's duration for added health regeneration. By whiffing Jecht Rush or Jecht Stream and then activating EX Mode, Jecht can quickly close the gap with the second combo chain. At a glance it sounds tempting, powerful even. But the tracking is not very strong and only the 3rd combo chain has an increase in priority from Melee Low to Melee Mid. However, Jecht Rush works particularly well with this since the 2nd chain (neutral) can traverse in the blink of an eye or anti-air (up).
As a general rule, the player character's EX Mode will not deactivate while they are in an attack state. Since Jecht can charge an attack without time restrictions, he can theoretically stay in EX Mode forever and thus, regenerate as much health as he wants. Taking advantage of this trait means allowing the opponent to pursue resources at their leisure while putting yourself at the risk of getting whiff punished. Remember that Jecht is still vulnerable while charging as well.
If no EX meter remains and Jecht is in a combo, the EX Mode will deactivate after the 3rd combo chain. Therefore, if you want to ensure an EX Burst, you must already be performing the HP attack by the time the EX meter has run out.
EX Burst: Blitz King

A flurry of attacks leading to a splendidly impressive shot. Watch your timing and press circle when the cursor hits the center.
| Base Damage (Initial) |
Base Damage (Remainder) |
Type
|
| 5 (5) |
5, 5, 10, 19 x 4 (96) (101 total) |
Physical
|
Blitz King is a timing based EX Burst with two separate inputs required for a perfect EX Burst. The low initial hit base damage and long EX Burst time cuts into the damage output quite a bit, making this one of the weaker EX Bursts in the game.
When the purple cursor starts moving inside the gauge from left to right, the player must press circle (![]()
 ) so that the cursor stops at the middle. Pressing circle when the cursor is outside of the highlighted grey area will reset the cursor back to the left side of the gauge. Stopping the cursor near the edges of the grey area will result in a "Good" and stopping it at the center will result in a "Great". Two "Great" inputs will make up the perfect EX Burst, dealing the most damage.
The EX Burst inputs have their own time limit, which are quite short. The first input must be done within 2 seconds and the second input must be done within 1 second. In both instances, there is enough time for a cursor to move to the right, come back to the center and stop at the perfect spot in the middle. Use that to give yourself more time to get the timing down.
Auto EX Command Ω support ability can be used to ignore the timing aspect entirely at the cost of 20 CP. This can be a good use of capacity points in rulesets where spare points are common such as Japan Ranked and it also works reliably in battles with high latency internet connections. However, Jecht also needs CP for other things and considering the overall difficulty of even getting a full EX gauge, the burst itself and its reward, this is not a clear cut recommendation.
Still, even though the effectiveness of Side by Side builds and the relatively weak EX generation limits EX Burst opportunities, Blitz King is still okay for tacking on extra damage or closing out a match.
Unique Mechanics: Charge
If an attack button is held, Jecht will begin charging the attack. Hold the button to increase the attack's properties and release the button to use it. Most attacks can be charged, except Jecht Block and Jecht Beam.
Charging is an important aspect of Jecht's gameplay, particularly with braveries. Their most common use is breaking through regular blocks, but they can also be used in dodge punishment and whiff punishment. However, charging will also make Jecht more vulnerable and telegraphed during startup. Jecht can keep charging as long as the button is held, but this usually makes it easier for the opponent to retaliate. It also has a side effect of extending Jecht's EX mode well beyond its intended limit.
All charged attacks have three levels to them. HP attacks simply get increased tracking and bravery damage. For the two braveries, Jecht Rush and Jecht Stream, the properties are a bit different.
- Level 1
- Uncharged, Melee Low priority, fastest start-up. Quickly tap the button.
- Level 2
- Slightly charged, Melee Low priority. Slower start-up, but minor range and damage increase. Indicated by a different grunt and additional, but subdued particle and sound effects.
- Level 3
- Fully charged, Melee High priority. Slowest start-up (almost doubled from LV2), but provides biggest range and damage increase. Indicated by a different sound effect and a major aura surrounding Jecht.
As mentioned before, charging is not without risks. Once Jecht begins charging, he MUST follow through with the attack even if it cannot hit. This means charging Jecht Stream is risky, as it takes even longer to start and recover from performing both kicks. Jecht remains vulnerable while he closes the distance with a charged Jecht Stream, and opponents usually have more room to evade the attack in the air as well.
While charged Jecht Stream is vulnerable on button release, charged Jecht Rush is much safer. This is because the hitbox comes out much earlier, the animation is shorter and it can be cancelled earlier. As such, ground combat is safer for Jecht than aerial fighting. Unfortunately, the majority of Dissidia Duodecim's interactions mandate air combat. Building good intuition for charging attacks can cripple Jecht's gameplay for some time, but it can pay dividends. Jecht can take advantage of walls and small stages as there is less room to evade safely.
When attacking, it is important to be mindful of how long the button is held. Even a slight hold can make Jecht's attack slower than it actually is, even if the properties don't change.
Builds
Main article: Jecht (012) Builds
Jecht can work with a variety of builds, including high base bravery + Side by Side ![]()
 , bravery boost on dodge and even Center of the World. Please refer to the main article for an extensive list of builds and breakdowns on them.
- About neutral attack input
The attack assigned to the neutral input (no direction) matters! Jecht Rush becomes immune to ambigious camera angles and helps Jecht hit grounded characters when moving. The same goes for Ultimate Jecht Shot, which can be used as an anti-air. On the other hand, gapless Jecht Blocks become more practical with neutral input. Defending against airborne attacks regardless of angle becomes easier as well.
Another way to mitigate "camera cross-ups" requires a larger CP investment; Jecht Block on neutral (15 CP) and Jecht Rush on both directional inputs (30 + 30 CP). Or Jecht Rush on neutral (30 CP) and Jecht Block on both directional inputs (15 + 15 CP). This is not an issue for air attacks, and lock-off Jecht Blade / Triumphant Grasp are not known to have effective uses either.
| Stats
|
| HP |
9376
|
| CP |
450
|
| BRV |
1393 (2089 initial)
|
| ATK |
179
|
| DEF |
183
|
| LUK |
--
|
| Max Booster |
x3.8
|
Special Effect: None
| Equipment
|
| Assist |
Kuja / Aerith
|
Weapon ![]()  |
Piggy's Stick ![]() 
|
Hand ![]()  |
Chainsaw ![]() 
|
Head ![]()  |
Royal Crown ![]() 
|
Body ![]()  |
Maximillian ![]() 
|
| Accessory 1 |
![]()  Muscle Belt Muscle Belt
|
| Accessory 2 |
![]()  Sniper Eye Sniper Eye
|
| Accessory 3 |
![]()  Dismay Shock Dismay Shock
|
| Accessory 4 |
![]()  BRV = 0 BRV = 0
|
| Accessory 5 |
![]()  Empty EX Gauge Empty EX Gauge
|
| Accessory 6 |
![]()  Pre-EX Mode Pre-EX Mode
|
| Accessory 7 |
![]()  Pre-EX Revenge Pre-EX Revenge
|
| Accessory 8 |
![]()  Hero's Seal Hero's Seal
|
| Accessory 9 |
![]()  Together as One Together as One
|
| Accessory 10 |
![]()  Side by Side Side by Side
|
Summon ![]() 
|
Rubicante
|
| Bravery attacks
|
| Ground |
Aerial
|
![]()  Jecht Block Jecht Block |
![]()  Jecht Block Jecht Block
|
|
|
|
|
↑+![]()  Jecht Rush Jecht Rush |
↑+![]()  Jecht Stream Jecht Stream
|
|
|
|
|
|
|
|
|
|
|
| HP attacks
|
| Ground |
Aerial
|
![]()  Ultimate Jecht Shot Ultimate Jecht Shot |
![]()  Jecht Beam Jecht Beam
|
↑+![]()  Jecht Beam Jecht Beam |
↑+![]()  Jecht Blade Jecht Blade
|
|
↓+![]()  Triumphant Grasp Triumphant Grasp
|
![]()
 indicates a "Gear" extra ability or the use of Equip Glitch. The total Capacity Point cost assumes the equip glitch is done.
The extra abilities are Peltast's Gear, Bard's Gear, Cavalier's Gear and Equip Machines.
Build Overview
Standard high base bravery with wall rush, a stable build for competition. Meter depletion is placed here, as are mobility boosts, initial BRV and assist gauge boosts. EX is unavailable since Side by Side ![]()
 is equipped.
The goal with this build is to hit hard and hit fast; The first wall rush combo with Hero's Seal is going to hit for over 3,000 HP. At base bravery, a solo combo with HP wall rush deals roughly 2,000 HP damage. Coupled with Side by Side's meter gain, that already creates a good health lead. Together as One ![]()
 kickstarts assist meter at the beginning and lets Jecht avoid committing to an attack for a longer period of time. Naturally, getting hit early will take the higher initial bravery away, but ideally the assist will be available to protect in worst case scenarios.
When doing a Kuja assist combo at base bravery, the bravery recovers fast enough for raw Jecht Blade to do base bravery damage (1393 + wall rush). Completing another solo combo is not usually required in these cases.
Basic Abilities
| Actions
|
| Ground Evasion
|
| Midair Evasion
|
| Ground Block
|
| Midair Block
|
| Aerial Recovery
|
| Recovery Attack
|
| Controlled Recovery
|
| Wall Jump
|
| Air Dash
|
| Free Air Dash
|
| Ground Dash
|
| Multi Air Slide
|
| Free Air Dash Boost
|
| Assist Gauge Up Dash
|
| Speed Boost++
|
| Jump Times Boost+
|
| Ground Evasion Boost
|
| Midair Evasion Boost
|
| Evasion Boost
|
| Descent Speed Boost
|
| Support
|
| Always Target Indicator
|
| EX Core Lock On
|
| Assist Lock On
|
| Extra
|
| Precision Jump
|
| Precision Evasion
|
| Counterattack
|
| Gambler's Spirit
|
| Disable Counterattack
|
| EXP to Assist
|
CP Allocation
5 points are available for Auto Assist Lock-On. It allows charged attacks to automatically home in towards the opponent's assist. This does leave Jecht open for an opponent's attack though.
Substitutes
For an EX variant of this build, swap Side by Side and Together as One for Tenacious Attacker ![]()
 and / or Glutton
 ![]()
 . The Empty EX Gauge booster
 ![]()
 should also be replaced with something else.
Attacks (Staple)
Jecht often uses most of his attacks, and they are all staples. They are recommended regardless of matchup, stage or player preference.
Attacks (Flexible)
These attacks are great to have, but can be swapped or removed depending on matchup, stage or player preference.
- Jecht Beam (ground)
Grounded Jecht Beam complements Jecht's poking, and is a good single hit HP with deceptively long active frames. Jecht cannot combo into this without assist, so if poking and countering with a quick HP is not a priority, it can be removed.
- Jecht Blade (ground)
Contrary to Jecht Beam, Jecht can combo into this HP. The combo route is different from his usual neutral 3rd chain, and it's usually not optimal. It does provide another way to aim for wall rush though. Other than that, raw grounded Jecht Blade can occupy space faster than aerial Jecht Blade would. This may be valuable in small stages, but it is still risky to throw out.
Attacks (Avoid)
Generally not recommended due to being outclassed by other attacks or having little to no distinct utility.
Depending on the person, Jecht Blade (ground) belongs here instead of the "flexible" section. The 15 CP cost for it bleeds into other aspects of Jecht's build while being nonessential for his core gameplay.Hybrid (Seal of Lufenia)
| Stats
|
| HP |
9644
|
| CP |
480
|
| BRV |
1314
|
| ATK |
180
|
| DEF |
181
|
| LUK |
--
|
| Max Booster |
x3.3
|
Special Effect: Seal of Lufenia
| Equipment
|
| Assist |
Kuja / Tidus
|
Weapon ![]()  |
Piggy's Stick
|
Hand ![]()  |
Lufenian Dirk
|
Head ![]()  |
Lufenian Hairpin
|
Body ![]()  |
Lufenian Jacket
|
| Accessory 1 |
![]()  Sniper Eye Sniper Eye
|
| Accessory 2 |
![]()  Bravery Orb Bravery Orb
|
| Accessory 3 |
![]()  Battle Hammer Battle Hammer
|
| Accessory 4 |
![]()  BRV = 0 BRV = 0
|
| Accessory 5 |
![]()  Summon Unused Summon Unused
|
| Accessory 6 |
![]()  Pre-EX Mode Pre-EX Mode
|
| Accessory 7 |
![]()  Pre-EX Revenge Pre-EX Revenge
|
| Accessory 8 |
![]()  Hero's Essence Hero's Essence
|
| Accessory 9 |
![]()  Tenacious Attacker Tenacious Attacker
|
| Accessory 10 |
![]()  First to Victory First to Victory
|
Summon ![]() 
|
Rubicante
|
| Bravery attacks
|
| Ground |
Aerial
|
![]()  Jecht Block Jecht Block |
![]()  Jecht Block Jecht Block
|
|
|
|
|
↑+![]()  Jecht Rush Jecht Rush |
↑+![]()  Jecht Stream Jecht Stream
|
|
|
|
|
|
|
|
|
|
|
| HP attacks
|
| Ground |
Aerial
|
![]()  Ultimate Jecht Shot Ultimate Jecht Shot |
![]()  Jecht Beam Jecht Beam
|
↑+![]()  Jecht Beam Jecht Beam |
↑+![]()  Jecht Blade Jecht Blade
|
|
↓+![]()  Triumphant Grasp Triumphant Grasp
|
![]()
 indicates a "Gear" extra ability or the use of Equip Glitch. The total Capacity Point cost assumes the equip glitch is done.
Build Overview
An all-rounder build with stronger EX gauge depletion. Recommended against characters with good EX generation or long-winded match-ups involving EX such as Gabranth, Gilgamesh, Prishe, Lightning, Garland and Tidus.
Base bravery is comparable to the Side by Side build, but the key difference is that Bravery Orb ![]()
 is used to improve bravery recovery. That leaves less room for other things in a build, but the current loadout provides some flexibility in a few ways. There is wall rush HP damage, initial boost in First to Victory
 ![]()
 and higher max CP for more abilities. If that's not enough, the substitutes section can help.
Basic Abilities
CP Allocation
Substitutes
If Seal of Lufenia set bonus' EX drain is not enough, you may swap one of the special accessories, BRV = 0 or Bravery Orb for Dismay Shock. The extra CP provided by Hero's Essence lets you equip more abilities with movement, critical hit rate boosts or stat increases. Depending on your preferences, First to Victory is also interchangeable. Glutton, Winged Boots and Muscle Belt are all good picks there.Assists
Jecht's Assist Data
| Type |
Attack |
Startup |
Position |
Spawn |
Damage multiplier |
Effects
|
| BRV |
Jecht Rush |
13F |
Ground |
Opponent |
4, 1 x 9, 3, 1 x 5, 2, 19 (42) |
Wall Rush
|
| BRV |
Jecht Stream |
17F |
Air |
Opponent |
2, 2, 1 x 4, 3, 5, 5, 1 x 4, 15 (40) |
Wall Rush
|
| HP |
Jecht Blade |
41F |
Ground |
Opponent |
2 x 5 (10) |
Wall Rush
|
| HP |
Triumphant Grasp |
41F |
Air |
Opponent |
1 x 5, 3, 2 (10) |
Wall Rush
|
Jecht Assist Overview
Jecht is one of the established meta assists in the game. He does not provide Assist Chase by default, but his combos hold the opponent for a long time which is great for setting up ground combos or lining up an HP attack at all. This is a bit different from Kuja and Sephiroth assists - Jecht traverses forward during bravery assists and does not lend well to repeated interim wall rush braveries. Jecht Rush finishes with Up 3 ender, while Jecht Stream finishes with Down 3. Jecht Stream works better for combo fillers due to slower travel speed and mostly stationary hit stun during Down 3, which is great for combos near the ground.
Jecht assist also has something that's not commonly found with other assists - fast braveries for both ground and midair that also lead to consistent followups. This is worth consideration when looking into whiff punishes, as some assists have good ground bravery, but below average air bravery for whiff punishing purposes or vice versa. Jecht has both.
However, he does not have ranged priority on his attacks so LV2 Assist Change stops him reliably. The long animations on hit also leave Jecht vulnerable for a relatively long time. Dashing close to him after LV1 Assist Change or using an attack with adequate vertical reach is often enough to lock him.
There is a quirk with the Jecht BRV assist that makes him end the combo early. If Jecht ends up in a corner during Jecht Rush's second combo chain, the finishing chain will not come out and it results in an Assist Chase instead. [1] The behavior is fairly consistent, but it can catch players off guard.
Further reading: Jecht overview in assist tier list
Assist Synergy Overview
With the ability to convert fast braveries into a full blown HP combo with wall rush, Jecht's gameplay lends well to a variety of assists. All meta assists work with Kuja being conventionally strongest, with other four providing match-up / stage specific utility.
In addition, Squall, Onion Knight and Ultimecia can provide specifically tailored utility. Small stages enable Terra and Gilgamesh.
High bravery damage, whiff punishes, consistent follow-ups anywhere and HP assists to help bypass LV2 Assist Change or force an HP through a botched combo. A Jecht Beam during a BRV assist is often guaranteed at a wall, pushing critical hit rate for the next combo higher and speeding up base bravery recovery.
Jecht will have to engage with the opponent directly if they choose to escape the opponent and lock the vulnerable Kuja assist, but it is well worth the effort.
What Tidus loses in raw damage output, he makes up for it with whiff punish proficiency and ground combo potential. Air BRV assist Hop Step is faster than Kuja air BRV with less range, but helps with reaction times and bypasses The Emperor's Dreary Cell HP reliably, both notable assets to Jecht.
Sonic Buster BRV isn't the best at whiff punishing, but the ground wall rush knockback means Jecht can go for a full Jecht Rush dodge cancel combo to rack up damage. The short interval between Hop Step and a teleport follow-up incentivises a full combo over a raw HP for high base bravery builds, which can hurt player consistency at times. If a Jecht Stream combo fails half way, the Slice and Dice HP can salvage it during a chase sequence.
Tidus is not necessarily an optimal assist in all match-ups, but definitely worth consideration regardless.Aerith does not primarily function as a whiff punisher, but she allows Jecht to play around situations where many other assists can fall short. Both Cure and Holy can provoke an approach, and the former can stack bravery in drawn out match-ups. Seal Evil lets Jecht land an HP via chase if the player didn't get past the second bravery chain. In addition, Seal Evil can be used in conjunction with Jecht Block or fully charged Jecht Stream to clash with high priority attacks and create a favorable interaction.
The big cherry on top though, would be the double Ultimate Jecht Shot combo. This lets Jecht combo into an HP three times in a row on the ground. For a high base bravery build, that is roughly 5000-6000 HP for two assist bars. Powerful in ground-based match-ups where Jecht can operate without landing an assist first.
If you are struggling to time Jecht's combos or want high burst damage on the ground, Aerith assist is a good choice.Functionally this may be treated as a budget Kuja assist with a faster ground BRV assist, but without Ranged High HP assists. Solid, perhaps a bit average, but viable nonetheless.
Stagger-immune air BRV assist with downward knockback makes Yuna a decent choice for small stages. Jecht can facilitate wall rushes fairly easily in stages such as M.S. Prima Vista or Pandaemonium - Top Floor, so combo game is a smooth process, Ultimate Jecht Shot notwithstanding.
Fast start-up and Ranged Low priority also makes whiff punishing air attacks with Yuna assist a noteworthy merit, though this may not come into play very often. Both air BRV and HP assists could work out though.
Ranged Low ground BRV assist is good for grounded interceptions and Ultimate Jecht Shot follow-ups, enabling Jecht Rush dodge cancel combos. Air BRV assist is a bit more situational, requiring wall to capitalise on whiff punishes or to cancel the knockback of the last hit for another HP. If Jecht fails to proceed to the 3rd chain, the Comet HP assist can enforce an HP hit.
Not the strongest assist available overall, but quite good on his own terms.
Ground BRV and HP assists are arguably Squall's strongest assets to Jecht here. Air BRV Heel Crush requires ground and even then it leaves little time for conversions. With no access to Jecht assist, Squall becomes the fastest ground BRV assist for whiff punishing purposes with Solid Barrel.
The holding potential and assist teleport ensure that Jecht can take advantage of any hits he DOES land with Squall assist. Using two assist bars is not without merit either - Blasting Zone can intercept and Aerial Circle lets Jecht land an HP through empty chase even if the player's combo timing was off.
As a result, Squall ends up serving a niche purpose. Air BRV can struggle to create favorable interactions due to slow speed and poor tracking, so much of his effectiveness hinges on having the opponent vulnerable on the ground. Ground wall rushes or more importantly, calling Squall after an opponent has whiffed. Recommended against Golbez.If you are willing to sacrifice consistent HP wall rush follow-ups and whiff punishes, Ultimecia allows Jecht to perform multiple Jecht Rush dodge cancel combos in a row. This relies on performing the Jecht Rush dodge cancel combo, calling Ultimecia for air BRV Knight's Axe and wall rushing with Down 3 ender near the wall so the axe hits. Since the projectile will hit after Ultimecia has disappeared, it will not lock the assist gauge, allowing repetitions of this combo. If you mess up the solo combo timing, the Knight's Axe can still force an HP / wall rush during chase near wall, but this should not be your primary way of landing HPs.
The air BRV Knight's Axe can also hypothetically force an interaction with it's Ranged High priority. And with the fast assist call glitch even the ground BRV assist can function as a ground wall rush follow-up!
The extended solo combos are the selling point here though. Ultimecia is not the kind of assist you would pick to tackle a specific match-up. Rather, this might be your way of signaling confidence as she requires an independent hit to function even remotely well. Investing in ATK and Assist Critical Boost is recommended.Functions primarily in small stages as a combo assist off of Wall Rush. Gilgamesh has some of the highest raw BRV damage with Excalibur equipped (50 / 50 chance), so he can substitute Yuna at the expense of being susceptible to LV2 Assist Change staggers.
Functions in small stages as a non-staggerable combo extender and an interceptor with Blizzara (midair). Terra's homing Meltdown HP can also enforce an offensive situation in closed spaces.
References
Navigation
Wiki Roadmap (012 Jecht)
Please edit this page's roadmap template when relevant additions and changes are made.
| Page |
Completed |
In progress |
To-do |
Score
|
| General |
Strengths and weaknesses. Data. Unique mechanics overview. |
|
|
/ 86
|
| Pros / Cons |
Done. |
|
Trim down? |
2 / ?
|
| Overview / Character Data |
Done. |
Shorten overview to fewer paragraphs. |
|
2 / 2
|
| Bravery Attacks |
|
|
Add images for charged versions. |
4 / 5
|
| HP Attacks |
Ability info added. Overviews. |
|
Add images for charged versions. |
4 / 5
|
| EX Mode |
Basic info, image and EX burst info added. |
|
|
3 / 3
|
| Combos |
Solo combo analysis, assist combos listed. |
|
Add a few example combos to main page, then link to the full combo page. Add damage and EX values. Add video examples for assists combos. |
4 / 7
|
| Builds |
7 example builds on combo page. |
|
Add more builds and write details about them. |
10 / 10
|
| Assist |
Assist data and overview. |
|
Elaborate on assists a bit more if possible? |
3 / 3
|
| Matchups |
Page created. |
|
Matchup analysis and tips against each character. |
0 / 32
|
| Frame Data |
|
|
|
0 / 1
|
| Starter Guide |
Page created. |
|
A concise PvP guide with core concepts and bare essentials explained concisely. Roughly 25 % of character's total page content. |
0 / 8
|
| Strategy |
Basic offense, defense and counterplays outlined. |
|
More general tips if possible. |
4 / 10
|


 .
.


 Muscle Belt
 BRV = 0