Sephiroth is a defensive air fighter who can fight close and from afar. His main strategy revolves around zoning with Shadow Flare, with the goal of forcing mistakes. Dodge cancelling lets Sephiroth cast Shadow Flares quickly, which makes it hard for his opponents to move. This encourages them to approach, and in turn, lets Sephiroth utilize his other moves.
Sephiroth is versatile; He synergizes well with system mechanics and thrives when the opponent has to approach him. Shadow Flare pressures both melee fighters and spell casters, and it also fills assist gauge at a steady pace. Sudden Cruelty complements the projectiles in close-range with a disjointedhitbox and high potential for damage and EX. His combos are well-rounded due to his assist synergy (Kuja & Aerith). Sephiroth works with many builds, with bravery damage and EX being his bread-and-butter. His defensive options after air dodging are also powerful; Heaven's Light and Hell's Gate are evasive, vertical HP attacks. Scintilla blocks attacks instantly on frame 1, staggering dashes and low priority melee attacks. And if Sephiroth needs to escape with LV2 Assist Change, Heaven's Light also guarantees HP damage for him.
Sephiroth is not without weaknesses, though. Bravery Boost on Dodge builds discourage repeated Shadow Flare use. Many of his attacks are telegraphed (HPs, Oblivion) or linear (Godspeed, Sudden Cruelty). Sephiroth has braveries with fast startup speed, but he takes longer to recover from them on average. His mobility is below average. Although Sephiroth can defend after dodging, he still takes a risk on picking the right move. Sephiroth also needs to watch out for vertical tracking, Precision Evasion and command blocks, so he doesn't overextend himself.
In competitive play, Sephiroth has been consistently ranked at high tier. He is great for new and experienced players alike thanks to his low skill floor and reliable air combat. He can be particularly challenging to beat at low and intermediate levels of play. His action-heavy play style helps him more than it hurts him, but players should be careful not to fall victim to their own habits. A strong character all around.
Strengths
Weaknesses
Zoning. Shadow Flare can pressure the opponent and dictate the pace of a match.
Aerial combat lets Sephiroth fight comfortably without ground, or relying on it.
Strong damage output with high attack stat, base damage and HP wall rushes. Sephiroth can shred bravery with a single assist combo.
Meter generation, Sephiroth builds both EX and Assist meter reliably.
Builds provide ample room to optimize and adjust Sephiroth's strengths.
Flexible post-dodge defense with three midair HPs providing evasion or instant guard.
EX Mode amplifies Sephiroth's damage and unlocks Heartless Angel, which drops opponent's bravery to 1.
Easy and reliable at all levels of play.
Anti-Zoning. Bravery Boost on Dodge and long range counters such as Firion's Shield Bash and Exdeath's block followups can limit the effectiveness of Sephiroth's zoning.
Linearity. Many of Sephiroth's attacks are either telegraphed or have average to poor tracking.
No quick air pokes. Sephiroth has attacks with early dodge cancel recovery and fast startup, but not both on a single move. The only exception is Transience which is only on ground.
Mobility is slightly worse on average overall, encouraging actions instead of less committal movement to remain competitive.
Bravery Attacks
Some of Sephiroth's melee bravery attacks require two bravery inputs to complete them. The second input is a finisher which can be done early. Delaying this button press until all preceding hits have connected maximizes the damage dealt. This is what attack descriptions refer to when they say "delay combo to boost hit times."
[Close] Katana slash. Delay combo to boost hit times.
Unlocked at level 1
Mastered at 100 AP
Reaper is a three-stage combo attack, and Sephiroth's high damaging ground punish move. It starts up quickly and has decent active frames on the first part, but Sephiroth can only transition into the two follow-ups on hit. Sephiroth transitions into the next follow-up whenever Circle is pressed. Pressing the button early reduces the number of hits and thus, the damage dealt. To ensure Sephiroth gets the maximum number of hits, it's recommended to press Circle after a barrage of hits ends. The input window for a maximum delay is not very long, but can be done consistently with a bit of practice.
Reaper leads to assist combos when stopped at the second part. Sephiroth can also use walls to reduce Reaper's knockback when finished for an assist combo. Although Reaper is fairly fast, Sephiroth has to dodge cancel it to make it safer on whiff. Sephiroth is stationary during this move, but the hitbox reaches its maximum range quickly once active.
In practice, Reaper is a serviceable close-range punish move with decent reward, and it may work occasionally as an offensive poke. Sephiroth fights in the air most of the time, so Reaper may not see much use purely for that reason.
[Long] Shockwaves from sword. Delay combo to boost hit times.
Unlocked at level 32
Mastered at 100 AP
A linear stream of projectiles. Fervent Blow can be used sparingly as a mid-range whiff punish tool, whether its reactively or as a callout. Its active duration covers attacks that have gaps between their hits, such as Prishe's Raging Fists. Fervent Blow can start an assist combo with the projectiles or after confirming a wall rush, which is good for a punish move.
However, Sephiroth may not get many opportunities to capitalize on this move because he fights in the air often. Also, Fervent Blow's long recovery, Ranged Low priority and lack of tracking make it vulnerable to sideways movement, Ground Dash and Free Air Dash. Only the close-range sword swing has melee priority, but it has a tendency to cross-up when blocked very close. If the opponent faces away from Sephiroth and blocks it, Sephiroth can get staggered from it. Due to the nature of lock on, this is not easily replicated in an online match. That means Sephiroth could potentially use Fervent Blow as a mixup against guarding opponents.
Generally speaking, Fervent Blow is not known to be very effective as a poke or as a close-range attack. Sephiroth has a functionally similar move in the air, which is Godspeed. It may see more use just because of its nature as an aerial attack.
[Long] Generate 4 spheres of darkness surrounding opponent.
Unlocked at level 1
Mastered at 80 AP
Shadow Flare is one of Sephiroth's character-defining braveries for its zoning capabilities. However, its grounded version is flawed in a few ways the aerial version is not; This version leaves Sephiroth airborne, so it cannot be repeated ad nauseam to harass opponents and build assist gauge. That creates a niche for the Pre-Jump booster (x1.5 multiplier), because Sephiroth can safely leave the ground without deactivating it.
Grounded Shadow Flare shares many of its traits with the midair variant, including the early cancel window for various actions. A ground Shadow Flare can be cancelled into an aerial Shadow Flare, while aerial Shadow Flare cannot be cancelled into itself. It's a small footnote in Sephiroth's overall strategy, but worth noting regardless.
Overall, this version of Shadow Flare is not used often, but it's great for builds with a Pre-Jump booster .
[Close] Quick upward sword slash. Short reach, but fast.
Unlocked at level 8
Mastered at 80 AP
Transience acts as a close-range poke for Sephiroth. It has the hallmarks of a conventional, effective poke in Dissidia 012; Fast startup, decent base damage and short recovery that can be cancelled quickly. This is great for Sephiroth in theory, because these kinds of moves form the basis for offense and defense alike, including filling assist gauge safely.
However, Sephiroth's air-centric gameplay means that Transience is often unavailable. His other moves usually work better just outside Transience's range, so Sephiroth may struggle to find opportunities to use Transience specifically. Transience also has low reward on hit, but it can be converted into an assist combo if it wall rushes. It has decent knockback, so it could theoretically work as a physical keepout move.
If Sephiroth is on the ground, Transience can be whiffed repeatedly to build assist gauge faster. Sephiroth doesn't have two fast pokes he can quickly rotate to keep assist gain fresh, but having one move for this purpose is better than nothing.
[Mid] Nigh-instant slices. Delay combo to boost hit times.
Unlocked at level 1
Mastered at 100 AP
Sudden Cruelty is a two-stage combo attack, and Sephiroth's high damaging aerial punish move. It's similar to Reaper in a few ways, including the delayable follow-up and the disjointedhitbox quickly extending to its max reach. This is Sephiroth's go-to offensive poke in close-range, and it's good for starting assist combos and racking up damage during them. He can even poke through high priority projectiles, given the right positioning. If the opponent gets hit by Shadow Flare, Sudden Cruelty is a consistent way to convert that into a combo in close-range.
The startup is fast enough to be unreactable, but Sephiroth remains stationary for a moment before he can dodge cancel the move. The hitbox also stays active during this time, which can make it difficult to punish him without moving into it and using a command block. This is generally good for Sephiroth, since command blocks are not very common in the roster. But it also has a weakness, which is the tracking; Sephiroth does not move much towards the opponent during start-up, and completely stops when the move is out. As a result, Sudden Cruelty is not very consistent at catching evasive movement, namely Ground Dashes. But if opponents attack or dodge into Sephiroth with no coverage, Sudden Cruelty can punish them for doing so.
[Long] Shockwaves from sword. Delay combo to boost hit times.
Unlocked at level 16
Mastered at 100 AP
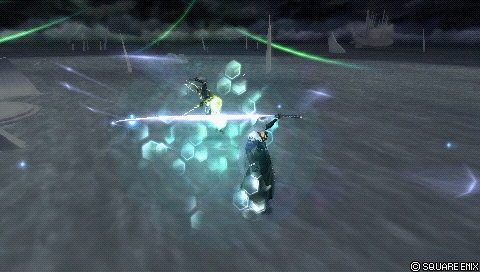
A linear stream of projectiles. To maximize damage, Sephiroth can delay the follow-up by pressing Circle after all projectiles have connected. Just like Fervent Blow, Godspeed can be used as a mid-range whiff punish tool, whether its reactively or as a callout. This works because of Godspeed's startup speed and active frames. It can contest moves with gaps in them, such as Tifa's feints, but this must be done from a distance. Once Godspeed hits, Sephiroth can wall rush on the ground and start an assist combo.
Godspeed is also linear like Fervent Blow. When Sephiroth performs this move, it has no horizontal or vertical tracking whatsoever. The projectiles will continue to go in a straight line whether they hit or miss. That makes Sephiroth vulnerable to assist punishes, but this is not a huge concern when Sephiroth often builds assist gauge reliably with Shadow Flare. Furthermore, Godspeed competes with Oblivion for the third bravery slot, which boils down to the matchup and player preference. Oblivion has better vertical range and lower damage, whereas Godspeed has better lateral range and more damage.
The close-range sword swing is melee priority, while the projectiles are ranged low priority. These can be dashed through and it cannot be cancelled early, so it's not as effective for zoning as Shadow Flare is. However, if the projectiles hit from a distance on a grounded opponent, Sephiroth can attempt to combo with landing lag by dodge cancelling into Sudden Cruelty. The dodge cancel timing is much later into the animation on hit though, which can make it difficult to use without practice.
[Mid] Light-speed movement continuously damaging foe.
Unlocked at level 4
Mastered at 100 AP
Sephiroth passes through the opponent and inflicts a series of blows afterwards. This move wall rushes the opponent downwards, which is good for assist combos on the ground, but the reward on hit isn't outstanding otherwise. Oblivion is Sephiroth's melee bravery with longest vertical reach, as it moves him closer to the opponent during its startup. This is good for punishing careless opponents below or above Sephiroth, and poorly placed assists, but it is reactable otherwise.
If the opponent gets hit by Shadow Flare, Oblivion has an easier time following up compared to other braveries. In that sense, Oblivion supports Sephiroth's gameplan, but it doesn't serve as the endpoint. When used appropriately, Sephiroth can get more damage in situations that required a bigger risk or where he could've missed the extra damage entirely. Due to its slow start-up and average reward without wall rush, it is not well suited for starting offense. The audio cue is somewhat subtle, but the move can be easier to see if Oblivion is done from a distance due to its movement. If Sephiroth is already at equal height when using Oblivion, he won't move nearly as much during startup.
If Sephiroth is locked off and Oblivion is set to Circle , he can use Oblivion to move in any direction he faces. This can be done to build assist gauge more safely.
[Long] Generate 4 spheres of darkness surrounding opponent.
Unlocked at level 24
Mastered at 80 AP
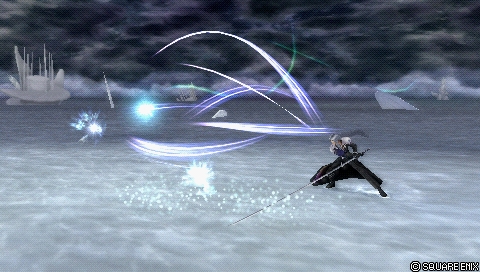
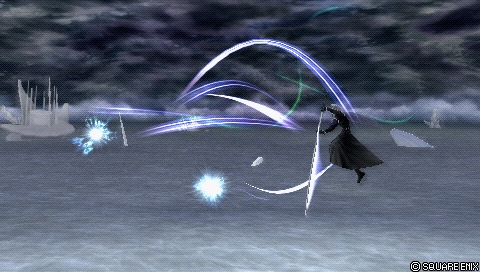
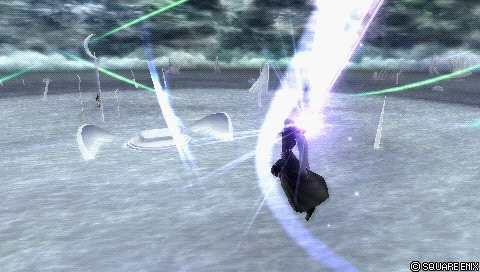
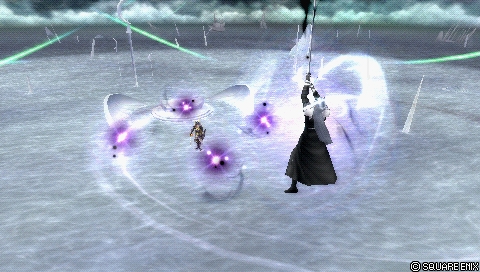
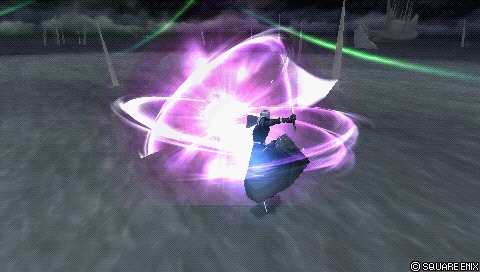
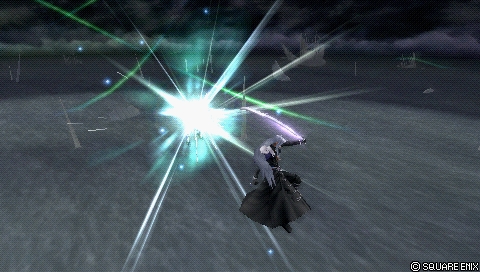
Sephiroth's character-defining projectile. Shadow Flare comprises of four long-range projectiles that surround the opponent and then hit at the center. It has good reach, it can be quickly cancelled into other actions and it can even start combos. This move is at the core of Sephiroth's zoning, where it represents a threat and encourages the opponent to approach and stop it. Sephiroth has excellent HP attacks and whiff punish tools to work with afterwards, which round out his core defensive strategy.
Because of Shadow Flare's short recovery and cancel options, Sephiroth can repeatedly use this move to quickly harass opponents from a distance. It can be effectively used to hinder characters who need time to set up their gameplan, like Kefka and Ultimecia. As an attack, Shadow Flare also builds assist gauge faster. If the opponent cannot respond to Shadow Flare on a moment's notice, it can overwhelm them in no time. The projectiles have a bit of tracking before they start closing on the opponent, so poorly timed dodges can create more trouble for them instead. Each projectile's damage is low and the hit stun is short, but it's just enough for Sephiroth to follow up on a combo if he knows Shadow Flare will hit. That makes Shadow Flare a relatively dangerous move to get hit by, as the situation can escalate depending on Sephiroth's positioning.
Shadow Flare has a few weaknesses. For one, it is a Ranged Low priority move, which means opponents can dash through it. Even though the projectiles have tracking, it stops once the projectiles become active. The travel speed during its active period is not instant either, so opponents can move vertically with jumps and fall speed to avoid it. Furthermore, Shadow Flare does not protect Sephiroth's body, so it is not well suited for close-range keepout. And lastly, Shadow Flare is a telegraphed projectile, which makes certain counter moves (Firion's Shield Bash, Exdeath's Omni Block) easier to use against Sephiroth. Bravery Boost on Dodge builds can greatly impact Shadow Flare's effectiveness, as using it frequently gives the opponent bravery without risk.
Overall, Shadow Flare is a staple move for Sephiroth that synergizes well with his other moves and the game's mechanics in general.
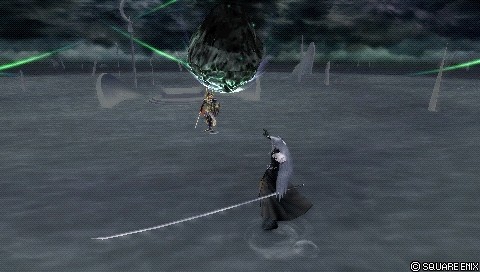
[Long] Summon meteors. Hold button to increase size.
Unlocked at level 28
Mastered at 150 AP
Black Materia level 2.Black Materia level 3.
Black Materia is a projectile that can be charged to increase some of its properties. At level 1, Black Materia is a small sized meteor that comes down at a diagonal angle from above Sephiroth. Level 2 is similar, except much larger. Level 3 comes straight down from above the opponent, and it is the only one to deal bravery damage and wall rush. Sephiroth can also move while the LV3 meteor is falling down, which let's Sephiroth reposition closer to the opponent. LV3 can even enable a solo follow-up with Reaper or Octaslash, though this is impractical and it has no consistent setups for it without EX Revenge.
This is not a move that is commonly used in competitive play. Aside from the slow start-up, Sephiroth is completely stationary when using Black Materia. He has no innate protection around him during this move either; The angle at which projectiles come from leave him open to dashes and interruptions at close range or long range. If the opponent is above Sephiroth, the LV1 / LV2 meteors can protect him the moment it is fired. The long startup for any version of Black Materia provides diminishing returns at best for the risk Sephiroth takes. If he is at a long distance, he can try to charge this move to temporarily stall the next interaction. Lower levels of Black Materia do not occupy much space for long, and even the max charged version has a height limit on its spawn position.
Overall, Black Materia is a move that can be easily avoided, interrupted and does not provide notable benefits to Sephiroth's neutral game. Sephiroth's playstyle revoles more around air combat, so Black Materia can be difficult to justify for that alone.
[Mid] 8 violent slicing attacks. Strike foe with long reach.
Unlocked at level 1
Mastered at 130 AP
An advancing multi-hit combo. Octaslash works as a callout tool against grounded whiffs and dodges. It has decent horizontal coverage and plenty of lateral tracking compared to his other melee HP Scintilla. Octaslash occupies space for a good moment, which can make it effective in enclosed spaces, such as corners or stages like Pandaemonium. It has weak vertical tracking though, so opponents who dodge above Sephiroth can avoid it easily. Sephiroth follows through the whole animation even if it misses, which makes it riskier to use Octaslash in the neutral.
Octaslash is Sephiroth's highest damaging HP attack in terms of bravery damage. It can start assist combos with a wall rush, so Sephiroth gets good reward for using this move well. Sephiroth will be considered airborne after Octaslash ends.
[Block] Defends, then attacks. Attack even if block fails.
Unlocked at level 1
Mastered at 130 AP
Scintilla is a command block, that guards instantly and then attacks afterwards. It's a strong move due to its defensive applications, but high risk for Sephiroth if it doesn't stagger the opponent. Sephiroth moves forward a little bit with the first hit. Scintilla is best used after a ground dodge to protect Sephiroth from incoming attacks (or dashes), but it can also be used aggressively with a good read. It doesn't have high knockback, but it can wall rush and lead to an assist combo afterwards.
Sephiroth can block low priority attacks and dashes with Scintilla. If Scintilla blocks a mid priority attack, Sephiroth will be staggered.
Scintilla's aerial version is used more often in competitive play, which works like the ground version. Sephiroth will be considered airborne after Scintilla ends.
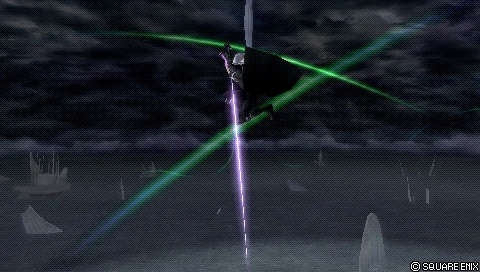
[Dive] Freefall lunge. Hold button to keep falling. Aim with the analog stick.
Unlocked at level 1
Mastered at 130 AP
Hell's Gate (hold, when landing)
Hell's Gate is a flexible diving attack that Sephiroth can use to threaten space on the ground, defend after air dodging, or to finish assist combos.
By default, Sephiroth will stop and do 1 HP hit. If Square is held, Hell's Gate turns into a diving multi-hit attack that drags the opponent down. If Square is released at any point, Sephiroth will transition into the single hit HP hit that he would do by just pressing the button. If the button is held and Sephiroth lands on the ground, he will finish the move and cause earth to shatter around him which also have an HP hitbox.
Hell's Gate is a good secondary HP for Sephiroth. It has some evasion to it thanks to the ascension on start-up, but he can also move manually during the entire attack, including its start-up. This works well as a defensive post-dodge action against some attacks. Sephiroth can convert any version of Hell's Gate into an assist combo, and he can even extend it further with Aerith assist.
A held Hell's Gate can also be an infinite combo in Phantom Train by moving Sephiroth towards one of the windows while hitting the opponent.
[Mid] 8 violent slicing attacks. Strike foe with long reach.
Unlocked at level 12
Mastered at 130 AP
Octaslash's aerial version functions similarly to its ground version, lateral tracking, multi-hits and all. What makes it less appealing here is due to Sephiroth's other aerial HPs having more utility in combos and in the neutral. Even so, Octaslash is one of Sephiroth's strongest assist combo enders in terms of bravery damage.
[Block] Defends, then attacks. Attack even if block fails.
Unlocked at level 20
Mastered at 130 AP
Scintilla's aerial version works like the grounded version. Short forward movement, it guards and it wall rushes. But because it can be done in the air, it serves an important role in Sephiroth's defense; As a frame 1 command block, Scintilla can stop many dodge punish attempts dead in their tracks, especially Free Air Dash. Since Evasion Boost doubles the invincibility for all dodges, Sephiroth can block with Scintilla without any gaps between it and the dodge. This is powerful against close-range characters who rely on melee low moves, but if it's avoided, Sephiroth is left wide open. Sephiroth always completes this attack even if it misses, so careful usage of Scintilla is advised.
This is a staple move for Sephiroth, as it supports his defensive gameplay. It deals less bravery damage compared to Octaslash, but its value as a defensive move is worth the inclusion.
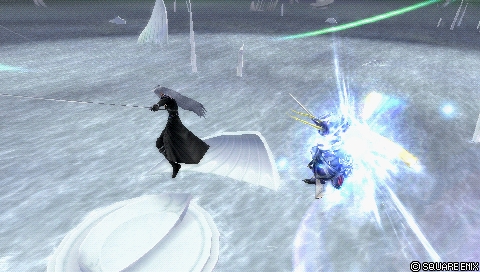
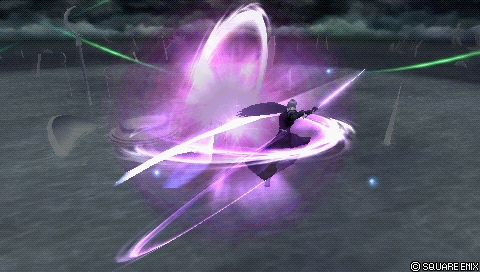
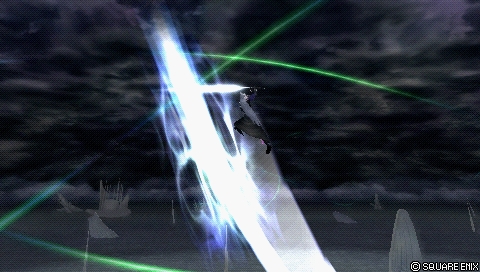
Heaven's Light is an evasive 1-hit HP attack with good knockback for ceiling wall rushes. Sephiroth will attempt to position below the opponent and then quickly move upwards with a rising slash. This is a good move for punishes, ending assist combos, protecting Sephiroth after air dodging or simply calling out whiffs. The downward movement is strong enough to make many attacks miss, but this should not be confused with invincibility. Sephiroth can still be hit out of Heaven's Light's start-up, but it usually requires a move with good tracking. If Heaven's Light is done near the ground, Sephiroth cannot take advantage of its movement as much, and he has a hard time hitting a grounded opponent.
Heaven's Light's effective range is quite good. It can be used reliably after a LV2 Assist Change stagger to secure HP damage. It's also difficult to punish because of its relatively long travel distance and short recovery for an HP. Assists can still punish Sephiroth, but not many characters have reliable anti-air moves they could use for this purpose. Sephiroth can make Heaven's Light safer by making sure the opponent is not positioned at the end of the rising lunge.
This is a staple move for Sephiroth. It has good range, utility as a defensive move, and the wall rush damage complements his damage output well. As a wall rush move, it is also good for HP damage and meter depletion.
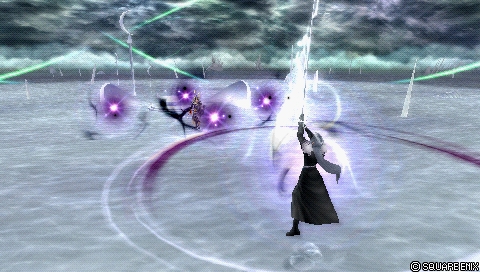
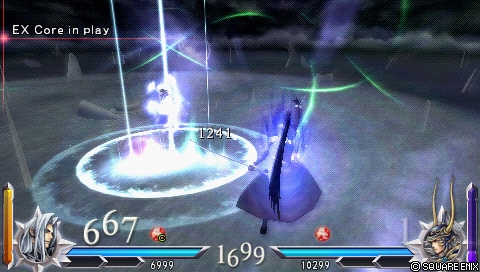
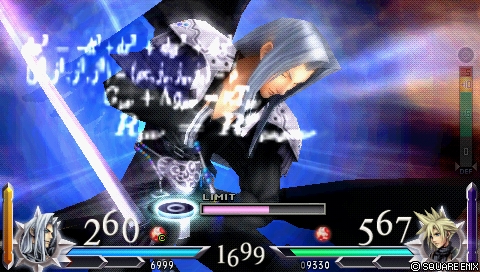
EX Mode: Reunion!
Effects:
Regen
Critical Boost
Glide
Heartless Angel
Sephiroth has a good EX mode, with Heartless Angel being the notable threat. If Sephiroth has full assist and EX gauges, he can create huge momentum with a single assist combo and EX mode activation. His bravery damage output is already good, so he naturally benefits from the critical hits and any Heartless Angel setups he can pull off.
Glide
[Activate by holding Cross in midair.] Draws spiritual energy within to move freely through the air.
Heartless Angel
[Activate with R + Square]
Bravery cannot be gained, but opponent's bravery falls to 1.
Charge time = 5 seconds (297 frames).
Early release cooldown time = 40 frames (roughly 0.6 seconds).
Sephiroth charges up an unblockable attack that reduces opponent's bravery to 1. This puts the opponent at great risk of being broken. Assists can follow up after Heartless Angel, which usually guarantees a bravery break. Its main downside is the long charge time, but assists that hold for a long time such as Jecht and Kuja can get around this. Even if Sephiroth does not have time to fully charge Heartless Angel, using it can encourage his opponent to approach in case he actually casts it.
If the opponent's bravery is already at 1, it won't be reduced further.
EX Burst: Super Nova
A blast of such despair that it can send destruction even into other dimensions. Repeatedly press Circle to raise the gauge.
Base Damage (Initial)
Base Damage (Remainder)
Type
5 x 5 (25)
5 x 6, 9 x 5 (75) (100 total)
Physical
Super Nova requires filling a gauge by repeatedly pressing Circle . Once the gauge is filled, Sephiroth follows through with the complete attack. Fairly simple execution and one of the higher damaging EX Bursts in the game.
Sephiroth has a plethora of solo combos, most of which revolve around Shadow Flare. He works well with assists both in close-range and in midrange, and he even has an infinite in Phantom Train. [1]
If Sephiroth is close to opponent, but doesn't want to risk dropping dodge cancel > Sudden Cruelty, he can cancel Shadow Flare into Oblivion instead. Can start assist combos near ground.
This is one of the more consistent combos for Sephiroth, especially after assist. It can work even when Sephiroth is above the opponent thanks to Heaven's Light's automatic movement.
Cancel Shadow Flare into Heaven's Light, a dodge cancel is not necessary.
A staple for Sephiroth. Repeatedly press Shadow Flare until five of them have been cast, and then finish with Heaven's Light. Works anywhere, as long as opponent is within range for Shadow Flare.
If Sephiroth doesn't start casting Shadow Flare immediately, or his cancel timing is slightly off, the fifth Shadow Flare may miss some of its projectiles. The damage loss is usually negligible, but worth noting. If the opponent is at a ceiling, that can guarantee all five Shadow Flares don't miss.
Base Damage (Breakdown): 25 > 50 (Assist) > HP + WR
Opponent Assist (Comrade's Vow): 112
EX Force (Breakdown): 27 > 0
A basic assist combo that can wall rush near the ceiling. Heaven's Light is a low-execution combo ender that works consistently. Sephiroth can add more damage during Kuja assist, but new players don't need to worry about that.
Base Damage (Breakdown): 35 > 50 (Assist) > 3~12 > HP + WR
Opponent Assist (Comrade's Vow): 132
EX Force (Breakdown): 33 > 0 > 0
Basic combo off of Sephiroth's ground bravery. Delay the second part to increase Sephiroth's damage, then call the assist. The Shadow Flare extension is extra damage, but not essential for new players.
Air punish starter Near ground
Oblivion > WR > AST BRV > Free Air Dash > Sudden Cruelty (1) > DC > AC > Scintilla
Base Damage (Breakdown): 25 + WR > 47 (Assist) > 25 > 10 + HP WR
Opponent Assist (Comrade's Vow): 156
EX Force (Breakdown): 30 > 27 > 30
Oblivion may have a telegraphed animation, but it leads to a good assist combo with a ground wall rush. Plenty of time to fit in a Sudden Cruelty (1) before dodge cancelling into another follow-up with assist chase. The combo works without it too, but obviously deals less damage.
Base Damage (Breakdown): HP + WR > 50 (Assist) > 3~12 > HP + WR
Opponent Assist (Comrade's Vow): 93
EX Force (Breakdown): 0 > 0 > 0
No EX with this combo, but Heaven's Light can evade moves, so it's good to have a combo ready. Shadow Flare adds damage, but all projectiles hit consistently if the opponent is at the ceiling. Not necessary when learning the game at first, but will be used for more damage later on.

 (x1.5 multiplier), because Sephiroth can safely leave the ground without deactivating it.


 Hyper Ring
 Tenacious Attacker