Assist (Dissidia 012)

Assist is a gameplay mechanic introduced in Dissidia 012. It allows players to call a secondary character to attack independently, or protect the player character from damage. The assist character can be assigned in customization for each character, but certain game modes may restrict their availability.
Each assist character has four attacks: Two bravery attacks and two HP attacks. These are activated with a context-sensitive input to interrupt opponents and create combos that lead to HP damage. All assist related actions consume assist gauge, and players must fill it before using it.
Assist is designed to be an antithesis to EX. It is a separate resource from EX that acts in direct opposition to it in many ways. For example, an accessory that boosts assist weakens some aspect of EX. Assist characters also deplete a portion of the opponent's EX gauge on hit, or cancel their EX Mode if it's active.
In competitive play, assist is a very prominent mechanic. Its utility is widespread and essential for many characters to compete. Comboing into an HP attack is the most important aspect, but whiff punishment and risk mitigation are also major roles for assist. By default, assist gauge can be filled much faster compared to EX gauge. Characters who can play well defensively are often capable of using assist effectively as well. Notable gaps in character strength are born partly due to the dynamic that the assist mechanic presents.
Every playable character has an assist version of themselves, except Feral Chaos. Aerith is only playable as an assist character. She is unlocked by downloading the separate data that is bundled with Dissidia 012 [duodecim] Final Fantasy Prologus.
How to fill the Assist Gauge
Situations that fill Assist Gauge
- Whiff an attack
- Connect an attack
- Land an HP attack (EXP to Assist extra ability or Side by Side
 accessory required)
 - Receive damage (A Comrade's Vow
 accessory required)
 - Using Ground Dash, Free Air Dash, Air Dash or their Reverse variants (Assist Gauge Up Dash basic ability required)
- Connect a bravery attack during EX Revenge; Assist gauge fills once EX Revenge ends.
Situations that don't fill Assist Gauge
- During Assist Lock (outside of EXP to Assist or Side by Side influx)
- During EX Burst or EX Revenge
- During player's assist character's presence (e.g no whiffing during a Jecht assist combo)
- Cancel an attack into another attack without returning to neutral first (a state where you can guard, dodge, jump etc.)
- Receive damage (without A Comrade's Vow accessory
 )
)
Controls (Assist Gauge)
When one or two assist gauges are filled, assist can be used on demand.
- L + Circle (
 +
+  ): Assist Bravery attack (uses 1 gauge)
 - L + Circle (
 +
+  ) when taking damage: LV1 Assist Change (uses 1 gauge + locks your assist gauge)
 - L + Square (
 +
+  ): Assist HP attack (uses 2 gauges)
 - L + Square (
 +
+  ) when taking damage: LV2 Assist Change (uses 2 gauges + does not lock your assist gauge)
The assist character's attack and spawn position can change depending on their moves and where they are called. Some attacks are done when the opponent is in the air, some attacks are done when the player is on the ground. This is indicated by two distinct icons next to the attack's name in customization menu; The horizontal white line indicates ground (bottom) or midair position (top). The light blue icon indicates player character, while the red icon indicates the opponent.
Assist attacks are predetermined and thus, cannot be customized. For more information, please check the assist character's data on the characters' main pages, such as Kuja.
Assist Break
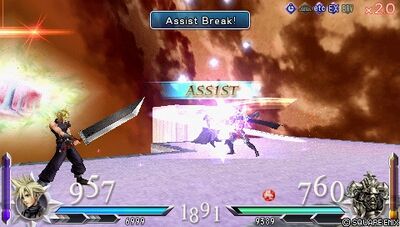
Assist Break happens when a player attacks the opponent's assist character during EX Mode. This locks the opponent's assist gauge and rewards the player with stage bravery.
Assist Break normally occurs in one of two ways: The first is when the assist character is whiff punished. The second is when the assist character is hit during LV1 Assist Change with an EX mode attack. Most attacks that cause a hit reaction during EX mode work for this. However, command blocks cannot Assist Break with the block property alone.
Because Assist Lock and EX mode duration are roughly the same (20 seconds by default), Assist Break can realistically happen only once during EX mode.
Assist Change
Assist Change is a combo break mechanic that can be used when taking damage. It has two different levels that consume different amounts of assist gauge when used.
LV1 Assist Change
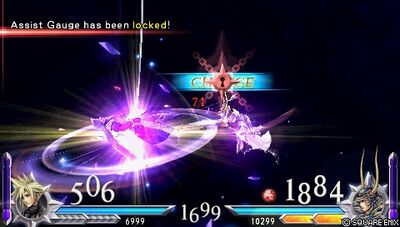
Press L + Circle (![]() +
+ ![]() ) when staggered, wall rushed or taking damage. Requires one assist gauge and consumes it when used.
) when staggered, wall rushed or taking damage. Requires one assist gauge and consumes it when used.
This is the most common way to escape damage. The assist character spawns at player character's position and sends them upwards, moving out of harm's way. If done at the ceiling, the player character will move downwards instead. When LV1 Assist Change happens, the player experiences Assist Lock.
LV1 Assist Change can be used to escape long lasting attacks and punish them. Cloud's HP links are notoriously weak against this [1] [2], but it works against other attacks as well, such as Jecht Beam. The viability of this technique varies depending on the matchup. Regardless, using LV1 Assist Change early and still having time to hit the opponent afterwards is important to execute the technique correctly.
The assist character can be hit during LV1 Assist Change. This provides beneficial effects; Side by Side  fills Assist Gauge with HP hits despite not doing any damage. Assist Break can happen as well. Some attacks can be cancelled into another attack or a dash. It is even possible to dodge the moment opponent's attack connects. [3]
LV2 Assist Change
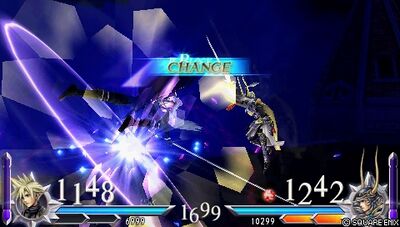
Press L + Square (![]() +
+ ![]() ) when staggered, wall rushed or taking damage. Requires two assist gauges and consumes them when used.
) when staggered, wall rushed or taking damage. Requires two assist gauges and consumes them when used.
LV2 Assist Change is a more powerful version of the mechanic. The player character still moves vertically when using this, but it has two major strengths to compensate for the cost.
Using LV2 Assist Change will not lock the assist gauge. In addition, the assist character will guard against incoming attacks. This is a rare Block Highest priority, which beats most attacks in the game, including HP attacks [4] and even assists. [5] It staggers melee attacks like any other block, with the added benefit of keeping the assist gauge available. Since most assists are also melee priority, LV2 Assist Change can lock the opponent's assist gauge and deter its use altogether. That means LV2 Assist Change grants universal access to one of the most powerful defensive options in the game.
As a block, LV2 Assist Change interacts with other properties appropriately. Unblockable priority bypasses LV2 Assist Change, while Ranged priority gets blocked without staggering the opponent.
The blocking period begins from the moment of the assist character's appearance, all the way until they are almost done with the backflip motion. This is a relatively long window, and staggering the opponent later provides a bigger opening for a counterattack. Once the blocking period ends, the assist character is vulnerable to attacks. Hitting the assist during this time will lock the player's assist gauge.A barrage of projectiles such as Kuja's Ultima or Ultimecia's Knight's Blade can outlast the guard's duration and hit the assist with ease.
Because LV2 Assist Change doesn't lock the player's assist gauge, it can provide great return on investment for Side by Side  users. Jecht can stagger the opponent, hit them with a Jecht Beam combo and get over 1 assist gauge back just for getting hit.
Assist Charge
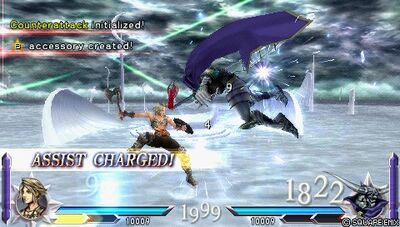
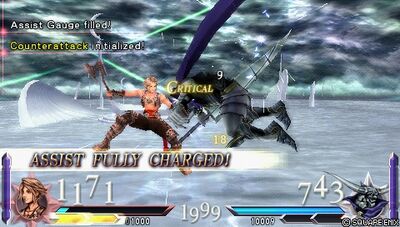
Assist Charge fills assist gauge for the attacker when they interrupt an opponent's own attack. The amount of gauge filled depends on the situation.
Assist Charge generates 1 assist bar:
- Player must be "near bravery break", under 200 bravery at LV100. Indicated with dim bravery numbers.
- This player must then land an attack against an opponent who is performing a bravery attack.
Assist Charge generates 2 assist bars:
- Player must be in near death state
- During near death state, that player must land any attack against an opponent who is performing an HP attack.
Please note, that HP attacks only get Assist Charge if they deal bravery damage. For example, Lightning cannot gain Assist Charge for meeting the conditions with a 1-hit HP attack such as Crushing Blow.
No other conditions are required for Assist Charge. As long as the opponent is considered in an attack state and the player's unfavorable condition is met, Assist Charge can happen. So if a player just landed an HP attack and their bravery is recovering, they can get 1 assist gauge for interrupting an opponent's attack while their bravery is close to a break.
Assist Charge can reward aggressive players after landing an HP attack or punish players for using an HP attack carelessly. Although not a 1:1 comparison, this mechanic can be likened to a sort of comeback mechanic seen in other fighting games or a momentum based system.
Assist Chase
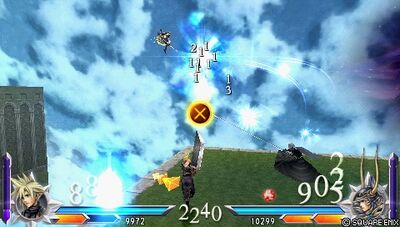
Assist Chase is a unique mechanic available with some assist characters. When an attack finishes damaging the opponent, a chase prompt appears. By pressing Cross (![]() ) during this time, the player slows down time and immediately moves close to the opponent. The player can follow up with an attack of their choice afterwards. The slow motion effect will wear off roughly 1-2 seconds after the movement period has ended.
) during this time, the player slows down time and immediately moves close to the opponent. The player can follow up with an attack of their choice afterwards. The slow motion effect will wear off roughly 1-2 seconds after the movement period has ended.
The slowdown effect and traversal make it much easier to apply HP damage anywhere. However, obstacles such as pillars in World of Darkness or walls in Pandaemonium can stop the player's movement. This can sabotage combos, but it is generally not a problem in large, open stages.
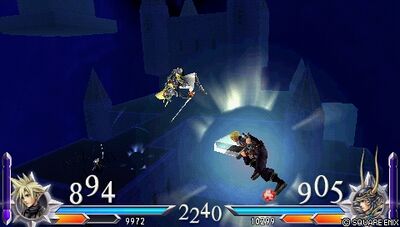
Depending on the assist's knockback (e.g. Kuja or Sephiroth), the follow-up can miss if Assist Chase is done too early.
Using Assist Chase will reset available midair jumps, but normally they cannot be used immediately after the movement period. To circumvent this, move the analog stick (![]() ) in any direction after the character has reappeared, and then jump.
) in any direction after the character has reappeared, and then jump.
Assist Chase also has a maximum distance, though the exact details of it are unspecified. It can be seen in large stages such as The Rift if a player assist punishes a move from across the stage.
Attacks with Assist Chase
| Assist Chase Attacks | |
|---|---|
| Character | Attack(s) |
| Warrior of Light | Shining Wave (HP) |
| Garland | Cyclone (HP) Tsunami (HP) |
| The Emperor | Mine (BRV) |
| Onion Knight | Blizzard (BRV) Comet (HP) |
| Cloud of Darkness | Tentacle of Suffering (BRV) [Anti-air] Particle Beam (HP) |
| Kain | Lance Burst (BRV) |
| Golbez | Glare Hand (BRV, 1st hit) Attack System (BRV, 1st hit) |
| Bartz | Blade Crash (BRV) |
| Exdeath | Hurricane (BRV) Grand Cross (HP) |
| Gilgamesh | Hurricane (HP) |
| Terra | Flood (HP) |
| Kefka | Meteor (BRV) Extra-Crispy Firaga (BRV) Hyperdrive (HP) |
| Sephiroth | Reaper (BRV) Sudden Cruelty (BRV) Hell's Gate (HP) |
| Tifa | Beat Rush (BRV) |
| Squall | Solid Barrel (BRV) Blasting Zone (HP) |
| Ultimecia | Knight's Axe (BRV, ground) Hell's Judgment (HP) Apocalypse (HP) |
| Zidane | Rumble Rush (BRV) Stellar Circle (HP) Free Energy (HP) |
| Kuja | Snatch Blow (BRV) Strike Energy (BRV) Force Symphony (HP) |
| Tidus | Hop Step (BRV) Spiral Cut (HP) Slice & Dice (HP) |
| Jecht | Jecht Rush (BRV) |
| Yuna | Hellfire (HP) Diamond Dust (HP) |
| Shantotto | Spirit Magic: Earth (HP) Spirit Magic: Ice (HP) |
| Prishe | Howling Fists (BRV) |
| Vaan | Staff (BRV) Cataclysm (HP) |
| Gabranth | Aero (BRV) Execution (HP) |
| Lightning | Lightning Strike (HP) |
Assist Depletion and Depletion Rate
Assist Depletion (Passive)
Also known as assist decay. After two seconds pass, the assist gauge will begin to deplete on its own. This countdown will not wait for an attack state to finish; It will begin immediately after the assist gain has occurred.
Assist depletion can be delayed by performing an attack. Cancelling a whiffed attack into another attack during recovery helps, but this will not build assist gauge on whiff. Attacks that do not generate assist gauge such as Jecht Block also reset this timer.
The default depletion rate for two full assist bars is 10 seconds without further actions.
Assist Depletion (Effect)
This is a different form of assist depletion. If an HP attack lands, the opponent will instantly lose a portion of assist gauge. However, this requires equipment with the assist depletion effect, such as Battle Hammer  .
.
If an HP attack inflicts wall rush damage, additional depletion is applied. Similiarly, if an HP attack connects twice during its active period, the meter depletion will activate twice as well.
Because assist depletion impacts an important resource, it is very effective in multiplayer battles. It can quickly swing the momentum in one player's favor, or make regaining momentum more difficult. The discrepancy created by depletion can greatly hinder characters who struggle to build assist gauge safely, such as Cecil and Kefka. This can incentivize players to use Assist Change before they take damage and lose assist.
Depletion builds can potentially drain entire bars of assist in one assist combo.
Assist Duration
Assist duration only happens when both assist bars are full. This effect prevents the assist gauge from depleting on its own for a set duration without attacking.
The effect lasts for 9 seconds, and it can be influenced by accessories. Much like assist depletion (passive), this time period is reset every time assist gain occurs from an attack.
Assist Gauge Charge
Main article: Assist Gauge Charge
This is different from Assist Charge. When a character performs an attack, the assist gauge is filled by a certain amount. This is known as Assist Gauge Charge or Assist Gain. The amount of assist gauge depends on whether the attack hits or not. These can be adjusted separately in Original Rules. Missing an attack fills the gauge less and hitting the attack fills it more.
Assist Gauge Charge also encourages players to use different moves to fill assist gauge more quickly. Repeatedly using the same move fills the assist gauge less. For more information on this topic, please refer to the main article.
Assist Gauge Up Time
Exclusive to Bartz. His Hellfire boosts assist duration and delays assist depletion (passive) when equipped.
This effect can can be stacked by equipping Hellfire on all three ground HP slots for a maximum boost of 30 %. This will grant 11.7 seconds of assist duration. The assist gauge will start depleting 2.6 seconds after the last assist gain, rather than after the usual 2 seconds.
Assist Lock
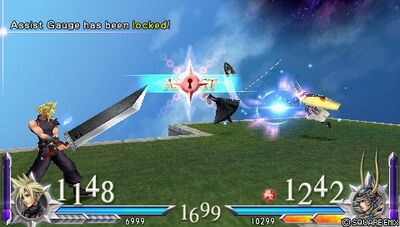
Assist Lock is a state during which the assist gauge cannot be used.
Assist Lock can happen in three ways:
- When LV1 Assist Change is used
- When the assist character is hit
- When the assist character's attack is blocked (melee priority)
The duration for Assist Lock is about 20.83 seconds. The duration can be modified with original rules. During this time the only way to fill assist gauge is by landing HP attacks with EXP to Assist extra ability or Side by Side  equipped.
Whenever Assist Lock occurs, all EX force present in the stage will be absorbed by the character who caused it. If this character cannot absorb EX force due to their equipment, it will remain on the field until EX Core appears.
Abilities that influence Assist
EXP to Assist
An ability unlocked at LV100 that costs 0 CP. Landing an HP attack will convert 0.3 % of the acquired experience points to assist meter (a 3 % boost for the meter). As such, it can scale with special accessories that increase EXP gain. A staple ability for characters who can land HP attacks without setting up an assist first.
Hellfire (Bartz)
Effect: Assist Gauge time +10 %
This boosts assist duration and delays assist gauge depletion (passive). It is exclusive to Bartz's Hellfire HP attack.
Details in the Assist Gauge Up Time section.
Accessories that influence Assist
Basic Accessories
As these are basic accessories  , their effect can be enhanced with the help of booster accessories
  .
.
- Attractorb: EX Intake Range +1m, Assist Gauge Charge -20 %
- Pearl Necklace: EX Force Absorption +10 %, Assist Gauge Charge -20 %
- Dragonfly Orb: EX Core Absorption +10 %, Assist Gauge Duration -30 %
- Silver Hourglass: EX Mode Duration +5 %, Assist Gauge Duration -10 %
- Battle Gem: Assist Gauge Duration +10 %, EX Force Absorption -20 %
- Battle Hammer: Assist Gauge Depletion +5 %
- Bond Breaker: Assist Iai Strike +2 %, Defense -10 %
- A Comrade's Vow: AST Charge on damage +15%, EX Intake Range -1m
A Comrade's Vow
Effect: AST Charge on damage + 15%, EX Intake Range -1m Info based on research done by NLM on Dissidia Community forums.
A basic accessory that fills the player's assist gauge whenever they are sustaining damage.
Whenever you're damaged, the base bravery damage of the attack is taken into account. So regardless of whether you are LV1 and have 12 DEF or if you are Lv 100 and have 111 DEF, the amount of assist gained when hit by a Jecht Stream will be the same, even if you receive 4,000 BRV damage at Lv1 or 300 at Lv100.
The formula for the Assist gain (%) A Comrade's Vow provides is as follows:
Base damage*0.15*multipliers/10
Beware that for hits that BRV Wall Rush, you'll get again the last value when you get wall rushed. So, for example, let's say you get hit by a Jecht Rush just like the assist one, and your multipliers show 5.0. The base damage for Jecht Rush is 42. According to the formula, you should get a 3.15% AST gain. However, the last hit has 19 base damage. So if you get wall rushed, you'd get an extra 1.425% AST gain.
Beware that the damage you receive from the opponent's assist will also increase your assist.
As you can see, this accessory requires pretty high multipliers to be effective, as otherwise the assist gain will be very little. Finally, it's also better when fighting against characters that rely on strong attacks that cause BRV wall rush to connect their Assist -> HP combos and powerful assists (such as Garland with Kuja or Sephiroth assist).
Source: In depth assist mechanics by NLM
Special Accessories
These accessories do not scale with booster accessories, but some can be stacked to increase their effect.
Please note that the breakable accessories are banned in competitive play where the in-game ruleset "Official" is set to on.
- White Drop: EX Force Absorption +5 %, Assist Gauge Duration -5 %
- Cyan Drop: Initial EX Force +10 %, Assist Gauge Duration -10 %
- Cyan Gem: Initial EX Force +20 %, Assist Gauge Duration -20 %
- White Gem: EX Force Absorption +10 %, Assist Gauge Duration -10 %
- Growth Egg: Experience Value +20 %
- Glimmering Crystal: EX Core Absorption +15 %, Assist Gauge Charge -15 %
- Badge of Trust: Initial Assist Charge +40 %, EX Force Absorption -30 %
- First to Victory: Initial EX Force +20 %, Initial Assist Charge +20 %, Initial Bravery +20 %
- Fiery Spirit: Assist Armor (Assist Character endures one attack from opponent)
- Battle Ring: Free Assist (5 % chance of assist gauge not draining when used)
- Close to You: Always Absorb EX Force, Assist Gauge Charge -30 %
- Center of the World: EX Intake Range +3m, EX Force & Core Absorption +25 %, Assist Gauge Freeze
- Together as One: Initial Assist Charge +40 %, Assist Gauge Duration +50 %, EX Force Absorption -40 %
- Side by Side: Assist Gauge Charge on HP Attack, EX Force Absorption Disabled, EX Gauge Freeze
- Friendship Incense: Initial Assist Charge +50 % (Accessory breakability: 100 %)
- Friendship Resin: Initial Assist Charge +100 % (Accessory breakability: 100 %)
- Chocobo Down: Experience Value +20 % (Accessory breakability: 30 %)
- Chocobo Wing: Experience Value +50 % (Accessory breakability: 30 %)
- Chocobo Feather: Experience Value +100 % (Accessory breakability: 30 %)
- Spirit of Qu´bia: Initial EX & Assist Charge +100 %, Initial Bravery +300 % (Accessory breakability: 100 %)
- Shock of Qu´bia: EX & Assist Chance, EX & Assist Gauge Depletion +100 % (Accessory breakability: 100 %)
- Hopes of Qu´bia: Assist Gauge Charge +100 % (Accessory breakability: 100 %)
Side by Side
Effect: Assist Gauge Charge on HP Attack, EX Force Absorption Disabled, EX Gauge Freeze
Japanese name: スタンドバイミー (sutando bai mī)
A special accessory so potent it deserves its own sub article. Side by Side (abbreviated as SbS) sacrifices all things EX in exchange for bolstering assist meter with a key aspect: Assist Gauge Charge on HP attack. This is a flat 30 % increase to an assist meter every time an HP attack connects and is not influenced by wall rush damage.
Think of this as a hyperbolic version of EXP to Assist. Any character that can land HP attacks without setting up an assist will acquire an amount of assist meter that can save them 3-4 whiffs on average. This is especially useful for characters who may rely on HP links or raw HPs to dish out damage such as Onion Knight, Cloud, Bartz, Golbez and Jecht. Often times these characters also suffer from somewhat slow or risky assist meter generation when it comes to whiffing, the most common form of building the resource.
As such, Side by Side can synergise with many characters at all levels of play. In small stages such as Edge of Madness, Phantom Train and Pandaemonium - Top Floor where escaping raw HPs can be more difficult, it can greatly increase the threat of getting hit as the potential punishment of sustaining an HP attack has an increased chance of occuring and elevated potency as well. Characters such as Squall who can stagger an opponent with LV2 Change and land an HP attack from it will have a distinct advantage in sustaining a meter and health lead, further bolstering the strength of the LV2 Change mechanic. Escaping a combo and making a chunk of assist meter back for it? Yes please.
Because of the disabled EX intake, Empty EX Gauge (1.5x) Pre-EX Mode (1.4x) and Pre-EX Revenge (1.3x) boosters will have a 100 % uptime from the beginning of a match with a x2.7 multiplier. This makes for an easy, good template set for character builds that can be further tailored to lean into assist meter, damage output, meter depletion or other miscellanious perks such as CP or additional experience points to complement EXP to Assist.
Side by Side can be paired with Together as One to a good effect. The initial assist meter will ensure the player is one or two hits away from securing an assist combo with meter to spare afterwards and the increased assist duration lets a character stay in a non-committal position for longer. It's not mandatory, Side by Side's effect is already powerful as it is, but the initial assist meter can make or break a match-up.
EX Cores can still be grabbed by players who have Side by Side equipped, but they will not receive any EX from it. The incentive for chasing after an EX Core is to then prevent the opponent from building a full EX bar faster, which is already a case when both characters still generate EX as they normally would.
The idea with a Side by Side build is to do a lot of damage or quickly offset assist meter discrepancies. Characters who have optimised builds around this accessory can end matches in potentially two or three hits that lead into a wall rush and assist every time. High base bravery, base bravery recovery and HP wall rush damage all contribute towards this fact and some characters such as Zidane can take advantage of the Aerith assist to take this to absurd heights.
That being said, the longer a fight goes on, the less of an impact Side by Side can have. If the player using Side by Side has no single hit HP attack, EX meter depletion, an assist bar available or all of the above, resolving situations with EX Revenge checkmates (also known as "Final EX Revenge") can be very difficult if not impossible. If the player cannot rely on landing HP attacks to generate assist meter, they are at the mercy of doing so in the neutral which is no different from not having Side by Side equipped. Keep this in mind when considering bringing Side by Side to battle.
Equipment that influences Assist
Only LV100 equipment and Final Strike are listed below.
Weapon
- Excalibur II: EXP +100 %
- Lufenia's Edge: Judgment of Lufenia set
- Death Blade: Final Strike set
- Lufenian Axe: Judgment of Lufenia set
- Lufenian Rod: Judgment of Lufenia set
- Lufenian Claw: Judgment of Lufenia set
- Highwind: Assist Gauge Duration +30 %, Kain Highwind's exclusive LV100 weapon
- Glanzfaust: Assist Gauge Duration +30 %, Prishe's exclusive LV100 weapon
- Death Penalty: Assist Gauge Duration +30 %
- Lufenian Gun: Judgment of Lufenia set
- Supreme Pole: Initial Assist Charge +40 %
Hand
- Lufenian Shield: Judgment of Lufenia set
Head
- Lufenian Cap: Judgment of Lufenia set
- Lufenian Helm: Judgment of Lufenia set
Body
- Lufenian Robes: Judgment of Lufenia set
- Lufenian Armor: Judgment of Lufenia set
- Lufenian Chestplate: Judgment of Lufenia set
Equipment Special Effects that influence Assist
Judgment of Lufenia
Effect: Assist Gauge Depletion +15 %
Three equipment pieces with this set bonus will provide you 15 % assist depletion upon landing an HP attack. This does not scale with boosters but with how assist is a vital resource in the game, you could do a lot worse than making a preliminary build with this. The parts that provide this set bonus are in abundance and provide solid stats all around, although they are not necessarily the strongest picks outside of starter builds or dedicated assist depletion builds.
Final Strike
Effect: EX Absorption & Range Boost, Assist Charge & Duration Boost
An armor set that requires all four pieces of equipment be worn in order for the effect to take place. The idea behind this set is something akin to a glass cannon, abnormally high damage intake in exchange for a notable boost in meter gain.
Unfortunately as far as Assist is concerned, the cons outweigh the pros. The Assist Charge only sees a 10 % increase and the Assist Duration gets a +45% increase. Other sources of assist charge increase are exclusive to breakable accessories and original rules, both of which are prohibited in competitive play. Together as One special accessory provides a 40 % increase in assist duration without sacrificing necessary stats or four equipment slots.
With the Death Blade weapon being middle of the pack with 68 ATK and -1 DEF and no extra properties, the rest of the set are equivalent to LV1 gear. DEF +3 on Reaper's Shield, BRV +38 and DEF +2 for Helmet of the Dead and HP +428 for the Death Armor. By numbers alone this is already difficult to ever justify in multiplayer, but if you are messing around with friends, you can try to send a statement with this set.
Otherwise, avoid using this. There are weapons that can provide more in the field Death Blade is trying to occupy, such as Earthbreaker with 69 ATK and +20 % HP Wall Rush damage increase or Heaven's Cloud with 67 ATK and +3m EX Intake Range.
Assist Damage Tables
Much like regular playable characters, assist characters come with their own base damge. Generally speaking the assist moves derive their properties and frame data from their original moves though.
Gilgamesh assist applies either Excalibur or Excalipoor on his attacks, which is decided at random before he performs them. The damage multipliers are for Excalibur and then Excalipoor respectively.
| Character | Attack | Startup | Spawns near | Damage Multiplier | Additional properties |
|---|---|---|---|---|---|
| Warrior of Light | Sword Thrust (Ground BRV) | 31F | Opponent | 6, 3 x 5, 15 (30) | Melee Mid, Wall Rush |
| Rising Buckler (Midair BRV) | 25F | Opponent | 2 x 4, 6, 16 (30) | Wall Rush | |
| Shining Wave (Ground HP) | 53F | Player | -- | Chase | |
| Shield of Light (Midair HP) | 51F | Opponent | -- | Block, Wall Rush | |
| Garland | Round Edge (Ground BRV) | 23F | Opponent | 2 x 4, 6, 16 (30) | Melee Mid (third hit), Wall Rush |
| Bardiche (Midair BRV) | 23F | Opponent | 30 (30) | Wall Rush | |
| Tsunami (Ground HP) | 45F | Opponent | 2 x 6 (12) | Chase | |
| Cyclone (Midair HP) | 51F | Opponent | - | Chase | |
| Firion | Rope Knife (Ground BRV) | 23F | Opponent | 2 x 10, 25 (45) | Wall Rush |
| Magic Arts: Flame (Midair BRV) | 25F | Opponent | 10 each (up to 30) | - | |
| Straightarrow (Ground HP) | 61F | Opponent | - | Wall Rush | |
| Weaponmaster (Aerial HP) | 52F | Opponent | 2 x 11 (22) | Wall Rush | |
| The Emperor | Thunder Crest (Ground BRV) | 35F | Player | 2 x 17, 6 (40) | Unblockable |
| Mine (Midair BRV) | 23F | Opponent | 35 each (up to 70) | Chase | |
| Flare (Ground HP) | 35F | Player | - | - | |
| Flare (Midair HP) | 37F | Opponent | - | Wall Rush | |
| Onion Knight | Blizzard (Ground BRV) | 35F | Opponent | 4 x 43, 7, 7, 18 (44) | Chase, Ranged Low |
| Turbo-Hit (Midair BRV) | 13F | Opponent | 1 x 7, 2, 3 x 7, 10 (40) | Wall Rush | |
| Blade Torrent (Ground HP) | 41F | Opponent | 1 x 15 (15) | Wall Rush | |
| Comet (Midair HP) | 81F | Opponent | 1 x 15 (15) | Chase | |
| Cloud of Darkness | Tentacle of Pain (Ground BRV) | 37F | Opponent | 7, 7, 12 x 4 (62) | Wall Rush |
| Tentacle of Suffering (Midair BRV) | 37F | Opponent | 3 x 10, 10 (40) | Chase | |
| Anti-Air Particle Beam (Ground HP) | 39F | Opponent | 1 x 9 (9) | Chase | |
| Fusillade Particle Beam (Midair HP) | 83F | Opponent | - | Wall Rush | |
| Cecil | Shadow Lance (Ground BRV) | 35F | Opponent | 8, 7 x 6 (up to 50) | Melee High (close), Ranged Low (far), Wall Rush |
| Radiant Wings (Midair BRV) | 19F | Opponent | 3, 3, 7, 6, 6, 9 (40) | Wall Rush | |
| Soul Eater (Ground HP) | 39F | Opponent | 4, 2 x 5, 6 (20) | Wall Rush | |
| Saint's Fall (Midair HP) | 53F | Opponent | 1 x 3, 2, 1 x 2, 3 (10) | Wall Rush | |
| Kain | Lance Burst (Ground BRV) | 29F | Opponent | 2 x 6, 5, 15 (32) | Chase |
| Crashing Dive (Midair BRV) | 21F | Opponent | 1 x 7, 8, 1 x 7, 6, 12 (40) | Wall Rush | |
| Jump (Ground HP) | 62F | Opponent | 2 x N | Wall Rush | |
| Dragon's Fang (Midair HP) | 41F | Opponent | - | Wall Rush | |
| Golbez | Glare Hand (Ground BRV) | 23F | Opponent | 8 x N, 6 x 3 (up to 26) | Chase (first hit), Wall Rush *5 |
| Attack System (Midair BRV) | 23/83F | Opponent | 4, 2 x N | Chase *5 | |
| Nightglow (Ground HP) | 15F (close), 91F (far) | Player | 1 x 3, 4, 4 | Melee High (five hits), Ranged High, Wall Rush | |
| Genesis Rock (Midair HP) | 51F | Opponent | 1 x 13 (up to 13) | Wall Rush | |
| Bartz | Blade Crash (Ground BRV) | 23F | Opponent | 8, 7, 6, 1 x 4, 15 (40) | Chase |
| Slide Shooter (Midair BRV) | 25F | Opponent | 1 x 6, 5, 6, 3, 3, 5, 12 (40) | Wall Rush | |
| Dark Flame (Ground HP) | 53F | Player | - | Wall Rush | |
| Ragnarok Blade (Midair HP) | 45F | Opponent | - | Wall Rush | |
| Exdeath | Sword Dance (Ground BRV) | 65F | Opponent | 30 (30) | Melee Mid, Wall Rush |
| Hurricane (Midair BRV) | 43F | Opponent | 2 x 6, 20 (32) | Chase | |
| Grand Cross (Ground HP) | 93F | Opponent | 2 x 5 (10) | Unblockable, Chase | |
| Delta Attack (Midair HP) | 51F | Opponent | - | Block, Wall Rush | |
| Gilgamesh | Cross Slash (Ground BRV) | 21F | Opponent | 6, 6, 8, 8, 16, 16 (60) OR 1, 1, 1, 1, 1, 1 (6) | Wall Rush |
| Tsubamegaeshi (Midair BRV) | 21F | Opponent | 8, 8, 12, 12, 24 (60) OR 1, 1, 1, 1, 1 (5) | Wall Rush | |
| Death Claw (Ground HP) | 41F | Opponent | 10, 10 (20) OR 1, 1 (2) | Wall Rush | |
| Hurricane (Midair HP) | 13F | Opponent | 4 x 6 (24) OR 1 x 6 (6) | Chase | |
| Terra | Graviga (Ground BRV) | 183F | Player | 2 x N, 40 (40+) | Unblockable, Wall Rush |
| Blizzara (Midair BRV) | 27F | Opponent | 20, 5 x 3 (35) | Ranged Low, Wall Rush | |
| Flood (Ground HP) | 71F | Player | - | Unblockable, Chase | |
| Meltdown (Midair HP) | 145F | Player | - | Wall Rush | |
| Kefka | Meteor (Ground BRV) | 35F | Player | 15 each (up to 75) | Chase |
| Extra-Crispy Firaga (Midair BRV) | 49F | Opponent | 15 each (up to 45) | Chase | |
| Hyperdrive (Ground HP) | 143F | Opponent | - | Unblockable, Chase | |
| Havoc Wing (Midair HP) | 51F | Opponent | - | Wall Rush | |
| Cloud | Sonic Break (Ground BRV) | 21F | Opponent | 8, 12, 25 (45) | Wall Rush |
| Slashing Blow (Midair BRV) | 21F | Opponent | 5, 10, 25 (40) | Wall R ush | |
| Cross Slash (Ground HP) | 41F | Opponent | 5, 5 (10) | Wall Rush | |
| Braver (Midair HP) | 47F | Opponent | 2, 1 x N (4+) | Wall Rush | |
| Tifa | Beat Rush (Ground BRV) | 21F | Opponent | 8, 11, 16 (35) | Chase |
| Falcon's Dive (Midair BRV) | 23F | Opponent | 26 (26) | Wall Rush | |
| Meteodrive (Ground HP) | 39F | Opponent | 15 (15) | Wall Rush | |
| Rolling Blaze (Midair HP) | 45F | Opponent | 1 x 7 (7) | Wall Rush | |
| Sephiroth | Reaper (Ground BRV) | 21F | Opponent | 2, 1 x 5, 10, 2, 1 x 6, 10, 3, 1 x 5, 2 (45) | Chase |
| Sudden Cruelty (Midair BRV) | 17F | Opponent | 2 x 8, 9, 4, 1 x 5, 6 (40) | Chase | |
| Octaslash (Ground HP) | 43F | Opponent | 2 x 6, 4 (16) | Wall Rush | |
| Hell's Gate (Midair HP) | 55F | Opponent | 2 x N | Chase | |
| Aerith | Cure (Ground BRV) | - | Player | 60 % of raw BRV | BRV heal |
| Seal Evil (Midair BRV) | - | Player | 3-second stun | Ranged Low | |
| Planet Protector (Ground HP) | - | Player | 5-second duration | Damage immunity | |
| Holy (Midair HP) | 480F | Player | - | Ranged High, Block (close) | |
| Squall | Solid Barrel (Ground BRV) | 13F | Opponent | 5, 6, 8, 10, 5, 5, 16 (55) | Chase |
| Heel Crush (Midair BRV) | 41F | Opponent | 20 (20) | Melee Mid, Wall Rush, Block (Ranged Low) | |
| Blasting Zone (Ground HP) | 41F | Opponent | 6, 1 x 4 (10) | Chase | |
| Aerial Circle (Midair HP) | 43F | Opponent | - | Wall Rush, Block (Ranged Low) | |
| Laguna | Machine Gun (Ground BRV) | 31F | Opponent | 1 x 31 (31) | - |
| Shotgun (Midair BRV) | 55F | Opponent | 1 x 6, 1 x 6, 3 x 6 (30) | Ranged Low, Ranged Mid, Wall Rush | |
| Satellite Laser (Ground HP) | 83F | Player | 2 x 8 (16) | Wall Rush | |
| Ragnarok Blade (Midair HP) | 43F | Opponent | - | Wall Rush | |
| Ultimecia | Knight's Axe (Ground BRV, uncharged) | 33F | Opponent | 10 x 3 (up to 30) | Chase |
| Knight's Axe (Midair BRV, charged) | 53F | Opponent | 40 (40) | Ranged High, Wall Rush | |
| Hell's Judgement (Ground HP) | 103F | Player | 3 x 13 (39) | Chase | |
| Apocalypse (Midair HP) | 59~240F | Player | - | Chase | |
| Zidane | Rumble Rush (Ground BRV) | 19F | Opponent | 2, 3, 4, 6, 2 x 3, 9 (30) | Chase |
| Vortex (Midair BRV) | 23F | Opponent | 2 x 3, 9, 1 x 5, 15 (35) | Wall Rush | |
| Stellar Circle (Ground HP) | 43F | Opponent | 1 x 9 (9) | Chase | |
| Free Energy (Midair HP) | 25F | Opponent | - | Chase | |
| Kuja | Snatch Blow (Ground BRV) | 35F | Opponent | 8, 1 x 4, 2 x 10, 15 (47) | Chase |
| Strike Energy (Midair BRV) | 17F | Opponent | 4 x 4, 2 x 7, 20 (50) | Chase | |
| Flare Star (Ground HP) | 39F | Opponent | 10, 1 x 5 (15) | Wall Rush | |
| Force Symphony (Midair HP) | 33F | Opponent | - | Chase | |
| Tidus | Sonic Buster (Ground BRV) | 25F | Opponent | 2 x 5, 6, 8, 16 (40) | Wall Rush |
| Hop Step (Midair BRV) | 11F | Opponent | 7, 13 (20) | Chase | |
| Spiral Cut (Ground HP) | 39F | Opponent | 1 x 4, 6 (10) | Chase | |
| Slice and Dice (Midair HP) | 53F | Opponent | 2 x 5 (10) | Chase | |
| Yuna | Meteor Strike (Ground BRV) | 19F | Opponent | 10, 20 (30) | Wall Rush |
| Heavenly Strike (Midair BRV) | 11F | Opponent | 4, 6, 12 (22) | Ranged Low, Wall Rush | |
| Hellfire (Ground HP) | 39F | Opponent | 10 (10) | Chase | |
| Diamond Dust (Midair HP) | 21F | Opponent | 2 x 5 (10) | Chase | |
| Jecht | Jecht Rush (Ground BRV) | 13F | Opponent | 4, 1 x 9, 3, 1 x 5, 2, 19 (42) | Wall Rush |
| Jecht Stream (Midair BRV) | 17F | Opponent | 2, 2, 1 x 4, 3, 5, 5, 1 x 4, 15 (40) | Wall Rush | |
| Jecht Blade (Ground HP) | 41F | Opponent | 2 x 5 (10) | Wall Rush | |
| Triumphant Grasp (Midair HP) | 41F | Opponent | 1 x 5, 3, 2 (10) | Wall Rush | |
| Shantotto | Bind (Ground BRV) | 65F | Opponent | - | Ranged Low |
| Bio (Midair BRV) | 33F | Opponent | 4 x 11 (44) | Ranged Low | |
| Spirit Magic: Earth (Ground HP) | 49F | Opponent | 5 x 5 (25) | Chase | |
| Spirit Magic: Ice (Midair HP) | 69F | Opponent | 3 x 5 (15) | Chase | |
| Prishe | Howling Fists -> Raging Fists (Ground BRV) | 17F | Opponent | 1 x 3, 7, 2 x 4, 7 (25) | Chase |
| Backhand Blow -> Shoulder Tackle (Midair BRV) | 29F | Opponent | 18, 12 (30) | Melee High, Wall Rush | |
| Nullifying Dropkick (Ground HP) | 49F | Opponent | - | Wall Rush | |
| Auroral Uppercut (Midair HP) | 43F | Opponent | 2 x 5 (10) | Wall Rush | |
| Vaan | Greatsword (Ground BRV, non-switch) | 23F | Opponent | 13, 17 (30) | Wall Rush |
| Staff (Midair BRV, non-switch) | 21F | Opponent | 3 x 3, 11 (20) | Chase | |
| Cataclysm (Ground HP) | 45F | Opponent | - | Chase | |
| Inferno (Midair HP) | 51F | Opponent | 1 x 9 (9) | Wall Rush | |
| Gabranth | Enrage (Ground BRV) | 15F | Opponent | 3 x 8, 16 (40) | Wall Rush |
| Aero (Midair BRV) | 31F | Opponent | 15 (15) | Ranged Low, Chase | |
| Execution (Ground HP) | 41F | Opponent | 20 (20) | Chase | |
| Hatred (Midair HP) | 35F | Opponent | - | Wall Rush | |
| Lightning | Aerora (Ground BRV) | 43F | Opponent | 1 x 5, 6 (11) | - |
| Smite (Midair BRV) | 23F | Opponent | 12, 10, 18 (40) | Wall Rush | |
| Lightning Strike (Ground HP) | 47F | Opponent | 7 each | Chase | |
| Thunderfall (Midair HP) | 55F | Opponent | 1 x 8, 2 x 6 (8/12) | Block, Wall Rush |
Below are original damage tables for assist bravery attacks and HP attacks respectively by Balguna.
ADD ASSIST BRV DAMAGE TABLE IMAGE
ADD ASSIST HP DAMAGE TABLE IMAGE
References
- ↑ Cloud's HP link Finishing Touch punished after LV1 Assist Change
- ↑ Cloud's HP link Omnislash Ver. 5 punished after LV1 Assist Change
- ↑ Dodging out of an attack after hitting opponent's assist
- ↑ LV2 Assist Change beats HP attack (Sephiroth Heaven's Light)
- ↑ LV2 Assist Change beats assist (Cecil BRV)