|
|
| Line 364: |
Line 364: |
| * Glide | | * Glide |
| * Heartless Angel | | * Heartless Angel |
| | |
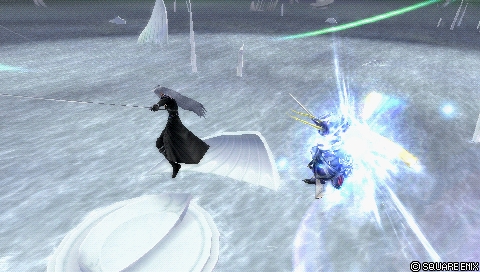
| | Sephiroth has a good EX mode, with Heartless Angel being the notable threat. If Sephiroth has full assist and EX gauges, he can create huge momentum with a single assist combo and EX mode activation. His bravery damage output is already good, so he naturally benefits from the critical hits and any Heartless Angel setups he can pull off. |
|
| |
|
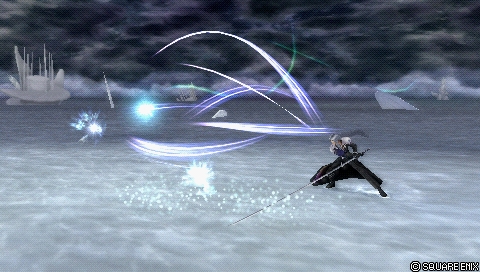
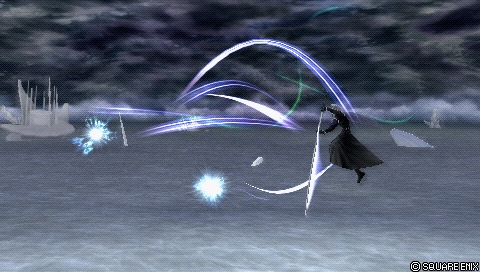
| == Glide == | | == Glide == |
| ''[Activate by holding x in midair.] Draws spiritual energy within to move freely through the air.'' | | {{image|https://dissidia.wiki/images/0/0e/Ex_mode_sephiroth_glide.jpeg}} |
| | |
| | ''[Activate by holding Cross in midair.] Draws spiritual energy within to move freely through the air.'' |
|
| |
|
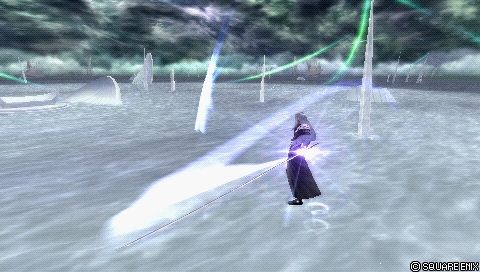
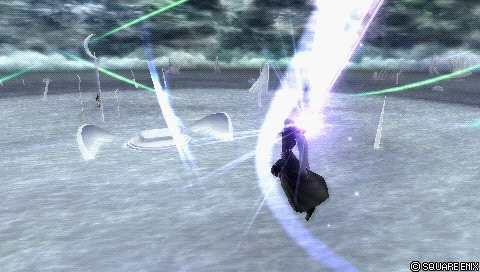
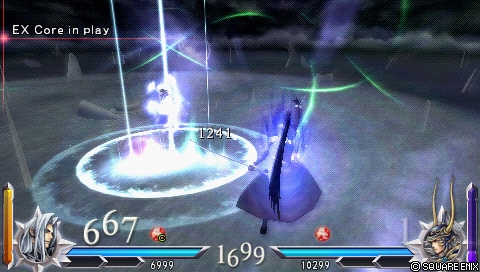
| == Heartless Angel == | | == Heartless Angel == |
| ''[Activate with R + square] | | {{image|https://dissidia.wiki/images/5/5a/Ex_mode_sephiroth_heartless.jpeg}} |
| | |
| | ''[Activate with R + Square] |
| Bravery cannot be gained, but opponent's bravery falls to 1.'' | | Bravery cannot be gained, but opponent's bravery falls to 1.'' |
|
| |
|
| Charge time = 5 seconds (297 frames). Early release cooldown time = 40 frames. | | * Charge time = 5 seconds (297 frames). |
| | * Early release cooldown time = 40 frames (roughly 0.6 seconds). |
|
| |
|
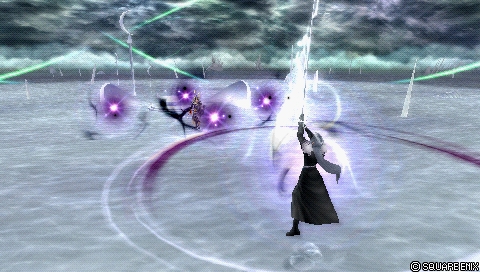
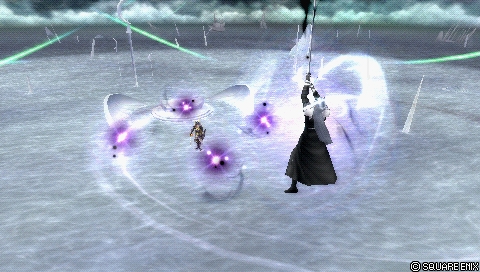
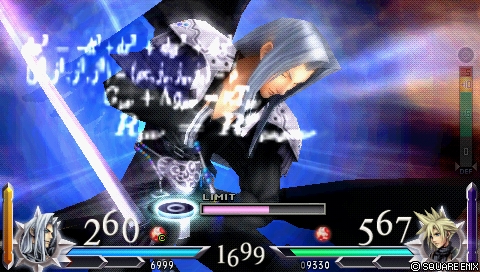
| === EX Burst: Super Nova ===
| | Sephiroth charges up an unblockable attack that reduces opponent's bravery to 1. This puts the opponent at great risk of being '''[[Bravery_(Dissidia_012)#Bravery_Break|broken]]'''. Assists can follow up after Heartless Angel, which usually guarantees a bravery break. Its main downside is the long charge time, but assists that {{keyword|hold|hold (012)}} for a long time such as {{012jec}} and {{012kuja}} can get around this. Even if Sephiroth does not have time to fully charge Heartless Angel, using it can encourage his opponent to approach in case he actually casts it. |
| ''A blast of such despair that it can send destructioon even into other dimensions. Repeatedly press circle to raise the gauge.'' | | |
| | If the opponent's bravery is already at 1, it won't be reduced further. |
| | |
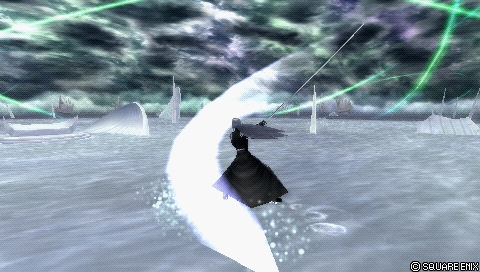
| | == EX Burst: Super Nova == |
| | |
| | {{image|https://dissidia.wiki/images/7/74/Ex_burst_sephiroth.jpeg}} |
| | ''A blast of such despair that it can send destruction even into other dimensions. Repeatedly press Circle to raise the gauge.'' |
|
| |
|
| {{burst | | {{burst |
| Line 382: |
Line 395: |
| |type=Physical | | |type=Physical |
| }} | | }} |
| | |
| | Super Nova requires filling a gauge by repeatedly pressing Circle {{pspcir}}. Once the gauge is filled, Sephiroth follows through with the complete attack. Fairly simple execution and one of the higher damaging EX Bursts in the game. |
|
| |
|
| = Combos = | | = Combos = |
Revision as of 12:12, 28 May 2025
Overview
Sephiroth is a defensive air-oriented character who operates between close and long range with projectiles and strong punishers. With the infamous Shadow Flare bravery, Sephiroth can execute competent zoning from a safe distance before capitalising on the opponent's mistakes. The utility on his attacks ensure that Sephiroth remains competitive at close range and he also reaps good rewards on hit.
This makes Sephiroth something of a powerhouse. His effective gameplan is easy to execute and difficult to shut down for many characters, especially at low and intermediate levels of play. He does not rely on ground and can often focus on adjusting to his opponent instead of his surroundings. Spellcasters like The Emperor, Kefka and Ultimecia can have a hard time establishing their own advantage due to having lackluster tools for quickly stopping Sephiroth from casting Shadow Flare. Even though Sephiroth dodge cancels frequently, he can fight well from above or below. Catching him requires a good understanding of positioning, dodge punishment and player habits. His HP attacks have defensive properties to dissuade approaches, which can then help him condition the opponent with bravery attacks.
Thanks to good meter generation and high attack stat, Sephiroth works well with a variety of builds. The repeated use of Shadow Flare generates assist meter quickly and reliably, while Sudden Cruelty shreds through bravery with a respectable 87 EX Force output. He has access to a good wall rush HP in Heaven's Light that supports meter drain and additional damage. Sephiroth's combo game is good, if not basic and he works with most competitive assists.
Sephiroth's weaknesses become more apparent once the opponent gets past the initial hurdle of his Shadow Flare pressure. While he has braveries with fast startup, good range and long active duration, he does not have a defacto quick low recovery close range poke such as Squall's Beat Fang. Many of his attacks are telegraphed (HPs, Oblivion), linear (Godspeed, Sudden Cruelty) or don't protect him in close range (Shadow Flare). The reliance on dodge cancels also puts Sephiroth repeatedly in dodge punish situations and choosing poorly at any point can cause setbacks. Dedicated Bravery Boost on Dodge builds will discourage constant Shadow Flare usage, but outside of that, dodge tracking, mid / high priorities and relatively low risk can counter Sephiroth's gameplan when utilised well. His mobility is below average overall and fighting grounded characters with good post-dodge defense at close range may prove to be a tad more difficult.
In competitive play, Sephiroth has been consistently ranked as a high tier character. With an easy reliable gameplan and plenty of favorable matchups, he is a good choice for new and experienced players alike. His frame data and mobility often pushes players towards an action-heavy playstyle with attacks, dashes and dodges which is not necessarily bad in the context of Dissidia 012. In fact, he is one of the easiest characters to use in that way. But it does mean Sephiroth players have to be mindful against adept opponents, lest they get fooled themselves.
| Strengths |
Weaknesses
|
- Zoning. Shadow Flare can pressure the opponent into taking action and follow a pace that Sephiroth dictates.
- Aerial combat lets Sephiroth fight comfortably without ground, or relying on it.
- Damage output is great with high attack stat, damaging braveries and HP wall rushes. Sephiroth can shred through bravery with a single assist combo.
- Meter generation, Sephiroth builds both EX and Assist meter reliably.
- Builds provide ample room to optimize and adjust Sephiroth's strengths.
- Flexible post-dodge defense with three midair HPs providing evasion or instant guard.
- EX Mode amplifies Sephiroth's damage, but also lets reset the opponent's bravery to 0 with Heartless Angel with an assist.
- Easy and reliable at all levels of play.
|
- Anti-Zoning. Bravery Boost on Dodge and long range counters such as Firion's Shield Bash and Exdeath's block followups can limit the effectiveness of Sephiroth's zoning.
- Linearity. Many of Sephiroth's attacks are either telegraphed or have average to poor tracking.
- No quick air pokes. Sephiroth has attacks with early dodge cancel recovery and fast startup, but not both on a single move. The only exception is Transience which is ground only bravery.
- Mobility is slightly worse on average overall, encouraging active use of attacks, dodges and dashes to stay on top of the competition.
|
Bravery Attacks
Some of Sephiroth's melee bravery attacks require two bravery inputs to complete them. The second input is a finisher which can be done early. Delaying this button press until all preceding hits have connected maximizes the damage dealt. This is what attack descriptions refer to when they say "delay combo to boost hit times."
Ground
|
| Base Damage
|
45 (2, 1 x 5, 10 > 2, 1 x 6, 10 > 3, 1 x 5, 2)
|
| Startup Frame
|
21F
|
| Damage Type
|
Physical
|
| Priority
|
Melee Low
|
| EX Force
|
93
|
| Effects
|
Chase
|
| Cancels
|
Dodge
|
| Assist Gain (Hit)
|
|
| CP (Mastered)
|
30 (15)
|
[Close] Katana slash.
Delay combo to boost hit times. |
Unlocked at
level 1 |
Mastered at
100 AP
|
Reaper is a three-stage combo attack, and Sephiroth's high damaging ground punish move. It starts up quickly and has decent active frames on the first part, but Sephiroth can only transition into the two follow-ups on hit. Sephiroth transitions into the next follow-up whenever Circle ![]()
 is pressed. Pressing the button early reduces the number of hits and thus, the damage dealt. To ensure Sephiroth gets the maximum number of hits, it's recommended to press Circle
 ![]() after a barrage of hits ends. The input window for a maximum delay is not very long, but consistent with a bit of practice.
after a barrage of hits ends. The input window for a maximum delay is not very long, but consistent with a bit of practice.
Reaper leads to assist combos when stopped at the second part. Sephiroth can also use walls to reduce Reaper's knockback when finished for an assist combo. Although Reaper is fairly fast, Sephiroth has to dodge cancel it to make it safer on whiff. Sephiroth is stationary during this move, but the hitbox reaches its maximum range quickly once active.
In practice, Reaper is a serviceable close-range punish move with decent reward, and it may work occasionally as an offensive poke. Sephiroth fights in the air most of the time, so Reaper may not see much use purely for that reason.
|
| Base Damage
|
35 (5, 4 x 5 > 1 x 3, 7)
|
| Startup Frame
|
27F
|
| Damage Type
|
Physical
|
| Priority
|
Melee Low, Ranged Low
|
| EX Force
|
30
|
| Effects
|
Wall Rush
|
| Cancels
|
Dodge
|
| Assist Gain (Hit)
|
|
| CP (Mastered)
|
30 (15)
|
[Long] Shockwaves from sword.
Delay combo to boost hit times. |
Unlocked at
level 32 |
Mastered at
100 AP
|
A linear stream of projectiles. Fervent Blow can be used as a mid-range whiff punish tool, whether its reactively or as a callout. Its active duration covers attacks that have gaps between their hits, such as Prishe's Raging Fists. Fervent Blow can start an assist combo with the projectiles or after confirming a wall rush, which is good for a punish move.
However, Sephiroth may not get many opportunities to capitalize on this move because he fights in the air often. What's also worth noting is that Fervent Blow's long recovery, lack of tracking and Ranged Low priority makes it vulnerable to sideways movement, Ground Dash and Free Air Dash. Only the close-range sword swing has melee priority, but this move is not typically used close to opponents. Therefore it's not particularly effective as a poke.
Sephiroth has a functionally similar move in the air, which is Godspeed. It may see more use just because of its nature as an aerial attack.
|
| Base Damage
|
each (3)
|
| Startup Frame
|
45F
|
| Damage Type
|
Magical
|
| Priority
|
Ranged Low
|
| EX Force
|
0
|
| Effects
|
-
|
| Cancels
|
Dodge, Block, Attack
|
| Assist Gain (Hit)
|
|
| CP (Mastered)
|
30 (15)
|
[Long] Generate 4 spheres of darkness
surrounding opponent. |
Unlocked at
level 1 |
Mastered at
80 AP
|
Shadow Flare is one of Sephiroth's character-defining braveries for it's zoning capabilities. However, its grounded version is flawed in a few ways the aerial version is not; This version leaves Sephiroth airborne, so it cannot be repeated ad nauseam to harass opponents and build assist gauge. That creates an interesting niche for Sephiroth, because he can safely leave the ground without deactivating a Pre-Jump booster ![]()
 with a strong x1.5 multiplier.
Grounded Shadow Flare shares many of its traits with the midair variant, including the early cancel window for various actions. A ground Shadow Flare can be cancelled into an aerial Shadow Flare, while aerial Shadow Flare cannot be cancelled into itself. It's a small footnote in Sephiroth's overall strategy, but worth noting regardless.
Overall, this version of Shadow Flare is not used often, but it's great for builds with a Pre-Jump booster ![]() .
.
|
| Base Damage
|
20 (1 x 7, 13)
|
| Startup Frame
|
15F
|
| Damage Type
|
Physical (1st hit)
Magical (other hits)
|
| Priority
|
Melee Low
|
| EX Force
|
30
|
| Effects
|
Wall Rush
|
| Cancels
|
Dodge (hit / whiff)
Block & Attack (whiff only)
|
| Assist Gain (Hit)
|
|
| CP (Mastered)
|
30 (15)
|
[Close] Quick upward sword slash.
Short reach, but fast. |
Unlocked at
level 8 |
Mastered at
80 AP
|
Transience acts as a close-range poke for Sephiroth. It has the hallmarks of a conventional, effective poke in Dissidia 012; Fast startup, decent base damage and short recovery that can be cancelled quickly. This is great for Sephiroth in theory, because these kinds of moves form the basis for offense and defense alike, including filling assist gauge safely.
However, Sephiroth's air-centric gameplay means that Transience is often unavailable. His other moves usually work better just outside Transience's range, so Sephiroth may struggle to find opportunities to use Transience specifically. Transience also has low reward on hit, but it can be converted into an assist combo if it wall rushes. It has decent knockback, so it could theoretically work as a physical keepout move.
If Sephiroth is on the ground, Transience can be whiffed repeatedly to build assist gauge faster. Sephiroth doesn't have two fast pokes he can quickly rotate to keep assist gain fresh, but having one move for this purpose is better than nothing.Aerial
|
| Base Damage
|
40 (2 x 8, 9, 4, 1 x 5, 6)
|
| Startup Frame
|
17F
|
| Damage Type
|
Physical
|
| Priority
|
Melee Low
|
| EX Force
|
87
|
| Effects
|
Chase
|
| Cancels
|
Dodge
|
| Assist Gain (Hit)
|
|
| CP (Mastered)
|
30 (15)
|
[Mid] Nigh-instant slices.
Delay combo to boost hit times. |
Unlocked at
level 1 |
Mastered at
100 AP
|
Sudden Cruelty is a two-stage combo attack, and Sephiroth's high damaging aerial punish move. It's similar to Reaper in a few ways, including the delayable follow-up and the disjointed hitbox quickly extending to its max reach. This is Sephiroth's go-to offensive poke in close-range, and it's good for starting assist combos and racking up damage during them. He can even poke through high priority projectiles, given the right positioning. If the opponent gets hit by Shadow Flare, Sudden Cruelty is a consistent way to convert that into a combo if they are close to Sephiroth.
The startup is fast enough to be unreactable, but Sephiroth remains stationary for a moment before he can dodge cancel the move. The hitbox also stays active during this time, which can make it difficult to punish him without moving into it and using a command block. This is generally good for Sephiroth, since command blocks are not very common in the roster. But it also has a weakness, which is the tracking; Sephiroth does not move much towards the opponent during start-up, and completely stops when the move is out. As a result, Sudden Cruelty is not very consistent at catching evasive movement, namely Ground Dashes. But if opponents attack or dodge into Sephiroth with no coverage, Sudden Cruelty can punish them for doing so.
|
| Base Damage
|
35 (5, 4 x 5, 1, 2, 7)
|
| Startup Frame
|
23F
|
| Damage Type
|
Physical
|
| Priority
|
Melee Low, Ranged Low
|
| EX Force
|
33
|
| Effects
|
Wall Rush
|
| Cancels
|
Dodge
|
| Assist Gain (Hit)
|
|
| CP (Mastered)
|
30 (15)
|
[Long] Shockwaves from sword.
Delay combo to boost hit times. |
Unlocked at
level 16 |
Mastered at
100 AP
|
A linear stream of projectiles. To maximize damage, Sephiroth can delay the follow-up by pressing Circle ![]() after all projectiles have connected. Just like Fervent Blow, Godspeed can be used as a mid-range whiff punish tool, whether its reactively or as a callout. This works because of Godspeed's startup speed and active frames. It can contest moves with gaps in them, such as Tifa's feints. Once Godspeed hits, Sephiroth can wall rush on the ground and start an assist combo.
after all projectiles have connected. Just like Fervent Blow, Godspeed can be used as a mid-range whiff punish tool, whether its reactively or as a callout. This works because of Godspeed's startup speed and active frames. It can contest moves with gaps in them, such as Tifa's feints. Once Godspeed hits, Sephiroth can wall rush on the ground and start an assist combo.
Godspeed is also linear like Fervent Blow. When Sephiroth performs this move, it has no horizontal or vertical tracking whatsoever. The projectiles will continue to go in a relatively straight line whether they hit or miss. That makes Sephiroth vulnerable to assist punishes, but this is not a huge concern when Sephiroth often build assist gauge reliably with Shadow Flare. Furthermore, Godspeed competes with Oblivion for the third bravery slot, which boils down to the matchup and player preference. Oblivion has better vertical range and lower damage, whereas Godspeed has better lateral range and more damage.
The close-range sword swing is melee priority, while the projectiles are ranged low priority. These can be dashed through and it cannot be cancelled early, so it's not as effective for zoning as Shadow Flare is. However, if the projectiles hit from a distance on a grounded opponent, Sephiroth can attempt to combo with landing lag by dodge cancelling into Sudden Cruelty. The dodge cancel timing is much later into the animation on hit though, which can make it difficult to use without practice.
|
| Base Damage
|
25 (6, 1 x 9, 10)
|
| Startup Frame
|
27F
|
| Damage Type
|
Physical
|
| Priority
|
Melee Low
|
| EX Force
|
30
|
| Effects
|
Wall Rush
|
| Cancels
|
Dodge
|
| Assist Gain (Hit)
|
|
| CP (Mastered)
|
30 (15)
|
[Mid] Light-speed movement
continuously damaging foe. |
Unlocked at
level 4 |
Mastered at
100 AP
|
Sephiroth passes through the opponent and inflicts a series of blows afterwards. This move wall rushes the opponent downwards, which is good for assist combos on the ground, but the reward on hit isn't outstanding otherwise. Oblivion is Sephiroth's melee bravery with longest vertical reach, as it moves him closer to the opponent during its startup. This is good for punishing careless opponents below or above Sephiroth, and poorly placed assists, but it is reactable otherwise.
If the opponent gets hit by Shadow Flare, Oblivion has an easier time following up compared to other braveries. In that sense, Oblivion supports Sephiroth's gameplan, but it doesn't serve as the endpoint. When used appropriately, Sephiroth can get more damage in situations that required a bigger risk or where he could've missed the extra damage entirely. Due to its slow start-up and average reward without wall rush, it is not well suited for starting offense. The audio cue is somewhat subtle, but the move can be easier to see if Oblivion is done from a distance due to its movement. If Sephiroth is already at equal height when using Oblivion, he won't move nearly as much during startup.
If Sephiroth is locked off and Oblivion is set to Circle ![]() , he can use Oblivion to move in any direction he faces. This can be done to build assist gauge more safely.
, he can use Oblivion to move in any direction he faces. This can be done to build assist gauge more safely.
|
| Base Damage
|
each (3)
|
| Startup Frame
|
45F
|
| Damage Type
|
Magical
|
| Priority
|
Ranged Low
|
| EX Force
|
0
|
| Effects
|
-
|
| Cancels
|
Dodge, Block, Attack
|
| Assist Gain (Hit)
|
|
| CP (Mastered)
|
30 (15)
|
[Long] Generate 4 spheres of darkness
surrounding opponent. |
Unlocked at
level 24 |
Mastered at
80 AP
|
Sephiroth's character-defining projectile. Shadow Flare comprises of four long-range projectiles that surround the opponent and then hit at the center. It has good reach, it can be quickly cancelled into other actions and it can even start combos. This move is at the core of Sephiroth's zoning, where it represents a threat and encourages the opponent to approach and stop it. Sephiroth has excellent HP attacks and whiff punish tools to work with afterwards, which round out his core defensive strategy.
Because of Shadow Flare's short recovery and cancel options, Sephiroth can repeatedly use this move to quickly harass opponents from a distance. It can be effectively used to hinder characters who need time to set up their gameplan, like Kefka and Ultimecia. As an attack, Shadow Flare also builds assist gauge faster. If the opponent cannot respond to Shadow Flare on a moment's notice, it can overwhelm them in no time. The projectiles have a bit of tracking before they start closing on the opponent, so poorly timed dodges can create more trouble for them instead. Each projectile's damage is low and the hit stun is short, but it's just enough for Sephiroth to follow up on a combo if he knows Shadow Flare will hit. That makes Shadow Flare a relatively dangerous move to get hit by, as it can escalate depending on Sephiroth's positioning.
Shadow Flare has a few weaknesses. For one, it is a Ranged Low priority move, which means opponents can dash through it. Even though the projectiles have tracking, it stops once the projectiles become active. The travel speed during its active period is not instant either, so opponents can move vertically with jumps and fall speed to avoid it. Furthermore, Shadow Flare does not protect Sephiroth's body, so it is not well suited for close-range keepout. And lastly, Shadow Flare is a telegraphed projectile, which makes certain counter moves (Firion's Shield Bash, Exdeath's Omni Block) easier to use against Sephiroth. Bravery Boost on Dodge builds can greatly impact Shadow Flare's effectiveness, as using it frequently gives the opponent bravery without risk.
Overall, Shadow Flare is a staple move for Sephiroth that synergizes well with his other moves and the game's mechanics in general.HP Attacks
Ground
![]()
|
| Base Damage
|
3 x N (max charged)
|
| Startup Frame
|
63F, 101F, 201F
|
| Damage Type
|
Magical
|
| Priority
|
Ranged High
|
| EX Force
|
0, 0, 6
|
| Effects
|
Wall Rush, Absorb (if max)
|
| Cancels
|
|
| Assist Gain (Hit)
|
|
| CP (Mastered)
|
30 (15)
|
| |
Unlocked at
level |
Mastered at
AP
|
[Long] Summon meteors. Hold button to increase size.
Minimum charge time for LV2 is 90F, and 178F for LV3.
![]()
|
| Base Damage
|
2 x 6, 4 (16)
|
| Startup Frame
|
43F
|
| Damage Type
|
Physical
|
| Priority
|
Melee High
|
| EX Force
|
21
|
| Effects
|
Wall Rush
|
| Cancels
|
|
| Assist Gain (Hit)
|
|
| CP (Mastered)
|
30 (15)
|
| |
Unlocked at
level |
Mastered at
AP
|
[Mid] 8 violent slicing attacks. Strike foe with long reach.
![]()
|
| Base Damage
|
4, 1 x 6 (10)
|
| Startup Frame
|
45F, 1F-42F (block)
|
| Damage Type
|
Physical
|
| Priority
|
Block Mid, Melee High
|
| EX Force
|
30
|
| Effects
|
Wall Rush, Block
|
| Cancels
|
|
| Assist Gain (Hit)
|
|
| CP (Mastered)
|
30 (15)
|
| |
Unlocked at
level |
Mastered at
AP
|
[Block] Defends, then attacks. Attack even if block fails.Aerial
![]()
|
| Base Damage
|
2 x N
|
| Startup Frame
|
55F
|
| Damage Type
|
Physical
|
| Priority
|
Melee High
|
| EX Force
|
60 + 3 x N
|
| Effects
|
-
|
| Cancels
|
|
| Assist Gain (Hit)
|
|
| CP (Mastered)
|
30 (15)
|
| |
Unlocked at
level |
Mastered at
AP
|
[Dive] Freefall lunge. Hold button to keep falling. Aim with the analog stick.
![]()
|
| Base Damage
|
2 x 6, 4 (16)
|
| Startup Frame
|
43F
|
| Damage Type
|
Physical
|
| Priority
|
Melee High
|
| EX Force
|
21
|
| Effects
|
Wall Rush
|
| Cancels
|
|
| Assist Gain (Hit)
|
|
| CP (Mastered)
|
30 (15)
|
| |
Unlocked at
level |
Mastered at
AP
|
[Mid] 8 violent slicing attacks. Strike foe with long reach.
![]()
|
| Base Damage
|
4, 1 x 6 (10)
|
| Startup Frame
|
45F, 1F-42F (block)
|
| Damage Type
|
Physical
|
| Priority
|
Block Mid, Melee High
|
| EX Force
|
30
|
| Effects
|
Wall Rush, Block
|
| Cancels
|
|
| Assist Gain (Hit)
|
|
| CP (Mastered)
|
30 (15)
|
| |
Unlocked at
level |
Mastered at
AP
|
[Block] Defends, then attacks. Attack even if block fails.
![]()
|
| Base Damage
|
-
|
| Startup Frame
|
43F
|
| Damage Type
|
-
|
| Priority
|
Melee High
|
| EX Force
|
0
|
| Effects
|
Wall Rush
|
| Cancels
|
|
| Assist Gain (Hit)
|
|
| CP (Mastered)
|
30 (15)
|
| |
Unlocked at
level |
Mastered at
AP
|
Powerful rising lunge. Effective when below foe.EX Mode: Reunion!
Effects:
- Regen
- Critical Boost
- Glide
- Heartless Angel
Sephiroth has a good EX mode, with Heartless Angel being the notable threat. If Sephiroth has full assist and EX gauges, he can create huge momentum with a single assist combo and EX mode activation. His bravery damage output is already good, so he naturally benefits from the critical hits and any Heartless Angel setups he can pull off.
Glide

[Activate by holding Cross in midair.] Draws spiritual energy within to move freely through the air.
Heartless Angel
[Activate with R + Square]
Bravery cannot be gained, but opponent's bravery falls to 1.
- Charge time = 5 seconds (297 frames).
- Early release cooldown time = 40 frames (roughly 0.6 seconds).
Sephiroth charges up an unblockable attack that reduces opponent's bravery to 1. This puts the opponent at great risk of being broken. Assists can follow up after Heartless Angel, which usually guarantees a bravery break. Its main downside is the long charge time, but assists that hold for a long time such as Jecht and Kuja can get around this. Even if Sephiroth does not have time to fully charge Heartless Angel, using it can encourage his opponent to approach in case he actually casts it.
If the opponent's bravery is already at 1, it won't be reduced further.
EX Burst: Super Nova
A blast of such despair that it can send destruction even into other dimensions. Repeatedly press Circle to raise the gauge.
| Damage multiplier (initial) |
Damage multiplier (rest) |
Type
|
| 5 x 5 (25) |
5 x 6, 9 x 5 (75) (100 total) |
Physical
|
Super Nova requires filling a gauge by repeatedly pressing Circle ![]() . Once the gauge is filled, Sephiroth follows through with the complete attack. Fairly simple execution and one of the higher damaging EX Bursts in the game.
. Once the gauge is filled, Sephiroth follows through with the complete attack. Fairly simple execution and one of the higher damaging EX Bursts in the game.
Combos
Solo
Assist
Builds
Builds here.
Assist
Sephiroth's assist data
| Type |
Attack |
Startup |
Position |
Spawn |
Damage multiplier |
Effects
|
| BRV |
Reaper |
21F |
Ground |
Opponent |
2, 1 x 5, 10, 2, 1 x 6, 10, 3, 1 x 5, 2 (45) |
Chase
|
| BRV |
Sudden Cruelty |
17F |
Air |
Opponent |
2 x 8, 9, 4, 1 x 5, 6 (40) |
Chase
|
| HP |
Octaslash |
43F |
Ground |
Opponent |
2 x 6, 4 (16) |
Wall Rush
|
| HP |
Hell's Gate |
55F |
Air |
Opponent |
2 x N |
Chase
|
Assists
Sephiroth works well with most tournament viable assists.
References
Navigation
Wiki Roadmap (012 Sephiroth)
Please edit this page's roadmap template when relevant additions and changes are made.
| Page |
Completed |
In progress |
To-do |
Score
|
| General |
|
|
|
25 / 86
|
| Pros / Cons |
Done. |
|
Edit if necessary. |
/ ?
|
| Overview / Character Data |
Done. |
|
Edit if necessary. |
2 / 2
|
| Bravery Attacks |
Ability info. Short description for Shadow Flare (ground). |
|
|
5 / 5
|
| HP Attacks |
|
|
|
5 / 5
|
| EX Mode |
Basic info. |
|
|
3 / 3
|
| Combos |
|
|
Add more combos with different assists and video examples |
7 / 7
|
| Builds |
1 build. |
|
Add more builds with overviews, attack loadouts and capacity point allocation (see Cloud's page). |
1 / 10
|
| Assist |
Assist data. |
|
Assist synergies and Sephiroth assist overview. |
1 / 3
|
| Matchups |
Prishe matchup. |
|
More matchup tips. |
1 / 32
|
| Frame Data |
|
|
Create page. |
0 / 1
|
| Starter Guide |
|
|
Create page. Concise pvp guide with core concepts and essentials. |
0 / 8
|
| Strategy |
|
|
Strategies and counterplays. |
0 / 10
|

 Hyper Ring
 Tenacious Attacker