|
|
| (16 intermediate revisions by the same user not shown) |
| Line 6: |
Line 6: |
| |name=Cecil Harvey (セシル・ハーヴィ) | | |name=Cecil Harvey (セシル・ハーヴィ) |
| |origin=Final Fantasy IV | | |origin=Final Fantasy IV |
| |weapon=Axes, Greatswords, Swords
| |
| |armor=Gauntlets, Heavy Armor, Helms, Light Armor, Shields
| |
| |atk=109 (Low / +2 as Dark Knight, High) | | |atk=109 (Low / +2 as Dark Knight, High) |
| |def=111 (Average / +2 as Paladin, Very High) | | |def=111 (Average / +2 as Paladin, Very High) |
| Line 14: |
Line 12: |
| |fall=81 (Dark Knight, Average) <br>89 (Paladin, Below Average) | | |fall=81 (Dark Knight, Average) <br>89 (Paladin, Below Average) |
| |fallr=39 (Dark Knight, Average) <br>40 (Paladin, Average) | | |fallr=39 (Dark Knight, Average) <br>40 (Paladin, Average) |
| | |fastestbrv=15F (Valiant Blow) |
| | |fastesthp=13F (Shadow Bringer) |
| | |1hithp=Dark Flame <br>Luminous Shard |
| | |hplinks=Yes (Combos only) |
| | |cmdblock=No |
| | |weapon=Axes, Greatswords, Swords |
| | |armor=Gauntlets, Heavy Armor, Helms, Light Armor, Shields |
| |exclusives=Dark Sword, Mythgraven Blade, Lustrous Sword<br>Lightbringer, Cimmerian Edge | | |exclusives=Dark Sword, Mythgraven Blade, Lustrous Sword<br>Lightbringer, Cimmerian Edge |
| | |unlock=Default |
| | |alignment=Cosmos |
| | |vajp=[https://en.wikipedia.org/wiki/Shizuma_Hodoshima Shizuma Hodoshima] |
| | |vaeng=[https://en.wikipedia.org/wiki/Yuri_Lowenthal Yuri Lowenthal] |
| | }} |
| | |
| | == Overview == |
| | |
| | Cecil Harvey is a close / mid-range character who functions with two different jobs - Dark Knight and Paladin. Dark Knight focuses on ground combat and wall rush, while Paladin focuses on air combat and a more balanced moveset. Cecil is practically two characters in one, and he can switch between jobs at will. This requires performing certain HP attacks, which is a double-edged sword; Cecil has decent HP attacks for {{keyword|neutral|neutral=1}} and {{keyword|punishes|punish=1}}, but they're mostly telegraphed attacks with long {{keyword|recovery|recovery=1}}. As such, Cecil can adapt to different situations, but he carries an inherent risk every time he wants access to a specific job. |
|
| |
|
| }} | | Cecil is not explicitly built for offense, or rock-solid defense. Instead, he works well as a punisher. Many of his moves have good reach, either vertically or laterally. He can punish opponents' {{keyword|whiffs|whiff=1}} effectively with both jobs, given the right {{keyword|matchup|matchup=1}}. Cecil has various solo combo routes, which he can setup with assist to suit his needs for damage or EX. |
| | |
| | Cecil struggles in a few ways. His {{keyword|frame data|framedata=1}} is below average, with long {{keyword|startup|startup=1}}, animations and late {{keyword|cancel|cancel=1}} windows. Building assist gauge safely with whiffs is dangerous for Cecil as a result, which is a fundamental weakness in competitive play. This makes him vulnerable to both whiff punishes and {{keyword|assist punishes|assistpunish=1}} alike. His {{keyword|tracking|tracking=1}} is also a bit finicky, which can lead to inconsistencies when punishing dodges or even hitting moving opponents at all. While Cecil has projectiles, their low priority and / or slow speed overall limit their effectiveness as {{keyword|zoning|zoning=1}} tools. |
| | |
| | In competitive play, Cecil has been commonly ranked at bottom / low tier. The nature of his job system restricts him in ways that other characters rarely have to deal with. He has good grounded {{keyword|pokes|poke=1}}, but lacks a strong air poke. He cannot enforce ground combat to offset that weakness. Despite specializing in either ground or aerial combat, Cecil is not considered the strongest in either aspect. Cecil often takes relatively high risks for lower reward, which makes him less consistent for tournaments. However, he can still capitalize on clean hits effectively with assist if an opportunity arises. |
|
| |
|
| {{ProConTable | | {{ProConTable |
|
| |
|
| |pros= | | |pros= |
| | * '''Good poking and burst damage''' as Dark Knight |
| | * '''Good EX generation''' as Paladin |
| | * '''Whiff punishment''' - Cecil has various moves fit for punishing missed attacks from different angles, such as Valiant Blow, Shadow Bringer and Sacred Cross. |
| | * '''Solo combos''' can deal high bravery damage and combo into HP attacks. |
|
| |
|
| |cons= | | |cons= |
| | * '''No safe air pokes''' make Cecil more vulnerable to whiff punishment on average. He struggles to build assist gauge safely and effectively as a result. |
| | * '''Situational solo combo starters''' limit Cecil's opportunities to take advantage of his combo routes |
| | * '''Lackluster zoning''' - Cecil often uses telegraphed projectiles which have decent reward on hit, but are difficult to connect in the neutral |
| | * '''Job change''' usually requires using telegraphed attacks that leave Cecil vulnerable to punishes |
| | * '''Job dilemma''' - Cecil can specialize in either job, but it always comes with notable trade-offs. He cannot rely exclusively on one job in large stages. |
|
| |
|
| }} | | }} |
|
| |
|
| = Overview = | | == Unique Mechanic: Job System == |
|
| |
|
| Cecil Harvey is a close / mid-range character who functions with two different movesets - Dark Knight and Paladin. Due to the risky nature of changing jobs and their distinct strengths, it is often recommended to focus on one job over the other. Cecil can whiff punish effectively from a variety of angles, has decent assist synergy and bravery damage output.
| | <gallery mode="packed-overlay" widths=170 heights=170> |
| | File:Brv_cecil_valiant_blow.jpeg|Dark Knight (Ground) |
| | File:Hp_cecil_luminous_shard.jpeg|Paladin (Midair) |
| | </gallery> |
|
| |
|
| However he struggles to generate assist meter on whiff due to long start-ups, animation length and late cancel opportunities. EX generation is good for Paladin, but weaker in Dark Knight. With less than ideal speed and tracking, limited effective angles, difficulties staying safe and keeping up in meter economy, Cecil often takes relatively high risks for a lower return.
| | Cecil has two jobs, which have vastly different moves. Dark Knight is focused on ground combat, while Paladin is focused on aerial combat. Both jobs have their own set of ground and aerial moves, while HP attacks are universal. Cecil can only have one job active at a time. The job can be changed by using specific attacks. Cecil turns to Dark Knight with ground HP attacks or Dark Step (during Paladin). Similarly, Cecil turns to Paladin with midair HP attacks or Paladin Arts (during Dark Knight). Each attack must be equipped, or Cecil cannot perform them to change jobs. |
|
| |
|
| His arguably safer repertoire is restricted to ground (Dark Knight), which also does not often force his opponents to play into his strengths.
| | Cecil will always start each fight as a Dark Knight. Therefore, Cecil must commit to specific attacks in order to access Paladin moves. This can be a risky proposition for Cecil due to his long {{keyword|whiffs|whiff=1}}, but it is a risk he has to deal with. If Cecil is in EX Mode, he can change jobs freely without attacking by pressing R + Square {{pspr}} + {{pspsqu}}. |
|
| |
|
| Cecil has been primarily a bottom tier character, with some hope for low tier status. Temper your expectations and you may discover a fun character for yourself. | | Certain equipment also affect Cecil's stats when he is in a specific job, such as Cimmerian Edge {{equwpn}} (ATK +1 in Dark Knight) and Lightbringer {{equwpn}} (DEF +1 in Paladin). In Dissidia 012, Cecil also has two new HP attacks; Shadow Bringer for Dark Knight and Luminous Shard for Paladin. Equipping one of these HP attacks prevents the other HP attack from being available. As a result, Cecil can only equip Shadow Bringer or Luminous Shard, but not both. |
|
| |
|
| Build styles:
| | Generally speaking, Cecil usually specializes in one job in competitive play. |
| * Side by Side (Dark Knight)
| |
| * EX (Paladin)
| |
|
| |
|
| = Bravery Attacks = | | == Bravery Attacks == |
|
| |
|
| == Ground (Dark Knight) == | | === Ground (Dark Knight) === |
| <tabber> | | <tabber> |
| |-|Valiant Blow= | | |-|Valiant Blow= |
| {{AbilityInfo | | {{AbilityInfo |
| |damage=10, 10, 20 (40) | | |damage='''40''' (10, 10, 20) |
| |startup=15F | | |startup=15F |
| |type=Physical | | |type=Physical |
| |priority=Melee Low | | |priority=Melee Low |
| |ex=30 | | |ex=30 |
| |effect=Wall rush | | |effect=Wall Rush |
| |cp=20 (10) | | |cp=20 (10) |
| | |image=https://dissidia.wiki/images/6/61/Brv_cecil_valiant_blow.jpeg |
| | |imgpos= |
| | |cancels=Dodge |
| | |asthit= |
| | |level= |
| | |ap= |
| | |gametext=[Close] Jab foe with blade. <br>Can send foe flying. |
| }} | | }} |
| ''[Close] Jab foe with blade. Can send foe flying.'' | | |
| | Valiant Blow is Cecil's ground {{keyword|poke|poke=1}}. It has fast {{keyword|startup|startup=1}} and moves Cecil towards opponent, which is good for {{keyword|punishing|punish=1}} missed attacks or dodges. On hit, Cecil can finish the attack for a wall rush, or stop halfway for an assist combo. A staple for Dark Knight Cecil. |
| | |
| | Valiant Blow cannot be aimed upwards, so it can struggle to hit airborne opponents that were blocked. This is not great for {{keyword|auto piloting|autopilot=1}}, but Cecil has other moves he can use in those situations instead, such as Shadow Lance and Shadow Bringer |
|
| |
|
| |-|Dark Cannon= | | |-|Dark Cannon= |
| {{AbilityInfo | | {{AbilityInfo |
| |damage=1 x 4, 2 x 4, 3 (15) | | |damage='''15''' (1 x 4, 2 x 4, 3) |
| |startup=41F | | |startup=41F |
| |type=Magical | | |type=Magical |
| |priority=Ranged Low (forward), Ranged Mid (backward) | | |priority=Ranged Low (forward) <br>Ranged Mid (backward) |
| |ex=each 3 | | |ex=each 3 |
| |effect=Block (Ranged Low) | | |effect=Block (Ranged Low) |
| |cp=20 (10) | | |cp=20 (10) |
| | |image=https://dissidia.wiki/images/1/1a/Brv_cecil_dark_cannon.jpeg |
| | |imgpos= |
| | |cancels=Dodge |
| | |asthit= |
| | |level= |
| | |ap= |
| | |gametext=[Long] Draw foe with projectile. <br>Good start for other combos. |
| }} | | }} |
| ''[Long] Draw foe with projectile. Good start for other combos.'' | | |
| | Cecil fires projectiles and draws them back to him. This is Dark Knight Cecil's only ground combo starter, but it can combo into most of his other moves. It provides decent reward on hit as a result, though its damage and EX generation is fairly low in practice. Dark Cannon can punish neutral ground dodges with a good {{keyword|read|read=1}}, so when used sparingly, Cecil can establish some momentum with this. |
| | |
| | Hitting Dark Cannon may not be very easy though. Dark Cannon has limited vertical reach and all projectiles are ranged low priority when moving forward. That makes Cecil a sitting duck against opponents who dash towards him. In addition to that, the projectiles don't protect Cecil's front constantly when they travel. Because of this, Dark Cannon has a blind spot in front of Cecil before the projectiles return to him. |
|
| |
|
| |-|Shadow Lance= | | |-|Shadow Lance= |
| {{AbilityInfo | | {{AbilityInfo |
| |damage=8, 7 x 6 (50) | | |damage='''50''' (8, 7 x 6) |
| |startup=35F | | |startup=35F |
| |type=Physical | | |type=Physical |
| |priority=Melee High (close), Ranged Low (far) | | |priority=Melee High (close) <br>Ranged Low (far) |
| |ex=~20 | | |ex=~20 |
| |effect=Wall rush | | |effect=Wall Rush |
| |cp=20 (10) | | |cp=20 (10) |
| | |image=https://dissidia.wiki/images/7/74/Brv_cecil_shadow_lance.jpeg |
| | |imgpos= |
| | |cancels=Dodge |
| | |asthit= |
| | |level= |
| | |ap= |
| | |gametext=[Mid] Throw weapon. Major damage <br>if lands near opponent. |
| }} | | }} |
| ''[Mid] Throw weapon. Major damage if lands near opponent.'' | | |
| | Shadow Lance is Cecil's secondary Dark Knight bravery. It functions as a projectile which can combo into assists with wall rush. It has decent horizontal {{keyword|tracking|tracking=1}} on the ground and it can {{keyword|anti-air|anti-air=1}} at a low diagonal angle. Shadow Lance can work as a secondary {{keyword|poke|poke=1}}, both in close-range and midrange. |
| | |
| | This is also a strong move in close-range; It has highest base damage out of Dark Knight braveries, and it has a melee high priority hitbox in {{keyword|point blank|pointblank=1}} range. This is on par with HP attacks, so it can be used as a {{keyword|mixup|mixup=1}} against blocks. Shadow Lance can lose most of its multi-hits this way, however. The range for the melee high is quite short, but it can also reflect HP projectiles, such as {{012vaan}}'s Windburst and {{012emp}}'s Flares. It's relatively low commitment when done properly. Cecil can {{keyword|dodge cancel|dc=1}} this move rather early, so it can be difficult to {{keyword|whiff punish|whiffpunish=1}}. |
| | |
| | Shadow Lance is generally low reward without assist and its close-range base damage. It's thrown at a low vertical angle, so it cannot function as an {{keyword|anti-air|anti-air=1}} in a way that Dark Flame can. |
|
| |
|
| </tabber> | | </tabber> |
|
| |
|
| == Ground (Paladin) == | | === Ground (Paladin) === |
| <tabber> | | <tabber> |
| |-|Slash= | | |-|Slash= |
| {{AbilityInfo | | {{AbilityInfo |
| |damage=10, 10 (20) | | |damage='''20''' (10, 10) |
| |startup=23F | | |startup=23F |
| |type=Physical | | |type=Physical |
| Line 93: |
Line 153: |
| |effect=Chase | | |effect=Chase |
| |cp=20 (10) | | |cp=20 (10) |
| | |image=https://dissidia.wiki/images/9/91/Brv_cecil_slash_%281%29.jpeg |
| | |imgpos= |
| | |cancels=Dodge ({{keyword|Whiff|whiff=1}})<br>Attack or Dash (On Hit) |
| | |asthit= |
| | |level= |
| | |ap= |
| | |gametext=[Close] Hit foe upwards. <br>Slow, but very accurate strike. |
| }} | | }} |
| ''[Close] Hit foe upwards. Slow, but very accurate strike.'' | | |
| | Slash is a two-hit Paladin bravery with high combo potential on hit. It has decent base damage (20), but generates a good 90 EX. What really stand out are the {{keyword|cancel|cancel=1}} options on hit; Cecil can cancel Slash into an attack or a dash, which lets him follow up with his air melee braveries consistently. Dash cancels are rare outside of '''[[Dash_feint|dash feints]]''' and '''[[EX_(Dissidia_012)#EX_Revenge|EX Revenge]]''', so Cecil having one is a great benefit. If opponent is at a wall, Cecil can even combo into Paladin Force for HP damage. |
| | |
| | Slash is used for its reward on hit. It provides some of the most practical, high damage combos for Paladin Cecil on the ground. He can combo into his most relevant Paladin moves, including Radiant Wings, Sacred Cross and even Paladin Force (wall only). This lets Cecil increase his damage or EX gain depending on what he wants. Because of this, Slash works as a combo starter and assist combo extension. The dash cancel (with Free Air Dash) fills assist gauge for Cecil as well with Assist Gauge Up Dash. |
| | |
| | Cecil can connect Slash reliably after block staggers or by {{keyword|whiff punishing|whiffpunish=1}} slower attacks on the ground. This may run in opposition to the normal Dark Knight-Paladin dynamic, but it pays off well if Cecil succeeds. |
| | |
| | However, Slash has shortcomings as a {{keyword|poke|poke=1}} and a snap reaction punish tool. The 23-frame {{keyword|startup|startup=1}} isn't the worst in the game (same as {{012fir}}'s Rope Knife). However, Slash doesn't move Cecil far and it has no {{keyword|tracking|tracking=1}} once Cecil is moving. He moves upward at a diagonal angle and then stops. The hitbox isn't too small, but the movement limits Slash's reach and accuracy. It can even miss in close-range in dodge punish situations. Cecil becomes airborne when he uses this move, so he cannot use Slash repeatedly as a {{keyword|mixup|mixup=1}}. |
|
| |
|
| |-|Lightning Rise= | | |-|Lightning Rise= |
| {{AbilityInfo | | {{AbilityInfo |
| |damage=3, 3, 5, 4, 4, 11 (30) | | |damage='''30''' (3, 3, 5, 4, 4, 11) |
| |startup=43F | | |startup=43F |
| |type=Physical | | |type=Physical |
| |priority=Melee Mid (first half), Melee Low (second half) | | |priority=Melee Mid (first half) <br>Melee Low (second half) |
| |ex=90 | | |ex=90 |
| |effect=Chase, Block (Ranged Low) | | |effect=Chase, Block (Ranged Low) |
| |cp=20 (10) | | |cp=20 (10) |
| | |image=https://dissidia.wiki/images/d/df/Brv_cecil_lightning_rise.jpeg |
| | |imgpos= |
| | |cancels= |
| | |asthit= |
| | |level= |
| | |ap= |
| | |gametext=[Mid] Charge, then leap. <br>Good start for midair attacks. |
| }} | | }} |
| ''[Mid] Charge, then leap. Good start for midair attacks.''
| |
|
| |
|
| Contrary to what the description says in the game, it is ''not'' a good start for midair attacks. The slow startup time makes it impractical against vigilant players and chase limits viable assist combo conversions.
| | Cecil charges forward with a series of attacks. As this move is mid priority for the first half, it can work as a somewhat telegraphed {{keyword|mixup|mixup=1}} against block with a hard {{keyword|read|read=1}}. If Cecil succeeds with this, he can use chase to convert into HP damage with {{012aer}} assist. Lightning Rise can block Ranged Low attacks, such as {{012squ}}'s Thunder Barret. The blocking lasts until the move becomes {{keyword|active|active=1}}, and Cecil can still deflect with the attack itself, though this isn't very reliable in the long-term. |
| | |
| | Lightning Rise has long {{keyword|startup|startup=1}} and relatively long animation overall. In this regard, Lightning Rise is not recommended as a central tool for mixups or defending against Ranged Low attacks. It has good base damage and fairly short {{keyword|dodge cancel|dc=1}} window at the end. However, its utility as a punisher and a gap closer are outclassed by other moves. Cecil's forward movement is stronger compared to Slash, but the lack of solo combo routes makes it weaker by comparison. |
| | |
| | Cecil becomes airborne when using this move. |
|
| |
|
| |-|Dark Step= | | |-|Dark Step= |
| {{AbilityInfo | | {{AbilityInfo |
| |damage=5, 10, 1 x 2, 10 (27) | | |damage='''27''' (5, 10, 1 x 2, 10) |
| |startup=23F | | |startup=23F |
| |type=Physical | | |type=Physical |
| |priority=Melee Low | | |priority=Melee Low |
| |ex=90 | | |ex=90 |
| |effect=Chase, job change | | |effect=Chase, Job Change |
| |cp=20 (10) | | |cp=20 (10) |
| | |image=https://dissidia.wiki/images/9/98/Brv_cecil_dark_step_1.jpeg |
| | |imgpos= |
| | |cancels= |
| | |asthit= |
| | |level= |
| | |ap= |
| | |gametext=[Close] Change job to Dark Knight <br>during combo. |
| }} | | }} |
| ''[Close] Change job to Dark Knight during combo.''
| | |
| | [[File:Brv_cecil_dark_step_2.jpeg|300px|thumb|Cecil changes to Dark Knight.]] |
| | |
| | Dark Step is a two-stage attack, that changes Cecil's job to Dark Knight. The initial animation is the same as Slash, but the dash cancel property is missing. Cecil will change to Dark Knight as soon as the follow-up is confirmed with Circle {{pspcir}}. |
| | |
| | The base damage is decent and it generates 90 EX, which is good. However, Cecil has relatively good HP attacks on the ground that can be used for job change, such as Shadow Bringer and Dark Flame. Dark Step has similarly low accuracy as with Slash, so it doesn't have many uses in the {{keyword|neutral|neutral=1}}. Cecil can finish Dark Step even if it misses, which can hit opponents as a situational gimmick. |
|
| |
|
| </tabber> | | </tabber> |
|
| |
|
| == Aerial (Dark Knight) == | | === Aerial (Dark Knight) === |
| <tabber> | | <tabber> |
| |-|Gravity Ball= | | |-|Gravity Ball= |
| {{AbilityInfo | | {{AbilityInfo |
| |damage=7, 2 x 4 (15) | | |damage='''15''' (7, 2 x 4) |
| |startup=37F | | |startup=37F |
| |type=Magical | | |type=Magical |
| Line 135: |
Line 231: |
| |effect=Wall Rush | | |effect=Wall Rush |
| |cp=20 (10) | | |cp=20 (10) |
| | |image=https://dissidia.wiki/images/0/02/Brv_cecil_gravity_ball.jpeg |
| | |imgpos= |
| | |cancels=Dodge |
| | |asthit= |
| | |level= |
| | |ap= |
| | |gametext=[Mid] Fire off gravity ball. <br>Good start for ground attacks. |
| }} | | }} |
| ''[Mid] Fire off gravity ball. Good start for ground attacks.''
| | |
| | Gravity Ball is a medium speed homing projectile. It stays on the field for a decent amount of time. It will drag opponent downwards if it hits, which can wall rush on the ground. Cecil can use this to start assist combos afterwards. |
| | |
| | Due to its low priority, Cecil's long {{keyword|startup|startup=1}} and {{keyword|recovery|recovery=1}}, Gravity Ball is not very effective for controlling {{keyword|space|space=1}}. Dark Knight has very few ways to fight effectively in the air, so Gravity Ball is not recommended as a primary air bravery for Cecil. |
|
| |
|
| |-|Nightfall= | | |-|Nightfall= |
| {{AbilityInfo | | {{AbilityInfo |
| |damage=1 each, 24 (25+) | | |damage='''25+''' (1 each hit, 24 finish) |
| |startup=37F | | |startup=37F |
| |type=Physical | | |type=Physical |
| |priority=Melee Low (falling), Ranged Mid (landing) | | |priority=Melee Low (falling) <br>Ranged Mid (landing) |
| |ex=60+ | | |ex=60+ |
| |effect=Chase | | |effect=Chase |
| |cp=20 (10) | | |cp=20 (10) |
| | |image=https://dissidia.wiki/images/3/32/Brv_cecil_nightfall.jpeg |
| | |imgpos= |
| | |cancels=Dodge |
| | |asthit= |
| | |level= |
| | |ap= |
| | |gametext=[Close] High-speed dive. <br>Useful for quick descents. |
| }} | | }} |
| ''[Close] High-speed dive. Useful for quick descents.''
| |
|
| |
|
| Dark Knight attacks do not produce much EX force, but comboing into Nightfall can provide 60+ EX if the descent has room to travel.
| | Cecil dives down in a straight line. Nightfall is Cecil's {{keyword|air-to-ground|air-to-ground=1}} bravery, which is typically used to get to ground faster or mix up landings. It has decent damage and EX gain, but hitting this can be difficult due to its predictable angle. Cecil moves forward a little before diving, which increases its overall range. |
| | |
| | Nightfall has a maximum travel distance. Cecil will remain airborne if he doesn't reach the ground. The attack ends with a mid priority explosion, which happens both on the ground and in the air. At max range the explosion can sometimes work as a surprise attack against slow {{keyword|punish|punish=1}} attempts. Cecil moves quickly during the dive and it can be {{keyword|dodge cancelled|dc=1}} at the end. That makes it safe against {{keyword|assist punishes|assistpunish=1}} during the recovery. However, it is not as safe during the slow {{keyword|startup|startup=1}}. So if Cecil air dodges at a bad time, he can still get interrupted with an assist punish. And due to the slow startup and low priority, it can be easily blocked during the dive as well. |
|
| |
|
| |-|Paladin Arts= | | |-|Paladin Arts= |
| {{AbilityInfo | | {{AbilityInfo |
| |damage=7, 2 x 4, 3 x 5 (30) | | |damage='''30''' (7, 2 x 4, 3 x 5) |
| |startup=37F | | |startup=37F |
| |type=Magical | | |type=Magical |
| |priority=Ranged Low | | |priority=Ranged Low |
| |ex=0 | | |ex=0 |
| |effect=Job change | | |effect=Job Change |
| |cp=20 (10) | | |cp=20 (10) |
| | |image=https://dissidia.wiki/images/3/3b/Brv_cecil_paladin_arts.jpeg |
| | |imgpos= |
| | |cancels=Dodge |
| | |asthit= |
| | |level= |
| | |ap= |
| | |gametext=[Mid] Change job to Paladin during combo. |
| }} | | }} |
| ''[Mid] Change job to Paladin during combo.''
| |
|
| |
|
| Paladin Arts lets you transition to Paladin job, but all projectiles are Ranged Low priority. While the Paladin projectile (Searchlight) comes out faster with this attack, Cecil can be hit out of this move that leaves him stationary and vulnerable for a long time. Use from afar or during assist combos. Both projectiles can combo into air attacks on hit. | | Paladin Arts is a two-stage attack, that changes Cecil's job to Paladin. The initial animation is the same as Gravity Ball, but the projectile has upward {{keyword|knockback|knockback=1}} on hit instead of downward. Cecil will change to Paladin as soon as the follow-up is confirmed with Circle {{pspcir}}. |
| | |
| | This move is good for it's reward on hit. It enables solo and assist combos, and it's part of Cecil's optimized EX mode combos as well. The Dark Knight projectile's upward knockback lets Cecil combo into assist or the job change. The follow-up is functionally the same as Paladin Cecil's Searchlight, so Cecil can get a guaranteed Paladin Force for HP damage. |
| | |
| | Paladin Arts' {{keyword|neutral|neutral=1}} applications aren't very prominent. It doesn't protect Cecil from offensive approaches, because all projectiles are low priority and relatively slow, which can be dashed through. The whole animation is very telegraphed, with no ways to mix it up other than doing nothing. It may look the same as Gravity Ball initially, but both moves are slow, ranged low moves that leave Cecil open for {{keyword|rushdown|rushdown=1}}. |
| | |
| | It is recommended to use Paladin Arts from afar or during assist combos. |
| | |
| | Caution is advised when Cecil is near walls or ceilings. The Paladin magic orb and projectiles can vanish if they collide with physical objects, such as World of Darkness' pillars or walls in most stages. |
|
| |
|
| </tabber> | | </tabber> |
|
| |
|
| == Aerial (Paladin) == | | === Aerial (Paladin) === |
| <tabber> | | <tabber> |
| |-|Radiant Wings= | | |-|Radiant Wings= |
| {{AbilityInfo | | {{AbilityInfo |
| |damage=3, 3, 7, 6, 6, 6, 9 (40) | | |damage='''40''' (3, 3, 7, 6, 6, 6, 9) |
| |startup=19F | | |startup=19F |
| |type=Physical | | |type=Physical |
| |priority=Melee Low | | |priority=Melee Low |
| |ex=30 | | |ex=30 |
| |effect=Wall rush | | |effect=Wall Rush |
| |cp=20 (10) | | |cp=20 (10) |
| | |image=https://dissidia.wiki/images/c/c5/Brv_cecil_radiant_wings.jpeg |
| | |imgpos= |
| | |cancels=Dodge |
| | |asthit= |
| | |level= |
| | |ap= |
| | |gametext=[Close] Splendid swordplay. <br>Long reach, fast strike speed. |
| }} | | }} |
| | |
| | Radiant Wings is one of Paladin Cecil's main braveries. It is the closest to an air {{keyword|poke|poke=1}} for Cecil. It is also one of his highest damaging moves with assist thanks to wall rush and high base damage. Cecil can use this as an assist combo starter with or without the wall rush. Radiant Wings is also good for punishing {{keyword|whiffs|whiff=1}} and block staggers, as Cecil moves forward before striking. |
| | |
| | The 19-frame {{keyword|startup|startup=1}} is great for Cecil in theory. However, Cecil will not {{keyword|track|tracking=1}} the opponent once he starts moving. His movement is linear and he performs the motion even if he is in {{keyword|point blank|pointblank=1}} range. This means he can have a hard time hitting moving opponents, even with more apparent openings. Furthermore, Cecil will perform three spinning slashes before he can {{keyword|dodge cancel|dc=1}} out of Radiant Wings. That makes Cecil vulnerable to {{keyword|whiff punishes|whiffpunish=1}}, which hurts his safety and assist gauge building a lot. |
| | |
| | If Cecil uses Radiant Wings while '''[[Lock_Off|locked off]]''', he will move in the direction he is facing. This can be done to build assist gauge a bit more safely, since opponents cannot dash into Cecil and block him as reliably. |
|
| |
|
| |-|Sacred Cross= | | |-|Sacred Cross= |
| {{AbilityInfo | | {{AbilityInfo |
| |damage=3 x 5, 5, 10 (30) | | |damage='''30''' (3 x 5, 5, 10) |
| |startup=21F | | |startup=21F |
| |type=Physical | | |type=Physical |
| Line 190: |
Line 331: |
| |effect=Chase | | |effect=Chase |
| |cp=20 (10) | | |cp=20 (10) |
| | |image=https://dissidia.wiki/images/4/4d/Brv_cecil_sacred_cross_1.jpeg |
| | |imgpos= |
| | |cancels=Dodge |
| | |asthit= |
| | |level= |
| | |ap= |
| | |gametext=Vertical charge. <br>Direction depends on position. |
| }} | | }} |
|
| |
|
| | [[File:Brv_cecil_sacred_cross_2.jpeg|300px|thumb|Sacred Cross dives when used from above.]] |
| | |
| | Sacred Cross is Paladin Cecil's vertical {{keyword|punish|punish=1}} tool. It's relatively fast at 21 frames with good base damage. Cecil moves toward opponent before attacking. If he is above opponent, he will attack down. If he is below opponent, he will attack up. This gives Cecil plenty of utility for punishing opponents at different heights, and it's pretty consistent at that. The built-in movement lets Cecil close gaps vertically, but it also has some evasion to it as well. If opponents try to dodge punish Cecil, Sacred Cross can potentially evade an incoming attack. |
| | |
| | Sacred Cross generates 90 EX which is good, but it's low reward without {{012aer}} assist or ground wall rush. The {{keyword|hit stun|hitstun=1}} is short, which makes it less effective in {{keyword|empty chase|emptychase=1}} and EX Core scenarios. |
| | |
| | Cecil follows through with the whole attack even if it misses. Therefore it doesn't function safely as a primary air {{keyword|poke|poke=1}}. Cecil can be {{keyword|assist punished|assistpunished=1}} for using Sacred Cross, and the long {{keyword|active|active=1}} frames make it easier for opponents to block it from a distance. The finishing hit doesn't have a large {{keyword|hitbox|hitbox=1}} in front of Cecil, so it can miss if Cecil misjudged his position. And despite the evasive movement, Cecil is not actually invincible during it. |
|
| |
|
| |-|Searchlight= | | |-|Searchlight= |
| {{AbilityInfo | | {{AbilityInfo |
| |damage=3 x 5 (15) | | |damage='''15''' (3 x 5) |
| |startup=95F | | |startup=95F |
| |type=Magical | | |type=Magical |
| Line 202: |
Line 357: |
| |effect=- | | |effect=- |
| |cp=20 (10) | | |cp=20 (10) |
| | |image=https://dissidia.wiki/images/8/82/Brv_cecil_searchlight.jpeg |
| | |imgpos= |
| | |cancels=Dodge |
| | |asthit= |
| | |level= |
| | |ap= |
| | |gametext=[Long] Launch magic orb. Orb fires projectiles. <br>Effective vs. any height, good diversion. |
| }} | | }} |
|
| |
|
| Be wary of using Searchlight near walls and ceilings, as the catalyst AND the projectiles can vanish if they collide with physical stage objects. "Paladin Arts" attack suffers from the same issue.
| | Searchlight is Cecil's long-range {{keyword|projectile|projectile=1}} which opens up solo combos and checks opponents poorly placed dodges and {{keyword|whiffs|whiff=1}}. Cecil summons a magic orb, which moves to opponent's position, stops and fires. A total of three projectiles are fired, and they have decent {{keyword|hit stun|hitstun=1}}. Since the projectiles hit relatively late, Cecil can use Searchlight to combo into his other attacks like Radiant Wings or Sacred Cross. This can be good against opponents who overextended their approach. Searchlight can also activate '''[[Glitch_(Dissidia_012)#Hit_Glitch|hit glitch]]''' for Radiant Wings and Paladin Force. Because of this, Searchlight can be used to apply pressure from a distance, as it enables follow-ups outside of Cecil's common ranges. |
| | |
| | Cecil uses Searchlight as a long-range tool, but it's far from being safe. The {{keyword|startup|startup=1}} is slow and very telegraphed with distinct audiovisual cues. Cecil is completely vulnerable to attacks during the entire animation, so he can get hit or even {{keyword|assist punished|assistpunish=1}} from afar. Searchlight also won't adjust its position once the magic orb is in motion, which makes it weak against fast movement in general. Despite this, Searchlight is a staple move for Paladin Cecil due to its reward on hit and occasional safety at long distances. It is his most common way to occupy space in the air without risking a huge whiff in close-range. |
| | |
| | Caution is advised when Cecil is near walls or ceilings. The magic orb and projectiles can vanish if they collide with physical objects, such as World of Darkness' pillars or walls in most stages. |
|
| |
|
| </tabber> | | </tabber> |
|
| |
|
| = HP Attacks = | | == HP Attacks == |
|
| |
|
| == Ground == | | === Ground === |
| <tabber> | | <tabber> |
| |-|Soul Eater= | | |-|Soul Eater= |
| {{AbilityInfo | | {{AbilityInfo |
| |damage=4, 2 x 5, 6 (20) | | |damage='''20''' (4, 2 x 5, 6) |
| |startup=39F | | |startup=39F |
| |type=Physical | | |type=Physical |
| |priority=Melee High | | |priority=Melee High |
| |ex=30 | | |ex=30 |
| |effect=Wall rush | | |effect=Wall Rush |
| |cp=30 (15) | | |cp=30 (15) |
| | |image=https://dissidia.wiki/images/4/4e/Hp_cecil_soul_eater.jpeg |
| | |imgpos= |
| | |cancels=Dodge |
| | |asthit= |
| | |level= |
| | |ap= |
| | |gametext=[Close] Stab fore and devour his soul. <br>Limited height, quick strike. |
| }} | | }} |
| ''[Close] Stab fore and devour his soul. Limited height, quick strike.'' | | |
| | Soul Eater functions as a grounded {{keyword|punish|punish=1}} tool against dodges and block staggers. It has good lateral {{keyword|knockback|knockback=1}} on hit, which can wall rush for assist combos. Soul Eater can also power through low priority moves, since Cecil transitions to the follow-up when he makes contact with opponent. |
| | |
| | This is a decent move for Dark Knight Cecil. It's {{keyword|reactable|reactable=1}} like many other HP attacks, but it provides good reward on hit. It doesn't hit above Cecil at all, so similar to Valiant Blow, Cecil cannot {{keyword|auto pilot|autopilot=1}} with this. Unfortunately Soul Eater is generally outclassed by Shadow Bringer, so it won't see much use if that's also equipped. |
|
| |
|
| |-|Dark Flame= | | |-|Dark Flame= |
| Line 231: |
Line 407: |
| |priority=Ranged High | | |priority=Ranged High |
| |ex=0 | | |ex=0 |
| |effect=Wall rush | | |effect=Wall Rush |
| |cp=30 (15) | | |cp=30 (15) |
| | |image=https://dissidia.wiki/images/2/2f/Hp_cecil_dark_flame.jpeg |
| | |imgpos= |
| | |cancels=Dodge |
| | |asthit= |
| | |level= |
| | |ap= |
| | |gametext=[Long] Summon dark fire. <br>Slow speed, strong homing. |
| }} | | }} |
| ''[Long] Summon dark fire. Slow speed, strong homing.''
| |
|
| |
|
| Dark Flame is reactable, but stays on the field for a few seconds and has decent tracking throughout the active period. | | Dark Flame is Dark Knight Cecil's {{keyword|zoning|zoning=1}} tool. It occupies space for a couple seconds and it {{keyword|tracks|tracking=1}} above Cecil well. It's commonly used to apply pressure in close / midrange, and calling out air dodges. In a way, it functions as an {{keyword|anti-air|anti-air=1}} against airborne opponents looking to approach Cecil. If opponents try to {{keyword|assist punish|assistpunish=1}} Cecil, he can automatically protect himself with Auto Assist Lock On against slower assists. Dark Flame is composed of multiple high priority projectiles, so even if the opponent deflects the first one, they can still get hit by another one. |
|
| |
|
| Dark Flame can adjust it's tracking, so if Auto Assist Lock On is enabled, it can protect Cecil against slower ground assists | | On hit, Dark Flame sends opponents upwards, helping Cecil keep his position. This can also wall rush, but it is only feasible in stages with low ceiling, such as Pandaemonium - Top Floor and M.S. Prima Vista. Dark Knight Cecil operates more consistently in those stages, so this a great boost in damage for Cecil there. |
| | |
| | Dark Flame is slow, both in {{keyword|startup|startup=1}} and traversal. While this isn't a big problem as an anti-air, it struggles to keep up against backwards movement. Cecil stays in place for a moment after the projectiles have become {{keyword|active|active=1}}. That presents a small gap of vulnerability against fast ground assists, such as Jecht Rush. Dark Flame is good at preventing close-range characters approaching from above, but it cannot stop zoning from a distance. The speed is too slow for that in large stages, and the flames won't stay near Cecil to protect him either. |
|
| |
|
| |-|Shadow Bringer= | | |-|Shadow Bringer= |
| {{AbilityInfo | | {{AbilityInfo |
| |damage=10, 10 (20) | | |damage='''20''' (10, 10) |
| |startup=13F | | |startup=13F |
| |type=Physical | | |type=Physical |
| |priority=Melee High | | |priority=Melee High |
| |ex=30 | | |ex=30 |
| |effect=Wall rush, Dark Knight BRV damage +3%, Paladin BRV damage -3% | | |effect=Wall Rush <br>Dark Knight BRV damage +3% <br>Paladin BRV damage -3% |
| |cp=30 (15) | | |cp=30 (15) |
| | |image=https://dissidia.wiki/images/e/ee/Hp_cecil_shadow_bringer.jpeg |
| | |imgpos= |
| | |cancels=Dodge |
| | |asthit= |
| | |level= |
| | |ap= |
| | |gametext=[Ultra-close] Dark sword slash. <br>Dark Knight BRV damage +3%, <br>Paladin BRV damage -3%. |
| }} | | }} |
| ''[Ultra-close] Dark sword slash. Dark Knight BRV damage +3%, Paladin BRV damage -3%.''
| |
|
| |
|
| Equipping Shadow Bringer will lock you out equipping the aerial Luminous Shard HP for the Paladin job. | | Shadow Bringer is one of Dark Knight Cecil's strongest moves. It comes out blindingly fast at 13 frames, it can {{keyword|anti-air|anti-air=1}} and it has very high diagonal knockback for wall rush. This move can be {{keyword|dodge cancelled|dc=1}} fast enough, to the point it can serve as an honorary {{keyword|poke|poke=1}}. |
| | |
| | Shadow Bringer outclasses Soul Eater in a few key ways. The unreactable {{keyword|startup|startup=1}} is a major difference, as well as the vertical reach. It has the same base damage, but it has far more knockback and safety in {{keyword|neutral|neutral=1}} and assist combos. Its Dark Knight BRV damage passive also adds damage slightly. |
| | |
| | Just like Soul Eater, Cecil commits to follow-up hits if Shadow Bringer connects. This is good when clashing with low priority pokes, due to Shadow Bringer's vertical angle with each hit. Soul Eater has a much harder time doing that. Shadow Bringer differs from Soul Eater in a couple subtle ways as well; Cecil can dodge cancel out of Shadow Bringer on hit slightly later than Soul Eater. Cecil needs to use a ground dash to increase Shadow Bringer's range, whereas Soul Eater can move forward by itself. Both of these factors aren't very detrimental to Shadow Bringer though, considering the overall benefits. |
| | |
| | Although Shadow Bringer is very fast, Cecil is still vulnerable to attacks during {{keyword|recovery|recovery=1}}. |
| | |
| | Equipping Shadow Bringer will disable Luminous Shard for Paladin. |
| </tabber> | | </tabber> |
|
| |
|
| == Aerial == | | === Aerial === |
|
| |
|
| <tabber> | | <tabber> |
| |-|Saint's Fall= | | |-|Saint's Fall= |
| {{AbilityInfo | | {{AbilityInfo |
| |damage=1 x 3, 2, 1 x 2, 3 (10) | | |damage='''10''' (1 x 3, 2, 1 x 2, 3) |
| |startup=53F | | |startup=53F |
| |type=Physical | | |type=Physical |
| |priority=Melee High | | |priority=Melee High |
| |ex=30 | | |ex=30 |
| |effect=Wall rush | | |effect=Wall Rush |
| |cp=30 (15) | | |cp=30 (15) |
| | |image=https://dissidia.wiki/images/4/46/Hp_cecil_saints_fall.jpeg |
| | |imgpos= |
| | |cancels=Dodge |
| | |asthit= |
| | |level= |
| | |ap= |
| | |gametext=[Mid] Focus light and charge. <br>From afar, good vs. any height. |
| }} | | }} |
| ''[Mid] Focus light and charge. From afar, good vs. any height.'' | | |
| | Saint's Fall is a committal gap closer, that works as a hard callout against {{keyword|whiffs|whiff=1}} and blocks from a distance. Cecil travels forward and then ascends before striking his opponent down. Saint's Fall has low base damage, but it wall rushes on the ground, which enables assist combos. Saint's Fall has {{keyword|active|active=1}} frames during the movement, so it can challenge whiffs and side ground dodges during the initial charge. |
| | |
| | Saint's Fall is rather risky to use in {{keyword|neutral|neutral=1}}. It has slow {{keyword|startup|startup=1}} and long recovery. Cecil travels in a fixed arc, and won't move very far. He completes the attack even if it misses, so Cecil is left wide open if he is not careful with this move. Its applications in {{keyword|neutral|neutral=1}} present more risk than reward on average, so it's outclassed by Paladin Force. |
|
| |
|
| |-|Paladin Force= | | |-|Paladin Force= |
| {{AbilityInfo | | {{AbilityInfo |
| |damage=2 x 5, 5 (15) | | |damage='''15''' (2 x 5, 5) |
| |startup=43F | | |startup=43F |
| |type=Both | | |type=Both |
| |priority=Ranged High (first hit), Melee High (other hits) | | |priority=Ranged High (first hit) <br>Melee High (other hits) |
| |ex=30 | | |ex=30 |
| |effect=Wall rush | | |effect=Wall Rush |
| |cp=30 (15) | | |cp=30 (15) |
| | |image=https://dissidia.wiki/images/0/0c/Hp_cecil_paladin_force_1.jpeg |
| | |imgpos= |
| | |cancels=Dodge |
| | |asthit= |
| | |level= |
| | |ap= |
| | |gametext=[Close] Holy sword magic. <br>Effective against any height. |
| }} | | }} |
| ''[Close] Holy sword magic. Effective against any height.''
| |
|
| |
|
| Using Paladin Force right after connecting with Searchlight activates the homing followup attacks even if Paladin Force would've otherwise missed. | | [[File:Hp_cecil_paladin_force_2.jpeg|300px|thumb|Paladin Force becomes a homing onslaught of attacks if it connects.]] |
| | |
| | Paladin Force is Cecil's primary midair HP for {{keyword|punishes|punish=1}} and assist combos. A single projectile is fired and if it connects, Cecil transitions into a swift, homing air combo. Paladin Force ends with a ground wall rush, which can set up damaging assist combos. Paladin Force's initial range is short, but it has good homing overall. Cecil can aim at opponents vertically during {{keyword|startup|startup=1}}, which is good for calling out dodges that go above Cecil. And if Cecil lands Searchlight, he can use Paladin Force to activate '''[[Glitch_(Dissidia_012)#Hit_Glitch|hit glitch]]''' and quickly attack the opponent from long distances. Cecil is one of the few characters who can use the hit glitch well to his advantage, and it directly improves his Paladin gameplay. Using Paladin Force in this manner can be relatively safe, as Cecil does not move initially with the HP. |
| | |
| | Once Paladin Force connects, Cecil cannot {{keyword|cancel|cancel=1}} the air combo early. This makes him briefly vulnerable to punishes if opponent escapes with LV1 Assist Change and dodges afterwards. Furthermore, Cecil always finishes with a dive from above. LV2 Assist Change can stagger Cecil from below, which makes him more susceptible to high damage punishes afterwards. Ceilings are the primary exception, as using Assist Change there causes the opponent to move down instead of up. |
| | |
| | The projectile has plenty of {{keyword|hit stun|hitstun=1}}, which is normally overrun by the follow-up attacks. However, if Cecil can {{keyword|trade|trade=1}} with just the projectile, there is potential to follow up with a different attack. Cecil is not invincible during Paladin Force though, so this requires specialized {{keyword|matchup|matchup=1}} knowledge to be effective. |
|
| |
|
| |-|Luminous Shard= | | |-|Luminous Shard= |
| Line 291: |
Line 511: |
| |priority=Ranged High | | |priority=Ranged High |
| |ex=60 | | |ex=60 |
| |effect=Paladin BRV damage +3%, Dark Knight BRV damage -3% | | |effect=Paladin BRV damage +3% <br>Dark Knight BRV damage -3% |
| |cp=30 (15) | | |cp=30 (15) |
| | |image=https://dissidia.wiki/images/4/46/Hp_cecil_luminous_shard.jpeg |
| | |imgpos= |
| | |cancels=Dodge |
| | |asthit= |
| | |level= |
| | |ap= |
| | |gametext=[Long] Shoot light projectiles. <br>Paladin BRV damage +3%. <br>Dark Knight BRV damage -3%. |
| }} | | }} |
| ''[Long] Shoot light projectiles. Paladin BRV damage +3%. Dark Knight BRV damage -3%.''
| |
|
| |
|
| Equipping Luminous Shard will lock you out equipping the grounded Shadow Bringer HP for the Dark Knight job.
| | Luminous Shard is Paladin Cecil's only 1-hit HP and midair HP projectile. It functions as a secondary {{keyword|zoning|zoning=1}} tool and as a safer combo ender against LV2 Assist Change staggers. It generates a nice 60 EX, but otherwise it doesn't provide much reward without assist setups. Luminous Shard travels a long distance and it can change its vertical trajectory after it is out. |
| | |
| | Luminous Shard is recommended for Paladin-oriented playstyles. Cecil can use Paladin Force or Luminous Shard to quickly change into Paladin at the start of a match, but Luminous Shard doesn't provide explicit benefits in that regard. Compared to Shadow Bringer which greatly complements Dark Knight, Luminous Shard provides more subdued benefits. Paladin Cecil can use Aerith assist to good effect, which also combos into Luminous Shard. Being able to avoid LV2 Assist Change staggers even in long matches helps Cecil stay afloat. As a 1-hit HP, Luminous Shard can also bypass EX Revenge {{keyword|checkmates|checkmate=1}} anywhere if Cecil can stagger his opponent. However, its slow {{keyword|frame data|framedata=1}} and low average damage potential limit its potential |
|
| |
|
| As Ranged High priority, Luminous Shard will prevent Cecil from staggering during LV2 Assist Change. This relative safety is about all the move has going for it though, only worth consideration for Paladin-oriented playstyles.
| | Equipping Luminous Shard will disable Shadow Bringer for Dark Knight. Because of this, Cecil needs to carefully assess whether he values ground combat more compared to relative midair safety in combos. |
|
| |
|
| </tabber> | | </tabber> |
|
| |
|
| = EX Mode: Job Augment! = | | == EX Mode: Job Augment! == |
|
| |
|
| Effects: | | Effects: |
| Line 311: |
Line 539: |
| * Inner Strength | | * Inner Strength |
|
| |
|
| == Proteus == | | Cecil's EX mode increases his damage output across the board with critical hits and Inner Strength. Proteus lets him change jobs without attacking, which makes it significantly safer for Cecil to access different bravery attacks on demand. This also contributes to Cecil's damage potential, as he can combo into Paladin Arts in Dark Knight whenever he is not in an attack state. Overall, the EX mode benefits Cecil in meaningful ways and acts as a long-term reward for Paladin combos and '''[[EX_(Dissidia_012)#EX_Core|EX cores.]]''' |
| | |
| | === Proteus === |
| | |
| | <gallery mode="nolines" widths=290 heights=250> |
| | File:Ex_mode_cecil_proteus_1.jpeg |
| | File:Ex_mode_cecil_proteus_2.jpeg |
| | </gallery> |
|
| |
|
| ''[Activate with R + Square] Bridles light and darkness to instantly change jobs without attacking.'' | | ''[Activate with R + Square] Bridles light and darkness to instantly change jobs without attacking.'' |
|
| |
|
| == Inner Strength == | | Proteus lets Cecil change jobs whenever he is not in an attack state. That means it is possible while running, dashing or dodging. This is a huge benefit for Cecil, as he does not have to commit to telegraphed HP attacks to access different job. The job change can be done repeatedly in quick succession with no cooldown. Cecil's stats still differ between jobs, including run speed, so he must be careful when positioning for his next attack. |
| | |
| | Proteus also plays a crucial role in looping Paladin Arts in combos. |
| | |
| | === Inner Strength === |
|
| |
|
| ''[Always active while in EX Mode] Each attack is 1.5 times as powerful.'' | | ''[Always active while in EX Mode] Each attack is 1.5 times as powerful.'' |
|
| |
|
| === EX Burst: Face Shift === | | === EX Burst: Face Shift === |
| | |
| | {{image|https://dissidia.wiki/images/b/b9/Ex_burst_cecil.jpeg}} |
|
| |
|
| ''A chain of attacks combining the power of light and darkness. Enter the commands that appear on both sides of the screen at the same time.'' | | ''A chain of attacks combining the power of light and darkness. Enter the commands that appear on both sides of the screen at the same time.'' |
| Line 333: |
Line 574: |
| }} | | }} |
|
| |
|
| = About the Job System =
| | Face Shift requires players inputting simultaneous inputs three times in a row. This is always a combination of d-pad + face button, though the exact button sequences may differ each time. The button inputs are read from left to right on both sides, and they must be pressed at the same time. Holding one button (e.g. Triangle {{psptri}}) and then pressing up on d-pad does not work. |
| Cecil has two jobs, but only has access to one of them at a time. To change jobs, use an attack that transitions into the other job. Dark Step or Paladin Arts braveries can only be done Dark Knight and Paladin jobs respectively. HP attacks on the other hand are always available and change Cecil's job depending on if he's grounded or not. Ground HP attacks change to a Dark Knight job, while midair HP attacks change to a Paladin job.
| |
|
| |
|
| Jobs can be changed freely outside of attack animations during EX mode by pressing R+Square. This means that outside of EX mode, Cecil often makes himself vulnerable in order to change movesets, making this adjustment rather risky for Cecil at times. Not only that, equipping Shadow Bringer or Luminous Shard HP attack locks Cecil out of equipping the other HP, further incentivising dedicated Dark Knight or Paladin playstyle.
| | Cecil has roughly 3.5 seconds to do the inputs. Once the simultaneous inputs have been performed, EX Burst is considered complete. If Cecil fails a button combination, he has to try it again. Failing to complete all three button combos within the allotted time results in a low damage "Darkness" finisher, which leaves Cecil in Dark Knight job. |
|
| |
|
| Cecil ALWAYS starts a fight in Dark Knight form, meaning Paladin-focused players will have to perform an HP attack as soon as the match starts, or bide their time in Dark Knight form until they have an opportunity to change forms without being punished.
| | Face Shift is an EX Burst with average damage output. It's not the weakest in the game, but the damage output fluctuates due to job changes and Dark Knight's passive ATK boost. |
|
| |
|
| = Combos = | | == Combos == |
|
| |
|
| == Solo ==
| | ''Main article: '''[[Cecil_Harvey_(Dissidia_012)/Combos|Cecil (Combos)]]''' '' |
|
| |
|
| === Dark Knight ===
| | Cecil has a couple solo combo starters with both jobs, which can lead to bravery and HP follow-ups alike. Most of his attacks can be used as follow-ups, so Cecil has rather flexible combo routing. Cecil's most reliable starters (Dark Cannon & Searchlight) are telegraphed low priority projectiles, so he may need assist to do these combos more consistently. With assists, Cecil can get damage from unfinished attacks and wall rushes as well. |
|
| |
|
| Dark Cannon is Cecil's only grounded solo combo starter. It cannot combo into Dark Flame or another Dark Cannon. | | === Solo Combos (Dark Knight) === |
|
| |
|
| The projectiles travel in a forward-back motion, but the damage output fluctuates a lot with range. Once the projectiles have reached their max range, their damage multiplier (1x4) will become stronger (2x4, 3) and return to Cecil. This latter portion of the attack is often more practical, but because the projectiles don't have excessive hitboxes or much vertical tracaking, Dark Cannon will realistically land at least '''four hits''' (2x3, 3) on it's way back. Please keep this in mind when referencing damage tables for combos involving Dark Cannon.
| | Dark Knight can combo with either Dark Cannon or Paladin Arts. Dark Cannon leads to other Dark Knight melee attacks, while Paladin Arts leads to Paladin attacks. Cecil gets decent damage with Dark Cannon starters, but its low damage can vary due to how projectiles move. On average, Dark Cannon can deal four hits (3x3, 3 / 9 total). |
|
| |
|
| Paladin Arts is Dark Knight Cecil's solo air combo starter that involves his Paladin bravery Searchlight. The combo structure is identical with Searchlight starters, but it can also be looped into itself during EX Mode. | | {{Combo-012 |
| | |data= |
| | {{Combo-012Data |
| | |combo='''Dark Cannon''' > Valiant Blow |
| | |condition=Projectile starter |
| | |requirement=Ground |
| | |characters= |
| | |damage=49 + WR |
| | |damagehits=9 > 40 + WR |
| | |ex=42+ |
| | |exhits=3, 3, 3, 3 > 30 |
| | |meteropp= |
| | |video= |
| | |notes=Basic bravery combo with high damaging wall rush ender. |
| | }} |
| | {{Combo-012Data |
| | |combo='''Dark Cannon''' > Shadow Bringer / Soul Eater |
| | |condition=Projectile starter |
| | |requirement=Ground |
| | |characters= |
| | |damage=29 + HP WR |
| | |damagehits=9 > 20 + HP WR |
| | |ex=42 |
| | |exhits=3, 3, 3, 3 > 30 |
| | |meteropp= |
| | |video= |
| | |notes=Basic HP combo with wall rush potential. Shadow Bringer ender is prioritized over Soul Eater since it has higher knockback. |
| | }} |
| | {{Combo-012Data |
| | |combo='''Paladin Arts''' > Paladin Force |
| | |condition=Projectile starter |
| | |requirement=Air |
| | |characters= |
| | |damage=45 + HP WR |
| | |damagehits=30 > 15 + HP WR |
| | |ex=30 |
| | |exhits=0 > 30 |
| | |meteropp= |
| | |video= |
| | |notes=Solo HP combo that also wall rushes on the ground. Good for ground assist combos. Paladin Force has slightly higher bravery damage output compared to Saint's Fall, and it also has better vertical tracking in close range, making this combo easier to land. |
| | }} |
| | }} |
|
| |
|
| {|class="wikitable sortable"
| | === Solo Combos (Paladin) === |
| ! scope=col | Combo
| |
| ! scope=col | Damage
| |
| ! scope=col | EX Force
| |
| ! scope=col | Notes
| |
| ! scope=col | Video
| |
| |-
| |
| |Dark Cannon > Valiant Blow || '''49+ WR''' (2x3, 3, 10, 10, 20) || '''42+''' 3, 3, 3, 3, 30 || Basic bravery combo with high damaging wall rush ender. || video
| |
| |-
| |
| |Dark Cannon > Shadow Lance || '''59+ WR''' (2x3, 3, 8, 7x6 + WR) ||| '''32''' (3, 3, 3, 3, ~20) || Basic bravery combo with an even more damaging wall rush ender. || video
| |
| |-
| |
| |Dark Cannon > Soul Eater || '''32 + HP WR''' (2x3, 3, 4, 2x5, 6 + HP WR) || '''42''' (3, 3, 3, 3, 30) || Basic HP combo with wall rush potential. Not prioritized unless Cecil doesn't have Shadow Bringer, which outclasses Soul Eater in a couple areas.
| |
| |-
| |
| |Dark Cannon > Shadow Bringer || '''32 + HP WR''' (2x3, 3, 10, 10 + HP WR) || '''42''' (3, 3, 3, 3, 30) || Basic HP combo with better wall rush potential. Shadow Bringer has better frame data and superior knockback for wall rush, outperforming Soul Eater. || video
| |
| |-
| |
| |Paladin Arts > Radiant Wings || '''70''' (7, 2x4, 3x5, 3, 3, 7, 6, 6, 6, 9 + WR) || '''30''' (0, 30) || High damage bravery ender. || video
| |
| |-
| |
| |Paladin Arts > Radiant Cross || '''60''' (7, 2x4, 3x5, 3x5, 5, 10) || '''90''' (0, 90) || Sacrifice bravery damage to generate more EX Force. || video
| |
| |-
| |
| |Paladin Arts > Saint's Fall || '''40 + HP WR''' (7, 2x4, 3x5, 1x3, 2, 1x2, 3 + HP WR) || '''30''' (0, 30) || Solo HP combo with a ground wall rush. Similiar to Soul Eater, Saint's Fall is typically outclassed by other HPs in damage, range or utility, so it's not often prioritized. || video
| |
| |-
| |
| |Paladin Arts > Paladin Force || '''45 + HP WR''' (7, 2x4, 3x5, 2x5, 5) || '''30''' (0, 30) || Solo HP combo that also wall rushes on the ground. Good for ground assist combos. Paladin Force has slightly higher bravery damage output compared to Saint's Fall, but it also has better vertical tracking in close range, making this combo easier to land. || video
| |
| |-
| |
| |Paladin Arts > DC > Job Change > Paladin Arts > DC > Job Change > Paladin Arts > Paladin Force || '''105 + HP WR''' (7, 2x4, 3x5, 7, 2x4, 3x5, 7, 2x4, 3x5, 2x5, 5) || '''30''' (0, 0, 0, 30) || EX Mode only. High damaging loop, but more reliable to set up with Aerith assist on the ground. <ref group="notes">Paladin Arts loop: This is one of Cecil's hardest solo combo routes, but also one of the most rewarding for him. Cecil can change jobs freely during EX Mode, which lets him combo into Dark Knight braveries without doing an HP first. <br>The goal is to stay at the opponent's height and at close range. Position Cecil just far enough so that he isn't touching them. The Dark Knight projectile will lift the opponent upwards, so you will have to dodge cancel slightly upwards at least once. More testing is required, but this is a proven concept for Cecil's combos.</ref>
| |
| |}
| |
|
| |
|
| === Notes ===
| | Cecil's combos expand considerably with Slash and Searchlight. Slash provides a few good Paladin combos on the ground. Searchlight also supports both jobs (and in EX Mode), and Cecil can do more if the opponent is on the ground. With Searchlight, Cecil can also go for the '''[[Glitch_(Dissidia_012)#Hit_Glitch|hit glitch]]''' with Paladin Force as means to do HP damage in the neutral. |
| <references group="notes" />
| |
|
| |
|
| === Paladin === | | {{Combo-012 |
| | |data= |
| | {{Combo-012Data |
| | |combo='''Slash''' > Free Air Dash > Radiant Wings |
| | |condition=Punish starter |
| | |requirement=Ground |
| | |characters= |
| | |damage=60 + WR |
| | |damagehits=20 > 40 + WR |
| | |ex=120 |
| | |exhits=90 > 30 |
| | |meteropp= |
| | |video= |
| | |notes=Ground combo into a wall rush. Cancel Slash's recovery into Free Air Dash and close the gap to follow up with Radiant Wings. |
| | }} |
| | {{Combo-012Data |
| | |combo='''Slash''' > Free Air Dash > Sacred Cross |
| | |condition=Punish starter |
| | |requirement=Ground |
| | |characters= |
| | |damage=50 |
| | |damagehits=20 > 30 |
| | |ex=180 |
| | |exhits=90 > 90 |
| | |meteropp= |
| | |video= |
| | |notes=Ground combo with higher EX generation. |
| | }} |
| | {{Combo-012Data |
| | |combo='''Searchlight''' > Paladin Force |
| | |condition=Projectile starter |
| | |requirement= |
| | |characters= |
| | |damage=30 + HP WR |
| | |damagehits=15 > 15 + HP WR |
| | |ex=30 |
| | |exhits=0 > 30 |
| | |meteropp= |
| | |video= |
| | |notes=Solo HP combo that also wall rushes on the ground. Good for ground assist combos. Paladin Force has slightly higher bravery damage output compared to Saint's Fall, but it also has far superior tracking after Searchlight connects. Naturally, the bravery damage is slightly reduced if Cecil has to close the distance with the attack first. |
| | }} |
| | }} |
|
| |
|
| Cecil's combo game expands considerably with Slash and Searchlight, moreso the latter. While Slash provides a few self-sufficient solo combos for just the Paladin job, Searchlight also supports Dark Knight followups in and out of EX mode.
| | === Assist Combos (Dark Knight) === |
|
| |
|
| Similiar to Dark Cannon, Searchlight allows Cecil to combo into other Paladin bravery and HP attacks. Searchlight does not have to hit with all of the projectiles to combo or do a [[Glitch_(Dissidia_012)#Hit_Glitch|'''hit glitch''']] with Paladin Force, so the damage will vary if less projectiles hit.
| | Dark Knight Cecil can convert off of wall rush or with first part of Valiant Blow. Jecht assist is good for damage and Dark Cannon setups, and Cecil can stay on ground. |
|
| |
|
| Because these combos don't rely on ground, players may find more opportunities to use them.
| | {{Combo-012 |
| | |data= |
| | {{Combo-012Data |
| | |combo='''Valiant Blow (1st part)''' > {{clr|astbrv=1}} > Dash toward opponent > Dark Cannon > Shadow Bringer |
| | |condition=Poke starter |
| | |requirement=Ground |
| | |purpose={{keyword|Midscreen|midscreen=1}} staple |
| | |damage=89 + HP WR |
| | |damagehits=20 > 40 + WR (Assist) > 9+ (Dark Cannon) > 20 + HP WR |
| | |ex=42+ |
| | |exhits=?? > 12+ > 30 |
| | |meteropp= |
| | |video= |
| | |notes= |
| | }} |
| | {{Combo-012Data |
| | |combo='''Shadow Bringer''' > {{clr|wr=1}} > {{clr|astbrv=1}} > Dash toward opponent > Dark Cannon > Shadow Bringer |
| | |condition=HP starter |
| | |requirement=Ground, Wall Rush |
| | |purpose=Wall HP combo |
| | |damage=89 + HP WR |
| | |damagehits=20 + HP WR > 40 + WR (Assist) > 9+ (Dark Cannon) > 20 + HP WR |
| | |ex=72+ |
| | |exhits=30 > 12+ > 30 |
| | |meteropp= |
| | |video= |
| | |notes= |
| | }} |
| | }} |
|
| |
|
| {|class="wikitable sortable"
| | === Assist Combos (Paladin) === |
| ! scope=col | Combo
| |
| ! scope=col | Damage
| |
| ! scope=col | EX Force
| |
| ! scope=col | Notes
| |
| ! scope=col | Video
| |
| |-
| |
| | Slash > Free Air Dash > Radiant Wings || '''60 + WR''' (10, 10, 3, 3, 7, 6, 6, 6, 9 + WR) || '''120''' 90, 30 || Ground combo into a wall rush. Cancel Slash's recovery into Free Air Dash and close the gap to follow up with Radiant Wings. || video
| |
| |-
| |
| |Slash > Free Air Dash > Sacred Cross || '''50''' (10, 10, 3x5, 5, 10) || '''180''' (90, 90) || Ground combo with higher EX generation. || video
| |
| |-
| |
| |Slash > Paladin Force || '''35 + HP WR''' (10, 10, 2x5, 5) || '''30''' (0, 30) || Wall / corner only. Ground combo into HP wall rush. Cancel Slash's recovery into Paladin Force instead of Free Air Dash.
| |
| |-
| |
| |Searchlight > Radiant Wings || '''55 + WR''' (3x5, 3, 3, 7, 6, 6, 6, 9 + WR) || '''30''' (0, 30) || Highest damaging bravery followup, moreso if it wall rushes. Good for setting up ground assist combos. || video
| |
| |-
| |
| |Searchlight > Sacred Cross || '''45''' (3x5, 3x5, 5, 10) || '''90''' (0, 90) || Less bravery damage, but more EX Force. Combos into {{012aer}} assist with a chase setup. || video
| |
| |-
| |
| |Searchlight > Saint's Fall || '''25 + HP WR''' (3x5, 1x3, 2, 1x2, 3 + HP WR) || '''30''' (0, 30) || Solo HP combo with a ground wall rush. Similiar to Soul Eater, Saint's Fall is typically outclassed by other HPs in damage, range or utility, so it's not often prioritized. || video
| |
| |-
| |
| |Searchlight > Paladin Force || '''30 + HP WR''' (3x5, 2x5, 5) || '''30 (0, 30)''' || Solo HP combo that also wall rushes on the ground. Good for ground assist combos. <br>Paladin Force has slightly higher bravery damage output compared to Saint's Fall, but it also has far superior tracking after Searchlight connects. Naturally, the bravery damage is slightly reduced if Cecil has to close the distance with the attack first.
| |
| |-
| |
| |Searchlight > DC > Job Change > Paladin Arts > Paladin Force || '''60 + HP WR''' (3x5, 7, 2x4, 3x5, 2x5, 5) || '''30''' (0, 0, 30) || EX Mode only. Must be done at close range (but not at point blank) and Cecil must be at roughly the same height with the opponent. Adjust Cecil's positioning with the dodge cancel movement to meet those requirements. <br>This is one of Cecil's hardest solo combo routes, but also one of the most rewarding for him. It is possible to loop Paladin Arts a couple times this way as well. <ref group="notes">Cecil can change jobs freely during EX Mode, which lets him combo into Dark Knight braveries without doing an HP first. Start with Searchlight in Paladin, dodge cancel, then press R + square right before Cecil can attack out of a dodge. Finally, follow up immediately with Paladin Arts in Dark Knight.</ref> || video
| |
| |}
| |
|
| |
|
| === Notes ===
| | ''Main article: '''[[Cecil_Harvey_(Dissidia_012)/Combos#Assist_Combos_(Aerith)|Cecil Combos (Aerith Assist)]]''' '' |
| <references group="notes" />
| |
|
| |
|
| == Assist ==
| | Paladin Cecil uses wall rush and chase to set up HP damage with Aerith assist. If Cecil gets a ground wall rush, he can go for Slash combos to get even more bravery with Searchlight routes or EX with Sacred Cross. |
|
| |
|
| === Dark Knight ===
| | {{Combo-012 |
| Cecil can convert off of wall rush, first part of a bravery attack or by initiating chase. Dark Knight primarily converts off of the first two, while Paladin can also convert off of chase.
| | |data= |
|
| | {{Combo-012Data |
|
| | |combo='''Radiant Wings''' > {{clr|astbrv=1}} > {{clr|wr=1}} > Searchlight > Paladin Force |
| Note that Dark Flame can wall rush in stages with low ceiling such Pandaemonium - Top Floor and M.S. Prima Vista!
| | |condition=Punish Starter |
| <tabber>
| | |requirement=Air, Near Ground |
| |-|Jecht= | | |purpose=HP Combo |
| * Valiant Blow (1st part) - Jecht - Dark Cannon - Valiant Blow / Shadow Lance / Shadow Bringer / Soul Eater
| | |damage=70 + HP WR |
| * Shadow Lance / HP (wall rush) - Jecht - Dark Cannon - Valiant Blow / Shadow Lance / Shadow Bringer / Soul Eater
| | |damagehits=40 + WR > 15 > 15 + HP WR |
| * Shadow Lance / HP (wall rush) - Jecht - Paladin Arts - Radiant Wings / Sacred Cross / Paladin Force
| | |ex=60 |
| * Gravity Ball (wall rush) - Jecht - dodge cancel forward - Paladin Arts - dodge cancel - Paladin Force
| | |exhits=30 > 0 > 30 |
| * Gravity Ball (wall rush) - Jecht - ground dash - Dark Flame
| | |meteropp= |
| * Paladin Arts (dark sphere) - Jecht - Dark Cannon - Valiant Blow / Shadow Lance / Shadow Bringer / Soul Eater
| | |video= |
| | | |notes=Wall Rush, straightforward assist combo into HP. Call Aerith after last hit, but before wall rush happens. |
| |-|Yuna= | | }} |
| | | {{Combo-012Data |
| The same principles apply as with Jecht assist, except ground wall rush off of Gravity Ball requires a wall for follow-ups. Yuna holds for a shorter amount of time as well.
| | |combo='''Sacred Cross''' > {{clr|astbrv=1}} > {{clr|chase=1}} HP > HP dodged > {{clr|astbrv=1}} (HIT) > Searchlight > Paladin Force |
| | | |condition=Punish Starter |
| * Valiant Blow (1st part) - Yuna - Dark Cannon - BRV / HP
| | |requirement=Air |
| * Shadow Lance / HP (wall rush) - ground dash if at a distance - Dark Cannon - BRV / HP
| | |purpose={{keyword|Midscreen|midscreen=1}} HP Setup |
| * Valiant Blow / HP (wall rush) - ground dash if at a distance - jump - Paladin Arts - dodge cancel - BRV / HP
| | |damage=60 + HP WR |
| | | |damagehits=30 > 15 > 15 + HP WR |
| |-|Sephiroth=
| | |ex=135 |
| | | |exhits=90 > 15 (Chase) > 0 > 30 |
| Due to the assist's knockback, ending combos in Paladin Force is often most reliable. Shadow Bringer can help in safely transitioning back to Dark Knight, however.
| | |meteropp= |
|
| | |video= |
| * Valiant Blow 2nd part + Assist call upon inputting 2nd part - assist teleport - Paladin Force
| | |notes=Air chase setup into a solo HP combo. Aerith must be called quickly after Sacred Cross' last hit, because of the early chase prompt. If Cecil staggers opponent with LV2 Assist Change when '''[[Assist Storage Glitch]]''' is set up, he can go for this combo after the LV2 Assist Change. |
| * Valiant Blow 2nd part + Assist call upon inputting 2nd part - lock off - assist teleport - turn around to face opponent - Paladin Arts - BRV / HP
| | }} |
| * Shadow Bringer - Assist call after second hit of Shadow Bringer - assist teleport - Paladin Force
| | {{Combo-012Data |
| * Valiant Blow / Shadow Lance / HP (wall rush) - Sephiroth - Paladin Force
| | |combo='''Slash''' > Free Air Dash > Radiant Wings > {{clr|astbrv=1}} > {{clr|wr=1}} > Searchlight (right before landing) > Land > Searchlight (hit) > Slash > Free Air Dash > Radiant Wings |
| | | |condition=Punish Starter |
| </tabber>
| | |requirement=Ground |
| | | |purpose=BRV Damage |
| === Paladin ===
| | |damage=135 + WR |
| <tabber>
| | |damagehits=20 > 40 + WR > 15 > 20 > 40 + WR |
| |-|Aerith=
| | |ex=240 |
| Chase sequences allow Cecil to trap the opponent inside Aerith's Seal Evil or brute force an HP attack via chase. What Cecil loses in EX depletion on assist hit, he makes up for it with opportunities to set up solo combos and accumulate bravery or inflict HP damage.
| | |exhits=90 > 30 > 0 > 90 > 30 |
| | | |meteropp= |
| Any grounded wall rush Aerith combo can be followed up with a Searchlight solo combo or an HP attack. This creates '''a lot''' of variance, but they all do the same things as they normally would - The Slash solo combo adds bravery damage or EX depending on the ender (Radiant Wings or Sacred Cross respectively), but landing an HP is also an option with Paladin Force or even Shadow Bringer.
| | |video= |
| | | |notes= |
| Note, that if an opponent does not evade a chase HP attack during an Aerith setup, they can get wall rushed when close to a wall or a corner. This will net Cecil HP damage on ''top'' of the assist combo.
| | }} |
| | | }} |
| == Ground == | |
| | |
| Slash solo combos also serve as assist combo starters for Aerith, so the damage and EX gain differ with the starter. Slash > Free Air Dash > Radiant Wings is more damage, while Slash > Free Air Dash > Sacred Cross is more EX.
| |
| | |
| {|class="wikitable sortable"
| |
| ! scope=col|Starter
| |
| ! scope=col|Combo
| |
| ! scope=col|Damage
| |
| ! scope=col|EX Force
| |
| ! scope=col|Notes
| |
| ! scope=col|Video
| |
| |- | |
| |rowspan="2"|Lightning Rise || -- || 30 (3, 3, 5, 4, 4, 11) || 90 || Not often used due to Lightning Rise's shortcomings, but Cecil can follow up after setting up Aerith assist with a chase HP. || --
| |
| |- | |
| |Aerith > Chase > Chase HP > opp dodged > Searclight > Paladin Force || '''60 + HP WR''' (30 > 3x5 > 2x5, 5) || '''135''' (90, 15 chase, 30) || Chase setup. Call Aerith before the chase prompt appears, then proceed to enforce an HP attack on the opponent. || video
| |
| |- | |
| |rowspan="2"|Slash > Free Air Dash > Radiant Wings || -- || 60 (10, 10, 3, 3, 7, 6, 6, 6, 9 + WR) || '''120''' (90, 30) || Higher damaging starter combo. || -- | |
| |- | |
| |Aerith > WR > Searchlight (right before landing) > Land > Searchlight (hit) > Slash > Free Air Dash > Radiant Wings || '''135 + WR''' (3x5 > 10, 10 > 40 + WR) || '''240''' (120, 0, 90, 30) || Bravery damage. || video
| |
| |- | |
| |rowspan="3"|Slash > Free Air Dash > Sacred Cross || -- || 50 (10, 10, 3x5, 5, 10) || 180 (90, 90) || No wall rush, Sacred Cross ender prioritizes EX Force generation. || --
| |
| |-
| |
| |Aerith > Chase > Chase HP > opp dodged > Searchlight > Sacred Cross || '''95''' (50 > 3x5 > 3x5, 5, 10) || '''285''' (180, 15 chase, 0, 90) || EX focused combo with no HP at the end. || video | |
| |-
| |
| |Aerith > Chase > Chase HP > opp dodged > Searchlight > Paladin Force || '''80 + HP'''(50 > 3x5 > 2x5, 5) || '''225''' (180, 15 chase, 30) || HP ender sacrifices brv damage and EX. || video
| |
| |-
| |
| |rowspan="2"|Dark Step || -- || 27 (5, 10, 1x2, 10) || 90 || Chase setup. Call Aerith before Cecil becomes grounded, then initiate chase. || --
| |
| |-
| |
| |Aerith > Land > Chase > Chase HP > opp dodged > Searchlight > Paladin Force || '''57''' (27, 3x5 > 2x5, 5 + HP WR) || '''135''' (90, 15 chase, 0, 30) || -- || video
| |
| |} | |
| | |
| == Aerial ==
| |
| | |
| {|class="wikitable sortable"
| |
| ! scope=col|Starter
| |
| ! scope=col|Combo
| |
| ! scope=col|Damage
| |
| ! scope=col|EX Force
| |
| ! scope=col|Notes
| |
| ! scope=col|Video
| |
| |- | |
| | rowspan="4"|Sacred Cross || -- || 30 (3x5, 5, 10) || 90 || Air combo starter. Doesn't require a wall and Sacred Cross is one of Cecil's better aerial moves, which will see use often. || --
| |
| |- | |
| |Aerith > Chase > Chase HP > Opp dodged > Aerith (hit) > Searchlight > Paladin Force || '''60 + HP WR''' (3x5, 5, 10 > 3x5 > 2x5, 5 + HP WR) || '''135''' (90, 15 chase, 30) || Air chase setup into a solo HP combo. Aerith must be called quickly after Sacred Cross' last hit, because of the early chase prompt. || video | |
| |-
| |
| |Aerith > Chase > Chase HP > Opp dodged > Aerith (hit) > Searchlight > Sacred Cross || '''75''' (3x5, 5, 10 > 3x5 > 3x5, 5, 10) || '''195''' (90, 15 chase, 90) || Air chase setup into solo BRV combo. Ending the combo with Sacred Cross generates a lot more EX Force. || video
| |
| |-
| |
| |Aerith > [[Chase_(Dissidia_012)#Empty_Chase|'''Empty Chase''']] > WR (ground) > Aerith (hit) > Jump > Searchlight > Land > Slash > Free Air Dash > Sacred Cross || '''95''' (3x5, 5, 10 > 3x5 > 10, 10 > 3x5, 5, 10) || '''270''' (90, 0, 90, 90) || Air-to-ground assist combo with a solo combo ender. This one has highest EX gain. Must be near ground for empty chase to cause wall rush. Delay the chase a little bit to force the grounded wall rush from higher altitude. || video | |
| |-
| |
| |rowspan="3"|Radiant Wings || -- || 40 + WR (3, 3, 7, 6, 6, 6, 9 + WR) || 30 || Wall Rush. Aerith is too slow to convert off of Radiant Wings' first part unless done pre-emptively as a punish. || --
| |
| |-
| |
| |Aerith > WR > Searchlight > Paladin Force || '''65 + HP WR''' (40 + WR > 3x5 > 2x5, 5 + HP WR) || '''60''' (30, 0, 30) || Wall Rush, basic assist combo into HP. Call Aerith after last hit, but before wall rush happens. || video
| |
| |-
| |
| |Aerith > WR > Searchlight (right before landing) > Land > Slash > Free Air Dash > Radiant Wings || '''115 + WR''' (40 + WR > 3x5 > 10, 10 > 40 + WR) || '''150''' (30, 0, 90, 30) || Wall Rush. Slash combo that prioritises bravery damage. || video
| |
| |- | |
| |} | |
|
| |
| | |
| |-|Tidus=
| |
| * Searchlight - Tidus (air) - BRV / HP
| |
| * Radiant Wings (1st part) - Tidus (air) - BRV / HP
| |
| * Radiant Wings (wall rush) - Tidus (ground) - dodge cancel - Searchlight - land on ground and approach - Slash - Free Air Dash cancel and dash for a split second - Radiant Wings or Sacred Cross
| |
| * Sacred Cross (near wall) - Assist call - empty chase - BRV / Paladin Force
| |
| * Sacred Cross (above opponent on the ground) - empty chase - Tidus (ground) - Free Air Dash - Searchlight - land on ground and approach
| |
| * Slash - Free Air Dash cancel and dash for a split second - Radiant Wings or Sacred Cross
| |
| * Dark Step (1st part) - Tidus - BRV / HP
| |
| | |
| |-|Yuna= | |
| * Searchlight - Yuna (air) - Free Air Dash if at a distance - BRV / HP
| |
| | |
| * Radiant Wings (1st part) - Yuna (air) - BRV / HP
| |
| | |
| * Radiant Wings (right before wall rush) - Yuna (air) - BRV / HP. Being closer to ground makes Yuna more likely to connect.
| |
| | |
| * Sacred Cross (near wall) - Assist call - empty chase - BRV / Paladin Force
| |
| | |
| * Dark Step (1st part, near wall) - Yuna (air) - BRV / HP
| |
| | |
| * Paladin Force (after BRV damage, but before HP hit) - Yuna (air) - Sacred Cross (if far from ground) / Paladin Force (if close to ground)
| |
| | |
| </tabber>
| |
|
| |
|
| = Builds = | | == Builds == |
| <tabber> | | <tabber> |
| |-|Side by Side (Dark Knight)= | | |-|Side by Side (Dark Knight)= |
| Line 611: |
Line 832: |
| </tabber> | | </tabber> |
|
| |
|
| = Assists = | | == Assists == |
|
| |
|
| == Cecil Assist Data == | | === Cecil Assist Data === |
|
| |
|
| {{012Assist | | {{012Assist |
| Line 646: |
Line 867: |
| }} | | }} |
|
| |
|
| == Assists (Dark Knight) == | | === Synergies (Dark Knight) === |
| <tabber> | | <tabber> |
| |-|Jecht= | | |-|Jecht= |
| Line 658: |
Line 879: |
| </tabber> | | </tabber> |
|
| |
|
| == Assists (Paladin) == | | === Assists (Paladin) === |
| <tabber> | | <tabber> |
| |-|Aerith= | | |-|Aerith= |
| Line 671: |
Line 892: |
| </tabber> | | </tabber> |
|
| |
|
| = References = | | == References == |
| <references /> | | <references /> |
|
| |
|
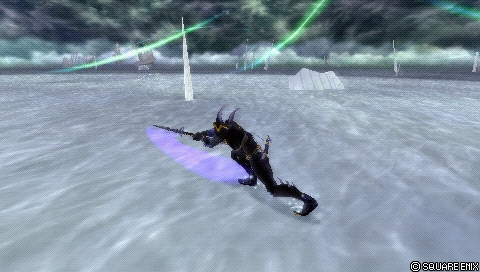

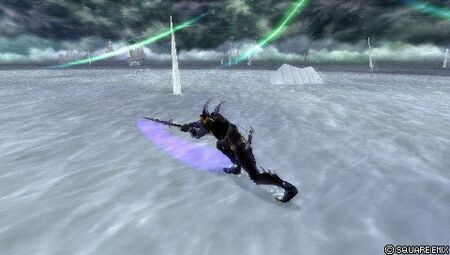

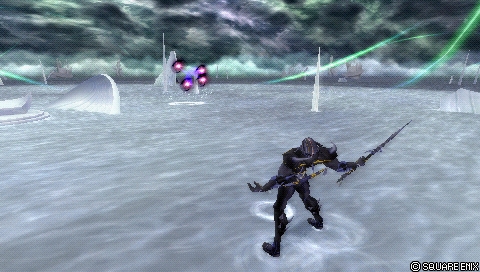
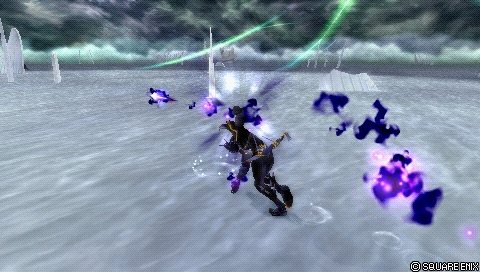
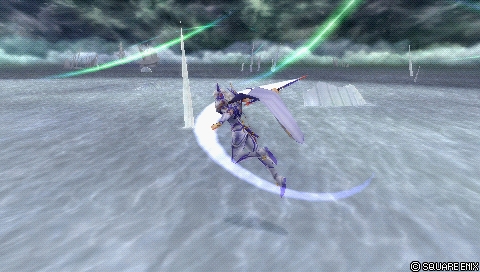
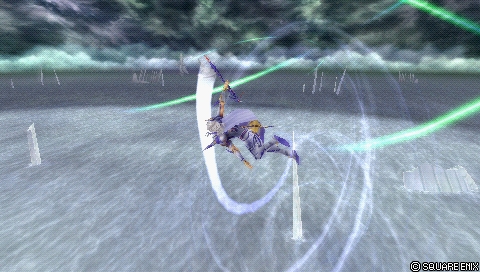
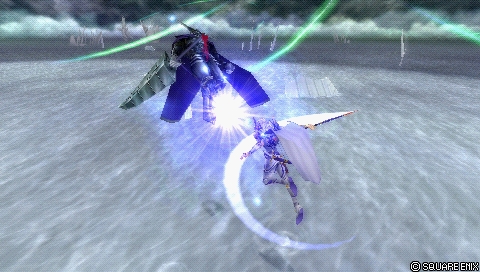
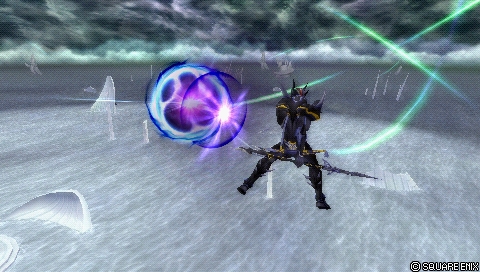
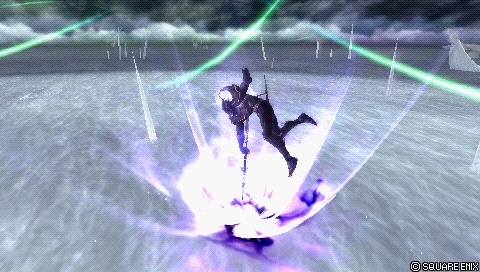
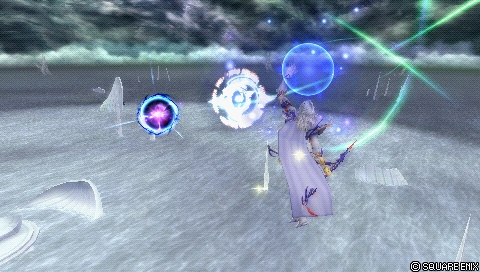
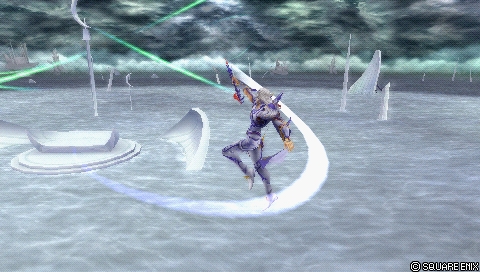
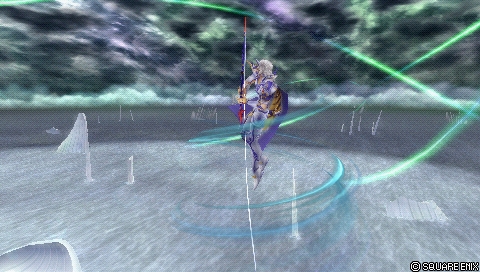
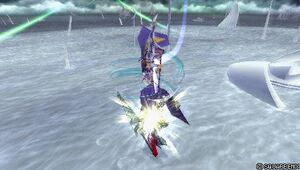
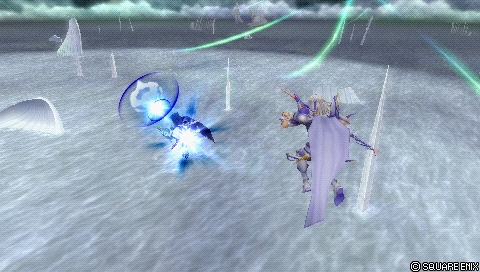
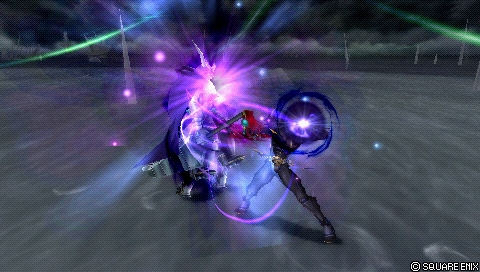
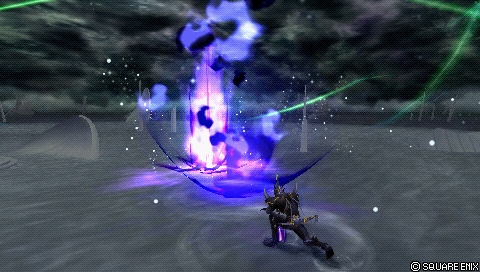
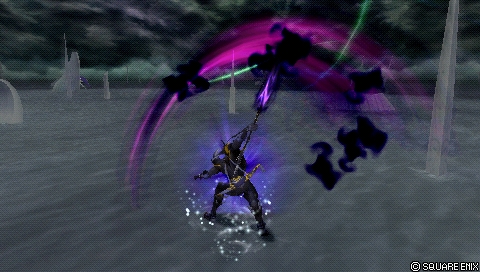
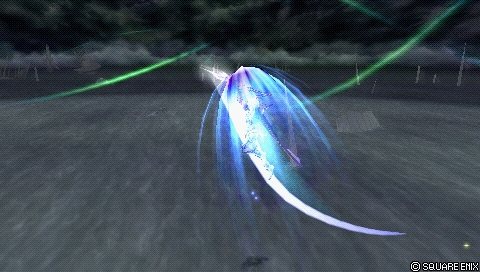
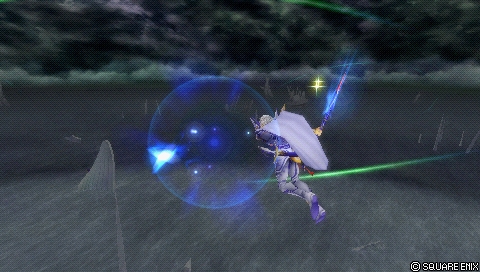
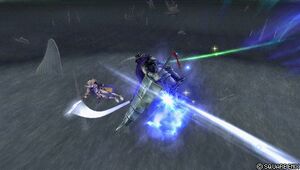
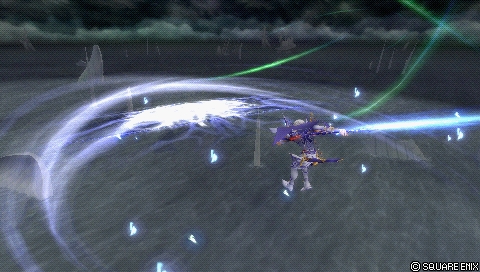
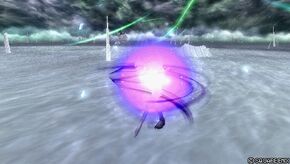
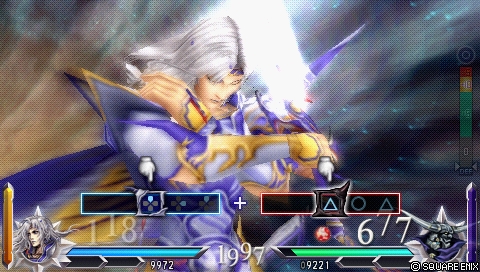
 Sniper Eye
 BRV = 0
 Blue Gem