|
|
| (30 intermediate revisions by the same user not shown) |
| Line 1: |
Line 1: |
| [[Category:Dissidia 012 Final Fantasy]] | | [[Category:Dissidia 012 Final Fantasy]] |
| | {{012CharNavSqu}} |
| | |
|
| |
|
| <img>https://resources.dissidia.wiki/ddff/chara-icon/ddff-icon-squall.png</img>
| |
| {{CharacterInfo | | {{CharacterInfo |
| | |portrait=https://resources.dissidia.wiki/ddff/portraits/ddff-port-squall.png |
| |name=Squall Leonhart (スコール・レオンハート) | | |name=Squall Leonhart (スコール・レオンハート) |
| |origin=Final Fantasy VIII | | |origin=Final Fantasy VIII |
| |weapon=Swords, Daggers, Katanas, Guns
| | |
| |armor=Shields, Bangles, Hats, Helms, Clothing,<br>Light Armor, Large Shields, and Chestplates
| |
| |atk=109 (Low) | | |atk=109 (Low) |
| |def=111 (Average) | | |def=111 (Average) |
| Line 13: |
Line 14: |
| |fall=81 (Average) | | |fall=81 (Average) |
| |fallr=38 (Average) | | |fallr=38 (Average) |
| | |fastestbrv=13F (Upper Blues, Solid Barrel) |
| | |fastesthp=41F (Blasting Zone) |
| | |1hithp=Yes (Multiple) |
| | |hplinks=Yes (Combos only) |
| | |cmdblock=No |
| | |weapon=Daggers <br>Guns <br>Katanas <br>Swords |
| | |armor=Bangles <br>Chestplates <br>Clothing <br>Hats <br>Helms <br>Large Shields <br>Light Armor <br>Shields |
| |exclusives=Revolver, Twin Lance, Punishment, Lionheart | | |exclusives=Revolver, Twin Lance, Punishment, Lionheart |
| | |unlock= |
| | |alignment=Cosmos |
| | |vajp=[https://en.wikipedia.org/wiki/Hideo_Ishikawa Hideo Ishikawa] |
| | |vaeng=[https://en.wikipedia.org/wiki/Doug_Erholtz Doug Erholtz] |
| }} | | }} |
| | |
| | == Overview == |
| | |
| | Squall is a close-range {{keyword|all-rounder|all-rounder=1}}, who takes advantage of his mobility and various {{keyword|pokes|poke=1}} to succeed. |
| | |
| | Let's start on the ground: Solid Barrel and Upper Blues are fast pokes with low {{keyword|recovery|recovery=1}}, which are great for filling assist gauge and starting offense. Thunder Barret pulls opponents in for a combo, and Blasting Zone's strong {{keyword|tracking|tracking=1}} and tall {{keyword|hitbox|hitbox=1}} punish careless dodges. In the air, Heel Crush and Aerial Circle go through low priority magic. Fire Barret supplements Squall's offense. And lastly, Beat Fang is a textbook example of a strong poke; A 15-frame move with notable tracking, low recovery and plenty of combo potential. |
| | |
| | Squall works well with system mechanics, so '''[[Multiplayer_Build_Guide_(Dissidia_012)#Hybrid|hybrid builds]]''' are commonly used. His delayable combo attacks are great for various assists. Ground combos with Revolver Drive generate lots of EX as well. Squall is one of the strongest users of '''[[Multiplayer_Build_Guide_(Dissidia_012)#Depletion|meter depletion builds]]''' with {{012yuna}} assist, as well. Even '''[[Multiplayer_Build_Guide_(Dissidia_012)#Side_by_Side|Side by Side builds]]''' aren't wasted on him since his HP attacks (Blasting Zone, Aerial Circle) work well enough in {{keyword|neutral|neutral=1}}. '''[[Assist_(Dissidia_012)#LV2_Assist_Change|LV2 Assist Change]]''' counters with Aerial Circle are also reliable... |
| | |
| | Squall has a few issues though; He has low EX gain without EX Cores and ground combos. He struggles to hit fast fallers who air dodge (e.g. {{012pri}}). Most of his moves miss against high speed characters, such as {{012ok}} and {{012tid}}. This is a problem, because Squall relies on dodges to stay safe, but they leave him open to attacks with little recourse. '''[[Multiplayer_Build_Guide_(Dissidia_012)#Adamant_Chains|Adamant Chains build]]''' helps, but cuts into his damage and meter depletion. Furthermore, Squall's air assist combo routes are limited and cannot always capitalize on '''[[Bravery_(Dissidia_012)#Bravery_Break|Bravery Breaks]]''' because of this. He cannot easily punish blocks or {{keyword|whiffs|whiff=1}} outside Beat Fang's range, either. |
| | |
| | In competitive play, Squall has a long history of being high tier. He has a low skill floor and reliable tools for many situations. This makes him a good recommendation for new and experienced players alike, even if some characters can run circles around him. |
|
| |
|
| {{ProConTable | | {{ProConTable |
| Line 20: |
Line 44: |
| *'''Defensive punishment''' is relatively easy and effective thanks to Beat Fang, Blasting Zone and Aerial Circle. | | *'''Defensive punishment''' is relatively easy and effective thanks to Beat Fang, Blasting Zone and Aerial Circle. |
| *'''Combo potential''' is great, particularly close to the ground. A variety of solo combos and assist conversions are available and he can combo into HPs reliably on the ground as well. | | *'''Combo potential''' is great, particularly close to the ground. A variety of solo combos and assist conversions are available and he can combo into HPs reliably on the ground as well. |
| *'''Assist synergy'''. Squall is great at using several assists to convert to HP damage thanks to multi-part attacks and wall rush capabilities. | | *'''Assist synergy''' is strong and diverse thanks to multi-part attacks and wall rush. |
| *'''EX Mode''' increases Squall's gunblade's range and damage exponentially. | | *'''EX Mode''' increases Squall's gunblade's range and damage exponentially. |
| *'''Meter depletion''', particularly with Yuna assist is among the strongest in the game. | | *'''Meter depletion''', particularly with Yuna assist is among the strongest in the game. |
| *'''Versatile builds''' can support Squall with a variety of different playstyles and matchups. | | *'''Versatile builds''' can support Squall with a variety of different playstyles and matchups. |
| |cons=*'''Average post-dodge defense'''. Beat Fang clashes being his primary defensive tool to cover for his floaty air dodges make Squall more vulnerable to [[Dodge_(Dissidia_012)#Dodge_punishment|'''dodge punishes''']]. | | |cons=*'''Average post-dodge defense'''. To cover for his floaty air dodges, Squall has to clash with Beat Fang or compromise reward on hit with Adamant Chains build. |
| *'''Lackluster EX generation in the air''' can lead Squall to rely on EX Cores to stay competitive with EX meter. | | *'''Lackluster EX generation in the air''' can lead Squall to rely on EX Cores to keep up with EX gauge. |
| *'''Prone to whiffing against fast characters'''. Dodge punishing fast fallers such as {{012tid}} and {{012pri}} and hitting fast runners such as {{012ok}} can put Squall at great risk for engaging first. | | *'''Prone to {{keyword|whiffing|whiff=1}} against fast movement''' - Squall takes bigger risks against fast fallers (Tidus, Prishe) and fast runners (Onion Knight, Tifa). |
| *'''Below average air combo extensions'''. With limited ways to extend aerial assist combos without wall rush, Squall's bravery damage output can suffer in air-centric fights. | | *'''Below average air combo extensions'''. With limited ways to extend aerial assist combos without wall rush, Squall's bravery damage output can suffer in air-centric fights. |
| }} | | }} |
|
| |
|
| = Overview = | | == Bravery Attacks == |
| Squall is a flexible close range character who can engage from further away and approach from a variety of angles. Above average running speed, fast multi-part bravery attacks, strong anti-air, strong combo & meter drain potential and Ranged Low block properties, Squall has a lot going for him.
| |
| | |
| On the ground, he can hit people outside of their effective range to lead into combos, easily anti-air and catch their dodges as well as play the conventional close range interactions. Air combat is handled with good usage of air movement, single hit HPs and the infamous Beat Fang. Building assist meter is consistent, with fast bravery whiffs and retaliatory HPs when using Side by Side. EX generation is weak in the air, but finishing ground attacks and investing into EX Core absorption with his exclusive weapon can make up the difference. Due to his holding potential, Squall can work with a variety of assists, though HP follow-ups may suffer depending on position and assist choice.
| |
| | |
| Squall is versatile and relatively easy to use. But he doesn't have a way to punish opponents in the air for using low recovery melee attacks outside of his blocking range. This is felt most with his Aerial Circle HP that pulls the opponent in. He also struggles to punish air dodges effectively against fall fallers such as Kefka or Prishe. Similiarly, fast running speed can make most of his moves whiff effortlessly. On top of that, his primary way of protecting himself after a dodge is clashing with a bravery attack. Combined with his floaty air dodges, the reliance on dodge cancels can put Squall at great risk for any approach attempts.
| |
| | |
| Squall has been ranked as a high tier character throughout the game's competitive lifespan. In rulesets where meter depletion is not allowed, his effectiveness falls off a little. Nevertheless, his consistency and ease of use make him a good pick for new and experienced players alike, even if a few matchups can cripple him a lot.
| |
| | |
| = Bravery Attacks = | |
| During EX Mode, damage multipliers inside brackets [ ] hit twice instead of once. | | During EX Mode, damage multipliers inside brackets [ ] hit twice instead of once. |
|
| |
|
| == Ground == | | === Ground === |
|
| |
|
| <tabber> | | <tabber> |
| Line 54: |
Line 69: |
| |effect=Wall Rush | | |effect=Wall Rush |
| |cp=30 (15) | | |cp=30 (15) |
| | |image=https://dissidia.wiki/images/b/bd/Brv_squall_upper_blues.jpeg |
| | |imgpos=46% |
| | |cancels=Dodge |
| | |asthit= |
| | |level=1 |
| | |ap=100 |
| | |gametext=[Close] Leap into the air. <br>Quick launch, easy wall rush. |
| }} | | }} |
| ''[Close] Leap into the air. Quick launch, easy wall rush.''
| |
|
| |
|
| A quick forward slash with combo potential. Upper Blues is commonly used as a poke, whiff punisher, in combos and to fill assist meter faster with dodge cancels. Due to the forward movement, it is more reliable in catching moving opponents than his other ground braveries. And while it's not his strongest anti-air attack, it can still serve as one against opponents who are barely hovering off the ground. | | A quick forward slash with combo potential. Upper Blues is commonly used as a poke, whiff punisher, in combos and to fill assist meter faster with dodge cancels. Due to the forward movement, it is more reliable in catching moving opponents than his other ground braveries. And while it's not his strongest anti-air attack, it can still serve as one against opponents who are barely hovering off the ground. |
|
| |
|
| On hit, Upper Blues can reliably wall rush on the floor for pressure or assist combos. Delaying the second hit allows comboing into Beat Fang with a dodge cancel for a higher damaging combo with more assist meter gain. | | On hit, Upper Blues can reliably wall rush on the floor for pressure or assist combos. Delaying the second hit allows comboing into Beat Fang with a dodge cancel for a higher damaging combo with more assist meter gain. |
|
| |
|
| |
|
| A good bravery to have in most match-ups and builds. | | A good bravery to have in most match-ups and builds. |
| Line 73: |
Line 93: |
| |effect=Chase | | |effect=Chase |
| |cp=30 (15) | | |cp=30 (15) |
| | |image=https://dissidia.wiki/images/c/c8/Brv_squall_solid_barrel.jpeg |
| | |imgpos= |
| | |cancels= |
| | |asthit= |
| | |level=3 |
| | |ap=100 |
| | |gametext=[Close] Repeated slashes. <br>Short range; quick and powerful. |
| }} | | }} |
| ''[Close] Repeated slashes. Short range; quick and powerful.''
| |
|
| |
|
| Another fast bravery with shorter reach than Upper Blues, but better EX generation. Much like Upper Blues, this can be dodge cancelled quickly to generate assist meter and cancelling the third hit even enables the well known "golden combo" that capitalises on landing lag. | | Another fast bravery with shorter reach than Upper Blues, but better EX generation. Much like Upper Blues, this can be dodge cancelled quickly to generate assist meter and cancelling the third hit even enables the well known "golden combo" that capitalises on landing lag. |
| Line 91: |
Line 117: |
| |effect=- | | |effect=- |
| |cp=30 (15) | | |cp=30 (15) |
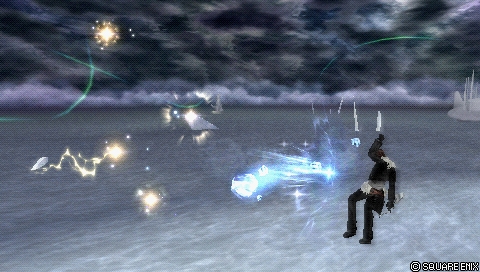
| | |image=https://dissidia.wiki/images/a/ad/Brv_squall_blizzard_barret.jpeg |
| | |imgpos=55% |
| | |cancels=Dodge |
| | |asthit= |
| | |level=1 |
| | |ap=90 |
| | |gametext=[Long] Fire one ice bullet. <br>Long range, strong homing. |
| }} | | }} |
| ''[Long] Fire one ice bullet. Long range, strong homing.''
| |
|
| |
|
| A slow single hit projectile with low priority. The tracking is deceptively good and the hit stun is serviceable for combo purposes. At particular spacings, it can enable combo extensions with Thunder Barret or even act as a combo starter. | | A slow single hit projectile with low priority. The tracking is deceptively good and the hit stun is serviceable for combo purposes. At particular spacings, it can enable combo extensions with Thunder Barret or even act as a combo starter. |
| Line 107: |
Line 139: |
| |effect= | | |effect= |
| |cp=30 (15) | | |cp=30 (15) |
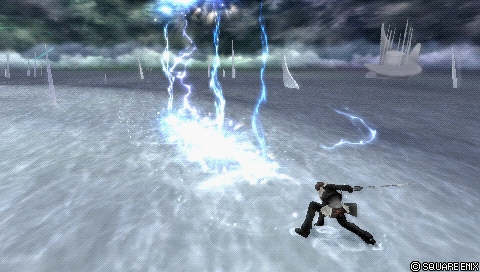
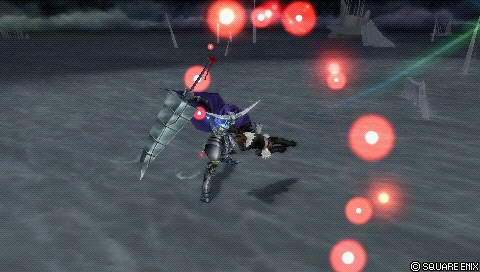
| | |image=https://dissidia.wiki/images/8/88/Brv_squall_thunder_barret.jpeg |
| | |imgpos= |
| | |cancels=Dodge, Attack (Hit) |
| | |asthit= |
| | |level=9 |
| | |ap=90 |
| | |gametext=[Mid] Lightning that draws foes. <br>Good start for combos. |
| }} | | }} |
| ''[Mid] Lightning that draws foes. Good start for combos''
| |
|
| |
|
| A signature Squall combo starter. Four vertical lightning bolts are cast in front of Squall, which can act as a longer range disjointed poke, anti-air, dodge punisher and as a combo starter. Squall can cancel the recovery on whiff into attacks, dodges and blocks. But on hit this can be cancelled much earlier to perform solo combos, including his staple HP attacks. | | A signature Squall combo starter. Four vertical lightning bolts are cast in front of Squall. Thunder Barret works as a longer range disjointed poke, anti-air, dodge punisher and as a combo starter. Squall can cancel the recovery on whiff into attacks, dodges and blocks. But on hit this can be cancelled much earlier to perform solo combos, including his staple HP attacks. |
|
| |
|
| Thunder Barret is a great move for Squall in most match-ups as it can control a decent amount of space with good reward on hit. | | Thunder Barret is a great move for Squall in most match-ups as it can control a decent amount of space with good reward on hit. |
| Line 121: |
Line 159: |
| |startup=33F | | |startup=33F |
| |type=Magical | | |type=Magical |
| |priority=Ranged Low, Mid (only thunder) | | |priority=Ranged Low <br>Ranged Mid (thunder) |
| |ex=60~90 | | |ex=60~90 |
| |effect=Chase | | |effect=Chase |
| |cp=30 (15) | | |cp=30 (15) |
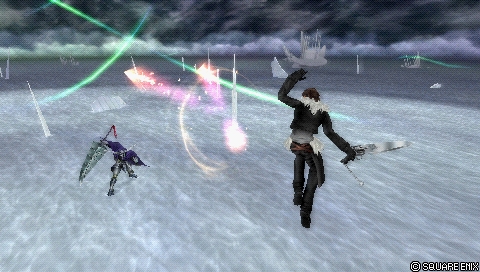
| | |image=https://dissidia.wiki/images/7/7b/Brv_squall_fusillade.jpeg |
| | |imgpos= |
| | |cancels=Dodge |
| | |asthit= |
| | |level=20 |
| | |ap=100 |
| | |gametext=[Mid] Magic barrage. <br>Can combo without hitting. |
| }} | | }} |
| ''[Mid] Magic barrage. Can combo without hitting.''
| |
|
| |
|
| A combination of magic projectiles with good EX generation. The startup, low priority and lack of dodge cancel windows do not lend to fighting at a range. However, the first two projectiles can be reasonably safe to throw out at a distance and they can be confirmed into an assist combo on hit. Each projectile can be input with a bit of delay to help with this. In addition, the mid priority thunder bolt can be used as an effective -albeit predictable- method to force a dodge from the opponent. Depending on the opponent, punishing a dodge or what comes after it is possible with an assist, creating a more favorable situation for Squall if he performs this move uninterrupted. | | A combination of magic projectiles with good EX generation. The startup, low priority and lack of dodge cancel windows do not lend to fighting at a range. However, the first two projectiles can be reasonably safe to throw out at a distance and they can be confirmed into an assist combo on hit. Each projectile can be input with a bit of delay to help with this. In addition, the mid priority thunder bolt can be used as an effective -albeit predictable- method to force a dodge from the opponent. Depending on the opponent, punishing a dodge or what comes after it is possible with an assist, creating a more favorable situation for Squall if he performs this move uninterrupted. |
| Line 135: |
Line 179: |
| </tabber> | | </tabber> |
|
| |
|
| == Aerial == | | === Aerial === |
| <tabber> | | <tabber> |
| |-|Heel Crush= | | |-|Heel Crush= |
| Line 146: |
Line 190: |
| |effect=Block Low (Ranged), Wall Rush | | |effect=Block Low (Ranged), Wall Rush |
| |cp=30 (15) | | |cp=30 (15) |
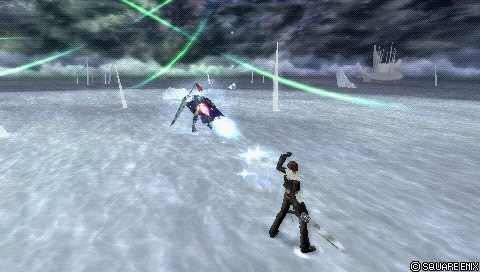
| | |image=https://dissidia.wiki/images/b/b9/Brv_squall_heel_crush.jpeg |
| | |imgpos= |
| | |cancels=Dodge |
| | |asthit= |
| | |level=1 |
| | |ap=100 |
| | |gametext=[Mid] Unleash heel drop. <br>Slow start, fast movement. |
| }} | | }} |
| ''[Mid] Unleash heel drop. Slow start, fast movement.''
| |
|
| |
|
| An advancing mid priority attack. Squall can block Ranged Low priority attacks during the startup animation such as {{012lig}}'s Thunder or {{012yuna}}'s Heavenly Strike. Heel Crush works as a callout against these kinds of attacks and because of the mid priority, it will also stagger opponents looking to block Beat Fang. This move can be dodge cancelled somewhat early during the recovery animation, but the lengthy startup gives the opponent time to prepare for a counter attack. | | An advancing mid priority attack. Squall can block Ranged Low priority attacks during the startup animation, such as {{012lig}}'s Thunder or {{012yuna}}'s Heavenly Strike. Heel Crush works as a callout against these kinds of attacks and because of the mid priority, it will also stagger opponents looking to block Beat Fang. This move can be dodge cancelled somewhat early during the recovery animation, but the lengthy startup gives the opponent time to prepare for a counter attack. |
|
| |
|
| Heel Crush is often used in conjunction with Beat Fang and Fire Barret to create mixups and otherwise create meaningful interactions at close range. It is not mandatory for all matchups. | | Heel Crush is often used in conjunction with Beat Fang and Fire Barret to create mixups and otherwise create meaningful interactions at close range. It is not mandatory for all matchups. |
| Line 162: |
Line 212: |
| |effect=Wall Rush | | |effect=Wall Rush |
| |cp=30 (15) | | |cp=30 (15) |
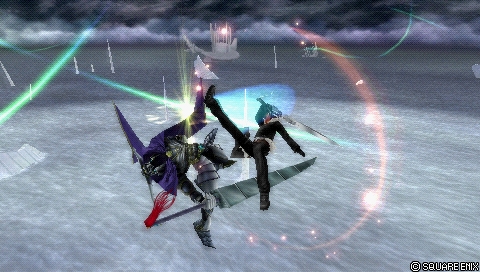
| | |image=https://dissidia.wiki/images/b/b8/Brv_squall_beat_fang.jpeg |
| | |imgpos= |
| | |cancels=Dodge |
| | |asthit= |
| | |level=1 |
| | |ap=100 |
| | |gametext=[Close] Float, then strike down foe. <br>Short reach, but fast. |
| }} | | }} |
| ''[Close] Float, then strike down foe. Short reach, but fast.''
| |
|
| |
|
| The defacto Squall bravery. A poke, a great whiff punisher, a flexible combo starter with an occasional guard crossup. Beat Fang shares many characteristics with his ground braveries, such as it's speed, multi-hit attacks with lenient input window and combo potential. But because this is Squall's only quick melee bravery, it is at the heart of his aerial combat. | | The defacto Squall bravery. Press Circle {{pspcir}} 4 times in total to complete the attack. A poke, a great whiff punisher, a flexible combo starter with an occasional guard cross-up. Beat Fang shares many characteristics with Squall's ground braveries, such as it's speed, multi-hit attacks with lenient input window and combo potential. Because this is Squall's only quick melee bravery, it is at the heart of his aerial combat. |
|
| |
|
| Beat Fang has a lot of utility. It's fast startup and early dodge cancel window make it great for building assist meter on whiff. The homing movement during startup lets him punish missed attacks with ease. It even has a hitbox that can hit behind a blocking opponent in close range seemingly at random, ignoring the guard attempt altogether. | | Beat Fang has a lot of utility. Its fast startup and early dodge cancel window make it great for building assist gauge on whiff. The homing movement during startup lets him punish missed attacks with ease. It even has a hitbox that can hit behind a blocking opponent in close range seemingly at random, ignoring the guard attempt altogether. |
|
| |
|
| Once Beat Fang connects, the second upward slash can evade incoming attacks, namely {{012emp}}'s Dreary Cell or assists that were called in an attempt to interrupt Beat Fang. Wall rushing near the ground not only enables a variety of assist followups, but also allows Squall to impose defensive decision making on the opponent and potentially repeat the situation, akin to the [https://glossary.infil.net/?t=Okizeme '''okizeme'''] concept in other fighting games. Because of the way camera works, the knocked down opponent may also have to deal with crossed up directional attack inputs 1-2 times depending on how Squall moves afterwards, further confusing his prey. | | Once Beat Fang connects, the second upward slash can evade incoming attacks, namely {{012emp}}'s Dreary Cell or assists that were called in an attempt to interrupt Beat Fang. Wall rushing near the ground not only enables a variety of assist followups, but also allows Squall to impose defensive decision making on the opponent and potentially repeat the situation, akin to the [https://glossary.infil.net/?t=Okizeme '''okizeme'''] concept in other fighting games. Because of the way camera works, the knocked down opponent may also have to deal with crossed up directional attack inputs 1-2 times depending on how Squall moves afterwards, further confusing his prey. |
|
| |
|
| There are a few things Squall players should be wary of, however. For one, Squall can only cancel Beat Fang's recovery into an air dodge which reduces ambiguity for the opponent. Despite the tracking during startup, Beat Fang has no hitbox below Squall. This means it can and will miss against dashes, air dodges with fast fall speed and fast runners on the ground such as {{012tid}} and {{012tifa}}. And if Squall commits to the finishing series of blows, he can be easily staggered with a LV2 Assist Change for a punish. Given how much Squall relies on this move, these factors can greatly reduce his hit rate and bravery damage output. Since critical hits are not distributed in a binary "all or nothing" fashion, the damage increase from critical hits can fluctuate greatly. | | There are a few things Squall players should be wary of. For one, Squall can only cancel Beat Fang's recovery into an air dodge, which reduces ambiguity for the opponent. Despite the tracking during startup, Beat Fang has no hitbox below Squall. This means it can miss against dashes, air dodges with fast fall speed and fast runners on the ground such as {{012tid}} and {{012tifa}}. And if Squall commits to the finishing series of blows, he can be easily staggered with a LV2 Assist Change for a punish. Considering how much Squall relies on this move, these factors can greatly reduce his hit rate and bravery damage output. Since critical hits are not distributed in a binary "all or nothing" fashion, the damage increase from critical hits can fluctuate greatly. |
|
| |
|
| Regardless, Beat Fang is one of Squall's most important and effective moves. Anything Solid Barrel and Upper Blues could achieve is relegated to it in the air and much of his success hinges on how he can leverage Beat Fang to his advantage. | | Regardless, Beat Fang is one of Squall's most important and effective moves. Anything Solid Barrel and Upper Blues could achieve is relegated to it in the air. Much of Squall's success hinges on how he well he uses Beat Fang. |
|
| |
|
| |-|Mystic Flurry= | | |-|Mystic Flurry= |
| Line 184: |
Line 240: |
| |effect=Wall Rush | | |effect=Wall Rush |
| |cp=30 (15) | | |cp=30 (15) |
| | |image=https://dissidia.wiki/images/3/3f/Brv_squall_mystic_flurry.jpeg |
| | |imgpos=65% |
| | |cancels=Dodge |
| | |asthit= |
| | |level=6 |
| | |ap=90 |
| | |gametext=[Mid] Magic barrage. <br>Can combo without hitting. |
| }} | | }} |
| ''[Mid] Magic barrage. Can combo without hitting.''
| |
|
| |
|
| A barrage of multi hitting low priority projectiles that stay in place after traversing a short distance. Mystic Flurry is not commonly prioritized in competitive play. | | A barrage of multi hitting low priority projectiles that stay in place after traversing a short distance. Mystic Flurry is not commonly prioritized in competitive play. |
| Line 204: |
Line 266: |
| |effect=- | | |effect=- |
| |cp=30 (15) | | |cp=30 (15) |
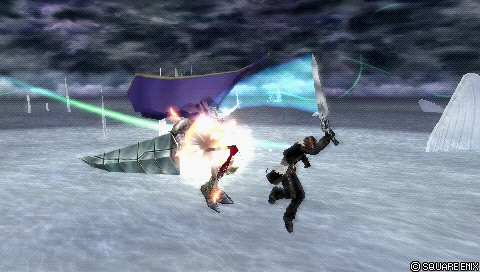
| | |image=https://dissidia.wiki/images/d/dc/Brv_squall_fire_barret.jpeg |
| | |imgpos= |
| | |cancels=Dodge |
| | |asthit= |
| | |level=25 |
| | |ap=90 |
| | |gametext=[Long] Launch multiple fireballs. <br>Normal speed, strong homing. |
| }} | | }} |
| ''[Long] Launch multiple fireballs. Normal speed, strong homing.''
| |
|
| |
|
| Three homing fireballs pursue the opponent for a period of time. Fire Barret is often used in conjunction with Beat Fang to build assist meter more efficiently in the air. The range is good for occupying space and creating a potential combo conversion later. Each projectile inflicts a decent amount of hit stun which is difficult to spontaneously react to, but it does allow Squall to combo into other attacks if the player has a good read on the situation. And even if Fire Barret is used up close, the recovery can be cancelled into an attack -usually Beat Fang- for additional damage on hit. | | Three homing fireballs pursue the opponent for a period of time. Fire Barret is often used in conjunction with Beat Fang to build assist meter more efficiently in the air. The range is good for occupying space and creating a potential combo conversion later. Each projectile inflicts a decent amount of hit stun which is difficult to spontaneously react to, but it does allow Squall to combo into other attacks if the player has a good read on the situation. And even if Fire Barret is used up close, the recovery can be cancelled into an attack -usually Beat Fang- for additional damage on hit. |
| Line 211: |
Line 279: |
| Squall remains stationary for a moment after firing and cannot dodge cancel until the split projectiles begin pursuing in earnest. This can make Squall vulnerable to whiff punishes with an assist when done with a precise timing even if he has Auto Assist Lock On extra ability equipped. | | Squall remains stationary for a moment after firing and cannot dodge cancel until the split projectiles begin pursuing in earnest. This can make Squall vulnerable to whiff punishes with an assist when done with a precise timing even if he has Auto Assist Lock On extra ability equipped. |
|
| |
|
| Fire Barret is a staple air bravery for Squall due to it's consistency and relatively low commitment in many situations. It complements his ability to interact in close and mid ranges and can provide opportunities for additional damage from time to time. In a way, it's usage could be likened to a conventional projectile in a traditional 2D fighting game. | | Fire Barret is a staple air bravery for Squall due to its consistency and relatively low commitment in many situations. It complements his ability to interact in close and mid ranges and can provide opportunities for additional damage from time to time. In a way, it's usage could be likened to a conventional projectile in a traditional 2D fighting game. |
|
| |
|
| </tabber> | | </tabber> |
|
| |
|
| = HP Attacks = | | == HP Attacks == |
| == Ground == | | === Ground === |
|
| |
|
| <tabber> | | <tabber> |
| Line 226: |
Line 294: |
| |priority=Ranged High | | |priority=Ranged High |
| |ex=0 | | |ex=0 |
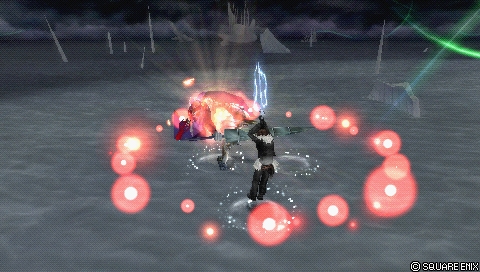
| |effect=Block Low (Ranged), wall rush, absorb | | |effect=Block Low (Ranged) <br>Wall Rush, Absorb |
| |cp=30 (15) | | |cp=30 (15) |
| | |image=https://dissidia.wiki/images/4/49/Hp_squall_fated_circle.jpeg |
| | |imgpos= |
| | |cancels=Dodge |
| | |asthit= |
| | |level=1 |
| | |ap=130 |
| | |gametext=[Close] Surround self with explosions. <br>Block foe's spells. |
| }} | | }} |
| ''[Close] Surround self with explosions. Block foe's spells.''
| |
|
| |
|
| A circular explosion surrounds Squall, pulling in nearby opponents and blowing them away. Fated Circle is a good secondary ground HP for Squall thanks to it's utility. The Ranged High priority cannot be staggered with blocks or LV2 Assist Change. It can wall rush for additional HP damage, bypass EX Revenge checkmates thanks to the lack of bravery damage, it can even block Ranged Low attacks similiar to Heel Crush! The animation is fairly quick with a slightly above average recovery for an HP, making it harder to whiff punish after escaping with an assist change. The absorb effect works well against guarding opponents from a short distance. Each explosion has it's own hitbox which won't necessarily hit often due to surrounding Squall. But they do contribute to the overall active duration when an opponent can be damaged. | | A circular explosion surrounds Squall, pulling in nearby opponents and blowing them away. Fated Circle is a good secondary ground HP for Squall thanks to it's utility. The Ranged High priority cannot be staggered with blocks or LV2 Assist Change. It can wall rush for additional HP damage, bypass EX Revenge checkmates thanks to the lack of bravery damage, it can even block Ranged Low attacks similiar to Heel Crush! The animation is fairly quick with a slightly above average recovery for an HP, making it harder to whiff punish after escaping with an assist change. The absorb effect works well against guarding opponents from a short distance. Each explosion has it's own hitbox which won't necessarily hit often due to surrounding Squall. But they do contribute to the overall active duration when an opponent can be damaged. |
| Line 244: |
Line 318: |
| |priority=Melee High | | |priority=Melee High |
| |ex=each 3 | | |ex=each 3 |
| |effect=Wall rush | | |effect=Wall Rush |
| |cp=30 (15) | | |cp=30 (15) |
| | |image=https://dissidia.wiki/images/9/92/Hp_squall_revolver_drive.jpeg |
| | |imgpos= |
| | |cancels=Dodge |
| | |asthit= |
| | |level=36 |
| | |ap=130 |
| | |gametext=[Mid] Rage-filled charge. <br>Can aim with the analog stick. |
| }} | | }} |
| ''[Mid] Rage-filled charge. Can aim with the analog stick.''
| |
|
| |
|
| Squall starts revolver driving. A staple HP, this is an advancing multi hitting attack that can be freely steered with no regard for lock on. The HP attack button must be held to extend this attack's duration, or Squall will transition to the ending of the move immediately upon button release and inflict HP damage. | | Squall starts revolver driving. A staple HP, this is an advancing multi hitting attack that can be freely steered with no regard for lock on. The HP attack button must be held to extend this attack's duration, or Squall will transition to the ending of the move immediately upon button release and inflict HP damage. |
| Line 272: |
Line 352: |
| |effect=- | | |effect=- |
| |cp=30 (15) | | |cp=30 (15) |
| | |image=https://dissidia.wiki/images/2/24/Hp_squall_blasting_zone.jpeg |
| | |imgpos=40% |
| | |cancels= |
| | |asthit= |
| | |level=16 |
| | |ap=130 |
| | |gametext=[Mid] Chop with massive blade of light <br>that flies forward. |
| }} | | }} |
| ''[Mid] Chop with massive blade of light that flies forward.''
| |
|
| |
|
| One of Squall's strongest and fastest HP attacks. Great reach and horizontal tracking make Blasting Zone effective for controlling space against dodges and missed attacks. Assists can follow up on hit without a wall and good EX Force output ensure consistent reward. | | One of Squall's strongest and fastest HP attacks. Great reach and horizontal tracking make Blasting Zone effective for controlling space against dodges and missed attacks. Assists can follow up on hit without a wall and good EX Force output ensure consistent reward. |
| Line 279: |
Line 365: |
| Blasting Zone's range cannot be understated. It is long and tall enough to hit airborne characters outside of Thunder Barret's reach. What really complements it is the tracking - Blasting Zone will home in the opponent right until the blade is slammed to the ground and it's very fast. | | Blasting Zone's range cannot be understated. It is long and tall enough to hit airborne characters outside of Thunder Barret's reach. What really complements it is the tracking - Blasting Zone will home in the opponent right until the blade is slammed to the ground and it's very fast. |
|
| |
|
| The recovery is quite short for a move as potent as this. It's vulnerable to [[Abilities_(Dissidia_012)|'''Omni Ground Dash''']] and [[Dodge_(Dissidia_012)#Air_Dodge|'''air dodge''']] invincibility, but it's borderline unpunishable without them or assist. | | The recovery is quite short for a move as potent as this. It's vulnerable to '''[[Abilities_(Dissidia_012)|Omni Ground Dash]]''' and '''[[Dodge_(Dissidia_012)#Air_Dodge|air dodge]]''' invincibility, but it's borderline unpunishable without them or assist. |
|
| |
|
| Whenever a player thinks an opponent will dodge, Blasting Zone is fantastic and easy to use to capitalise on that opportunity. The hitboxes are active from the 41 frame startup until the HP damage portion. That can be used to disrupt opponents inside traps such as {{012emp}} and reflect lingering high priority projectiles like {{012vaan}}'s Windburst. | | Whenever a player thinks an opponent will dodge, Blasting Zone is fantastic and easy to use to capitalise on that opportunity. The hitboxes are active from the 41 frame startup until the HP damage portion. That can be used to disrupt opponents inside traps such as {{012emp}} and reflect lingering high priority projectiles like {{012vaan}}'s Windburst. |
| Line 292: |
Line 378: |
| |priority=Melee High | | |priority=Melee High |
| |ex=0 | | |ex=0 |
| |effect=Wall rush | | |effect=Wall Rush |
| |cp=30 (15) | | |cp=30 (15) |
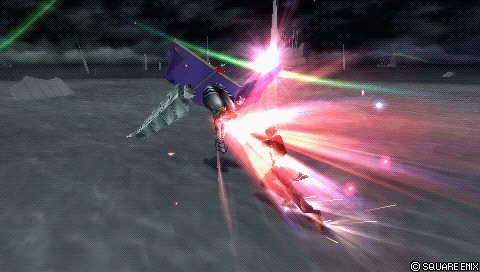
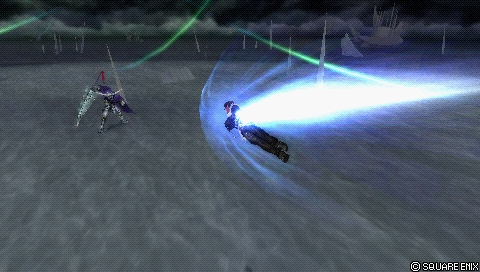
| | |image=https://dissidia.wiki/images/e/ef/Hp_squall_rough_divide_g.jpeg |
| | |imgpos=70% |
| | |cancels=Dodge |
| | |asthit= |
| | |level=1 |
| | |ap=130 |
| | |gametext=[Long] Leap into a charge. <br>Slow start, but very fast charge. |
| }} | | }} |
| ''[Long] Leap into a charge. Slow start, but very fast charge.''
| |
|
| |
|
| A long distance aerial charging attack. While good for whiff punishing long recovery attacks from a great distance, Rough Divide is usually outclassed by his other ground HP attacks. As such, it's midair version is often used instead. | | A long distance aerial charging attack. While good for whiff punishing long recovery attacks from a great distance, Rough Divide is usually outclassed by his other ground HP attacks. As such, its midair version is often used instead. |
|
| |
|
| </tabber> | | </tabber> |
|
| |
|
| == Aerial == | | === Aerial === |
| <tabber> | | <tabber> |
| |-|Aerial Circle= | | |-|Aerial Circle= |
| Line 310: |
Line 402: |
| |priority=Ranged High | | |priority=Ranged High |
| |ex=0 | | |ex=0 |
| |effect=Block Low (Ranged), wall rush, absorb | | |effect=Block Low (Ranged) <br>Wall Rush, Absorb |
| |cp=30 (15) | | |cp=30 (15) |
| | |image=https://dissidia.wiki/images/8/89/Hp_squall_aerial_circle.jpeg |
| | |imgpos= |
| | |cancels=Dodge |
| | |asthit= |
| | |level=1 |
| | |ap=130 |
| | |gametext=[Close] Surround self with explosions. <br>Blocks foe's spells. |
| }} | | }} |
| ''[Close] Surround self with explosions. Blocks foe's spells.''
| |
|
| |
|
| Midair variant of Fated Circle, Aerial Circle is Squall's go-to HP attack while airborne. The surrounding explosions are formed vertically instead of horizontally, which leaves Squall vulnerable to attacks from his sides. This isn't as much of a weakness as it may seem at first, because Aerial Circle shares many traits with the grounded Fated Circle. The startup, absorb effect, Ranged Low block, single hit Ranged High priority and wall rush are all here. | | Midair variant of Fated Circle, Aerial Circle is Squall's go-to HP attack while airborne. The surrounding explosions are formed vertically instead of horizontally, which leaves Squall vulnerable to attacks from his sides. This isn't as much of a weakness as it may seem at first, because Aerial Circle shares many traits with the grounded Fated Circle. The startup, absorb effect, Ranged Low block, single hit Ranged High priority and wall rush are all here. |
| Line 330: |
Line 428: |
| |priority=Melee High | | |priority=Melee High |
| |ex=0 | | |ex=0 |
| |effect=Wall rush | | |effect=Wall Rush |
| |cp=30 (15) | | |cp=30 (15) |
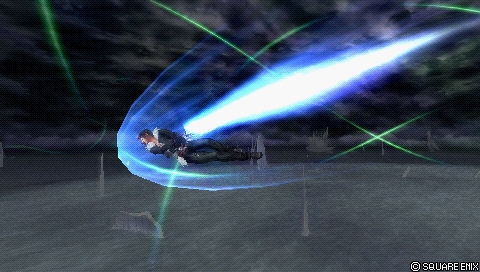
| | |image=https://dissidia.wiki/images/a/ae/Hp_squall_rough_divide_a.jpeg |
| | |imgpos= |
| | |cancels= |
| | |asthit= |
| | |level=31 |
| | |ap=130 |
| | |gametext=[Long] Leap into a charge. <br>Slow start, but very fast charge. |
| }} | | }} |
| ''[Long] Leap into a charge. Slow start, but very fast charge.''
| |
|
| |
|
| Aerial version of Rough Divide. A common, albeit secondary HP attack for Squall. Rough Divide starts with a minor jump before charging towards the opponent at high speed. This is a single hit HP attack that will travel a set distance unless it hits the ground. Rough Divide does not have freeform vertical homing, but it can connect after confirming a Kuja air bravery assist for example. | | Aerial version of Rough Divide. A common, albeit secondary HP attack for Squall. Rough Divide starts with a minor jump before charging towards the opponent at high speed. This is a single hit HP attack that will travel a set distance unless it hits the ground. Rough Divide does not have freeform vertical homing, but it can connect after confirming a Kuja air bravery assist for example. |
| Line 343: |
Line 447: |
| </tabber> | | </tabber> |
|
| |
|
| = EX Mode: Lionheart equipped! = | | == EX Mode: Lionheart equipped! == |
| Effects: | | Effects: |
| * Regen | | * Regen |
| Line 350: |
Line 454: |
| * Lionheart (HIT) | | * Lionheart (HIT) |
|
| |
|
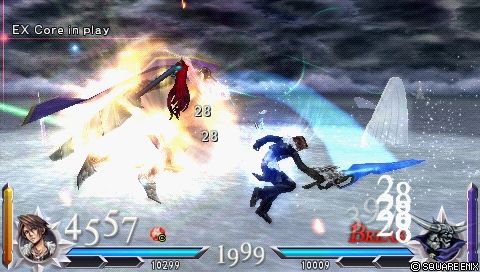
| == Lionheart (RANGE) == | | Squall's EX Mode increases his bravery damage output with critical hits and additional gunblade hits. His melee braveries also get a range increase, which can help with whiff punishment and combos. Squall's EX Burst is on the weaker side, but his combo braveries can quickly decimate opponent's bravery. Therefore setting up an assist combo with an EX mode bravery can be good for comebacks and bravery breaks in general. |
| | |
| | === Lionheart (RANGE) === |
| ''[Always active while in EX Mode] Transfers the heart of a lion to the weapon, increasing it's range.'' | | ''[Always active while in EX Mode] Transfers the heart of a lion to the weapon, increasing it's range.'' |
|
| |
|
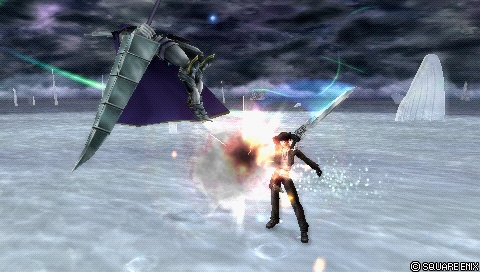
| == Lionheart (HIT) == | | During EX Mode, Squall has longer range on his gunblade. This can help connect the "Golden Combo" more consistently. |
| | |
| | === Lionheart (HIT) === |
| | {{image|https://dissidia.wiki/images/e/e8/Ex_mode_squall.jpeg}} |
| | |
| ''[Always active while in EX Mode] Pushes the weapon's specs to the limit, increasing the force of each blast.'' | | ''[Always active while in EX Mode] Pushes the weapon's specs to the limit, increasing the force of each blast.'' |
|
| |
|
| == EX Burst: Renzokuken == | | Upper Blues, Solid Barrel and Beat Fang get double hits for most of their hits. That means their base damage go up considerably, of which Solid Barrel benefits the most (2x increase). These extra hits can also become critical hits, which can boost Squall's bravery damage exponentially. |
| ''A flurry of attacks ending in one shattering blow. Watch your timing and press R when the cursor is in the frame.'' | | |
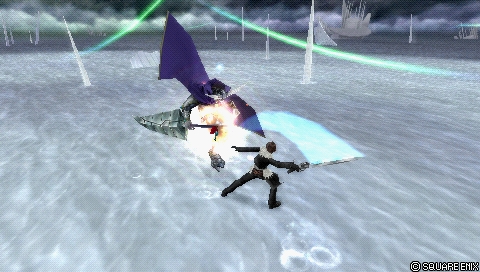
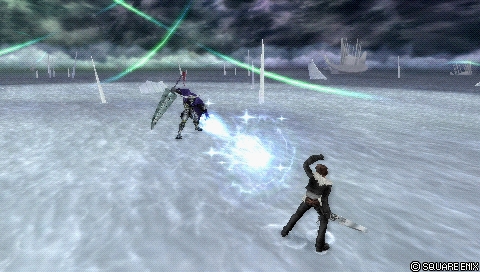
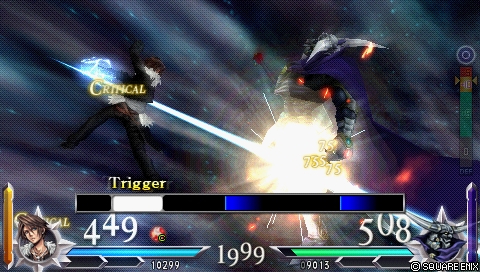
| | === EX Burst: Renzokuken === |
| | {{image|https://dissidia.wiki/images/2/21/Ex_burst_squall.jpeg}} |
| | |
| | ''A flurry of attacks ending in one shattering blow. Watch your timing and press R {{pspr}} when the cursor is in the frame.'' |
|
| |
|
| {{burst | | {{burst |
| Line 365: |
Line 479: |
| }} | | }} |
|
| |
|
| = Combos =
| | Renzokuken requires pressing R {{pspr}} eight times in a row, whenever a cursor is in the "Trigger" frame. The timing for a successful input is relatively generous, and every subsequent input comes at a consistent speed. That means once Squall gets the timing for the first couple triggers, the rest can be done with the exact same timing. |
|
| |
|
| == Solo ==
| | Regardless of player input, Squall will follow through with the entire EX Burst sequence. If Squall misses a trigger, he will simply do less damage for that hit. |
|
| |
|
| Squall has several solo combos on the ground and is one of the best characters at taking advantage of landing lag.
| | == Combos == |
|
| |
|
| DC = Dodge cancel
| | ''Main article: '''[[Squall_Leonhart_(Dissidia_012)/Combos|Squall (Combos)]]''' '' |
| <br>LL = Landing lag
| |
|
| |
|
| {| class="wikitable sortable"
| | === Solo === |
| |-
| |
| ! scope=col | Combo
| |
| ! scope=col | Approximate damage (multipliers)
| |
| ! scope=col | Approximate EX Force
| |
| ! scope=col | Notes
| |
| ! scope=col class=unsortable | Video
| |
| |-
| |
| |Solid Barrel (3 hits) > DC > LL > Upper Blues (2 hits, delay the 2nd hit) > DC > LL > Beat Fang || '''65 + WR''' (5, 6, 8, 3, 3, 40 + WR) || ?? || The notorious "golden combo". Highest assist gain. Solid Barrel DC into Upper Blues is particularly difficult to time. The landing lag link is prone to escape outside of EX Mode (1-2 frame timing), but if the opponent's dodge timing is off at any point, the combo becomes far more consistent.<br>Solid Barrel's 2nd and 4th hits can be more reliable, but will require having back against the wall. || video
| |
| |-
| |
| |Beat Fang (1st hit) > DC > LL > Beat Fang (1st hit) > repeat || 6+ (3, 3, 3...) || ?? || Infinite combo. Reliant on landing lag and difficult to time, but it is inescapable if the opponent cannot use assist or EX. Can be easier during EX Mode due to the added hit. On average this is a very low damaging infinite, but even with one repetition the added assist generation on attack is a great asset to Squall. This can be used to the player's advantage in tournaments where infinites are banned. || video
| |
| |-
| |
| |Mystic Flurry > DC > Beat Fang / Aerial Circle || ?? || ?? || Very inconsistent due to Mystic Flurry's projectile positioning and reliance on connecting another attack during one of the projectiles. || video
| |
| |-
| |
| |Fire Barret > Beat Fang || '''45~55 +WR (5~15, 40 + WR) || ?? || A single Fire Barret projectile has enough hit stun to combo into Beat Fang or even Aerial Circle if it hit moments after firing it. Can be difficult to visually confirm in the heat of the moment. || video
| |
| |}
| |
|
| |
|
| === Thunder Barret ===
| | Squall can do various combos alone. Almost anything works after Thunder Barret, while landing lag opens up even more elaborate and rewarding combo routes. |
|
| |
|
| Squall's Thunder Barret inherently allows cancelling into another attack and causes enough hitstun to even chain into HP attacks with precise timing. In short, Thunder Barret can combo into any grounded attack except Rough Divide. | | {{Combo-012 |
| | | data = |
| | {{Combo-012Data |
| | |combo='''Thunder Barret''' > Solid Barrel |
| | |condition=Punish Starter |
| | |requirement=Ground |
| | |purpose=BRV Damage |
| | |damage=67 |
| | |damagehits=12 > 55 |
| | |ex=126 |
| | |exhits=36 > 90 |
| | |meteropp=100 |
| | |video=https://www.youtube.com/watch?v=G51x2dmDRgU&t=11 |
| | |notes=A staple combo and great for beginners. Solid Barrel can be pressed repeatedly after Thunder Barret, and it will generate a good amount of EX. It knocks the opponent far away, which lets Squall get some of the EX Force he generated. This also sets up various other combos, so it's a good idea to get comfortable with this. |
| | }} |
| | {{Combo-012Data |
| | |combo='''Thunder Barret''' > Blasting Zone |
| | |condition=Punish Starter |
| | |requirement=Ground |
| | |purpose=HP Combo, EX Force |
| | |damage=16 + HP |
| | |damagehits=6 > 10 + HP |
| | |ex=108 |
| | |exhits=18 > 90 |
| | |meteropp=24 |
| | |video=https://www.youtube.com/watch?v=G51x2dmDRgU&t=106 |
| | |notes=This HP combo (barely) has the most lenient timing. It is Squall's second highest option for EX and it still allows assist combos as well. Since Blasting Zone is Squall's fastest HP on the ground, players can attempt to repeatedly press Blasting Zone to increase their success rate. The closer Thunder Barret hits, the easier the HP timing can become. |
| | }} |
| | {{Combo-012Data |
| | |combo='''Solid Barrel (3 hits)''' > {{clr|dc=1}} > {{clr|ll=1}} > Upper Blues (2 hits) > {{clr|dc=1}} > {{clr|ll=1}} > Beat Fang |
| | |condition=Poke Starter |
| | |requirement=Ground, Landing Lag |
| | |purpose=BRV Damage, Assist Gauge |
| | |damage=65 + WR |
| | |damagehits=19 > 6 > 40 + WR |
| | |ex=66 |
| | |exhits=18 > 18 > 30 |
| | |meteropp=117 |
| | |video=https://www.youtube.com/watch?v=G51x2dmDRgU&t=212 |
| | |notes=This has been historically known as a "Golden Combo" in an English speaking community. A combination of three braveries make this a rewarding combo for bravery, and especially assist gauge. Since Squall exits an attack state with the two dodges, both Upper Blues and Beat Fang also get a fresh move bonus for filling assist gauge. |
|
| |
|
| Each Thunder Barret bolt has a damage multiplier of 3 and further bolts can miss if performed close to the opponent. Therefore, the overall damage and meter generation depend largely on the initial distance and followup(s).
| | Try to delay Solid Barrel's hits as much as possible to maximize landing lag chance. After Solid Barrel (3), dodge (backstep) and attack as soon as possible. Remember to delay Upper Blues second hit as well. The opponent can technically dodge all landing lag here, but it requires very precise timing. That means this combo is more practical against human players specifically. |
|
| |
|
| Note that the bolts do not hit at once - Each bolt hits consecutively, with the furthest bolt hitting first and the closest bolt hitting last. That means Thunder Barret inflicts more hit stun when used from longer range. This is important for comboing into Revolver Drive, Squall's most rewarding link.
| | Squall can also perform this with 2 hits from Solid Barrel, if opponent misses their air dodge. Same thing with 4 hits from Solid Barrel; Squall's back must be against a wall. That reduces dodge distance enough for the combo to work. Even unequipping Ground Evasion Boost basic ability is not enough, so this kind of positioning makes the combo more situational. |
|
| |
|
| {| class="wikitable sortable"
| | This combo works on Shantotto as well, despite her small size. And of course, EX Mode amplifies the damage output a lot with critical hits and increased base damage. |
| |-
| | }} |
| ! scope=col | Combo
| | {{Combo-012Data |
| ! scope=col | Approximate damage (multipliers)
| | |combo='''Heel Crush''' > Heel Crush > Heel Crush > Aerial Circle |
| ! scope=col | Approximate EX Force
| | |condition=EX Revenge, Midair |
| ! scope=col | Notes
| | |requirement=Full EX Gauge |
| ! scope=col class=unsortable | Video
| | |purpose=Bravery into HP Damage |
| |-
| | |damage=60 + HP & WR |
| |Thunder Barret > Solid Barrel || '''58~67''' (3~12, 55) || 99~126 (9~36, 90) || Easy to do, high EX gain. || video
| | |damagehits=20 + WR > 20 + WR > 20 + WR > HP + WR |
| |- | | |ex=0 |
| |Thunder Barret > Upper Blues || '''23~32 + WR''' (3~12, 20 + WR) || 39~66 (9~36, 30) || Wall rush and dodge cancel Beat Fang help facilitate ground assist followups. || video | | |exhits=0 > 0 > 0 > 0 |
| |- | | |meteropp=90 |
| |Thunder Barret > Blizzard Barret || '''13~22''' (3~12, 10) || 9~36 (9~36, 0) || No known utility to prioritise this over other followups. || video | | |video=https://www.youtube.com/watch?v=G51x2dmDRgU&t=375 |
| |- | | |notes=A staple combo that works pretty much anywhere. This can do more damage with Wall Rushes if opponent is near ground. This is a pretty lenient combo to perform, as Heel Crush and Aerial Circle can be pressed repeatedly with little concern for timing. |
| |Thunder Barret > Fusillade || 33~42+ || 69~96+ || Not often prioritised due to other braveries, but this cannot be staggered by LV2 Assist Change. Can be used in conjunction with assists with downward knockback for added EX Force. || video | | }} |
| |- | | }} |
| |Thunder Barret > Fated Circle || '''3~12 + HP WR''' || 9~36 || Same timing requirement as Revolver Drive, does not inflict additional bravery damage or generate EX. Similiar to Fusillade, LV2 Assist Change cannot stagger Squall. Overall the weakest HP option of the three in terms of reward, but can still wall rush. || video
| |
| |-
| |
| |Thunder Barret > Blasting Zone || '''13~22''' (3~12, 10) || 99~126 (9~36, 90) || Easiest HP attack timing due to faster start-up. Good EX gain and can still combo into air assists. || video
| |
| |-
| |
| |Thunder Barret > Revolver Drive || '''4~86 + HP WR''' (3~12, 1xN, max 50) || 12~186 || Highest EX gain, great wall rush potential and stage position manipulation. One of Squall's strongest solo combos. Repeatedly pressing Revolver Drive will not register a held input once the HP attack begins, which can cause issues when practicing the timing. || video
| |
| |-
| |
| |Thunder Barret > Solid Barrel (3 hits) > DC > LL > Upper Blues (2 hits, delay the 2nd hit) > DC > LL > Beat Fang || '''68~77 + WR''' (3xN, 5, 6, 8, 3, 3, 40 + WR) || ?? || The most extensive solo ground combo. Comboing into Solid Barrel also enables the golden combo, increasing bravery damage and assist meter gain even further. || video
| |
| |}
| |
|
| |
|
| == Assist == | | === Assist (Kuja) === |
|
| |
|
| * AC = Assist Chase
| | ''Main article: '''[[Squall_Leonhart_(Dissidia_012)/Combos#Assist_(Kuja)|Squall Combos (Kuja Assist)]]''' '' |
| * DC = Dodge Cancel
| |
| * LL = Landing Lag
| |
| * WR = [[Wall_Rush_(Dissidia_012_Final_Fantasy)|'''Wall Rush''']]
| |
|
| |
|
| Any attack that can be chained from Thunder Barret adds 3~12 extra damage and 9~36 EX Force depending on how many bolts hit.
| | {{Combo-012 |
| | | | data = |
| <tabber>
| | {{Combo-012Data |
| |-|Kuja= | | |combo='''Solid Barrel (4 hits)''' > {{clr|astbrv=1}} > {{clr|ac=1}} > Aerial Circle |
| | | |condition={{keyword|Poke|poke=1}} Starter |
| == Ground == | | |requirement=Ground |
| | | |purpose={{keyword|Midscreen|midscreen=1}} BRV to HP |
| {| class="wikitable sortable" | | |damage=79 + HP & WR |
| ! scope="col"| Starter
| | |damagehits=5, 6, 8, 10 > 50 AST > HP + WR |
| ! scope="col"| Combo
| | |ex=24 |
| ! scope="col"| Damage
| | |exhits=24 > 0 |
| ! scope="col"| EX Force
| | |meteropp=118 |
| ! scope="col"| Notes
| | |video=https://www.youtube.com/watch?v=UKixw8LkJM0&t=20 |
| ! scope="col"| Video
| | |notes=Ground combo, no wall needed. Squall has plenty of time to confirm an assist combo here. The fourth hit is the last part before the opponent is sent away, so assist should be called by then. If Squall is having trouble calling assist, try holding Circle {{pspcir}} on the fourth hit and then pressing L {{pspl}}. |
| |- | | <br> |
| |rowspan="3"|Solid Barrel (4th hit) || -- || 29 (5, 6, 8, 10) || 24 (6, 6, 6, 6) || -- || --
| | This combo can be done after Thunder Barret as well. |
| |- | | }} |
| |Kuja > AC > Aerial Circle || '''79 + HP''' (29 + 50, HP) || '''24''' || Basic. HP ender.|| video | | {{Combo-012Data |
| |-
| | |combo='''Beat Fang''' > {{clr|wr=1}} > {{clr|astbrv=1}} > {{clr|ac=1}} > Aerial Circle |
| |Kuja > AC > Beat Fang || '''119''' (29, 50, 40) || '''54''' (29, 30) || Basic. BRV ender. || video
| | |condition=Poke Starter |
| |-
| | |requirement=Air, Wall Rush (Ground) |
| |rowspan="2"|Solid Barrel (last hit) || -- || 55 (5, 6, 8, 10, 5, 5, 16) || 90 || Knockback cancel or wall. <ref group="footnotes">'''Solid Barrel (last hit):''' Call Kuja as you press the last part of Solid Barrel. The assist should hit the opponent as Squall blows the opponent away. It's still technically more damage even with an early timing where the last hit misses.</ref>|| --
| | |purpose=BRV to HP Damage |
| |- | | |damage=86 + HP & WR |
| |Solid Barrel 4th > Call Kuja > Solid Barrel (last) > Kuja (hit) > Aerial Circle || '''105 + HP''' (55, 50, HP) || '''90''' (90, 0) || -- || video | | |damagehits=40 + WR > 46 AST > HP & WR |
| |-
| | |ex=30 |
| |rowspan="4"|Upper Blues (3rd hit) || -- || 11 (3, 3, 5) || 24 (9, 9, 6) || -- || -- | | |exhits=30 > 0 |
| |- | | |meteropp=148 |
| |Kuja > DC > AC > Aerial Circle || '''61 + HP''' (11, 50, HP) || '''24''' || Basic. || video | | |video=https://www.youtube.com/watch?v=UKixw8LkJM0&t=49 |
| |-
| | |notes=A standard Wall Rush combo. Call assist as soon as Wall Rush happens, then teleport a moment after the Assist Chase {{pspcro}} prompt shows up, so Aerial Circle does not miss. Note, that Beat Fang will not Wall Rush from all heights, so it's not guaranteed everywhere. |
| |Kuja > DC > AC > Beat Fang || '''101''' (11, 50, 40) || '''54''' (24, 30) || Basic. || video
| | <br> |
| |-
| | '''Note:''' If Squall cannot Wall Rush, assist can still be called after Beat Fang's third hit. Kuja assist will do his air attack instead, but HP damage is still possible afterwards. |
| |Kuja > DC (back) Fire Barret > DC > AC > Beat Fang (1st hit) > DC > Fire (hit) > Beat Fang || '''109''' (11, 50, 3, 5, 40) || '''63''' (24, 9, 30) || Advanced. Fire Barret tracking is finicky, but adds a bit of extra damage. || video
| | }} |
| |-
| | {{Combo-012Data |
| |rowspan="2"|Upper Blues || -- || 20 + WR || 30 || Wall Rush || -- | | |combo='''Fated Circle''' > {{clr|wr=1}} > {{clr|astbrv=1}} > {{clr|ac=1}} > Beat Fang |
| |-
| | |condition=HP Starter |
| |Kuja > DC > Aerial Circle (+WR) > AC > Beat Fang || '''107 + HP & WR''' (20 + WR, 47 + HP (WR) 40) || '''60''' (30, 30) || Staple. Aerial Circle enables crits during brv recovery for Beat Fang, increasing damage output. Use the HP from far enough to knock towards floor again. <ref group="footnotes">'''Upper Blues WR > Kuja > Aerial Circle:''' You have to dodge upwards a little bit to not pull the opponent out of Kuja assist, and to not push the opponent away from floor with the HP. This idea of hovering over the opponent applies to a Beat Fang Kuja combo as well.</ref> || video
| | |requirement=Ground, Wall Rush |
| |-
| | |purpose=HP into BRV Damage |
| |rowspan="2"|Blasting Zone || -- || 10 || 90 || -- || --
| | |damage=90 + HP & WR |
| |-
| | |damagehits=HP + WR > 50 AST > 40 + WR |
| |Kuja > AC > Beat Fang || '''100 + HP''' (10 + HP, 50, 40) || '''120''' || Call assist when opponent's knockback is slowing down. || video
| | |ex=30 |
| |-
| | |exhits=0 > 30 |
| |rowspan="2"|Fated Circle || -- || 0 || 0 || Wall Rush || --
| | |meteropp=138 |
| |-
| | |video=https://www.youtube.com/watch?v=UKixw8LkJM0&t=72 |
| |WR > Kuja > Beat Fang || '''87 + HP & WR''' (0 + HP WR, 47, 40 + WR) || '''30''' (0, 30) || Against a grounded opponent, Fated Circle can wall rush on the floor without the extra damage for a combo. || video
| | |notes=HP Attack Wall Rush combo. Call assist after Wall Rush happens, then follow up with Beat Fang. Two reasons for this; Squall's {{keyword|base bravery|basebrv=1}} does not recover fast enough for another HP to do as much damage. Also, the critical hit rate increases momentarily after HP damage. It may not raise Squall's bravery by much, but the opponent's bravery may drop a lot more instead. This is a common theme when comboing with Kuja assist, so brace yourself for it. |
| |-
| | <br> |
| |rowspan="2"| Fusillade || -- || 30+ (6,6,6,6 each 6) || 60~90 || Dodge cancel for an assist combo. || video | | Other HP attacks that Wall Rush also work here. Revolver Drive, Rough Divide and Aerial Circle are all OK. |
| |- | | <br> |
| |DC > Kuja > Aerial Circle || '''80+''' (30+, 50, HP) || '''60~90''' || -- || video | | If Squall's build has increased Bravery recovery, this issue of lower damage for second HP can be solved. Royal Crown {{equhead}} or Bravery Orb {{accbas}} are a good starting point for builds. |
| |- | | }} |
| |rowspan="2"|Revolver Drive || -- || 1xN (max 50) || each 3 (max 150) || Wall Rush || --
| | {{Combo-012Data |
| |-
| | |combo='''Beat Fang''' > {{clr|wr=1}} > {{clr|astbrv=1}} > {{clr|dc=1}} > Aerial Circle > {{clr|wr=1}} > {{clr|dc=1}} > {{clr|ac=1}} > Beat Fang |
| |WR > Kuja > Beat Fang || '''91~140 + HP WR''' (1~50, 50, 40) || '''31~80''' (1~50, 30) || Basic. || video
| | |condition=Poke Starter |
| |}
| | |requirement=Air, Wall Rush (Ground) |
| | | |purpose=HP Damage & Critical Hits |
| == Aerial ==
| | <span style="color:#008000;">'''Staple Combo!''</span> |
| | | |damage=124 + HP & WR |
| {| class="wikitable sortable"
| | |damagehits=40 + WR > 44 AST + HP & WR> 40 + WR |
| ! scope="col"| Starter
| | |ex=60 |
| ! scope="col"| Combo
| | |exhits=30 > 0 > 30 |
| ! scope="col"| Damage
| | |meteropp=225 |
| ! scope="col"| EX Force
| | |video=https://www.youtube.com/watch?v=UKixw8LkJM0&t=112 |
| ! scope="col"| Notes
| | |notes=Beat Fang with Aerial Circle {{keyword|filler|filler=1}}. Press Aerial Circle as Kuja pulls the opponent to himself. The goal here is to knock the opponent towards ground with Aerial Circle and then quickly follow up with Beat Fang for critical hits. Again, the critical hit rate goes up momentarily after connecting an HP attack, which improves Beat Fang's damage. |
| ! scope="col"| Video
| | <br> |
| |-
| | Squall must be at certain height to ensure Aerial Circle pushes the opponent downwards. Upper Blues is a good reference point for this. If Squall gets a ground Wall Rush from higher up in the air, he may have to measure the distance manually to do this combo. Being too high can pull opponent out of Kuja assist due to Aerial Circle's absorb effect. Conversely, being too low can push the opponent away with no guarantee for finishing the combo. Squall's position makes a big difference here. He can also push the opponent diagonally down, and Kuja may still be able to finish his attack. This does mean that Kuja may do slightly less damage, or that Squall may even lose HP Wall Rush damage entirely. |
| |rowspan="2"|Beat Fang || -- || 27 (3, 5, 7, 2x6) || 30 || No wall. Call Kuja during last part.<ref group="footnotes">'''Beat Fang > Kuja:''' Similiar to Solid Barrel knockback cancel, call Kuja as you input the last part of Beat Fang. Kuja will pick up the opponent. If that's too difficult, Kuja can also combo off of Beat Fang's third hit for less damage.</ref> || --
| | <br> |
| |-
| | Squall can also do Fire Barret into Beat Fang (no dodge cancel) after Assist Chase. This depends more on the Assist Chase timing, but try not to teleport too late so the fireballs can hit. And even then, Beat Fang might barely miss if the angle is a little off. Please see the linked video for an example. |
| |Kuja > AC > Aerial Circle || '''77''' (27, 50, HP) || 30 (30, 0) || -- || video
| | }} |
| |-
| | {{Combo-012Data |
| |rowspan="2"|Beat Fang || -- || 40 (3, 5, 7, 2x6) || 30 || Wall Rush. || --
| | |combo='''Blasting Zone''' > {{clr|astbrv=1}} > {{clr|dc=1}} (↑) > {{clr|ac=1}} > Beat Fang |
| |-
| | |condition=HP Starter |
| |WR > Kuja > DC > Aerial Circle > DC > AC > Beat Fang || '''127 + HP & WR''' (40 + WR, 47, HP + WR, 40 + WR) || '''60''' (30, 0, 30) || Same idea as with Upper Blues > Aerial Circle. HP during assist for extra crits. || video
| | |requirement=Ground (Squall) |
| |-
| | |purpose=HP & BRV Damage |
| |rowspan="2"|Aerial Circle || -- || HP + WR || 0 || Wall Rush. || --
| | |damage=96 + HP & WR |
| |-
| | |damagehits=10 + HP > 46 AST > 40 + WR |
| |WR > Kuja > AC > Beat Fang || '''90 + HP WR''' (HP+ WR, 50, 40) || '''30''' (0, 30) || Basic. || video
| | |ex=120 |
| |}
| | |exhits=90 > 30 |
| | | |meteropp=144 |
| | | |video=https://www.youtube.com/watch?v=UKixw8LkJM0&t=240 |
| ==Notes==
| | |notes=Blasting Zone combo, no wall needed. Call Kuja assist a moment after HP damage is dealt. The opponent will gradually slow down while flying in the air, which makes it possible for Kuja assist to combo. |
| <references group="footnotes" />
| | <br> |
| | | This is mostly to add bravery damage and EX depletion from assist. If Squall needs the damage for Bravery Break, a well placed Blasting Zone can turn the match in his favor. Be sure to dodge forward after Blasting Zone to get some of the EX Force floating around. |
| |-|Yuna=
| | }} |
| | | }} |
| * Solid Barrel (4th hit) > Yuna > DC (neutral) > Thunder Barret > Solid Barrel (damage) / Revolver Drive (EX)
| |
| * Upper Blues (3rd hit) > Yuna > DC > Aerial Circle when second assist hit connects
| |
| * Upper Blues (3rd hit) > Yuna > DC > Thunder Barret > BRV / HP
| |
| * Upper Blues or Beat Fang (wall rush) > Yuna > WR > Thunder Barret / Rough Divide (depending on distance)
| |
| * Beat Fang (3 hits) > Yuna > DC > Aerial Circle when second assist hit connects
| |
| * Yuna > DC > Thunder Barret > BRV / HP (requires ground)
| |
| * Blasting Zone > Yuna > Ground Dash > Thunder Barret > BRV / HP <ref group="notesyuna">'''Blasting Zone:''' Call Yuna as late as possible. She doesn't have much horizontal reach. Easier at a wall.</ref>
| |
| * Fated Circle > WR > Yuna > Thunder Barret > BRV / HP
| |
| | |
| ==Notes==
| |
| <references group="notesyuna" />
| |
| | |
| |-|Jecht=
| |
| | |
| * Solid Barrel (4th hit) > Jecht > Thunder Barret > DC > move backwards > Thunder Barret > BRV / HP
| |
| * Upper Blues (3rd hit) > Jecht > DC > Thunder Barret > BRV / HP
| |
| * Upper Blues or Beat Fang (wall rush) > DC > Jecht > Thunder Barret > BRV / HP
| |
| * Beat Fang (3 hits) > DC > Thunder Barret > BRV / HP (requires ground)
| |
| * Beat Fang (3 hits) > Jecht > DC (diagonally forward) > Rough Divide
| |
| * Blasting Zone > Jecht > Ground Dash > Thunder Barret > BRV / HP <ref group="notes">Similiar to Kuja assist, call Jecht when the opponent's momentum has slowed down. Without wall, only the second kick will hit and follow through with the air combo.</ref>
| |
| * Fated Circle (floor WR) > Jecht > Ground Dash > Thunder Barret > BRV / HP
| |
| * Aerial Circle / Rough Divide (WR) > Jecht > Thunder Barret > BRV / HP
| |
| | |
| ==Notes==
| |
| <references group="notes" />
| |
| | |
| |-|Tidus=
| |
| * Solid Barrel (4th hit) > Tidus > Beat Fang / Aerial Circle
| |
| * Upper Blues (3rd hit) > Tidus > Beat Fang / Aerial Circle
| |
| * Upper Blues / Beat Fang (WR) > Tidus > DC > Thunder Barret > BRV / HP
| |
| * Beat Fang (3 hits) > Tidus > DC > Aerial Circle
| |
| * Blasting Zone > Tidus <ref group="notestidus"> Much like Yuna assist, timing must be delayed more than usual to make up for short reach.</ref>
| |
| * Fated Circle (floor WR) > Tidus > Ground Dash x2 > Upper Blues (delayed 2nd hit) > DC > LL > Beat Fang
| |
| | |
| == Notes ==
| |
| <references group="notestidus" />
| |
| | |
| |-|Sephiroth=
| |
| | |
| * Solid Barrel (4th hit) > Sephiroth > DC (forward) > Rough Divide
| |
| * Solid Barrel (4th hit) > Sephiroth > DC (forward) > Beat Fang (1st hit) > DC > teleport > Beat Fang
| |
| * Upper Blues (3rd hit) > Sephiroth > DC (diagonally forward) > Rough Divide <ref group="notessephi">'''Upper Blues (3rd hit):'''Do Rough Divide when Sephiroth transitions to second part of his attack.</ref>
| |
| * Upper Blues / Beat Fang (WR) > Sephiroth > DC > Aerial Circle > AC > Beat Fang <ref group="notessephi">Same idea as with Kuja ground assist. HP during the assist and leverage the increased critical hit rate afterwards with Beat Fang.</ref>
| |
| * Upper Blues / Beat Fang (WR) > Sephiroth > DC > Heel Crush > teleport > Beat Fang / Aerial Circle
| |
| * Beat Fang (3 hits) > Sephiroth > DC (diagonally forward) > Rough Divide
| |
| * Beat Fang (3 hits) > Sephiroth > DC > Aerial Circle (during assist)
| |
| * Blasting Zone > Sephiroth > Beat Fang
| |
| * Fated Circle (floor WR) > Sephiroth > AC > Beat Fang
| |
| | |
| == Notes ==
| |
| <references group="notessephi" />
| |
| | |
| |-|Onion Knight=
| |
| * Solid Barrel (4th hit) > Onion Knight > DC (forward) > Rough Divide
| |
| * Solid Barrel (4th hit) > Onion Knight > DC (neutral) > Thunder Barret > DC (neutral) > Blasting Zone
| |
| * Upper Blues (3rd hit) > Onion Knight > DC > Rough Divide
| |
| * Upper Blues / Beat Fang (WR) > Onion Knight > DC > Aerial Circle > WR > DC > AC > Beat Fang <ref group="notesok">Same as with Kuja and Sephiroth assist. Wall rush with Aerial Circle during the assist. </ref>
| |
| * Beat Fang (3 hits) > Onion Knight > DC > Rough Divide
| |
| * Blasting Zone > Onion Knight > DC (forward) > Free Air Dash > BRV / HP if wall rushed. <ref group="notesok">Requires later timing than other listed assists, therefore margin for error is small.</ref >
| |
| * Fated Circle (floor WR) > Onion Knight > AC > Beat Fang
| |
| | |
| == Notes ==
| |
| <references group="notesok" />
| |
| | |
| |-|The Emperor=
| |
| * Solid Barrel (4th hit) > The Emperor > Solid Barrel (last hit) > The Emperor (hit) > Thunder Barret > BRV / HP
| |
| * Upper Blues > The Emperor (call during 1st hit) - Upper Blues wall rush > The Emperor (trap) HIT > DC > Heel Crush > DC > Thunder Barret > BRV / HP
| |
| * Upper Blues > The Emperor (call during 2nd hit, continue after slowdown ends) > Upper Blues wall rush > The Emperor (Mine) HIT > DC > AC > Beat Fang
| |
| * Beat Fang (WR) > Beat Fang WR > The Emperor > AC > Beat Fang <ref group="notesemp">call The Emperor just as wall rush happens</ref>
| |
| * Beat Fang (3 hits)
| |
| * Blasting Zone
| |
| * Fated Circle (floor WR)
| |
| | |
| == Notes ==
| |
| <references group="notesemp" />
| |
| | |
| |-|Terra=
| |
| * Solid Barrel (4th hit) > Terra > Solid Barrel last hit > chase > chase HP > opponent dodges and does chase BRV > Terra HIT > (If you dodged chase BRV): Thunder Barret - BRV / HP]. (If hit by chase BRV): Recovery attack Rough Divide
| |
| * Solid Barrel (4th hit) > Terra > Solid Barrel last hit > chase > chase HP > opponent dodges and does chase HP > player dodge HP* > Terra HIT > Thunder Barret > BRV / HP
| |
| * You will want to evade chase HP, as the movement can make Terra's Graviga miss.
| |
| * Upper Blues (3rd hit) > Terra > DC > Aerial Circle / Rough Divide (requires wall rush, HP depending on distance)
| |
| * Upper Blues / Beat Fang (WR)
| |
| * Beat Fang (3 hits) > Terra > DC > Aerial Circle / Rough Divide (requires wall rush, HP depending on distance)
| |
| * Fusillade > Fusillade (1st hit) > Terra > delay all Fusillade hits and finish > Terra HIT - BRV / HP <ref group="notesterra">If you have second assist bar, you can follow up "Terra HIT" with: Thunder Barret > before Thunder hits, call Terra > Fusillade no delayed hits > Terra HIT > BRV / HP</ref>
| |
| | |
| == Notes ==
| |
| <references group="notesterra" />
| |
| | |
| | |
| | |
| | |
| | |
| </tabber>
| |
|
| |
|
| = Builds = | | = Builds = |
| Line 881: |
Line 914: |
|
| |
|
| </tabber> | | </tabber> |
| | |
| | = References = |
| | <references /> |
| | |
| | {{navbox012}} |
| | |
| | {{roadmap012squ}} |
 equipped as both characters remain close to the generated EX Force, but it is a good alternative for racking up damage in stages like
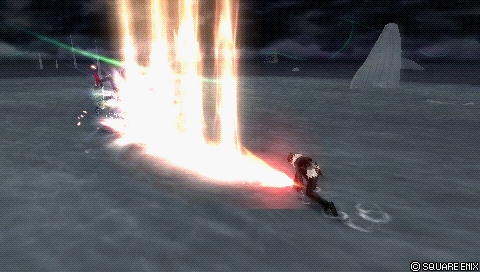
 are a good starting point for builds.
  Large Gap in HP