|
|
| (16 intermediate revisions by the same user not shown) |
| Line 28: |
Line 28: |
| = Overview = | | = Overview = |
|
| |
|
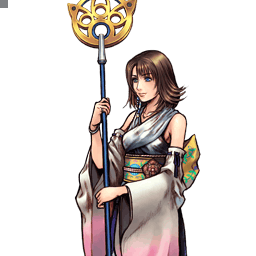
| Yuna is a unique character that excels with disjointed attacks at close and mid range. With each attack, Yuna summons an aeon to attack in her stead. These range from quick pokes to long-range projectiles, but the most prominent aspect lies in the aeons themselves; They extend beyond Yuna's reach while not moving her forward or having any '''[https://glossary.infil.net/?t=Hurtbox hurtbox]''' of their own. This is great for poking and '''[https://glossary.infil.net/?t=Whiff whiff]''' punishment purposes, but also for hitting through higher priority Ranged attacks where others would struggle. She has a handful of attacks for most distances, which help her apply pressure regardless of where the opponent is. | | Yuna is a unique character that excels with disjointed attacks at close and mid range. With each attack, Yuna summons an aeon to attack in her stead. These range from quick pokes to long-range projectiles, but the most prominent aspect lies in the aeons themselves; They extend beyond Yuna's reach while not moving her forward or having any {{keyword|hurtbox|hurtbox}} of their own. This is great for {{keyword|poking|poke}} and {{keyword|whiff punishment|whiff punish}} purposes, but also for hitting through higher priority Ranged attacks where others would struggle. She has a handful of attacks for most distances, which help her apply pressure regardless of where the opponent is. |
|
| |
|
| With this varied arsenal, Yuna can also build '''[[Assist_(Dissidia_012)|assist]]''' gauge safely by whiffing braveries, most notably Heavenly Strike which is a fast '''[[Attack_Priority_(Dissidia_012)#Low|Ranged Low]]''' priority move. Many of her HPs aren't as high commitment compared to other characters and they are effective in '''[https://glossary.infil.net/?t=Neutral neutral]''' for punishing poor movement or controlling space. | | With this varied arsenal, Yuna can also build '''[[Assist_(Dissidia_012)|assist]]''' gauge safely by whiffing braveries, most notably Heavenly Strike which is a fast '''[[Attack_Priority_(Dissidia_012)#Low|Ranged Low]]''' priority move. Many of her HPs aren't as high commitment compared to other characters and they are effective in {{keyword|neutral|neutral}} for punishing poor movement or controlling space. |
|
| |
|
| Like many other characters, Yuna relies on assist and reads with '''[https://glossary.infil.net/?t=Raw raw]''' HPs to deal HP damage. Although most of her HP attacks are lower commitment on average, she lacks practical ways to combo into them; Her only solo HP combo requires EX Mode, which is situational. Fortunately Yuna builds an above average amount of '''[[EX_(Dissidia_012)#Overview|EX Force]]''' with almost all of her attacks, so given enough hits, she gets a chance to capitalize on her distinct '''[[EX_(Dissidia_012)#EX_Mode|EX Mode]]'''. Her EX Mode adds extra hits to all her braveries, increasing damage significantly and becoming better at catching dodges. However it also adds melee priority hits to Heavenly Strike, which becomes vulnerable to being staggered. | | Like many other characters, Yuna relies on assist and reads with {{keyword|raw|raw}} HPs to deal HP damage. Although most of her HP attacks are lower commitment on average, she lacks practical ways to combo into them; Her only solo HP combo requires EX Mode, which is situational. Fortunately Yuna builds an above average amount of '''[[EX_(Dissidia_012)#Overview|EX Force]]''' with almost all of her attacks, so given enough hits, she gets a chance to capitalize on her distinct '''[[EX_(Dissidia_012)#EX_Mode|EX Mode]]'''. Her EX Mode adds extra hits to all her braveries, increasing damage significantly and becoming better at catching dodges. However it also adds melee priority hits to Heavenly Strike, which becomes vulnerable to being staggered. |
|
| |
|
| Yuna works with a variety of builds, including '''[[Customisation_Guide_for_Online_Battles_(Dissidia_012)#Balanced_/_Hybrid|hybrid builds]]''' emphasizing EX gain. Her exclusive (LV100) weapon has a very valuable +3m '''[[EX_(Dissidia_012)#EX_Intake_Range|EX Intake Range]]''' effect, but due to her attacks' disjoints she can struggle to accumulate EX effectively without it. Yuna has average assist conversion capability with most competitive assists and doesn't rely on walls for combos, though they can still help. Yuna's large mid-range attacks can also let her capitalize on additional movement abilities such as Multi Air Slide. | | Yuna works with a variety of builds, including '''[[Customisation_Guide_for_Online_Battles_(Dissidia_012)#Balanced_/_Hybrid|hybrid builds]]''' emphasizing EX gain. Her exclusive (LV100) weapon has a very valuable +3m '''[[EX_(Dissidia_012)#EX_Intake_Range|EX Intake Range]]''' effect, but due to her attacks' disjoints she can struggle to accumulate EX effectively without it. Yuna has average assist conversion capability with most competitive assists and doesn't rely on walls for combos, though they can still help. Yuna's large mid-range attacks can also let her capitalize on additional movement abilities such as Multi Air Slide. |
| Line 108: |
Line 108: |
| |cp=30 (15) | | |cp=30 (15) |
| |cancels=Dodge | | |cancels=Dodge |
| |astatk=
| | |asthit=Stale: '''800''' <br>Fresh: '''1050''' |
| |asthit= | | |level=1 |
| |level= | | |ap=80 |
| |ap= | |
| |gametext=[Close] Summon Ifrit. Sends foe flying. | | |gametext=[Close] Summon Ifrit. Sends foe flying. |
| }} | | }} |
| Line 128: |
Line 127: |
| |cp=- | | |cp=- |
| |cancels=Dodge | | |cancels=Dodge |
| |astatk=
| | |asthit=Stale: '''950''' <br>Fresh: '''1300''' |
| |asthit= | |
| |level= | | |level= |
| |ap= | | |ap= |
| |gametext=[Close] Summon Ifrit. Sends foe flying. | | |gametext= |
| }} | | }} |
|
| |
|
| Line 164: |
Line 162: |
| |damage=3 x 4, 5 x 6 (42) | | |damage=3 x 4, 5 x 6 (42) |
| |startup=27F | | |startup=27F |
| |type=Physical (strike) > Magical (projectiles) | | |type=Physical (strike) <br>Magical (projectiles) |
| |priority=Melee Mid (strike) > Ranged Low (projectiles) | | |priority=Melee Mid (strike) <br>Ranged Low (projectiles) |
| |ex=90 (36, 53~54) | | |ex=90 (36, 53~54) |
| |effect=Chase | | |effect=Chase |
| |cp=30 (15) | | |cp=30 (15) |
| |cancels= | | |cancels=Dodge |
| |astatk=
| | |asthit=Stale: '''920''' <br>Fresh:'''1170''' |
| |asthit= | | |level=27 |
| |level= | | |ap=80 |
| |ap= | | |gametext=[Mid] Summon Ixion. <br>Delay combo to boost hit times. |
| |gametext=[Mid] Summon Ixion. Delay combo to boost hit times. | |
| }} | | }} |
|
| |
|
| Rush forward with Ixion. On launching opponent, Ixion’s horn will glow twice. Pressing Circle ({{pspcir}}) again will fire discs, and pressing as late as possible on the second flash will fire the maximum amount of 6 discs. The max amount of discs provide a safe empty chase against recovery attack and is one of the handful of attacks in the game to do so. | | Rush forward with Ixion. On launching opponent, Ixion’s horn will glow twice. Pressing Circle ({{pspcir}}) again will fire discs, and pressing as late as possible on the second flash will fire the maximum amount of 6 discs. The max amount of discs provide a safe empty chase against recovery attack and is one of the handful of attacks in the game to do so. |
|
| |
|
| This is a '''[[Attack_Priority_(Dissidia_012)#Mid|Melee Mid]]''' so it will stagger regular blocks, making it a relatively safe tool for ground-to-ground or anti-air poking and area denial while the enemy is slightly above ground. | | This is a '''[[Attack_Priority_(Dissidia_012)#Mid|Melee Mid]]''' so it will stagger regular blocks, making it a relatively safe tool for ground-to-ground, anti-air poking and area denial while the enemy is slightly above ground. |
|
| |
|
| This attack is pretty fast on both startup and recovery for its range. As a niche technique, Ixion can spawn on the opposite side of thin obstacles that Yuna is pressed against as an extra-safe poking option. | | This attack is pretty fast on both startup and recovery for its range. As a niche technique, Ixion can spawn on the opposite side of thin obstacles that Yuna is pressed against as an extra-safe poking option. |
| Line 189: |
Line 186: |
| |damage=3 x 4, [10, 10], 5 x 6 (62) | | |damage=3 x 4, [10, 10], 5 x 6 (62) |
| |startup=27F | | |startup=27F |
| |type=Physical (strike) > Magical (projectiles) | | |type=Physical (strike) <br>Magical (projectiles) |
| |priority=Melee Mid (strike) > Ranged Low (projectiles) | | |priority=Melee Mid (strike) <br>Ranged Low (projectiles) |
| |ex=90 | | |ex=90 |
| |effect=Chase | | |effect=Chase |
| |cp= | | |cp= |
| |cancels= | | |cancels=Dodge |
| |astatk=
| | |asthit=Stale: '''1120''' <br>Fresh: '''1370''' |
| |asthit= | |
| |level= | | |level= |
| |ap= | | |ap= |
| Line 202: |
Line 198: |
| }} | | }} |
|
| |
|
| EX mode Aerospark puts Yuna in the air. The hit stun from the projectiles remains largely the same, but because Yuna is now airborne, she can dodge cancel towards her opponent and link EX mode Heavenly Strike without walls or even Diamond Dust when done near a wall. This is the only way to combo into her own HP by herself, which improves Aerospark's damage potential considerably, even though it is difficult to do. | | EX mode Aerospark puts Yuna in the air. In adds more hits and extends the input window for a maximum amount of disc projectiles. |
| | |
| | The hit stun from the projectiles remains largely the same. But because Yuna is now airborne, she can dodge cancel towards her opponent and link EX mode Heavenly Strike without walls or even Diamond Dust when done near a wall. This is the only way to combo into her own HP by herself, which improves Aerospark's damage potential considerably, even though it is difficult to do. |
|
| |
|
| }} | | }} |
| Line 236: |
Line 234: |
| |effect=- | | |effect=- |
| |cp=30 (15) | | |cp=30 (15) |
| |cancels= | | |cancels=Dodge |
| |astatk=
| | |asthit=Stale: '''570''' <br>Fresh: '''820''' |
| |asthit= | | |level=1 |
| |level= | | |ap=80 |
| |ap= | | |gametext=[Long] Summon Valefor. <br>Fire five lasers in wave pattern. |
| |gametext=[Long] Summon Valefor. Fire five lasers in wave pattern. | |
| }} | | }} |
|
| |
|
| Line 257: |
Line 254: |
| |effect=- | | |effect=- |
| |cp=- | | |cp=- |
| |cancels= | | |cancels=Dodge |
| |astatk=
| | |asthit=Stale: '''851''' <br>Fresh:'''1020''' |
| |asthit= | |
| |level= | | |level= |
| |ap= | | |ap= |
| Line 265: |
Line 261: |
| }} | | }} |
|
| |
|
| EX Energy Blast adds a fast melee low priority Ifrit swipe that can beat dash attempts, but is otherwise not particularly outstanding. Being able to combo into projectiles with Ifrit is nice, but the reward on hit remains similiarly underwhelming for the requirements and risk associated with it. | | EX Energy Blast adds a fast melee low priority Ifrit swipe that can beat dash attempts, but is otherwise not outstanding. Being able to combo into projectiles with Ifrit is nice, but the reward on hit remains similiarly underwhelming for the requirements and risk associated with it. |
|
| |
|
| }} | | }} |
| Line 303: |
Line 299: |
| |effect=Chase | | |effect=Chase |
| |cp=30 (15) | | |cp=30 (15) |
| |cancels= | | |cancels=Dodge |
| |astatk=
| | |asthit=Stale: '''850''' <br>Fresh: '''1175''' |
| |asthit= | | |level=12 |
| |level= | | |ap=80 |
| |ap= | | |gametext=[Mid] Summon Valefor. <br>Great for attacking from below. |
| |gametext=[Mid] Summon Valefor. Great for attacking from below. | |
| }} | | }} |
| Yuna calls Valefor who spins at the enemy. If it hits, Yuna can press circle again to send the enemy away, initiating chase. | | Yuna calls Valefor who spins at the enemy. If it hits, Yuna can press circle again to send the enemy away, initiating chase. |
| Line 325: |
Line 320: |
| |effect=Wall Rush | | |effect=Wall Rush |
| |cp=30 (15) | | |cp=30 (15) |
| |cancels= | | |cancels=Dodge |
| |astatk=
| | |asthit=Stale: '''860''' <br>Fresh:'''1290''' |
| |asthit= | |
| |level= | | |level= |
| |ap= | | |ap= |
| Line 367: |
Line 361: |
| |effect=Wall Rush | | |effect=Wall Rush |
| |cp=30 (15) | | |cp=30 (15) |
| |cancels= | | |cancels=Dodge |
| |astatk=
| | |asthit=Stale: '''720''' <br>Fresh: '''970''' |
| |asthit= | | |level=1 |
| |level= | | |ap=80 |
| |ap= | | |gametext=[Close] Summon Shiva. <br>Short range, quick strike. |
| |gametext=[Close] Summon Shiva. Short range, quick strike. | |
| }} | | }} |
| Slightly remote icicle strike attack. This is Yuna’s defining air poke for building assist meter and poking in general. If it hits, press circle to add another hit, press circle again to slam your opponent to the ground for a wall rush. Each hit has a long confirm window if they hit the opponent. | | Slightly remote icicle strike attack. This is Yuna’s defining air poke for building assist meter and poking in general. If it hits, press circle to add another hit, press circle again to slam your opponent to the ground for a wall rush. Each hit has a long confirm window if they hit the opponent. |
| Line 393: |
Line 386: |
| |effect=Wall Rush | | |effect=Wall Rush |
| |cp=- | | |cp=- |
| |cancels= | | |cancels=Dodge |
| |astatk=
| | |asthit=Stale: '''840''' <br>Fresh: '''1090''' |
| |asthit= | |
| |level= | | |level= |
| |ap= | | |ap= |
| Line 427: |
Line 419: |
| {{#tag:tabber | | {{#tag:tabber |
| |Normal= | | |Normal= |
| {{AbilityInfo | | {{AbilityInfo2 |
| | |ver1=Uncharged |
| | |damage1=10 |
| | |startup1=39F |
| | |type1=Magical |
| | |priority1=Ranged Low |
| | |ex1=0 |
| | |effect1=- |
| | |cancels1=Dodge |
| | |asthit1=Stale: '''600''' <br>Fresh: '''850''' |
| | |gametext=[Long] Summon Bahamut. <br>Charge to change strength. |
| | |level=1 |
| | |ap=80 |
| | |cp=30 (15) |
| | |ver2=Charged |
| | |damage2=Each 5 |
| | |startup2=39F |
| | |type2=Magical |
| | |priority2=Ranged Low |
| | |ex2=0 |
| | |effect2=- |
| | |cancels2=Dodge |
| | |asthit2=Stale: '''700''' (all hits) <br>Fresh: '''950''' (all hits) |
| |image=https://dissidia.wiki/images/c/cd/Brv_yuna_impulse_%28normal%29.jpeg | | |image=https://dissidia.wiki/images/c/cd/Brv_yuna_impulse_%28normal%29.jpeg |
| |imgpos= | | |imgpos= |
| |damage=10 (uncharged) / each 5 (charged)
| |
| |startup=39F
| |
| |type=Magical
| |
| |priority=Ranged Low
| |
| |ex=0
| |
| |effect=-
| |
| |cp=30 (15)
| |
| |cancels=
| |
| |astatk=
| |
| |asthit=
| |
| |level=
| |
| |ap=
| |
| |gametext=[Long] Summon Bahamut. Charge to change strength.
| |
| }} | | }} |
|
| |
|
| Line 463: |
Line 464: |
| |cp=- | | |cp=- |
| |cancels= | | |cancels= |
| |astatk=
| |
| |asthit= | | |asthit= |
| |level= | | |level= |
| Line 489: |
Line 489: |
| |startup=37F | | |startup=37F |
| |type=Physical | | |type=Physical |
| |priority=Melee High (claw), Ranged High (pillars) | | |priority=Melee High (claw) <br>Ranged High (pillars) |
| |ex=60~150 | | |ex=60~150 |
| |effect=- | | |effect=- |
| |cp=30 (15) | | |cp=30 (15) |
| |cancels= | | |cancels=Dodge |
| |astatk=
| | |asthit=Stale: '''600''' (claw) <br>Fresh: '''850''' (claw) |
| |asthit= | | |level=8 |
| |level= | | |ap=150 |
| |ap= | | |gametext=[Close] Summon Ifrit. <br>Short range, good vertical range. |
| |gametext=[Close] Summon Ifrit. Short range, good vertical range. | |
| }} | | }} |
|
| |
|
| Line 507: |
Line 506: |
| Ifrit’s claw is melee high priority, and Yuna’s fastest and safest at that; It is her go-to option for reflecting ranged high attacks when necessary. Do note that Ifrit’s claw does not cover Yuna’s body. | | Ifrit’s claw is melee high priority, and Yuna’s fastest and safest at that; It is her go-to option for reflecting ranged high attacks when necessary. Do note that Ifrit’s claw does not cover Yuna’s body. |
|
| |
|
| The pillars can be used as a 1-hit HP if the opponent is sitting with a full EX gauge. The knockback from the pillar can be converted into a combo by precisely timing Kuja assist. Fire pillars remain on the field if the claw clashes partially through the attack, which can lead to favorable trades with opponent’s short-range melee high attacks. | | The pillars can be used as a 1-hit HP if the opponent is sitting with a full EX gauge. The knockback from the pillars can be converted into a combo by precisely timing Kuja assist. Fire pillars remain on the field if the claw clashes partially through the attack, which can lead to favorable trades with opponent’s short-range melee high attacks. |
|
| |
|
| |-|Energy Ray= | | |-|Energy Ray= |
| Line 521: |
Line 520: |
| |effect=- | | |effect=- |
| |cp=30 (15) | | |cp=30 (15) |
| |cancels= | | |cancels=Dodge |
| |astatk=
| | |asthit=- |
| |asthit= | | |level=1 |
| |level= | | |ap=150 |
| |ap= | | |gametext=[Long] Summon Valefor. <br>Invokes vertically long columns of fire. |
| |gametext=[Long] Summon Valefor. Invokes vertically long columns of fire. | |
| }} | | }} |
| Yuna’s long-range HP attack. Valefor draws a glowing line on the ground that explodes straight upwards after a short delay. Valefor has a slight curving tracking when casting the ray. This is just enough to force slower walking characters to dodge to the side, but not enough to actually catch dodges most of the time. | | Yuna’s long-range HP attack. Valefor draws a glowing line on the ground that explodes straight upwards after a short delay. Valefor has a slight curving tracking when casting the ray. This is just enough to force slower walking characters to dodge to the side, but not enough to actually catch dodges most of the time. |
| Line 549: |
Line 547: |
| |effect=Absorb | | |effect=Absorb |
| |cp=30 (15) | | |cp=30 (15) |
| |cancels= | | |cancels=Dodge |
| |astatk=
| | |asthit=Stale: '''600''' <br>Fresh: '''850''' |
| |asthit= | | |level=1 |
| |level= | | |ap=150 |
| |ap= | | |gametext=[Mid] Summon Ixion. <br>Effective against any height. |
| |gametext=[Mid] Summon Ixion. Effective against any height. | |
| }} | | }} |
|
| |
|
| Line 572: |
Line 569: |
| |effect=- | | |effect=- |
| |cp=30 (15) | | |cp=30 (15) |
| |cancels= | | |cancels=Dodge |
| |astatk=
| | |asthit=Stale: '''600''' <br>Fresh: '''850''' |
| |asthit= | | |level=19 |
| |level= | | |ap=150 |
| |ap= | | |gametext=[Close] Summon Shiva. <br>Short range, quick execution. |
| |gametext=[Close] Summon Shiva. Short range, quick execution. | |
| }} | | }} |
| Yuna summons Shiva to create a lingering ice cloud in one spot, that deals small bravery damage and an HP hit when touched. Very potent and a fast anti-approach and mixup move, especially against advancing melee attacks. | | Yuna summons Shiva to create a lingering ice cloud in one spot, that deals small bravery damage and an HP hit when touched. Very potent and a fast anti-approach and mixup move, especially against advancing melee attacks. |
| Line 595: |
Line 591: |
| |effect=Wall Rush | | |effect=Wall Rush |
| |cp=30 (15) | | |cp=30 (15) |
| |cancels= | | |cancels=Dodge |
| |astatk=
| | |asthit=Stale: '''660''' <br>Fresh: '''910''' |
| |asthit= | | |level=36 |
| |level= | | |ap=150 |
| |ap= | | |gametext=[Long] Summon Bahamut. <br>Very accurate and powerful. |
| |gametext=[Long] Summon Bahamut. Very accurate and powerful. | |
| }} | | }} |
| Yuna summons Bahamut under her, who fires a big laser at mid range. The laser deals a good amount of damage and it is Yuna’s only HP attack that can wall rush. Before firing the laser, Bahamut has excellent horizontal tracking on the opponent. During the attack, it also has decent downwards tracking and serviceable sideways tracking during the attack. All this makes Mega Flare good for catching most dodges close, if not directly below Yuna. | | Yuna summons Bahamut under her, who fires a big laser at mid range. The laser deals a good amount of damage and it is Yuna’s only HP attack that can wall rush. Before firing the laser, Bahamut has excellent horizontal tracking on the opponent. During the attack, it also has decent downwards tracking and serviceable sideways tracking during the attack. All this makes Mega Flare good for catching most dodges close, if not directly below Yuna. |
| Line 615: |
Line 610: |
|
| |
|
| == Double Summons == | | == Double Summons == |
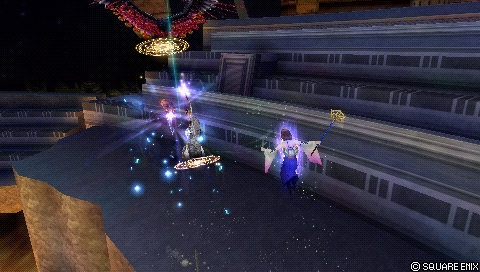
| <img src="https://dissidia.wiki/images/3/3f/Ex_mode_yuna_heavenly_strike.jpeg" style="object-fit: none; object-position: 0% 0%; border:3px solid RGB(105,86,160);"></img>
| | {{image|https://dissidia.wiki/images/3/3f/Ex_mode_yuna_heavenly_strike.jpeg}} |
| <div style="clear: both"></div>
| |
|
| |
|
| ''[Always active while in EX Mode] | | ''[Always active while in EX Mode] |
| Line 635: |
Line 629: |
|
| |
|
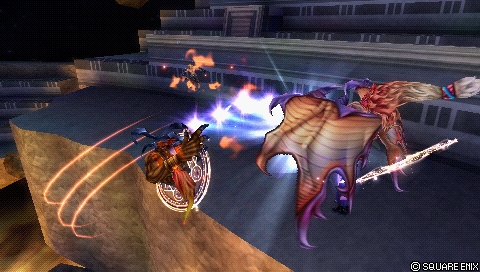
| == EX Burst: To the Farplane == | | == EX Burst: To the Farplane == |
| <img src="https://dissidia.wiki/images/0/06/Ex_burst_yuna.jpeg" style="object-fit: none; object-position: 0% 0%; border:3px solid RGB(105,86,160);"></img>
| | {{image|https://dissidia.wiki/images/0/06/Ex_burst_yuna.jpeg}} |
| <div style="clear: both"></div>
| |
|
| |
|
| ''Sends foe to another dimension after attacking with the summoned Aeon. Enter the commands that appear to summon another Aeon.'' | | ''Sends foe to another dimension after attacking with the summoned Aeon. Enter the commands that appear to summon another Aeon.'' |
| Line 651: |
Line 644: |
|
| |
|
| = Combos = | | = Combos = |
| | |
| | ''Main article: '''[[Yuna_(Dissidia_012)/Combos|Yuna (Combos)]]''''' |
|
| |
|
| == Solo == | | == Solo == |
| Line 668: |
Line 663: |
| |exhits=0 > 15 | | |exhits=0 > 15 |
| |meteropp= | | |meteropp= |
| |video= | | |video=https://www.youtube.com/watch?v=PlnIpb7acwk&t=5s |
| |notes=This utilizes the hit glitch, which requires Yuna doing Heavenly Strike when the charged Impulse hits the opponent. Because Yuna cannot cancel Impulse into Heavenly Strike, the projectiles must hit much later than when they were first shot. That limits the practicality of this combo, but it still provides Yuna a long range wall rush conversion into assist if it hits. | | |notes=This utilizes the hit glitch, which requires Yuna doing Heavenly Strike when the charged Impulse hits the opponent. Because Yuna cannot cancel Impulse into Heavenly Strike, the projectiles must hit much later than when they were first shot. That limits the practicality of this combo, but it still provides Yuna a long range wall rush conversion into assist if it hits. |
| }}
| |
| {{Combo-012Data
| |
| |combo=Aerospark (max delay) > DC (forward) > Heavenly Strike
| |
| |condition=Low ceiling / corner only.
| |
| |characters=
| |
| |damage=64 + WR
| |
| |damagehits=3x4, 5x6 > 4, 6, 12
| |
| |ex=120
| |
| |exhits=90 + 30
| |
| |meteropp=
| |
| |video=
| |
| |notes=This combo only works in stages with low ceiling and corners, such as Phantom Train. That makes this another situational, but powerful solo combo for Yuna. The timing for dodge cancel and attacking are both strict. So even with the reduced knockback, this can still be a difficult combo to do.
| |
| }}
| |
| {{Combo-012Data
| |
| |combo='''EX Aerospark (max delay)''' > DC (forward) > Heavenly Strike
| |
| |condition=Ground only.
| |
| |requirement=EX Mode only.
| |
| |characters=
| |
| |damage=76~92 + WR
| |
| |damagehits='''Minimum:''' 3x4, 10, 5x6 (52) > 4, 4, 4, 12 (24). '''Highest:''' 3x4, [10, 10], 5x6 > [4], 6, [4, 4], 12
| |
| |ex=105-120
| |
| |exhits=90 + 15-30
| |
| |meteropp=
| |
| |video=
| |
| |notes=This is one of Yuna's strongest solo combos. It is possible due to EX Aerospark leaving Yuna airborne. No Adamant Chains midair boost is needed, but the timing is strict once again. Yuna must dodge towards her opponent for this to work. The second hit of EX Heavenly Strike can connect thanks to its increased range. Mapping Heavenly Strike to up + circle (↑+{{pspcir}}) can make this combo easier to do.
| |
| }} | | }} |
| {{Combo-012Data | | {{Combo-012Data |
| Line 706: |
Line 676: |
| |exhits=90 + 90 | | |exhits=90 + 90 |
| |meteropp= | | |meteropp= |
| |video= | | |video=https://www.youtube.com/watch?v=PlnIpb7acwk&t=72s |
| |notes=This is Yuna's only solo combo into an HP attack. The requirements are high and situational, but the reward ''is'' noteworthy. Diamond Dust has less vertical reach than Heavenly Strike, so a wall etc. is needed to reduce the opponent's knockback. That will shorten the distance Yuna has to travel. Mapping Diamond Dust to up + square (↑+{{pspsqu}}) can make this combo easier to do. | | |notes=This is Yuna's only solo combo into an HP attack. The requirements are high and situational, but the reward ''is'' noteworthy. Diamond Dust has less vertical reach than Heavenly Strike, so a wall etc. is needed to reduce the opponent's knockback. That will shorten the distance Yuna has to travel. Mapping Diamond Dust to up + square (↑+{{pspsqu}}) can make this combo easier to do. |
| }} | | }} |
| Line 719: |
Line 689: |
| |exhits= 63 + 30 | | |exhits= 63 + 30 |
| |meteropp= | | |meteropp= |
| |video= | | |video=https://www.youtube.com/watch?v=PlnIpb7acwk&t=13s |
| |notes=When Diamond Dust hits late, Yuna has enough frame advantage to go for a solo follow-up. Heavenly Strike's vertical reach is a consistent follow-up, and quite rewarding if it wall rushes for an assist combo. Using assist to set this up helps Yuna keep the opponent on the ground as well. | | |notes=When Diamond Dust hits late, Yuna has enough frame advantage to go for a solo follow-up. Heavenly Strike's vertical reach is a consistent follow-up, and quite rewarding if it wall rushes for an assist combo. Using assist to set this up helps Yuna keep the opponent on the ground as well. |
| }}
| |
| {{Combo-012Data
| |
| |combo='''Diamond Dust (late hit)''' > Sonic Wings
| |
| |condition=HP starter, no wall required.
| |
| |requirement=Starter must hit late, opponent must be below Yuna.
| |
| |characters=
| |
| |damage=2
| |
| |damagehits=2 > 0
| |
| |ex=153
| |
| |exhits=63 + 90
| |
| |meteropp=
| |
| |video=
| |
| |notes=Yuna must be above her opponent for this to work. Diamond Dust's upward knockback remains the same, but the opponent won't be pulled to Yuna's height when it hits. Sonic Wings may not deal any bravery damage at all due to the short gap between Diamond Dust and the bravery. It generates 90 EX on hit however and pushes the opponent back a fair amount.
| |
| }}
| |
| {{Combo-012Data
| |
| |combo='''Diamond Dust (late hit)''' > Diamond Dust
| |
| |condition=HP starter, no wall required.
| |
| |requirement=Starter must hit late, opponent must be below Yuna.
| |
| |characters=
| |
| |damage=4
| |
| |damagehits=2 > 2
| |
| |ex=153
| |
| |exhits=63 + 90
| |
| |meteropp=
| |
| |video=
| |
| |notes=Yuna must be above her opponent for this to work. Diamond Dust's upward knockback remains the same, but the opponent won't be pulled to Yuna's height when it hits. Diamond Dust generates the same amount of EX as Sonic Wings, but also applies meter depletion if it's equipped. The opponent will be left closer and above Yuna, which is a good position for poking more with Heavenly Strike.
| |
| }} | | }} |
| }} | | }} |
| Line 752: |
Line 696: |
| == Assist == | | == Assist == |
|
| |
|
| == Kuja == | | === Kuja === |
|
| |
|
| {{Combo-012 | | {{Combo-012 |
| | data = | | | data = |
| {{Combo-012Data | | {{Combo-012Data |
| |combo=Meteor Strike (1st hit) > Kuja > AC > Diamond Dust | | |combo='''Sonic Wings (1)''' > Kuja > AC > Diamond Dust |
| |condition=Ground, no wall
| |
| |requirement=
| |
| |characters=
| |
| |damagehits=10, 50, 10 + HP
| |
| |damage=70
| |
| |exhits=30 + 90
| |
| |ex=120
| |
| |meteropp=
| |
| |video=
| |
| |notes=Basic grounded starter. No wall required, but be sharp about calling Kuja on time.
| |
| }}
| |
| {{Combo-012Data
| |
| |combo=Meteor Strike > WR > Kuja > AC > Diamond Dust
| |
| |condition=Ground, Wall Rush
| |
| |requirement=Wall
| |
| |characters=
| |
| |damagehits=30, 50, 10
| |
| |damage=90 + BRV Wall Rush
| |
| |exhits=30 + 90
| |
| |ex=120
| |
| |meteropp=
| |
| |video=
| |
| |notes=Basic wall rush conversion.
| |
| }}
| |
| {{Combo-012Data
| |
| |combo=Aerospark (max delay) > Empty Chase > Kuja > AC > Diamond Dust
| |
| |condition=Ground, Chase
| |
| |requirement=
| |
| |characters=
| |
| |damagehits=42, 50, 10
| |
| |damage=102
| |
| |exhits=90 + 90
| |
| |ex=180
| |
| |meteropp=
| |
| |video=
| |
| |notes=Good grounded combo for EX. No wall required, but empty chase and Kuja assist must be done as soon as possible. There is not enough frame advantage otherwise. If aerial {{accboo}} booster is equipped, Yuna has to dodge to keep its active.
| |
| }}
| |
| {{Combo-012Data
| |
| |combo=Aerospark > Kuja > Aerospark (max delay) > both HIT > chase BRV > AC > Diamond Dust
| |
| |condition=Ground, Chase
| |
| |requirement=Wall
| |
| |characters=
| |
| |damagehits='''Minimum:''' 2x4, 5x6, ~50 (Kuja), 0 (Chase BRV), 10. '''Maximum:''' 3x4, 5x6, 50 (Kuja), 30 (Chase BRV), 10
| |
| |damage=~98 - 132
| |
| |exhits='''Minimum:''' ~90, 15, 90. '''Maximum:''' ~90, 60, 90
| |
| |ex=195 - 240
| |
| |meteropp=
| |
| |video=
| |
| |notes=Chase setup that enables more damage and EX. The chase BRV keeps the combo going, but the opponent can choose to dodge it. The combo will work even then, but obviously means less damage and EX.
| |
| }}
| |
| {{Combo-012Data
| |
| |combo=Sonic Wings (1) > Kuja > AC > Diamond Dust
| |
| |condition=Midair, no wall | | |condition=Midair, no wall |
| |requirement= | | |requirement= |
| Line 818: |
Line 710: |
| |ex=120 | | |ex=120 |
| |meteropp= | | |meteropp= |
| |video= | | |video=https://www.youtube.com/watch?v=PlnIpb7acwk&t=128s |
| |notes=Midair conversion, can be done at a distance. Since Yuna is already airborne, this can help reach the ceiling. Be wary of banish traps in Ultimecia's Castle and Orphan's Cradle, though. | | |notes=Midair conversion, can be done at a distance. Since Yuna is already airborne, this can help reach the ceiling. Be wary of banish traps in Ultimecia's Castle and Orphan's Cradle, though. |
| }} | | }} |
| {{Combo-012Data
| | |
| |combo=Sonic Wings > Kuja > Empty Chase > AC > Diamond Dust
| |
| |condition=Midair, wall
| |
| |requirement=
| |
| |characters=
| |
| |damagehits='''Minimum:''' 5x3, 15, 50 (Kuja), 10. '''Maximum:''' 5x4, 15, 50 (Kuja), 10
| |
| |damage=90 - 95
| |
| |exhits=90 + 90
| |
| |ex=180
| |
| |meteropp=
| |
| |video=
| |
| |notes=If near a wall, Yuna can finish Sonic Wings for more damage and EX. Empty Chase as Kuja is about to hit the opponent and follow with Assist Chase afterwards.
| |
| }}
| |
|
| |
|
| {{Combo-012Data | | {{Combo-012Data |
| |combo=Heavenly Strike (2 hits) > Kuja > AC > Diamond Dust | | |combo='''Heavenly Strike''' > WR > Kuja > AC > Diamond Dust |
| |condition=Midair, no wall
| |
| |requirement=
| |
| |characters=
| |
| |damagehits=4, 6, 50 (Kuja), 10
| |
| |damage=70
| |
| |exhits=15 + 15 + 90
| |
| |ex=120
| |
| |meteropp=
| |
| |video=
| |
| |notes=Basic air combo off of Yuna's main poke. Low damage, but works without walls. Yuna uses this move frequently, so this is a good combo to learn first.
| |
| }}
| |
| {{Combo-012Data
| |
| |combo=Heavenly Strike (2) > Kuja > DC (up) > H. Strike (1) > DC > AC > Diamond Dust
| |
| |condition=Midair, no wall
| |
| |requirement=
| |
| |characters=
| |
| |damagehits=4, 6, 4, 50, 10
| |
| |damage=74
| |
| |exhits=15 + 15 + 15 + 90
| |
| |ex=135
| |
| |meteropp=
| |
| |video=
| |
| |notes=A simple filler that slightly increases damage and EX gain. Dodge cancel up and hit the opponent with H. Strike's first hit when Kuja is attacking upwards.
| |
| }}
| |
| {{Combo-012Data
| |
| |combo=Heavenly Strike (2) > Kuja > DC (up) > Sonic Wings (1) > AC > Diamond Dust
| |
| |condition=Midair, no wall
| |
| |requirement=
| |
| |characters=
| |
| |damagehits=4, 6, 4, 4x5, 50 (Kuja), 10
| |
| |damage=94
| |
| |exhits=15 + 15 + 30 + 90
| |
| |ex=150
| |
| |meteropp=
| |
| |video=
| |
| |notes=A stronger filler that increases damage and EX gain. Dodge cancelling Sonic Wings is not necessary, but leaves less time for a slower HP if it's needed.
| |
| }}
| |
| {{Combo-012Data
| |
| |combo=Heavenly Strike (2) > Kuja > DC x2 > Mega Flare
| |
| |condition=Midair
| |
| |requirement=
| |
| |characters=
| |
| |damagehits=4, 6, 50, 16 + HP WR
| |
| |damage=76 + HP WR
| |
| |exhits=15 + 15 + 24
| |
| |ex=54
| |
| |meteropp=
| |
| |video=
| |
| |notes=Mega Flare doesn't track much vertically, but it is possible to use it after Kuja. Try to time Mega Flare a bit before opponent stops moving up.
| |
| }}
| |
| {{Combo-012Data
| |
| |combo=Heavenly Strike > WR > Kuja > AC > Diamond Dust
| |
| |condition=Midair, Wall Rush (ground) | | |condition=Midair, Wall Rush (ground) |
| |requirement= | | |requirement= |
| Line 897: |
Line 725: |
| |ex=120 | | |ex=120 |
| |meteropp= | | |meteropp= |
| |video= | | |video=https://www.youtube.com/watch?v=PlnIpb7acwk&t=203s |
| |notes=Basic air combo that leads to Kuja ground assist. Kuja provides a lot of time to reposition and add filler attacks. Many fillers work great here. | | |notes=Basic air combo that leads to Kuja ground assist. Kuja provides a lot of time to reposition and add filler attacks. Many fillers work great here. |
| }} | | }} |
| | |
| | |
| {{Combo-012Data | | {{Combo-012Data |
| |combo=Heavenly Strike > WR > Kuja > DC (side) > Sonic Wings (1) > DC > AC > Diamond Dust | | |combo='''Diamond Dust''' > Kuja > DC > AC > Diamond Dust |
| |condition=Midair, Wall Rush (ground)
| |
| |requirement=
| |
| |characters=
| |
| |damagehits=22 + WR, 47 (Kuja), 20, 10
| |
| |damage=99 + BRV WR
| |
| |exhits=15 + 15 + 30 + 90
| |
| |ex=150
| |
| |meteropp=
| |
| |video=
| |
| |notes=
| |
| }}
| |
| {{Combo-012Data
| |
| |combo=H. Strike > WR > Kuja > DC (quarter circle) > Diamond Dust > DC > AC > Diamond Dust
| |
| |condition=Midair, Wall Rush (Ground)
| |
| |requirement=
| |
| |characters=
| |
| |damagehits=22 + WR, 47 (Kuja), 10 (D. Dust), 10 (D. Dust)
| |
| |damage=89 + BRV WR
| |
| |exhits=15 + 15 + 90 + 90
| |
| |ex=210
| |
| |meteropp=
| |
| |video=
| |
| |notes=This is Yuna's strongest filler for EX. Aiming Diamond Dust without losing damage or dropping the combo can be tricky. Landing this also inflicts more meter depletion if it's equipped. The good thing about that is this combo does not rely on walls, only the floor. Yuna has a different HP attack filler that requires it.
| |
| }}
| |
| {{Combo-012Data
| |
| |combo=H. Strike > WR > Kuja > DC (towards Kuja) > Mega Flare > WR > DC > AC > Sonic Wings
| |
| |condition=Midair, ground & wall
| |
| |requirement=
| |
| |characters=
| |
| |damagehits=22 + WR, ~47 (Kuja), 16 (M. Flare) + HP WR, 35
| |
| |damage=~120
| |
| |exhits=15 + 15 + 24 + 90
| |
| |ex=144
| |
| |meteropp=
| |
| |video=
| |
| |notes=This combo filler is the only HP wall rush Yuna can use. This can deal lots of extra damage at high bravery (25 % of original bravery), with still enough time for Sonic Wings. Mega Flare may push the opponent out of Kuja during this combo, which can reduce brv damage. Regardless, Kuja has enough tracking to hit after Mega Flare. Just be ready to dodge cancel as soon as possible. If extra meter depletion is needed, replace Sonic Wings ender with Diamond Dust.
| |
| }}
| |
| {{Combo-012Data
| |
| |combo=H. Strike > WR > Kuja > Hellfire > DC > AC > Sonic Wings
| |
| |condition=Midair, Wall Rush (Ground)
| |
| |requirement=
| |
| |characters=
| |
| |damagehits=22 + WR, 47 (Kuja), 10, 35
| |
| |damage=114
| |
| |exhits=15 + 15 + 60~150 + 90
| |
| |ex=180 - 270
| |
| |meteropp=
| |
| |video=
| |
| |notes=Hellfire can hit multiple times with the fire pillars, which theoretically makes this the strongest filler for EX and meter depletion. The close range claw hit also deals comparable BRV damage to other HP fillers. Time the Hellfire during Kuja's multihits.
| |
| }}
| |
| {{Combo-012Data
| |
| |combo=H. Strike > WR > Kuja > DC x2 > Diamond Dust (late) > Sonic Wings
| |
| |condition=Midair, Wall Rush (Ground)
| |
| |requirement=
| |
| |characters=
| |
| |damagehits=22 + WR, 47 (Kuja), 2 + HP, 35
| |
| |damage=106
| |
| |exhits=15 + 15 + 63 + 90
| |
| |ex=183
| |
| |meteropp=
| |
| |video=
| |
| |notes=Kuja ground BRV can also setup Yuna's late Diamond Dust combos. Time the Diamond Dust a bit after Kuja's multihits begin.
| |
| }}
| |
| {{Combo-012Data
| |
| |combo=Diamond Dust > Kuja > DC > AC > Diamond Dust
| |
| |condition=Midair, no wall | | |condition=Midair, no wall |
| |requirement= | | |requirement= |
| Line 975: |
Line 740: |
| |ex=180 | | |ex=180 |
| |meteropp= | | |meteropp= |
| |video= | | |video=https://www.youtube.com/watch?v=PlnIpb7acwk&t=297s |
| |notes=Basic midair combo off of Yuna's fastest HP. Good EX gain, no wall needed. The dodge cancel (DC) is not necessary, unless the stage or aerial {{accboo}} booster require it. | | |notes=Basic midair combo off of Yuna's fastest HP. Good EX gain, no wall needed. The dodge cancel (DC) is not necessary, unless the stage or aerial {{accboo}} booster require it. |
| }} | | }} |
| | |
| {{Combo-012Data | | {{Combo-012Data |
| |combo=Hellfire > Kuja > AC > Diamond Dust | | |combo='''Mega Flare''' > WR > Kuja > DC > AC > Diamond Dust |
| |condition=
| |
| |requirement=
| |
| |characters=
| |
| |damagehits=HP, ~56
| |
| |damage=HP, 46, 10, HP
| |
| |exhits=60 + 90
| |
| |ex=150
| |
| |meteropp=
| |
| |video=
| |
| |notes=Grounded anti-air conversion. Works when opponent is above Yuna or close to her. Kuja assist won't always land all of his hits, which reduces BRV damage slightly. He can consistently hit the opponent though.
| |
| }}
| |
| {{Combo-012Data
| |
| |combo=Mega Flare > WR > Kuja > DC > AC > Diamond Dust
| |
| |condition=Wall Rush | | |condition=Wall Rush |
| |requirement= | | |requirement= |
| Line 1,001: |
Line 754: |
| |ex=114 | | |ex=114 |
| |meteropp= | | |meteropp= |
| |video= | | |video=https://www.youtube.com/watch?v=PlnIpb7acwk&t=330s |
| |notes=Basic wall rush conversion. If you catch the opponent dodging after Heavenly Strike, this is a good way to capitalize on that habit. Mega Flare is Yuna's only wall rush HP, so the payoff can be great. | | |notes=Basic wall rush conversion. If you catch the opponent dodging after Heavenly Strike, this is a good way to capitalize on that habit. Mega Flare is Yuna's only wall rush HP, so the payoff can be great. |
| }} | | }} |
| {{Combo-012Data | | {{Combo-012Data |
| |combo=Energy Ray > Kuja > AC > Diamond Dust | | |combo='''Energy Ray''' > Kuja > AC > Diamond Dust |
| |condition=Ground (Yuna) | | |condition=Ground (Yuna) |
| |requirement= | | |requirement= |
| Line 1,014: |
Line 767: |
| |ex=150 | | |ex=150 |
| |meteropp= | | |meteropp= |
| |video= | | |video=https://www.youtube.com/watch?v=PlnIpb7acwk&t=344s |
| |notes=Basic HP conversion. Energy Ray is pretty linear, but the generous hit stun rewards good reads. | | |notes=Basic HP conversion. Energy Ray is pretty linear, but the generous hit stun rewards good reads. |
| }}
| |
| {{Combo-012Data
| |
| |combo=Thor's Hammer > Kuja > AC > Diamond Dust.
| |
| |condition=Midair, wall / corner
| |
| |requirement=
| |
| |characters=
| |
| |damagehits=10 + HP, 50, 10 + HP
| |
| |damage=70 + HP x2
| |
| |exhits=90 + 90
| |
| |ex=180
| |
| |meteropp=
| |
| |video=
| |
| |notes=Basic HP conversion. This requires wall or corner, but it's reliable due to shorter knockback and long hit stun.
| |
| }}
| |
| {{Combo-012Data
| |
| |combo=Impulse (charged) > Impulse HIT > Heavenly Strike > WR > Kuja > AC > Diamond Dust
| |
| |condition=Ground,
| |
| |requirement='''[[Glitch_(Dissidia_012)#Hit_Glitch|hit glitch]]'''
| |
| |characters=
| |
| |damagehits='''Minimum:''' 5, 5, 6, 12 + WR, 47, 10 + HP. '''Maximum:''' 5, 5, 5, 5, 6, 12 + WR, 47, 10 + HP
| |
| |damage=85 - 95 + BRV WR + HP
| |
| |exhits=15 + 90
| |
| |ex=105
| |
| |meteropp=
| |
| |video=
| |
| |notes=The hit glitch combo can also start assist combos. Depending on how far Yuna is from the opponent, filler hits may not be possible at all.
| |
| }}
| |
| {{Combo-012Data
| |
| |combo='''EX Aerospark (max delay)''' > DC (forward) > Heavenly Strike > WR
| |
| |condition=Ground only.
| |
| |requirement=EX Mode only.
| |
| |characters=
| |
| |damage=171~187 + WR & HP
| |
| |damagehits='''Minimum:''' 3x4, 10, 5x6 (52) > 4, 4, 4, 12 (24) > 47 (Kuja) > 38 > 10 + HP. '''Highest:''' 3x4, [10, 10], 5x6 > [4], 6, [4, 4], 12 > 47 (Kuja) > 38 > 10 + HP
| |
| |exhits=90 + 15-30 + 90
| |
| |ex=195 - 210
| |
| |meteropp=
| |
| |video=
| |
| |notes=The EX mode combo can also start assist combos. This can be a particularly powerful combo route when combined with fillers.
| |
| }}
| |
| {{Combo-012Data
| |
| {{Combo-012Data
| |
| |combo='''EX Aerospark''' > DC (forward) > Diamond Dust > Kuja > AC > Diamond Dust
| |
| |condition=Ground only, near wall / corner / ceiling.
| |
| |requirement=EX mode only.
| |
| |characters=
| |
| |damage=122~132 + HP
| |
| |damagehits='''Minimum:''' 3x4, 10, 5x6 (52) > 2x5 (10) > 50 (Kuja) > 10 + HP. '''Highest:''' 3x4, [10, 10], 5x6 > 2x5 (62) > 50 (Kuja) > 10 + HP.
| |
| |ex=180
| |
| |exhits=90 + 90
| |
| |meteropp=
| |
| |video=
| |
| |notes=Since Yuna can combo into Diamond Dust with this route, it also enables an assist combo. The requirements are still high, but the reward is quite good for Yuna. If EX mode is still active, Sonic Wings wall rush is also a good option. Otherwise delaying HP for base bravery recovery is recommended.
| |
| }} | | }} |
| }} | | }} |
|
| |
|
| = Builds = | | = Builds = |
| Builds here.<zx<x
| | |
| aaa
| |
| <tabber> | | <tabber> |
| |-|Hybrid= | | |-|Hybrid= |
| Line 1,088: |
Line 787: |
| |ast=Kuja | | |ast=Kuja |
| |wpn=Spira's Hope | | |wpn=Spira's Hope |
| |hand=Hero's Shield ([[CP_Glitch_(Dissidia_012)|'''CP Glitch''']]) | | |hand=Hero's Shield {{equip}} |
| |head=Royal Crown | | |head=Royal Crown |
| |armor=Maximillian ([[CP_Glitch_(Dissidia_012)|'''CP Glitch''']]) | | |armor=Maximillian {{equip}} |
| |acc1={{accbas}} Dismay Shock | | |acc1={{accbas}} Dismay Shock |
| |acc2={{accbas}} Battle Hammer | | |acc2={{accbas}} Battle Hammer |
| Line 1,132: |
Line 831: |
| |hp3-a=Mega Flare | | |hp3-a=Mega Flare |
| }}}} | | }}}} |
| | |
| | == Basic Abilities == |
|
| |
|
| {{Build-Ability | | {{Build-Ability |
| Line 1,199: |
Line 900: |
| == Build Overview == | | == Build Overview == |
|
| |
|
| Equip the Best Dresser extra ability for +100 base bravery.
| | This is a general use all-rounder build. Constant EX absorption, long EX intake range with Yuna's exclusive weapon and high base bravery are key aspects of this build. |
| | |
| | The damage comes from the base bravery and the fact it recovers much faster with Royal Crown {{equhead}}and Great Gospel {{accsp}} equipped. If Yuna lands an HP attack by herself while at base bravery, Kuja assist usually provides enough time for it to recover. The Best Dresser extra ability is required for higher base bravery. The meter depletion is not high, but it is still good to have. |
|
| |
|
| == CP Allocation == | | == CP Allocation == |
|
| |
|
| 25 CP is available for Counterattack extra ability. | | 25 CP is available for Energy Blast, Energy Ray, the Counterattack extra ability and other basic abilities. |
|
| |
|
| == Substitutes == | | == Substitutes == |
| Line 1,211: |
Line 914: |
| {{Build-SubstituteData | | {{Build-SubstituteData |
| |item={{accsp}} Blue Gem | | |item={{accsp}} Blue Gem |
| |substitute= | | |substitute={{accsp}} First to Victory <br>{{accsp}} Winged Boots |
| {{accsp}} First to Victory | | |notes=Blue Gem contributes to damage with higher base bravery. But if that is not important, First to Victory provides a small initial boost in meter and bravery. |
| {{accsp}} Winged Boots | |
| |notes= | |
| Blue Gem contributes to damage with higher base bravery. But if that is not important, First to Victory provides a small initial boost in meter and bravery. | |
| | |
| Winged Boots reduces bravery depletion from '''[[Bravery_(Dissidia_012)#Banish_Trap|banish traps]]''', but this is only relevant in stages that have them. | | Winged Boots reduces bravery depletion from '''[[Bravery_(Dissidia_012)#Banish_Trap|banish traps]]''', but this is only relevant in stages that have them. |
| }} | | }} |
|
| |
| {{Build-SubstituteData | | {{Build-SubstituteData |
| |item=Omni Ground Dash | | |item=Omni Ground Dash |
| |substitute= | | |substitute=Ground Dash <br>Reverse Ground Dash |
| Ground Dash | |
| Reverse Ground Dash | |
| |notes=If lateral movement is not important, equipping one of these dashes will move Yuna in one direction while building assist gauge. | | |notes=If lateral movement is not important, equipping one of these dashes will move Yuna in one direction while building assist gauge. |
| }} | | }} |
| Line 1,233: |
Line 929: |
| }} | | }} |
| }} | | }} |
| | |
| | == Attacks (Staple) == |
| | |
| | These attacks are recommended regardless of matchup, stage or player preference. |
| | |
| | Yuna does not switch out attacks often. Her core moves remain largely the same. |
| | |
| | '''Meteor Strike (BRV)''': Occasional ground poke, defensive melee low priority |
| | |
| | '''Aerospark (BRV)''': Mid priority gap closer, occasional anti-air and ground threat |
| | |
| | '''Heavenly Strike (BRV)''': Main aerial poke, combo starter, assist gauge builder |
| | |
| | '''Sonic Wings (BRV)''': Yuna's aerial melee poke, ranged disjoint |
| | |
| | '''Hellfire (HP)''': Defensive single hit HP, anti-air |
| | |
| | '''Diamond Dust (HP)''': Very fast HP, good EX, consistent assist combo starter and combo ender |
| | |
| | '''Thor's Hammer (HP)''': Catch dodges around Yuna |
| | |
| | '''Mega Flare (HP)''': Yuna's only HP wall rush, reflect HP projectiles, grounded wake-up pressure |
| | |
| | == Attacks (Flexible) == |
| | |
| | These attacks are great to have, but can be swapped or removed depending on matchup, stage or player preference. |
| | |
| | '''Impulse (BRV)''': Occasional long range poke for assist gauge. Can hit glitch if charged |
| | |
| | '''Energy Ray (HP)''': Linear, but long range single hit HP for calling out whiffs and dodges. Can anti-air. |
| | |
| | == Attacks (Avoid) == |
| | |
| | Generally not recommended due to being outclassed by other attacks or having little to no distinct utility. |
| | |
| | '''Energy Blast (BRV)''': Low priority, low damage, mediocre space control. If the opponent's ground assist is slow, this can be safer to use without getting '''[[Glossary_(Dissidia_012)#Assist_punish|assist punished]]'''. |
|
| |
|
| |-|Build #2= | | |-|Build #2= |


 . Diamond Dust is generally safer and more reliable check to blocks in neutral.

 booster require it.
  Dismay Shock