|
|
| (26 intermediate revisions by the same user not shown) |
| Line 83: |
Line 83: |
| |type1=Physical | | |type1=Physical |
| |priority1=Melee Low | | |priority1=Melee Low |
| |ex1=30 | | |ex1=30 (30, 0) |
| |effect1=Wall Rush | | |effect1=Wall Rush |
| |cp1=30 (15) | | |cp1=30 (15) |
| Line 104: |
Line 104: |
| |type=Physical | | |type=Physical |
| |priority=Melee Low | | |priority=Melee Low |
| |ex=30 | | |ex=30 (30, 0) |
| |effect=Wall Rush | | |effect=Wall Rush |
| |cp=30 (15) | | |cp=30 (15) |
| Line 118: |
Line 118: |
| {{!}}-{{!}}EX Mode= | | {{!}}-{{!}}EX Mode= |
| {{AbilityInfo | | {{AbilityInfo |
| |image= | | |image=https://dissidia.wiki/images/8/81/Brv_yuna_meteor_strike_ex.jpeg |
| |imgpos= | | |imgpos= |
| |damage=10, [5, 10], 20 (45) | | |damage=10, [5, 10], 20 (45) |
| Line 145: |
Line 145: |
| |type1=Physical (strike) > Magical (projectiles) | | |type1=Physical (strike) > Magical (projectiles) |
| |priority1=Melee Mid (strike) > Ranged Low (projectiles) | | |priority1=Melee Mid (strike) > Ranged Low (projectiles) |
| |ex1=90 | | |ex1=90 (36, 53~54) |
| |effect1=Chase | | |effect1=Chase |
| |cp1=30 (15) | | |cp1=30 (15) |
| Line 166: |
Line 166: |
| |type=Physical (strike) > Magical (projectiles) | | |type=Physical (strike) > Magical (projectiles) |
| |priority=Melee Mid (strike) > Ranged Low (projectiles) | | |priority=Melee Mid (strike) > Ranged Low (projectiles) |
| |ex=90 | | |ex=90 (36, 53~54) |
| |effect=Chase | | |effect=Chase |
| |cp=30 (15) | | |cp=30 (15) |
| Line 179: |
Line 179: |
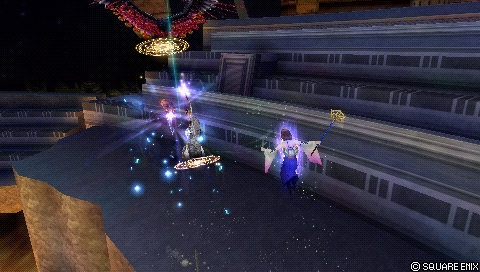
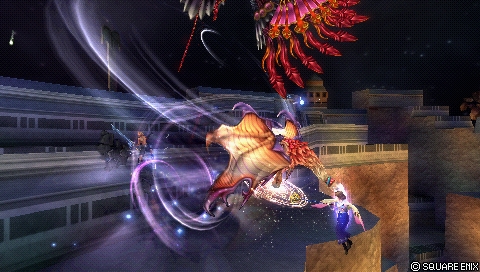
| Rush forward with Ixion. On launching opponent, Ixion’s horn will glow twice. Pressing Circle ({{pspcir}}) again will fire discs, and pressing as late as possible on the second flash will fire the maximum amount of 6 discs. The max amount of discs provide a safe empty chase against recovery attack and is one of the handful of attacks in the game to do so. | | Rush forward with Ixion. On launching opponent, Ixion’s horn will glow twice. Pressing Circle ({{pspcir}}) again will fire discs, and pressing as late as possible on the second flash will fire the maximum amount of 6 discs. The max amount of discs provide a safe empty chase against recovery attack and is one of the handful of attacks in the game to do so. |
|
| |
|
| This is a '''[[Attack_Priority_(Dissidia_012)#Mid|Melee Mid]]''' so it will stagger regular blocks, making it a relatively safe tool for ground-to-ground or anti-air poking and area denial while the enemy is slightly above ground. | | This is a '''[[Attack_Priority_(Dissidia_012)#Mid|Melee Mid]]''' so it will stagger regular blocks, making it a relatively safe tool for ground-to-ground, anti-air poking and area denial while the enemy is slightly above ground. |
|
| |
|
| This attack is pretty fast on both startup and recovery for its range. As a niche technique, Ixion can spawn on the opposite side of thin obstacles that Yuna is pressed against as an extra-safe poking option. | | This attack is pretty fast on both startup and recovery for its range. As a niche technique, Ixion can spawn on the opposite side of thin obstacles that Yuna is pressed against as an extra-safe poking option. |
| Line 185: |
Line 185: |
| {{!}}-{{!}}EX Mode= | | {{!}}-{{!}}EX Mode= |
| {{AbilityInfo | | {{AbilityInfo |
| |image= | | |image=https://dissidia.wiki/images/6/6e/Brv_yuna_aerospark_ex.jpeg |
| |imgpos= | | |imgpos= |
| |damage=3 x 4, [10, 10], 5 x 6 (62) | | |damage=3 x 4, [10, 10], 5 x 6 (62) |
| Line 202: |
Line 202: |
| }} | | }} |
|
| |
|
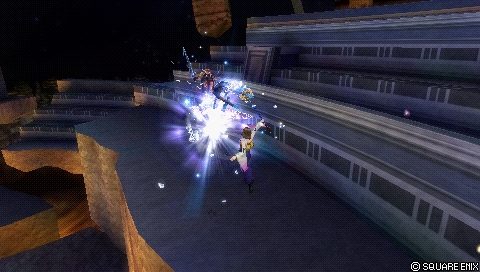
| EX mode Aerospark puts Yuna in the air. The followup projectiles have enough hit stun that allow Yuna to dodge cancel into Heavenly Strike or Diamond Dust for additional damage near walls or ceilings. This is the only way to combo into her own HP by herself, which improves Aerospark's damage potential considerably. | | EX mode Aerospark puts Yuna in the air. In adds more hits and extends the input window for a maximum amount of disc projectiles. |
| | |
| | The hit stun from the projectiles remains largely the same. But because Yuna is now airborne, she can dodge cancel towards her opponent and link EX mode Heavenly Strike without walls or even Diamond Dust when done near a wall. This is the only way to combo into her own HP by herself, which improves Aerospark's damage potential considerably, even though it is difficult to do. |
|
| |
|
| }} | | }} |
| Line 248: |
Line 250: |
| {{!}}-{{!}}EX Mode= | | {{!}}-{{!}}EX Mode= |
| {{AbilityInfo | | {{AbilityInfo |
| |image= | | |image=https://dissidia.wiki/images/2/2b/Brv_yuna_energy_blast_ex.jpeg |
| |imgpos= | | |imgpos= |
| |damage=[20], 7 each (27+) | | |damage=[20], 7 each (27+) |
| Line 265: |
Line 267: |
| }} | | }} |
|
| |
|
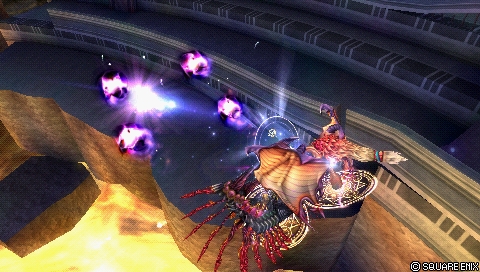
| EX Energy Blast adds a fast melee low priority Ifrit swipe that can beat dash attempts, but is otherwise not particularly outstanding. Being able to combo into projectiles with Ifrit is nice, but the reward on hit remains similiarly underwhelming for the requirements and risk associated with it. | | EX Energy Blast adds a fast melee low priority Ifrit swipe that can beat dash attempts, but is otherwise not outstanding. Being able to combo into projectiles with Ifrit is nice, but the reward on hit remains similiarly underwhelming for the requirements and risk associated with it. |
|
| |
|
| }} | | }} |
| Line 279: |
Line 281: |
| |type1=Physical | | |type1=Physical |
| |priority1=Melee Low | | |priority1=Melee Low |
| |ex1=90 | | |ex1=90 (30, 60) |
| |effect1=Chase | | |effect1=Chase |
| |cp1=30 (15) | | |cp1=30 (15) |
| Line 300: |
Line 302: |
| |type=Physical | | |type=Physical |
| |priority=Melee Low | | |priority=Melee Low |
| |ex=90 | | |ex=90 (30, 60) |
| |effect=Chase | | |effect=Chase |
| |cp=30 (15) | | |cp=30 (15) |
| Line 316: |
Line 318: |
| {{!}}-{{!}}EX Mode= | | {{!}}-{{!}}EX Mode= |
| {{AbilityInfo | | {{AbilityInfo |
| |image= | | |image=https://dissidia.wiki/images/a/a6/Brv_yuna_sonic_wings_ex.jpeg |
| |imgpos= | | |imgpos= |
| |damage=5 x 4, [2 x 4, 10], 10 (48) | | |damage=5 x 4, [2 x 4, 10], 10 (48) |
| Line 343: |
Line 345: |
| |type1=Magical | | |type1=Magical |
| |priority1=Ranged Low | | |priority1=Ranged Low |
| |ex1=30 | | |ex1=30 (15, 15) |
| |effect1=Wall Rush | | |effect1=Wall Rush |
| |cp1=30 (15) | | |cp1=30 (15) |
| Line 364: |
Line 366: |
| |type=Magical | | |type=Magical |
| |priority=Ranged Low | | |priority=Ranged Low |
| |ex=30 | | |ex=30 (15, 15) |
| |effect=Wall Rush | | |effect=Wall Rush |
| |cp=30 (15) | | |cp=30 (15) |
| Line 453: |
Line 455: |
| {{!}}-{{!}}EX Mode= | | {{!}}-{{!}}EX Mode= |
| {{AbilityInfo | | {{AbilityInfo |
| |image= | | |image=https://dissidia.wiki/images/e/e8/Brv_yuna_impulse_ex.jpeg |
| |imgpos= | | |imgpos=40% |
| |damage=10 / [10] each 5 | | |damage=10 / [10] each 5 |
| |startup=39F | | |startup=39F |
| Line 469: |
Line 471: |
| |gametext= | | |gametext= |
| }} | | }} |
| | |
| | EX Impulse adds a low priority Valefor projectile, but practically offers no notable utility. In addition to the EX mode requirement, Impulse must be charged for this version of the attack to come out. |
|
| |
|
| }} | | }} |
| Line 480: |
Line 484: |
|
| |
|
| |-|Hellfire= | | |-|Hellfire= |
| The amount of EX force generated depends on how many flame pillars hit.
| |
| In Street Figther words : this is a shoryuken. Use this when your opponent is trying to approach you from the air. Does not work directly above Yuna.
| |
| A relatively fast move for its power with great anti air capabilities. Great tracking around Yuna when she casts it, it s very good at catching side dodges
| |
| Each flame pillar has its own hitbox and HP damaging abilities. Your opponent can bounce back between flame pillars generating a lot of EX force from this.
| |
| If you want to get some distance, or have your opponent go away from you do this move, they have to respect it.
| |
| This is your fastest melee high so this is your go to option to reflect Emperor's flare. Be careful that only the ifrit claw is Melee.
| |
| Pillars are ranged high.
| |
| Pillars can be used as 1 hit HP if your opponent is sitting at full EX.
| |
| The knockback from the pillar is quite high and can be chained with a kuja assist, allowing for an assist chase with 100% crit due to the bravery recovery mechanic or simply to continue to apply bravery pressure.
| |
|
| |
|
| {{AbilityInfo | | {{AbilityInfo |
| | |image=https://dissidia.wiki/images/c/ce/Hp_yuna_hellfire.jpeg |
| | |imgpos=30% |
| |damage=10 | | |damage=10 |
| |startup=37F | | |startup=37F |
| Line 498: |
Line 495: |
| |effect=- | | |effect=- |
| |cp=30 (15) | | |cp=30 (15) |
| | |cancels= |
| | |astatk= |
| | |asthit= |
| | |level= |
| | |ap= |
| | |gametext=[Close] Summon Ifrit. Short range, good vertical range. |
| }} | | }} |
| ''[Close] Summon Ifrit. Short range, good vertical range.''
| | |
| | Massively active, tall and wide anti-approach fire pillar attack. Use this when the opponent is trying to approach Yuna from the air or ground. It does not hit opponents directly above Yuna, however. |
| | |
| | Hellfire is a very fast HP attack for its power with great anti-air capabilities. Great horizontal tracking around Yuna when she casts it. Combined with extremely high active frames on the pillars, Hellfire is very good at catching dodges near Yuna. The opponent can get hit by multiple flame pillars, which generates a lot of EX Force and multiple meter depletion and Side by Side triggers. |
| | |
| | Ifrit’s claw is melee high priority, and Yuna’s fastest and safest at that; It is her go-to option for reflecting ranged high attacks when necessary. Do note that Ifrit’s claw does not cover Yuna’s body. |
| | |
| | The pillars can be used as a 1-hit HP if the opponent is sitting with a full EX gauge. The knockback from the pillar can be converted into a combo by precisely timing Kuja assist. Fire pillars remain on the field if the claw clashes partially through the attack, which can lead to favorable trades with opponent’s short-range melee high attacks. |
|
| |
|
| |-|Energy Ray= | | |-|Energy Ray= |
| | |
| {{AbilityInfo | | {{AbilityInfo |
| | |image=https://dissidia.wiki/images/7/7d/Ddff_yuna_hp_energy_ray_%286%29.jpeg |
| | |imgpos=45% |
| |damage=- | | |damage=- |
| |startup=59F | | |startup=59F |
| Line 510: |
Line 523: |
| |effect=- | | |effect=- |
| |cp=30 (15) | | |cp=30 (15) |
| | |cancels= |
| | |astatk= |
| | |asthit= |
| | |level= |
| | |ap= |
| | |gametext=[Long] Summon Valefor. Invokes vertically long columns of fire. |
| }} | | }} |
| Yuna's one hit HP, Valefor draws a line on the ground that explodes after a short delay.
| | Yuna’s long-range HP attack. Valefor draws a glowing line on the ground that explodes straight upwards after a short delay. Valefor has a slight curving tracking when casting the ray. This is just enough to force slower walking characters to dodge to the side, but not enough to actually catch dodges most of the time. |
| Each circle on the ground is a Ranged high projectile inflicting HP damage. Valefor has a small tracking when casting the ray, but it s really poor.
| |
| One of the long ranged attack Yuna has, useful to force to approach or to punish long casting animation.
| |
| This move is super vulnerable to assist punishes.
| |
| | |
| ''[Long] Summon Valefor. Invokes vertically long columns of fire.''
| |
|
| |
|
| | Energy Ray is one of the longest ranged attacks Yuna has, and one that reaches the end of its travel distance very quickly. It can be useful to force a side dodge when backed by assist or to punish a long whiffed animation. The explosion also has surprisingly high vertical reach. This attack is super vulnerable to assist punishes on reaction, but sometimes difficult to punish in close range. Use with caution. |
|
| |
|
| </tabber> | | </tabber> |
| Line 525: |
Line 540: |
| <tabber> | | <tabber> |
| |-|Thor's Hammer= | | |-|Thor's Hammer= |
| | |
| {{AbilityInfo | | {{AbilityInfo |
| | |image=https://dissidia.wiki/images/6/63/Hp_Yuna_thor_hammer.jpeg |
| | |imgpos=30% |
| |damage=2 x 5 (10) | | |damage=2 x 5 (10) |
| |startup=49F | | |startup=49F |
| Line 533: |
Line 551: |
| |effect=Absorb | | |effect=Absorb |
| |cp=30 (15) | | |cp=30 (15) |
| | |cancels= |
| | |astatk= |
| | |asthit= |
| | |level= |
| | |ap= |
| | |gametext=[Mid] Summon Ixion. Effective against any height. |
| }} | | }} |
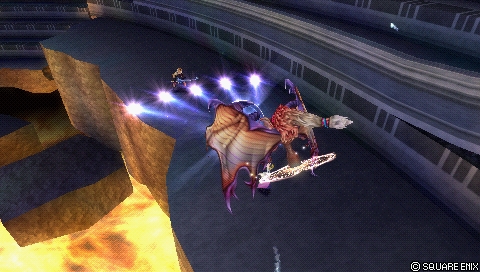
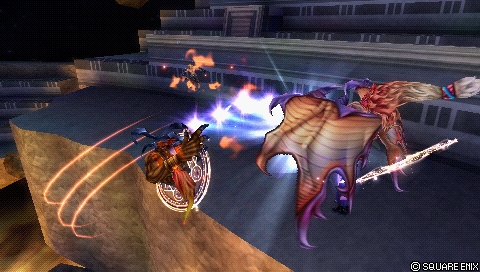
| Yuna delays a bit and summon Ixion to do a vortex attack at mid range. Slight absorption effect.
| |
| This move has average horizontal range but very good vertical tracking, Ixion has a very good adaptability to where he can put the vortex attack.
| |
| This is useful to deny any attack from directly above/below.
| |
| One of the use case is to cover from an assist swap against opponent with the ability to attack verticaly (Cloud, FC, Golbez) The whole attack is considered Ranged High so it will go through any projectile and deny most approach.
| |
| This attack leaves Yuna wide open from where she does not attack, making it very vulnerable to assist punishes and neutral rush down.
| |
| This should be used sparingly as it is really reactable and punishable.
| |
|
| |
|
| ''[Mid] Summon Ixion. Effective against any height.''
| | Yuna summons Ixion to create a vacuuming lightning orb at mid range after a short delay. Ixion can place the orb almost anywhere within a 360-degree range, but the maximum distance from Yuna and the orb’s size are a little lacking. The main application of this move is to be used at semi-close range when the opponent is in big frame disadvantage and will probably dodge in any one direction. |
| | |
| | Thor’s Hammer leaves Yuna wide open where she is not attacking, making it vulnerable to assist punishes and fast mid-range attacks. This move builds decent EX Force on hit, but due to its distance from Yuna, the opponent will often get more of it with Glutton {{accsp}}. Diamond Dust is generally safer and more reliable check to blocks in neutral. |
|
| |
|
| |-|Diamond Dust= | | |-|Diamond Dust= |
| {{AbilityInfo | | {{AbilityInfo |
| | |image=https://dissidia.wiki/images/9/99/Ddff_yuna_hp_diamond_dust_%282%29.jpeg |
| | |imgpos= |
| |damage=2 x 5 (10) | | |damage=2 x 5 (10) |
| |startup=21F | | |startup=21F |
| Line 552: |
Line 574: |
| |effect=- | | |effect=- |
| |cp=30 (15) | | |cp=30 (15) |
| | |cancels= |
| | |astatk= |
| | |asthit= |
| | |level= |
| | |ap= |
| | |gametext=[Close] Summon Shiva. Short range, quick execution. |
| }} | | }} |
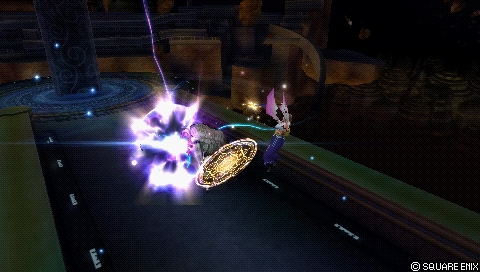
| Summon shiva who linger in one spot, if the enemy enters shiva's range, triggers a follow up with small BRV damage and a HP hit.
| | Yuna summons Shiva to create a lingering ice cloud in one spot, that deals small bravery damage and an HP hit when touched. Very potent and a fast anti-approach and mixup move, especially against advancing melee attacks. |
| Very powerful move, useful to catch wandering opponents around you. | |
| This move is the opposite of heavenly strike in the fact it is really good at catching character underneath you.
| |
| The followup will bump the opponent into the air. This move stays active for quite a while.
| |
| If the opponent triggers the followup in the end of the active frames, Yuna will be actionnable before the lag from the animation finishes, leading in a true combo of Diamond dust -> heavenly strike.
| |
|
| |
|
| ''[Close] Summon Shiva. Short range, quick execution.''
| | This move has surprisingly strong vertical tracking, even allowing it to combo off of EX Mode Aerospark. The final hit will launch the opponent straight up, allowing for easy conversions into assists. Diamond Dust stays active for a while; If the opponent triggers the hits near the end of active frames, Yuna will be actionable before hit stun ends. This allows a true combo off of Diamond Dust into different attacks depending on the amount of frame advantage, with Heavenly Strike being most practical. |
|
| |
|
| |-|Mega Flare= | | |-|Mega Flare= |
| | |
| {{AbilityInfo | | {{AbilityInfo |
| | |image=https://dissidia.wiki/images/1/1e/Hp_yuna_mega_flare.jpeg |
| | |imgpos=40% |
| |damage=2 x 8 (16) | | |damage=2 x 8 (16) |
| |startup=63F | | |startup=63F |
| Line 570: |
Line 597: |
| |effect=Wall Rush | | |effect=Wall Rush |
| |cp=30 (15) | | |cp=30 (15) |
| | |cancels= |
| | |astatk= |
| | |asthit= |
| | |level= |
| | |ap= |
| | |gametext=[Long] Summon Bahamut. Very accurate and powerful. |
| }} | | }} |
| Yuna summons Bahamut directly under her and it fires a big laser at mid range. The laser deals quite a good amount of damage and it is the only HP attack with Wall Rush capabilities. | | Yuna summons Bahamut under her, who fires a big laser at mid range. The laser deals a good amount of damage and it is Yuna’s only HP attack that can wall rush. Before firing the laser, Bahamut has excellent horizontal tracking on the opponent. During the attack, it also has decent downwards tracking and serviceable sideways tracking during the attack. All this makes Mega Flare good for catching most dodges close, if not directly below Yuna. |
| Before firing the laser Bahamut has excellent tracking of your opponent, making this move able to catch any dodge around Yuna. | |
| The laser is Melee High so it can be clashed and it will stagger Yuna (same with jecht's block). It can reflect Emp's Flares.
| |
| Same as Thor's Hammer, the move leaves Yuna very vulnerable to assist punish, throwing this out in neutral is a free assist opportunity for your opponent.
| |
| This move is generally used to safely punish a missed close range opportunity, or to put pressure on your opponent if they don't have assist.
| |
| | |
| ''[Long] Summon Bahamut. Very accurate and powerful.''
| |
|
| |
|
| | The laser is Yuna’s only aerial melee high attack. But similar to Hellfire, it does not cover Yuna’s body well. Same as Thor’s Hammer, Mega Flare leaves Yuna completely exposed to punishes, even moreso because of its longer duration. This move is generally used in a couple other ways as well; A very strong '''[https://glossary.infil.net/?t=Okizeme okizeme]''' option near or on the ground, often near a wall to restrict opponent’s mobility further. It also works as a last resort for reflecting opponent’s ranged high projectiles. |
|
| |
|
| </tabber> | | </tabber> |
| Line 612: |
Line 640: |
| <div style="clear: both"></div> | | <div style="clear: both"></div> |
|
| |
|
| ''Sends foe to another dimension after attacking with the summoned Aeon. Enter the commands that apppear to summon another Aeon.'' | | ''Sends foe to another dimension after attacking with the summoned Aeon. Enter the commands that appear to summon another Aeon.'' |
|
| |
|
| {{burst | | {{burst |
| Line 625: |
Line 653: |
|
| |
|
| = Combos = | | = Combos = |
| | |
| | ''Main article: '''[[Yuna_(Dissidia_012)/Combos|Yuna (Combos)]]''''' |
|
| |
|
| == Solo == | | == Solo == |
| | |
| | Yuna has a handful of solo combos. Most of them are situational, if not impractical. But they are good for Yuna when they ''do'' hit. |
| | |
| | {{Combo-012 |
| | | data = |
| | {{Combo-012Data |
| | |combo='''Impulse (Charged)''' > Impulse HIT > Heavenly Strike |
| | |condition=Long range, no wall required. |
| | |requirement='''[[Glitch_(Dissidia_012)#Hit_Glitch|Hit Glitch]]''' only. |
| | |characters= |
| | |damage=23~38 + WR |
| | |damagehits=5~20 > 6, 12 + WR |
| | |ex=15 |
| | |exhits=0 > 15 |
| | |meteropp= |
| | |video=https://www.youtube.com/watch?v=PlnIpb7acwk&t=5s |
| | |notes=This utilizes the hit glitch, which requires Yuna doing Heavenly Strike when the charged Impulse hits the opponent. Because Yuna cannot cancel Impulse into Heavenly Strike, the projectiles must hit much later than when they were first shot. That limits the practicality of this combo, but it still provides Yuna a long range wall rush conversion into assist if it hits. |
| | }} |
| | {{Combo-012Data |
| | |combo='''EX Aerospark''' > DC (forward) > Diamond Dust |
| | |condition=Ground only, near wall / corner / ceiling. |
| | |requirement=EX mode only. |
| | |characters= |
| | |damage=62~72 |
| | |damagehits='''Minimum:''' 3x4, 10, 5x6 (52) > 2x5 (10). '''Highest:''' 3x4, [10, 10], 5x6 > 2x5 (62) |
| | |ex=180 |
| | |exhits=90 + 90 |
| | |meteropp= |
| | |video=https://www.youtube.com/watch?v=PlnIpb7acwk&t=72s |
| | |notes=This is Yuna's only solo combo into an HP attack. The requirements are high and situational, but the reward ''is'' noteworthy. Diamond Dust has less vertical reach than Heavenly Strike, so a wall etc. is needed to reduce the opponent's knockback. That will shorten the distance Yuna has to travel. Mapping Diamond Dust to up + square (↑+{{pspsqu}}) can make this combo easier to do. |
| | }} |
| | {{Combo-012Data |
| | |combo='''Diamond Dust (late hit)''' > Heavenly Strike |
| | |condition=HP starter, no wall required. |
| | |requirement=Starter must hit late. |
| | |characters= |
| | |damage=24 |
| | |damagehits=2 > 4, 6, 12 |
| | |ex=93 |
| | |exhits= 63 + 30 |
| | |meteropp= |
| | |video=https://www.youtube.com/watch?v=PlnIpb7acwk&t=13s |
| | |notes=When Diamond Dust hits late, Yuna has enough frame advantage to go for a solo follow-up. Heavenly Strike's vertical reach is a consistent follow-up, and quite rewarding if it wall rushes for an assist combo. Using assist to set this up helps Yuna keep the opponent on the ground as well. |
| | }} |
| | }} |
|
| |
|
| == Assist == | | == Assist == |
| | |
| | === Kuja === |
| | |
| | {{Combo-012 |
| | | data = |
| | {{Combo-012Data |
| | |combo='''Sonic Wings (1)''' > Kuja > AC > Diamond Dust |
| | |condition=Midair, no wall |
| | |requirement= |
| | |characters= |
| | |damagehits='''Minimum:''' 5x3, 50, 10. '''Maximum:''' 5x4, 50, 10 |
| | |damage=75 - 80 |
| | |exhits=30 + 90 |
| | |ex=120 |
| | |meteropp= |
| | |video=https://www.youtube.com/watch?v=PlnIpb7acwk&t=128s |
| | |notes=Midair conversion, can be done at a distance. Since Yuna is already airborne, this can help reach the ceiling. Be wary of banish traps in Ultimecia's Castle and Orphan's Cradle, though. |
| | }} |
| | |
| | |
| | {{Combo-012Data |
| | |combo='''Heavenly Strike''' > WR > Kuja > AC > Diamond Dust |
| | |condition=Midair, Wall Rush (ground) |
| | |requirement= |
| | |characters= |
| | |damagehits=22 + WR, 47 (Kuja), 10 |
| | |damage=79 + BRV WR |
| | |exhits=15 + 15 + 90 |
| | |ex=120 |
| | |meteropp= |
| | |video=https://www.youtube.com/watch?v=PlnIpb7acwk&t=203s |
| | |notes=Basic air combo that leads to Kuja ground assist. Kuja provides a lot of time to reposition and add filler attacks. Many fillers work great here. |
| | }} |
| | |
| | |
| | {{Combo-012Data |
| | |combo='''Diamond Dust''' > Kuja > DC > AC > Diamond Dust |
| | |condition=Midair, no wall |
| | |requirement= |
| | |characters= |
| | |damagehits=10, 50, 10 |
| | |damage=70 |
| | |exhits=90 + 90 |
| | |ex=180 |
| | |meteropp= |
| | |video=https://www.youtube.com/watch?v=PlnIpb7acwk&t=297s |
| | |notes=Basic midair combo off of Yuna's fastest HP. Good EX gain, no wall needed. The dodge cancel (DC) is not necessary, unless the stage or aerial {{accboo}} booster require it. |
| | }} |
| | |
| | {{Combo-012Data |
| | |combo='''Mega Flare''' > WR > Kuja > DC > AC > Diamond Dust |
| | |condition=Wall Rush |
| | |requirement= |
| | |characters= |
| | |damagehits=16 + HP WR, 50, 10 |
| | |damage=76 + HP WR |
| | |exhits=24 + 90 |
| | |ex=114 |
| | |meteropp= |
| | |video=https://www.youtube.com/watch?v=PlnIpb7acwk&t=330s |
| | |notes=Basic wall rush conversion. If you catch the opponent dodging after Heavenly Strike, this is a good way to capitalize on that habit. Mega Flare is Yuna's only wall rush HP, so the payoff can be great. |
| | }} |
| | {{Combo-012Data |
| | |combo='''Energy Ray''' > Kuja > AC > Diamond Dust |
| | |condition=Ground (Yuna) |
| | |requirement= |
| | |characters= |
| | |damagehits=HP, 10 + HP |
| | |damage=10 + HP x2 |
| | |exhits=60 + 90 |
| | |ex=150 |
| | |meteropp= |
| | |video=https://www.youtube.com/watch?v=PlnIpb7acwk&t=344s |
| | |notes=Basic HP conversion. Energy Ray is pretty linear, but the generous hit stun rewards good reads. |
| | }} |
| | }} |
|
| |
|
| = Builds = | | = Builds = |
| Builds here.
| |
|
| |
|
| <tabber> | | <tabber> |
| Line 646: |
Line 796: |
| |ast=Kuja | | |ast=Kuja |
| |wpn=Spira's Hope | | |wpn=Spira's Hope |
| |hand=Hero's Shield ([[CP_Glitch_(Dissidia_012)|'''CP Glitch''']]) | | |hand=Hero's Shield {{equip}} |
| |head=Royal Crown | | |head=Royal Crown |
| |armor=Maximillian ([[CP_Glitch_(Dissidia_012)|'''CP Glitch''']]) | | |armor=Maximillian {{equip}} |
| |acc1={{accbas}} Dismay Shock | | |acc1={{accbas}} Dismay Shock |
| |acc2={{accbas}} Battle Hammer | | |acc2={{accbas}} Battle Hammer |
| |acc3={{accboo}} BRV = 0 | | |acc3={{accboo}} Pre-EX Mode |
| |acc4={{accboo}} Pre-EX Revenge | | |acc4={{accboo}} Pre-EX Revenge |
| |acc5={{accsp}} Blue Gem | | |acc5={{accsp}} Blue Gem |
| Line 660: |
Line 810: |
| |acc10={{accsp}} Miracle Shoes | | |acc10={{accsp}} Miracle Shoes |
| |summon=Rubicante | | |summon=Rubicante |
| | |dataBRV= |
| | {{Build-AttackData |
| | |brv1-g=Meteor Strike |
| | |branch-1gbrv= |
| | |branch-1ghp= |
| | |brv2-g=Aerospark |
| | |branch-2gbrv= |
| | |branch-2ghp= |
| | |brv3-g= |
| | |branch-3gbrv= |
| | |branch-3ghp= |
| | |brv1-a=Heavenly Strike |
| | |branch-1abrv= |
| | |branch-1ahp= |
| | |brv2-a=Sonic Wings |
| | |branch-2abrv= |
| | |branch-2ahp= |
| | |brv3-a=Impulse |
| | |branch-3abrv= |
| | |branch-3ahp= |
| | }} |
| | | dataHP = |
| | {{Build-AttackDataHP |
| | |hp1-g=Hellfire |
| | |hp2-g= |
| | |hp3-g= |
| | |hp1-a=Thor's Hammer |
| | |hp2-a=Diamond Dust |
| | |hp3-a=Mega Flare |
| | }}}} |
| | |
| | == Basic Abilities == |
| | |
| | {{Build-Ability |
| | |action= |
| | {{Build-AbilitySet |
| | |1=Ground Evasion}} |
| | {{Build-AbilitySet |
| | |1=Midair Evasion}} |
| | {{Build-AbilitySet |
| | |1=Ground Block}} |
| | {{Build-AbilitySet |
| | |1=Midair Block}} |
| | {{Build-AbilitySet |
| | |1=Aerial Recovery}} |
| | {{Build-AbilitySet |
| | |1=Recovery Attack}} |
| | {{Build-AbilitySet |
| | |1=Controlled Recovery}} |
| | {{Build-AbilitySet |
| | |1=Wall Jump}} |
| | {{Build-AbilitySet |
| | |1=Air Dash}} |
| | {{Build-AbilitySet |
| | |1=Free Air Dash}} |
| | {{Build-AbilitySet |
| | |1=Omni Ground Dash}} |
| | {{Build-AbilitySet |
| | |1=Multi Air Slide}} |
| | {{Build-AbilitySet |
| | |1=Free Air Dash Boost}} |
| | {{Build-AbilitySet |
| | |1=Assist Gauge Up Dash}} |
| | {{Build-AbilitySet |
| | |1=Jump Times Boost+}} |
| | {{Build-AbilitySet |
| | |1=Ground Evasion Boost}} |
| | {{Build-AbilitySet |
| | |1=Midair Evasion Boost}} |
| | {{Build-AbilitySet |
| | |1=Evasion Boost}} |
| | {{Build-AbilitySet |
| | |1=Descent Speed Boost}} |
| | |
| | |support= |
| | {{Build-AbilitySet |
| | |1=Always Target Indicator}} |
| | {{Build-AbilitySet |
| | |1=EX Core Lock On}} |
| | {{Build-AbilitySet |
| | |1=Assist Lock On}} |
| | |
| | |extra= |
| | {{Build-AbilitySet |
| | |1=Precision Jump}} |
| | {{Build-AbilitySet |
| | |1=Assist Critical Boost}} |
| | {{Build-AbilitySet |
| | |1=Disable Counterattack}} |
| | {{Build-AbilitySet |
| | |1=EXP to HP}} |
| | {{Build-AbilitySet |
| | |1=Best Dresser}} |
| | |
| | |cp=425 / 450 |
| }} | | }} |
|
| |
|
| Equip the Best Dresser extra ability for +100 base bravery.
| | == Build Overview == |
| | |
| | This is a general use all-rounder build. Constant EX absorption, long EX intake range with Yuna's exclusive weapon and high base bravery are key aspects of this build. |
| | |
| | The damage comes from the base bravery and the fact it recovers much faster with Royal Crown {{equhead}}and Great Gospel {{accsp}} equipped. If Yuna lands an HP attack by herself while at base bravery, Kuja assist usually provides enough time for it to recover. The Best Dresser extra ability is required for higher base bravery. The meter depletion is not high, but it is still good to have. |
| | |
| | == CP Allocation == |
| | |
| | 25 CP is available for Energy Blast, Energy Ray, the Counterattack extra ability and other basic abilities. |
| | |
| | == Substitutes == |
| | {{Build-Substitute |
| | |datasub= |
| | |
| | {{Build-SubstituteData |
| | |item={{accsp}} Blue Gem |
| | |substitute={{accsp}} First to Victory <br>{{accsp}} Winged Boots |
| | |notes=Blue Gem contributes to damage with higher base bravery. But if that is not important, First to Victory provides a small initial boost in meter and bravery. |
| | Winged Boots reduces bravery depletion from '''[[Bravery_(Dissidia_012)#Banish_Trap|banish traps]]''', but this is only relevant in stages that have them. |
| | }} |
| | {{Build-SubstituteData |
| | |item=Omni Ground Dash |
| | |substitute=Ground Dash <br>Reverse Ground Dash |
| | |notes=If lateral movement is not important, equipping one of these dashes will move Yuna in one direction while building assist gauge. |
| | }} |
| | {{Build-SubstituteData |
| | |item=Assist Critical Boost |
| | |substitute=Counterattack |
| | |notes=Counterattack activates whenever the opponent is hit out of their attack, which is good for Yuna's pokes. But it is also commonly nullified with "Disable Counterattack". |
| | }} |
| | }} |
| | |
| | == Attacks (Staple) == |
| | |
| | These attacks are recommended regardless of matchup, stage or player preference. |
| | |
| | Yuna does not switch out attacks often. Her core moves remain largely the same. |
| | |
| | '''Meteor Strike (BRV)''': Occasional ground poke, defensive melee low priority |
| | |
| | '''Aerospark (BRV)''': Mid priority gap closer, occasional anti-air and ground threat |
| | |
| | '''Heavenly Strike (BRV)''': Main aerial poke, combo starter, assist gauge builder |
| | |
| | '''Sonic Wings (BRV)''': Yuna's aerial melee poke, ranged disjoint |
| | |
| | '''Hellfire (HP)''': Defensive single hit HP, anti-air |
| | |
| | '''Diamond Dust (HP)''': Very fast HP, good EX, consistent assist combo starter and combo ender |
| | |
| | '''Thor's Hammer (HP)''': Catch dodges around Yuna |
| | |
| | '''Mega Flare (HP)''': Yuna's only HP wall rush, reflect HP projectiles, grounded wake-up pressure |
| | |
| | == Attacks (Flexible) == |
| | |
| | These attacks are great to have, but can be swapped or removed depending on matchup, stage or player preference. |
| | |
| | '''Impulse (BRV)''': Occasional long range poke for assist gauge. Can hit glitch if charged |
| | |
| | '''Energy Ray (HP)''': Linear, but long range single hit HP for calling out whiffs and dodges. Can anti-air. |
| | |
| | == Attacks (Avoid) == |
| | |
| | Generally not recommended due to being outclassed by other attacks or having little to no distinct utility. |
| | |
| | '''Energy Blast (BRV)''': Low priority, low damage, mediocre space control. If the opponent's ground assist is slow, this can be safer to use without getting '''[[Glossary_(Dissidia_012)#Assist_punish|assist punished]]'''. |
|
| |
|
| |-|Build #2= | | |-|Build #2= |
| Line 729: |
Line 1,040: |
| }} | | }} |
|
| |
|
| Yuna works well with Tidus, Jecht, Kuja, Sephiroth.
| | == Assists == |
| | <tabber> |
| | |-|Kuja= |
| | Most builds use Kuja as the assist for both high damage and consistent confirms from most of her attacks. Heavenly Strike (with or without ground wall rush), Sonic Wings (1st part) and even Hellfire. |
| | |
| | Heavenly Strike can ground wall rush in many situations, which combos into Kuja ground assist for plenty of damage and time for followups. |
| | |
| | |-|Tidus= |
| | |
| | |-|Jecht= |
| | |
| | |-|Sephiroth= |
| | |
| | </tabber> |
|
| |
|
| = References = | | = References = |


 . Diamond Dust is generally safer and more reliable check to blocks in neutral.

 booster require it.
  Dismay Shock