| Info
|
|
| Name |
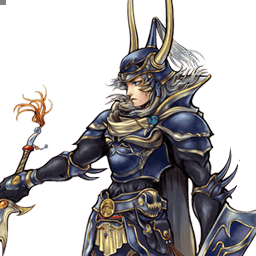
Warrior of Light
|
| Original game |
Final Fantasy
|
| Base ATK (LV100) |
110 (Average)
|
| Base DEF (LV100) |
113 (Very High, +10 during EX Mode)
|
| Run Speed |
6 (Average / Good)
|
| Dash Speed |
77 (Average / Good)
|
| Fall Speed |
87 (Average)
|
| Fall Speed Ratio After Dodge |
40 (Average)
|
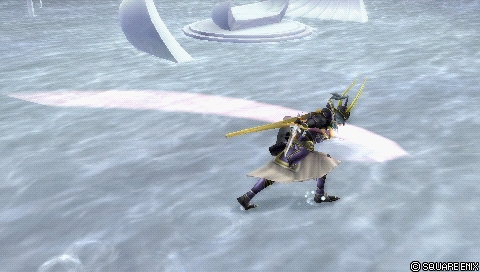
| Fastest BRV |
13F (Dayflash ground)
|
| Fastest HP |
51F (Shining Wave)
|
| 1-Hit HP |
Yes (Multiple)
|
| HP Links |
Yes
|
| Command Block |
Shield of Light
|
| Weapon |
Axes, Daggers, Greatswords, Katanas, Swords
|
| Armor |
Chestplates, Gauntlets, Heavy Armor, Helms,
Large Shields, Light Armor, Shields
|
| Exclusive weapons |
Flame Sword, Braveheart, Barbarian's Sword
|
| Unlock |
Default
|
| Alignment |
Cosmos
|
| Voice Actor (JP) |
Toshihiko Seki
|
| Voice Actor (ENG) |
Grant George
|
Overview
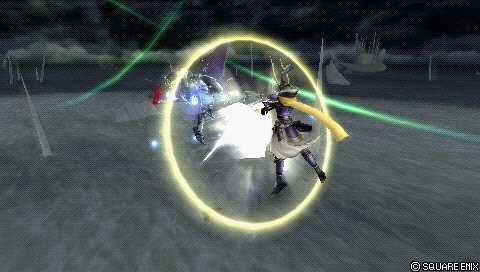
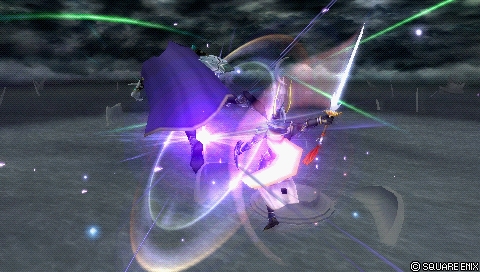
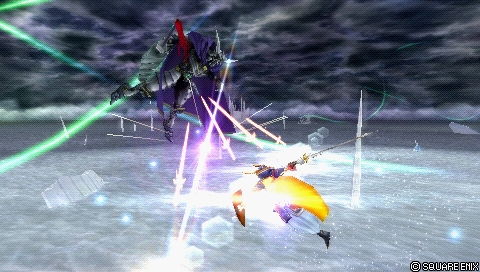
Warrior of Light is a close range fighter who operates as an all-rounder. He represents a standard-fare fighting style with quick Dayflash pokes, committal gap closers and midrange projectiles. His standard mobility lets him create offense and defense as needed, and once he gets an opening, his HP links can deal good damage. Warrior of Light's damage output is supported by high base bravery builds, HP wall rush and assist combos. He works well with many assists and his combo routes are consistent in most positions. Thanks to his high coverage with HP links such as Shield Strike / Rising Buckler > Bitter End, Warrior of Light can punish effectively from most angles.
As an all-rounder, Warrior of Light works with a variety of builds, including EX and Side by Side ![]()
 . His standout traits are defensively oriented; He has very high base DEF stat, which is greatly amplified in EX Mode. He also has an advancing frame 1 command block in Shield of Light, which is a 1-hit HP that wall rushes. This is not common in the game. It makes Warrior of Light's dodges safer and beating low priority attacks with long active frames easier.
Warrior of Light can struggle against lingering projectiles due to risky disjoints. His projectiles are serviceable, but often low reward at a distance. The reliance on HP links makes Warrior of Light susceptible to punishes after LV1 Assist Change. He has safer options at the cost of damage. His air dodge has an average fall speed ratio, so he has to protect himself with Shield of Light occasionally to stay safe. While this is a powerful option, it is also high commitment and vulnerable if it misses.
In competitive play, Warrior of Light has been usually ranked at high tier. His fundamentally good moveset and stats lend to a consistent playstyle that adheres to the metagame.
| Strengths |
Weaknesses
|
- All-rounder - Average to good stats, HP links and a fundamentally good moveset with an answer to many sitations.
- User-friendly - Great for beginners and experienced players alike. Good for learning the game and honing fundamentals.
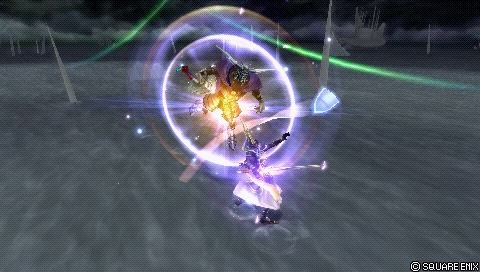
- Command block - Shield of Light is an advancing single hit HP attack. It blocks instantly throughout its startup, and works both offensively and defensively after dodges.
- Ground combat - Projectiles and empty chase assist combo starters allow Warrior of Light to adapt to a match's pace and improve his combo potential.
- Build synergy - Works well with all common build styles, including EX, bravery boost on dodge and Side by Side
![]() . .
- EX generation - Most bravery attacks produce 30 to 90 EX Force. His most common poke Dayflash produces 90 EX, which supports long-term survivability with EX gauge.
- EX Mode - Boasts highest defense stat, automatically blocks Ranged Low projectiles and increases damage output of melee bravery attacks.
|
- Struggles against traps - Despite having projectiles and disjoints, Warrior of Light cannot easily punish characters hiding inside lingering projectiles and traps without resources or considerable risk.
- Commital vertical attacks - Rising Buckler and Shield Strike braveries are serviceable, but are reactable and cannot be cancelled early on whiff.
- 4-slot bravery dilemma - Warrior of Light benefits from all of his air braveries, but he cannot equip all of them
- Floaty air dodge, risky dodge protection - While Shield of Light is great at covering his air dodges, it is also high risk and doesn't work against high priority attacks. Outside of clashing with Dayflash bravery, air dodges make Warrior of Light vulnerable.
|
Bravery Attacks
Ground
|
|
Normal |
EX Mode
|
| Base Damage
|
40 (4, 5, 11, 20) |
54 (4 +5, 5 +4, 11, 20 +6)
|
| Startup Frame
|
15F |
15F
|
| Damage Type
|
Physical |
Physical
|
| Priority
|
Melee Low |
Melee Low
|
| EX Force
|
90 |
90
|
| Effects
|
Chase, Wall Rush |
Chase, Wall Rush,
Block (Ranged Low)
|
| Cancels
|
Dodge |
Dodge
|
| Assist Gain (Hit)
|
|
|
| CP (Mastered)
|
30 (15)
|
[Close] Throw shield to
hurl opponent upwards. |
Unlocked at
level 19 |
Mastered at
120 AP
|
Ascension is a close-range combo move that's used in punishes, ground solo combos and occasional approaches. Two follow-ups can be done with Circle ![]()
 , which ends with a rising thrust. A Chase prompt appears afterwards, but if opponent is near ceiling, it will wall rush instead. Ascension is well suited for punishing grounded and airborne opponents. The initial shield is fast at 15 frames, and it anti-airs. It also has decent active frames.
Ascension leads to Rune Saber HP link at the end, so Warrior of Light doesn't rely on assist for HP damage. This is good for damage overall, because Ascension's base damage is quite high at 40. Warrior of Light can always finish Ascension and then do Rune Saber from below if he deems it appropriate.
This move has average recovery, which is enough to put Warrior of Light at risk on whiff. Ascension has no other cancel options on whiff, so even though it's a good move, Warrior of Light can lose his "turn" if it misses.
|
|
Normal |
EX Mode
|
| Base Damage
|
30 (6, 3x3, 15) |
40 (6, 3x3 +4, 15 +6)
|
| Startup Frame
|
31F |
31F
|
| Damage Type
|
Physical |
Physical
|
| Priority
|
Melee Mid (1st hit)
Melee Low (others) |
Melee Mid (1st hit)
Melee Low (others)
|
| EX Force
|
30 |
30
|
| Effects
|
Wall Rush |
Wall Rush
Block (Ranged Low)
|
| Cancels
|
Dodge |
Dodge
|
| Assist Gain (Hit)
|
|
|
| CP (Mastered)
|
30 (15)
|
[Mid] Hurl shield and charge.
Instantly close in on opponent. |
Unlocked at
level 4 |
Mastered at
90 AP
|
Sword Thrust is a committal gap closer that moves towards opponent. Warrior of Light throws a mid priority shield first, which staggers regular blocks. If it hits, a follow-up can be done with Circle ![]() . Warrior of Light can combo into assist with or without wall rush.
. Warrior of Light can combo into assist with or without wall rush.
Warrior of Light moves forward even if it misses. This can catch ground dodges, but it's risky and difficult to do consistently. Sword Thrust is reactable at 31 frames. Since Warrior of Light commits to the charge even on whiff, it takes a while before he can dodge out of it. The move also cannot anti-air opponents, so its uses are more limited compared to Ascension. It's effective against blocks, but it should used with caution.

|
| Base Damage
|
15
|
| Startup Frame
|
41F
|
| Damage Type
|
Magical
|
| Priority
|
Ranged Low
|
| EX Force
|
0
|
| Effects
|
Block
(Ranged Low, EX Mode)
|
| Cancels
|
Dodge
|
| Assist Gain (Hit)
|
|
| CP (Mastered)
|
30 (15)
|
[Long] Shoot high-speed fireball
towards opponent. |
Unlocked at
level 32 |
Mastered at
90 AP
|
Red Fang is a fast single hit projectile. It travels the longest distance out of Warrior of Light's bravery projectiles, from wall to wall in Order's Sanctuary. Due to its low priority, short hit stun and low reward on hit, it is not commonly used in competitive play. His other projectiles have more utility in neutral and lead to more practical combos on hit.

|
| Base Damage
|
7 each
|
| Startup Frame
|
41F
|
| Damage Type
|
Magical
|
| Priority
|
Ranged Low
|
| EX Force
|
0
|
| Effects
|
Block
(Ranged Low, EX Mode)
|
| Cancels
|
Dodge
|
| Assist Gain (Hit)
|
|
| CP (Mastered)
|
30 (15)
|
[Long] Chunks of ice slowly
descend on opponent. |
Unlocked at
level 1 |
Mastered at
90 AP
|
Blue Fang is a group of midrange projectiles that strike from above. Their travel speed is slow, but they can hit characters hiding behind their projectiles, such as Laguna's Electro Shield and Ultimecia's charged Knight's Lance. Each projectile has short hit stun, but they can hit one after another. This is not very consistent for combo purposes, and it can be challenging to convert any hits into a combo at all. The multiple hits do make it easier compared to Red Fang, though.
Blue Fang's main utility is in keeping ranged opponents in check. In terms of midrange presence, Blue Fang is one of the fastest. This is because at certain heights, the projectiles spawn near opponent's location. And since the projectiles travel at different angles, they can potentially hit behind opponent's back as well, ignoring block. Due to projectiles' upward spawning position, Blue Fang is not well suited for close-range either offensively or defensively. Blue Fang also has a maximum range for its spawn position. It's roughly 30-40 % of Order's Sanctuary's length horizontally and vertically. The projectiles can cover more distance as they move to make up for this. The projectiles are Ranged Low priority, so they lose to dashes and melee attacks even if they make contact. The bravery damage is low as well.
Overall, Blue Fang has niche utility. It's not his staple projectile on the ground, but it has some potential in Ultimecia matchup on low ceiling stages, such as Pandaemonium - Top Floor.
|
| Base Damage
|
6 each
|
| Startup Frame
|
47F
|
| Damage Type
|
Magical
|
| Priority
|
Ranged Low
|
| EX Force
|
0
|
| Effects
|
Block
(Ranged Low, EX Mode)
|
| Cancels
|
Dodge
|
| Assist Gain (Hit)
|
|
| CP (Mastered)
|
30 (15)
|
[Long] Call down lightning bolts
that slowly close in on foe. |
Unlocked at
level 8 |
Mastered at
90 AP
|
White Fang is a group of advancing lightning bolts. It's Warrior of Light's go-to projectile on the ground for pressure and combos. The Ranged Low priority still loses to dashes, blocks and melee attacks, but it has enough utility to make up for it. Warrior of Light can use White Fang to cover his approach thanks to being actionable himself while the bolts are active. The bolts have a decent amount of hit stun, which lets Warrior of Light follow-up with Ascension, Dayflash and more.
The projectiles travel at medium speed, but only remain active for roughly 1.7 seconds. As a result, their maximum uptime and travel distance are shorter compared to other projectiles. White Fang is far more practical in competitive play for offense, though. The projectiles are homing, but they adjust slowly to sharp vertical angles. White Fang works against aerial opponents at a low diagonal angle, but Warrior of Light needs to make sure the opponent won't dash through and hit him.
|
|
Normal |
EX Mode
|
| Base Damage
|
22 (3, 4, 15) |
36 (3 +4, 4 +4, 15 +6)
|
| Startup Frame
|
13F |
13F
|
| Damage Type
|
Physical |
Physical
|
| Priority
|
Melee Low |
Melee Low
|
| EX Force
|
90 |
90
|
| Effects
|
Chase |
Chase
Block (Ranged Low)
|
| Cancels
|
Dodge,
Block & Attack (Whiff) |
Dodge,
Block & Attack (Whiff)
|
| Assist Gain (Hit)
|
|
|
| CP (Mastered)
|
30 (15)
|
[Close] Fast horizontal slice.
Low power, quick strike. |
Unlocked at
level 1 |
Mastered at
90 AP
|
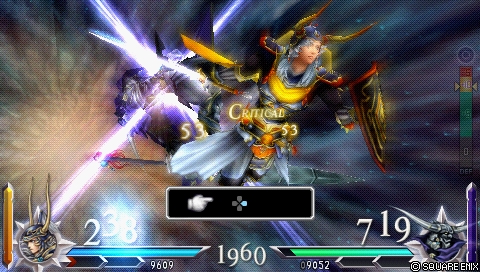
Dayflash is Warrior of Light's main poke. It is fast, generates good 90 EX and works as an assist combo starter. It can be whiffed safely to build assist gauge due to its short recovery and multiple cancel options. Warrior of Light can mixup with dodges, blocks or other attacks, including another Dayflash.
On hit, Warrior of Light can perform two follow-up slashes with Circle ![]() if the first hit connects. This 3-hit combo has a relatively long input window, which makes it good for hit confirming assist combos. The last hit leads to Chase. The low knockback angle and long chase prompt let Warrior of Light do empty chase to force a grounded wall rush. This is good for getting all EX Force on the field, but also for starting assist combos. And if Warrior of Light already used assist beforehand, he can extend that combo with Dayflash empty chase to use assist again if he has another bar in stock.
if the first hit connects. This 3-hit combo has a relatively long input window, which makes it good for hit confirming assist combos. The last hit leads to Chase. The low knockback angle and long chase prompt let Warrior of Light do empty chase to force a grounded wall rush. This is good for getting all EX Force on the field, but also for starting assist combos. And if Warrior of Light already used assist beforehand, he can extend that combo with Dayflash empty chase to use assist again if he has another bar in stock.
When used appropriately, Dayflash can control the pace of a match without high risk. It is a staple move for Warrior of Light in competitive play. Its aerial version is just as good and important to him.Aerial

|
|
Normal |
EX Mode
|
| Base Damage
|
40 (5, 5, 10, 20) |
50 (5, 5, 10 +4, 20 +6)
|
| Startup Frame
|
23F |
23F
|
| Damage Type
|
Physical |
Physical
|
| Priority
|
Melee Low |
Melee Low
|
| EX Force
|
90 |
90
|
| Effects
|
Chase, Wall Rush |
Chase, Wall Rush
Block (Ranged Low)
|
| Cancels
|
Dodge |
Dodge
|
| Assist Gain (Hit)
|
|
|
| CP (Mastered)
|
30 (15)
|
[Close] Spinning approach and
thrust opponent upwards. |
Unlocked at
level 1 |
Mastered at
120 AP
|
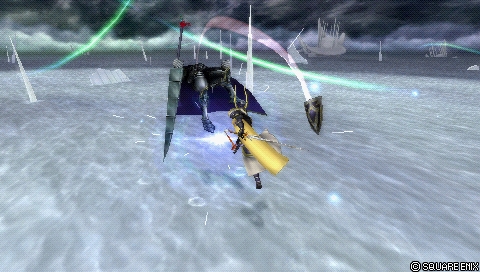
Crossover is an advancing bravery with an HP link. It is primarily used as a punish tool against long winded attacks and staggered opponents. It can be used to approach if done sparingly. The damage potential and longer lateral reach make this an aerial alternative to Ascension.
Warrior of Light can follow up with an upward thrust by pressing Circle ![]() , which causes chase. If opponent is near ceiling, it can wall rush instead. The thrust has high upward knockback, which can easily wall rush at medium heights. With wall rush, empty chase can be done from medium distance to make it safe against Recovery Attack. Whether or not chase is done, Warrior of Light needs assist to follow up after wall rush.
, which causes chase. If opponent is near ceiling, it can wall rush instead. The thrust has high upward knockback, which can easily wall rush at medium heights. With wall rush, empty chase can be done from medium distance to make it safe against Recovery Attack. Whether or not chase is done, Warrior of Light needs assist to follow up after wall rush.
Crossover must be completed to do the Rune Saber HP link. That means Warrior of Light usually does not lose bravery damage in exchange for HP damage. The startup is borderline reactable though, and Warrior of Light stays in the animation for roughly a second before he can dodge cancel out of it. That makes it more dangerous to whiff in neutral.
|
|
Normal |
EX Mode
|
| Base Damage
|
30 (2x4, 6, 16) |
42 (2x4 +6, 6, 16 +6)
|
| Startup Frame
|
25F |
25F
|
| Damage Type
|
Physical |
Physical
|
| Priority
|
Melee Low |
Melee Low
|
| EX Force
|
30 |
30
|
| Effects
|
Wall Rush |
Wall Rush
Block (Ranged Low)
|
| Cancels
|
Dodge |
Dodge
|
| Assist Gain (Hit)
|
|
|
| CP (Mastered)
|
30 (15)
|
Upward swing, snagging foe with shield.
Useful from below. |
Unlocked at
level 15 |
Mastered at
150 AP
|
Rising Buckler is a punish tool against opponents who are above Warrior of Light. Its vertical reach and Bitter End HP link make it rewarding as an anti-air. It is also a consistent follow-up to Kuja and Sephiroth air bravery assists. The disjointed shield can even poke through projectiles, if the opponent is not fully covered by them. To top it off, it can side switch on hit, ideal for sneaky counter attacks near walls.
Rising Buckler is not risk-free, however. It is reactable due to its 25-frame startup and distinct audio cue. It is Warrior of Light's primary upward aerial attack, which makes it more telegraphed. He stays in place for a moment before he is actionable, and won't track the opponent once the shield is thrown. If Warrior of Light blocks an opponent, he has to make sure they are above him so that Rising Buckler does not miss. Rising Buckler does not wall rush often in open spaces. It is primarily done near ground, or if the opponent can escape from Bitter End with Assist Change, since it is safer against it.
Warrior of Light has a downward alternative in Shield Strike. He can use both attacks to have high vertical coverage, but he does not always need both. Rising Buckler specifically can be useful in some air oriented match-ups, such as Sephiroth and Kuja.

|
|
Normal |
EX Mode
|
| Base Damage
|
30 (2x4, 6, 16) |
42 (2x4 +6, 6, 16 +6)
|
| Startup Frame
|
25F |
25F
|
| Damage Type
|
Physical |
Physical
|
| Priority
|
Melee Low |
Melee Low
|
| EX Force
|
30 |
30
|
| Effects
|
Wall Rush |
Wall Rush
Block (Ranged Low)
|
| Cancels
|
Dodge |
Dodge
|
| Assist Gain (Hit)
|
|
|
| CP (Mastered)
|
30 (15)
|
Downward attack, scooping foe with shield.
Useful from above. |
Unlocked at
level 1 |
Mastered at
200 AP
|
Shield Strike is almost identical to Rising Buckler, but it hits downward instead. On hit, it side switches and knocks at an upward angle. It is his main aerial move for air-to-ground situations and punishing reckless play from above. This has high coverage against many close-range melee characters, since they rarely rely on fighting above Warrior of Light. It is also effective for hitting staggered opponents after LV2 Assist Change. Shield Strike has the Bitter End HP link as well, which makes this a more threatening move on average.
Shield Strike shares many of Rising Buckler's flaws. Its startup is reactable, and it is his primary downward attack. That makes it more telegraphed in neutral. It's great when used cautiously, but carries a lot of risk if it whiffs. It has long recovery and no tracking after the shield is thrown.
Warrior of Light does not move far if he is not above opponent, but the shield does hit in front of Warrior of Light. That lets him combo into HP after Sephiroth assist, who is one of his strongest assists.

|
|
Normal |
EX Mode
|
| Base Damage
|
22 (3, 4, 15) |
36 (3 +4, 4 +4, 15 +6)
|
| Startup Frame
|
15F |
15F
|
| Damage Type
|
Physical |
Physical
|
| Priority
|
Melee Low |
Melee Low
|
| EX Force
|
90 |
90
|
| Effects
|
Chase |
Chase
Block (Ranged Low)
|
| Cancels
|
Dodge,
Block & Attack (Whiff) |
Dodge,
Block & Attack (Whiff)
|
| Assist Gain (Hit)
|
|
|
| CP (Mastered)
|
30 (15)
|
[Close] Fast horizontal slice.
Low power, quick strike. |
Unlocked at
level 25 |
Mastered at
90 AP
|
Dayflash's aerial version is essential, and similar to ground version in many aspects. It is fast, safe to whiff for assist gauge and reliable for confirming assist combos. It's also used to accumulate EX over time. Fights often happen in the air, so Warrior of Light relies on this move a lot.
The startup is slightly slower than ground Dayflash (15 frames instead of 13), but it's still unreactable. The recovery is short as well, which lets him build assist gauge on whiff. He can also cancel a missed Dayflash into other attacks or block to keep opponents guessing. The hitbox goes low enough where it can still hit grounded opponents, so Dayflash also works as an air-to-ground move.
This is Warrior of Light's lowest damaging move compared to his other moves, but it's also the fastest and safest to use. Assist (or Chase) is needed to get HP damage from this. It's a staple for him in competitive play, and his longevity hinges on how well he can utilize Dayflash.HP Attacks
Ground
|
| Base Damage
|
-
|
| Startup Frame
|
53F (Block from 1F to 53F)
|
| Damage Type
|
-
|
| Priority
|
Melee High, Block Mid
|
| EX Force
|
0
|
| Effects
|
Block, Wall Rush
|
| Cancels
|
Dodge
|
| Assist Gain (Hit)
|
|
| CP (Mastered)
|
30 (15)
|
[Close] Fire force blast from shield.
Hurls foe while blocking. |
Unlocked at
level 22 |
Mastered at
130 AP
|
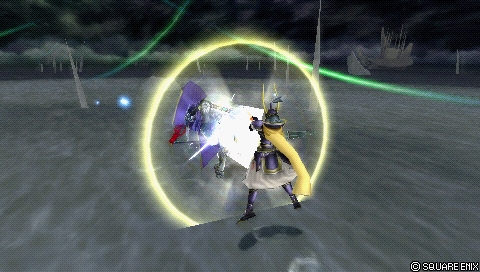
Shield of Light is Warrior of Light's signature command block. He moves forward before unleashing a 1-hit force blast that can wall rush. Its blocking duration is very generous, as it blocks instantly from frame 1 until the move does damage. Combined with the forward movement, Shield of Light can call out low priority pokes, such as Cloud of Darkness's tentacles.
More importantly, Shield of Light works as an instant defensive option after a ground dodge. If Warrior of Light is about to get hit, he can use this to keep the opponent at bay. Blocks like this work against dashes and low priority attacks alike. This presents a second layer of defense that the opponent has to consider at all times, or they risk taking HP damage just for approaching.
Shield of Light is a great defensive tool, but it still carries a risk. If it misses, Warrior of Light is left wide open for punishes. Shield of Light can only block low priority moves. Higher priority moves like HP attacks and Squall's Heel Crush will guard crush or stagger Warrior of Light respectively.
Warrior of Light becomes airborne when using this move. He automatically aims this move at a diagonal angle against airborne opponents, but he cannot change the direction halfway through.
|
| Base Damage
|
-
|
| Startup Frame
|
51F
|
| Damage Type
|
-
|
| Priority
|
Melee High (blade)
Ranged High (light pillar)
|
| EX Force
|
each 60
|
| Effects
|
-
|
| Cancels
|
Dodge
|
| Assist Gain (Hit)
|
|
| CP (Mastered)
|
30 (15)
|
[Mid] Shoot pillars of light.
Homes in on opponent. |
Unlocked at
level 1 |
Mastered at
130 AP
|
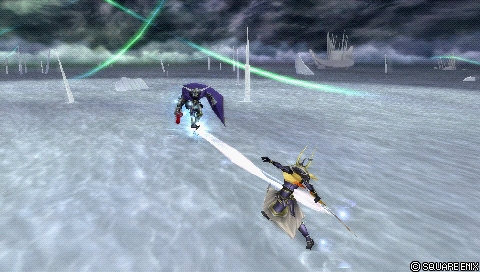
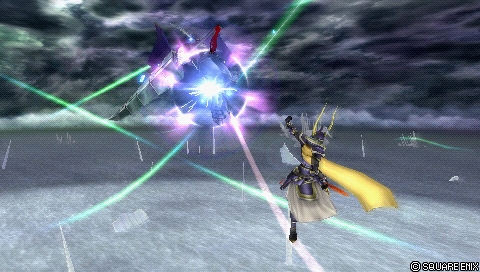
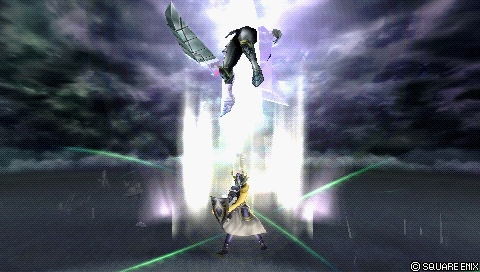
Shining Wave is a long-range wave attack that deals HP damage on hit. It can punish air dodges in close-range and follow up after a block stagger. It is also used sometimes as a passive projectile to occupy space. Shining Wave cannot be reflected back at Warrior of Light, but it does lose to high priority melee attacks and command blocks from Jecht and Exdeath. The ranged high priority also lets Warrior of Light ignore LV2 Assist Change, useful in certain assist combo situations.
Warrior of Light is stationary for a moment after firing, which leaves him vulnerable to attacks. When used sparingly, Shining Wave is a move that complements Warrior of Light's ground combat.
The wave projectile travels at a relatively high speed once it's active. It can track airborne opponents, but it always moves forward at first before it starts realigning. Shining Wave can hit twice if it connects this way, though this can be difficult to aim for in a competitive match. Shining Wave can also combo into assist at a wall, but outside of that, its reward is pretty low on average.
As a wave HP, Shining Wave has a little quirk with its hitbox. It can miss against high speed movement that is passing through the projectile. [1] This is pretty risky to attempt though, so Warrior of Light does not have to worry about it too often.
|
| Base Damage
|
20 (4 x 3, 8)
|
| Startup Frame
|
41F
|
| Damage Type
|
Physical
|
| Priority
|
Melee High
|
| EX Force
|
30
|
| Effects
|
Wall Rush
|
| Cancels
|
Dodge
|
| Assist Gain (Hit)
|
|
| CP (Mastered)
|
30 (15)
|
[Close] Deft shieldwork.
Effective against any height. |
Unlocked at
level 28 |
Mastered at
130 AP
|
Ultimate Shield is a combo attack used to call out blocks, nearby dodges or even attacks. It is his fastest ground HP attack, and it has strong vertical tracking when aiming his shield.
Warrior of Light stays in place while his shield goes towards opponent. If the shield misses, Warrior of Light will not continue with a combo. This makes it a bit safer to use from a distance. Ultimate Shield can also reflect HP projectiles without moving towards them. The reach is decent, but not enough to punish neutral ground dodges without prior movement. Assists can follow up either after wall rush or with a knockback cancel.
If White Fang connects, it can activate a hit glitch for Ultimate Shield if its done at the same time. That means the move will transition to follow-up hits despite not making any contact with opponent. This can be detrimental due to short reach. It has long recovery when finished, so Warrior of Light should watch out for Assist Changes when using this.
|
| Base Damage
|
10 (2 x 3, 4) / +Ascension = (50 Total)
|
| Startup Frame
|
?
|
| Damage Type
|
Magical
|
| Priority
|
Melee High (?)
|
| EX Force
|
0
|
| Effects
|
Wall Rush
|
| Cancels
|
Dodge
|
| Assist Gain (Hit)
|
|
| CP (Mastered)
|
30 (15)
|
Branching from Ascension
[Combo] Light beam pierces foe. |
Unlocked at
level |
Mastered at
130 AP
|
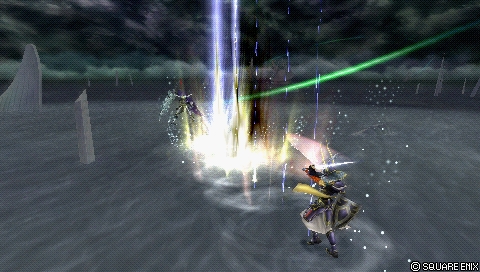
Rune Saber is the HP link from Ascension. It is notable for its combo potential and relative safety against Assist Change counters. Both Ascension and Rune Saber have long upward knockback. That means Rune Saber can wall rush consistently in stages with lower ceilings, such as Sky Fortress Bahamut and Edge of Madness. Rune Saber cannot hit a wall rushed opponent, though.
The wall rush is great for HP damage and assist combos alike. If Warrior of Light cannot guarantee a ceiling wall rush, multi-hit assists like Sephiroth can also knockback cancel for combos. As a result, Rune Saber is useful as an independent source of HP damage and assist combo starter anywhere.
Rune Saber has a lengthy animation, which normally makes it risky against opponents who escaped with Assist Change. Rune Saber's last hit has a tall hitbox with long active frames. This provides some cover for Warrior of Light before he can dodge cancel, but it's not entirely safe. Opponents can still try to Assist Change out early and dodge next to Warrior of Light, but it's harder to do compared to Bitter End.Aerial
|
| Base Damage
|
-
|
| Startup Frame
|
53F (Block from 1F to 53F)
|
| Damage Type
|
-
|
| Priority
|
Melee High, Block Mid
|
| EX Force
|
0
|
| Effects
|
Block, Wall Rush
|
| Cancels
|
Dodge
|
| Assist Gain (Hit)
|
|
| CP (Mastered)
|
30 (15)
|
[Close] Fire force blast from shield.
Hurls foe while blocking. |
Unlocked at
level 1 |
Mastered at
130 AP
|
The signature command block. More commonly used since it's an aerial move, otherwise it's very similar to the ground version. It is still used for self defense after air dodges, and blocking melee low attacks such as Cloud's Slashing Blow. As a 1-hit move, Shield of Light can also circumvent EX Revenge checkmates with EX depletion.
The force blast has short reach and it doesn't stay active for long. However, it can wall rush and start assist combos with a good read. It's not commonly used in most assist combos due to limited vertical tracking and long animation, but it can set up double assist combos with Aerith assist. Regardless, the aerial Shield of Light is a must-have for Warrior of Light. It's what distinguishes him from similarly well rounded characters such as Cloud and Squall.
|
| Base Damage
|
-
|
| Startup Frame
|
77F
|
| Damage Type
|
-
|
| Priority
|
Ranged High
|
| EX Force
|
0
|
| Effects
|
Wall Rush
|
| Cancels
|
Dodge
|
| Assist Gain (Hit)
|
|
| CP (Mastered)
|
30 (15)
|
[Long] Fire blades of light from seal.
Blades weakly track foe. |
Unlocked at
level 13 |
Mastered at
130 AP
|
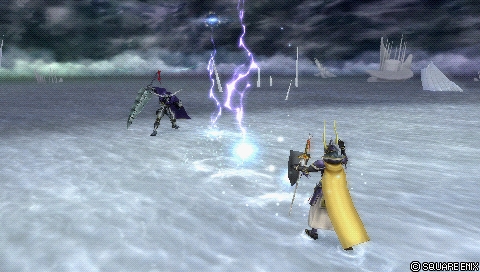
Radiant Sword is a group of long-range homing projectiles. This is a move with low hit rate due to its telegraphed animation and gradual accelerated speed. As the speed increases, the tracking projectiles all gather and focus on the opponent. That means they are easier to dodge once they are moving in a line. This limits Radiant Sword's ability to occupy space. The projectiles track well and reach far enough force a dodge almost anywhere. They do not go through solid objects such as walls or Empyreal Paradox's crystal, though.
Radiant Sword's applications are very limited overall. If it hits, it can wall rush and start assist combos. It is sometimes used to threaten opponents going for EX cores, but even this is not waterproof. Use with caution.
|
|
| Base Damage
|
10 (2 x 3, 4) / +Crossover = (50 Tota)
|
| Startup Frame
|
??
|
| Damage Type
|
Magical
|
| Priority
|
Melee High (?)
|
| EX Force
|
0
|
| Effects
|
Wall Rush
|
| Cancels
|
Dodge
|
| Assist Gain (Hit)
|
|
| CP (Mastered)
|
30 (15)
|
Branching from Crossover
[Combo] Light beam pierces foe. |
Unlocked at
level |
Mastered at
130 AP
|
Rune Saber is the HP link from Crossover. It is always recommended for Crossover, and is functionally similar to the other Rune Saber. The main thing to watch out for are ceiling wall rushes; Since Crossover is an aerial move, it is more likely to wall rush before Rune Saber connects.
|
| Base Damage
|
15 (2 x 6, 3) / +Rising Buckler = (29 Total)
|
| Startup Frame
|
??
|
| Damage Type
|
Physical
|
| Priority
|
Melee High (?)
|
| EX Force
|
0
|
| Effects
|
Wall Rush
|
| Cancels
|
Dodge
|
| Assist Gain (Hit)
|
|
| CP (Mastered)
|
30 (15)
|
Branching from Rising Buckler
[Combo] Deft bladework. |
Unlocked at
level |
Mastered at
130 AP
|
Bitter End is another staple HP link for Warrior of Light. It rewards well placed whiff punishes with HP damage, no assist needed. Its total damage output is a bit lower compared to Rune Saber, but there is no need to worry about ceiling wall rushes. It's a consistent assist combo starter thanks to the wall rush, and the long animation sets up knockback cancels for Sephiroth assist. With high base bravery builds, the animation lasts long enough to get most of the base bravery back at the end of an assist combo.
Bitter End is a stationary combo attack that starts quickly, but takes a few seconds to finish. It is very unsafe against opponents who escaped with LV1 Assist Change. Warrior of Light cannot cancel Bitter End until the last hit comes out. He stays still for the entire animation, and he has little protection against vertical attacks. He needs assist as backup for this, but he also needs this move to represent a threat without assist. It's a conundrum he has to work with.
|
|
| Base Damage
|
15 (2 x 6, 3) / +Shield Strike = (29 Total)
|
| Startup Frame
|
??
|
| Damage Type
|
Physical
|
| Priority
|
Melee High (?)
|
| EX Force
|
0
|
| Effects
|
Wall Rush
|
| Cancels
|
Dodge
|
| Assist Gain (Hit)
|
|
| CP (Mastered)
|
30 (15)
|
Branching from Shield Strike
[Combo] Deft bladework. |
Unlocked at
level |
Mastered at
130 AP
|
Bitter End B is identical with Bitter End A.EX Mode: Class Change!
Effects:
- Regen
- Critical Boost
- Mirror Attack
- Protect
- Light's Blessing
Warrior of Light's EX Mode has plenty of useful effects. He gets additional hits for his melee braveries, a big damage reduction in +10 base DEF and he blocks ranged low moves during his own attacks. EX modes are commonly used to secure a win with assist combo, and Warrior of Light is no different. As such, the defensive boosts may not come into play often. It is still a competent EX mode overall, though.
Mirror Attack

[Active while attacking]
A wall of light appears while attacking, repelling weak magical attacks.
Warrior of Light can block attacks with Ranged Low priority during his own attack animations. The blocking effect activates very quickly and lasts for most, if not the whole attack animation. This applies even during a move's recovery.
Protect
[Always active while in EX Mode]
An aura of light covers the body, raising defense.
Warrior of Light gets +10 DEF for the duration of his EX mode. That is a huge increase, which can greatly reduce bravery damage taken if Warrior of Light is hit during this time.
Light's Blessing
[Activates when combo hits] Swords of light appear, dealing additional damage.
Light's Blessing adds several hits to Warrior of Light's physical bravery attacks. Each light sword has a base damage of 1. The light swords cause hit stun, but they don't create more lenient, practical solo combo routes for Warrior of Light.
EX Burst: Oversoul
Sharp, repeated strikes like flashes of light.
![]()

![]()

![]()

![]()

Each directional button corresponds to one attack.
| Damage multiplier (initial) |
Damage multiplier (rest) |
Type
|
| 5x3 (15) |
10x6, 25 (100 total) |
Physical
|
Oversoul is a fairly standard EX Burst. The base damage for initial hits isn't high, but follow-up hits begin almost immediately, leaving less time for the opponent to raise their DEF.
To complete this EX Burst, Warrior of Light must press the correct button shown on screen six times. The button inputs always require a directional button. Analog stick ![]()
 will not work regardless of what the character control option is set to. If Warrior of Light does not press the correct button within a short time, or presses a wrong button, he will end EX Burst early. Regardless of how well this EX Burst is done, Warrior of Light always finishes with a slash that has decent 25 base damage.
Combos
Solo
(Main article pending)
| Condition
|
Combo
|
Base Damage
|
EX
|
Notes
|
|
Projectile Starter
Ground
Projectile to HP Damage
|
White Fang > Ascension > Rune Saber
|
56 minimum + HP & WR
|
90
|
|
| Base Damage (Breakdown): 6 min > 40 > 10 + HP & WR |
Opponent Assist (Comrade's Vow): ??? |
EX Force (Breakdown): 0 > 90 > 0 |
| White Fang combos into most of WoL's moves, Ascension is his staple high damage follow-up. This combo works in close range. If the opponent is further away, Warrior of Light may have to dash to combo afterwards. |
|
|
Projectile Starter
Ground
Projectile, Safe Chase for EX
|
White Fang > Dayflash > Delayed Empty Chase
|
28 minimum
|
90
|
|
| Base Damage (Breakdown): 6 min > 22 |
Opponent Assist (Comrade's Vow): ??? |
EX Force (Breakdown): 0 > 90 |
| Less damage than Ascension, but this combo does two things: It lets WoL chase safely without getting countered and get all EX in the stage. Delay Dayflash's Chase as much as possible, then do it just before the opponent reaches the ground. This forces a wall rush reaction.
The second thing is it enables assist combos, and the chase also resets assist gauge if it was already used previously. This doesn't have much merit in the solo combo context, but it does leave WoL close to the opponent for pressure.
In a neutral situation, Dayflash can be easier to react with if White Fang hits a moving opponent. Other than that, Ascension is the stronger follow-up. |
|
|
Assist (Sephiroth)
Warrior of Light can create assist combos with Wall Rush, Dayflash and even during his Bitter End and Rune Saber HP links. This gives him flexibility in setting up HP damage. When following up after Sephiroth, delay Assist Chase a little so that Shield Strike connects more consistently.
| Condition
|
Combo
|
Base Damage
|
EX
|
Notes
|
|
Poke Starter
Ground / Air OK
Staple Midscreen Combo
|
Dayflash (2 hits) > AST BRV > AC > Shield Strike > Bitter End
|
76 + HP & WR
|
???
|
|
| Base Damage (Breakdown): 3, 4 > 40 AST > 14 > 15 + HP & WR |
Opponent Assist (Comrade's Vow): ??? |
EX Force (Breakdown): ??? |
| Standard combo from a safe poke. Confirm the second Dayflash hit visually, then press assist and follow up. This is an important combo to get right, as it lets WoL do HP damage without using the more telegraphed bravery attacks first. |
|
|
Punish Starter
Ceiling HP Wall Rush
HP Damage
|
Crossover / Ascension > Rune Saber > WR > AST BRV > AC > Shield Strike > Bitter End
|
119 + HP & WR
|
???
|
|
| Base Damage (Breakdown): 40 > 10 + HP & WR > 40 AST > 14 > 15 + HP & WR |
Opponent Assist (Comrade's Vow): ??? |
EX Force (Breakdown): 90 > 0 > ?? > 30 |
| A standard Wall Rush combo. Make sure to do Rune Saber as soon as possible before Crossover Wall Rushes at the ceiling. This is not very practical for low ceiling stages, such as Pandaemonium - Top Floor and M. S. Prima Vista. In those stages, Crossover's BRV Wall Rush has to suffice. |
|
|
Punish Starter
Knockback Cancel
Midscreen HP Damage
|
Shield Strike / Rising Buckler > Bitter End > AST BRV > Bitter End + Assist HIT > DC > AC > Shield Strike > Bitter End
|
98 + HP & WR
|
???
|
|
| Base Damage (Breakdown): 14 > 15 + HP > 40 AST > 14 > 15 + HP & WR |
Opponent Assist (Comrade's Vow): ??? |
EX Force (Breakdown): ??? |
| This combo works anywhere, but Sephiroth must be timed to hit when Bitter End finishes. Press assist just as Bitter End's last bravery slash connects. WoL should be winding up his sword during the assist slowdown if done properly. |
|
|
Builds
Main article: Warrior of Light (012) Builds
Warrior of Light works with a variety of builds, such as hybrid builds, Bravery Boost on Dodge and Side by Side. Most of his damage comes from Dayflash assist combos and HP links, so he is not often built explicitly for bravery damage. However, Warrior of Light benefits greatly from having high base bravery for assist combos.
Hybrid
| Stats
|
| HP |
11299
|
| CP |
450
|
| BRV |
996
|
| ATK |
178
|
| DEF |
184
|
| LUK |
60
|
| Max Booster |
|
Special Effect: Seal of Lufenia
| Equipment
|
| Assist |
Sephiroth
|
Weapon ![]()  |
Heaven's Cloud
|
Hand ![]()  |
Lufenian Dirk ![]() 
|
Head ![]()  |
Lufenian Headband ![]()
|
Body ![]()  |
Lufenian Vest
|
| Accessory 1 |
Muscle Belt ![]() 
|
| Accessory 2 |
Dismay Shock ![]()
|
| Accessory 3 |
Battle Hammer ![]()
|
| Accessory 4 |
Summon Unused ![]() 
|
| Accessory 5 |
Pre-EX Mode ![]()
|
| Accessory 6 |
Pre-EX Revenge ![]()
|
| Accessory 7 |
Opponent Summon Unused ![]()
|
| Accessory 8 |
White Gem ![]()
|
| Accessory 9 |
Tenacious Attacker ![]()
|
| Accessory 10 |
Glutton ![]()
|
Summon ![]() 
|
Rubicante
|
| Bravery attacks
|
| Ground |
Aerial
|
![]() Dayflash Dayflash |
![]() Dayflash Dayflash
|
|
|
|
|
↑+![]() Ascension Ascension |
↑+![]() Crossover Crossover
|
|
|
![]()  Branch: Rune Saber Branch: Rune Saber |
![]() Branch: Rune Saber Branch: Rune Saber
|
↓+![]() White Fang White Fang |
↓+![]() Shield Strike Shield Strike
|
|
|
|
![]() Branch: Bitter End Branch: Bitter End
|
| HP attacks
|
| Ground |
Aerial
|
![]() Shield of Light Shield of Light |
![]() Shield of Light Shield of Light
|
↑+![]() Ultimate Shield Ultimate Shield |
|
↓+![]() Shining Wave Shining Wave |
↓+![]() Radiant Sword Radiant Sword
|
![]() indicates a "Gear" extra ability or the use of Equip Glitch. The total Capacity Point cost will assume the glitch is done.
indicates a "Gear" extra ability or the use of Equip Glitch. The total Capacity Point cost will assume the glitch is done.
This is a general purpose build focused on EX intake and EX depletion. Most competitive builds focus on damage, ex and / or meter depletion, so this is a good build to start with.
Seal of Lufenia set lowers DEF, but Warrior of Light's high base DEF stat mitigates it. Lufenian Dirk ![]() adds +1 ATK for more damage, which in turn compensates for Heaven's Cloud's
adds +1 ATK for more damage, which in turn compensates for Heaven's Cloud's ![]() low ATK. Heaven's Cloud makes grabbing EX Force much easier due to its increased EX intake range.
low ATK. Heaven's Cloud makes grabbing EX Force much easier due to its increased EX intake range.
Assist
Warrior of Light's assist data.
Assist Data
| Type |
Attack |
Startup |
Position |
Spawn |
Damage multiplier |
Effects
|
| BRV |
Sword Thrust |
31F |
Ground |
Opponent |
6, 3 x 5, 15 (30) |
Wall Rush
|
| BRV |
Rising Buckler |
25F |
Air |
Opponent |
2 x 4, 6, 16 (30) |
Wall Rush
|
| HP |
Shining Wave |
53F |
Ground |
Player |
- |
Chase
|
| HP |
Shield of Light |
51F |
Air |
Opponent |
- |
Block, Wall Rush
|
Assist Overview
As an assist, Warrior of Light is one of the weaker assists in the game. His braveries do not hold the opponent in place for long and they quickly push them away from the player. The lack of Assist Chase hurts; Warrior of Light struggles to serve the role of setting up HP attacks for the player character. He relies on Wall Rush to achieve this. It is recommended to fight near ground, so that Rising Buckler can at least slam opponents to the floor for easier combos.
Shield of Light can guard attacks, which is worth noting for scrambles and checkmate situations. But because it is an HP attack, it is expensive and risky to use.
Synergies
Warrior of Light works well with most competitive assists.
- Sephiroth
- Arguably the most popular synergy in competitive play. He can combo from almost every move and Wall Rush consistently, and set up another HP link afterwards. Sephiroth may be a budget Kuja assist, but his multi-hits make it easier to do knockback cancels anywhere. This lets Warrior of Light deal consistent HP damage regardless of his position, while still having access to a consistent whiff punish option. Sephiroth also knocks back at a lower vertical angle compared to Kuja, which makes Crossover > Rune Saber more consistent (and damaging) as a follow-up.
- Aerith
- Aerith has less bravery damage and worse whiff punish tools in exchange for safer combos and EX intake. Dayflash chase setups take center stage here; They're useful for getting EX and bypassing LV2 Assist Change staggers. This is where Radiant Sword can see some use. Knockback cancels are also possible with Rune Saber and Bitter End, so technically Warrior of Light does not need Wall Rush for combos either. They are not very easy to do, though. If Warrior of Light does get a Wall Rush, he can use Shield of Light to set up another Aerith assist. A double assist combo can be a lot of damage, particularly with high base bravery.
- Jecht
- Jecht hits faster than Sephiroth and his air BRV sets up extended ground combos for lots of bravery. Even if Crossover is not equipped, Ascension usually is, which is also a high damaging move. If WoL wants to use assist again for even more bravery after Jecht's air BRV, Dayflash (ground) empty chase reset makes it possible. This is a competent synergy in its own right, though WoL loses out on consistent midscreen knockback cancels.
References
Navigation
Wiki Roadmap (012 Warrior of Light)
Please edit this page's roadmap template when relevant additions and changes are made.
| Page |
Completed |
In progress |
To-do |
Score
|
| General |
Added images for attacks. |
|
|
/ 86
|
| Pros / Cons |
Done. |
|
Adjust if necessary. |
/ ?
|
| Overview / Character Data |
Overview ok. |
|
|
2 / 2
|
| Bravery Attacks |
Ability info, images, overviews. |
|
|
5 / 5
|
| HP Attacks |
Ability info, images, overviews. |
|
|
5 / 5
|
| EX Mode |
EX mode info, overviews, ex mode ability overview. |
|
|
3 / 3
|
| Combos |
|
|
Add solo and assist combos. Use Cloud's page as an example. |
0 / 7
|
| Builds |
2 example builds. |
|
Add more builds for brv boost on dodge etc. |
8 / 10
|
| Assist |
Assist data, WoL assist overview, most common assist synergies. |
|
More assists. |
3 / 3
|
| Matchups |
|
|
Create the page, add matchup analysis and tips against every character. |
0 / 32
|
| Frame Data |
|
|
Create the page. |
0 / 1
|
| Starter Guide |
|
|
Create the page. A concise PvP guide with core concepts and bare essentials explained concisely. Roughly 25 % of character's total page content. |
0 / 8
|
| Strategy |
|
|
Create the page and add basic offensive and defensive strategies. Use Jecht and Squall pages as examples. |
0 / 10
|