| Info
|
|
| Name |
Cloud Strife (クラウド・ストライフ)
|
| Original game |
Final Fantasy VII
|
| Base ATK (LV100) |
110 (Average)
|
| Base DEF (LV100) |
112 (High)
|
| Run Speed |
7 (Average)
|
| Dash Speed |
77F (Average / Good)
|
| Fall Speed |
87F (Below Average)
|
| Fall Speed Ratio After Dodge |
39 (Below Average)
|
| Fastest BRV |
13F (Double Cut)
|
| Fastest HP |
41F (Cross Slash)
|
| 1-Hit HP |
Meteorain
|
| HP Links |
Yes
|
| Command Block |
No
|
| Weapon |
Sword, Greatsword, Katana, Spear
|
| Armor |
Shields, Bangles, Hats, Helms, Clothing,
Light Armor, Large Shields, Chestplates
|
| Exclusive weapons |
Buster Sword, Force Stealer, Butterfly Edge, Fenrir
|
| Unlock |
Default
|
| Alignment |
Chaos (012)
Cosmos (013)
|
| Voice Actor (JP) |
Takahiro Sakurai
|
| Voice Actor (ENG) |
Steve Burton
|
Overview
Cloud is an all-rounder with a focus on close-range fighting and damage. He can close gaps with his good dash speed and mix up with Double Cut, its multiple cancel options and slower heavy hitting braveries. Cloud has HP links that can deal a lot of damage, especially with assist. With a good read or a dodge punish, Cloud can build some EX gauge or momentum on a short notice.
Cloud needs to get close to make his biggest plays, as his midrange tools are slow or don't have high reward. Cloud doesn't specialize in zoning, but he can use his many projectiles on the ground to disrupt movement or do more damage during combos. He builds EX and assist gauge well with pokes, but his offense isn't bulletproof; His HP links are vulnerable against Assist Change and dodge punishing fast fallers (Kain, Kefka) or characters with command block (Jecht) can be challenging. Cloud also needs to be mindful of air dodges, as he doesn't fall quickly after he finishes dodging.
Cloud works with a variety of build styles, such as damage, EX Core and Side by Side ![]()
 . His assist synergy is diverse thanks to his wall rush potential and Double Cut confirms. And if Cloud gets a full EX gauge, his guard crushing EX mode can cripple the opposition.
In competitive play, Cloud has been ranked at high tier. His good base stats, damage output and coverage for many situations make him a strong character. Verticality, midrange threat, post-dodge defense, command blocks and consistent Assist Changes are Cloud's weaker points. Despite that, Cloud is a good character for new and experienced players alike who can compete with much of the cast.
| Strengths |
Weaknesses
|
- Solid, easy and straightforward gameplay with an intuitive moveset and standard mobility.
- Ground combat - Pokes, HP conversions and ranged attacks provide a well rounded arsenal for grounded interactions.
- Damage - With powerful wall rush moves, assist and an extensive ground combo game, Cloud can secure a lot of damage with a single opening.
- Meter generation - Cloud can whiff for assist meter consistently and build a good amount of meter on hit with Double Cut and HP links.
- Build variety - Cloud supports a myriad of build styles that are known to be effective in competitive play.
- Flexible assist synergy thanks to wall rush potential and Double Cut confirms.
- EX Mode lets Cloud to power through blocks with Melee High priority braveries and he deals more damage the more health he has, creating one of the most damaging EX Bursts in the game.
- High base defense of 112 at LV100 reduces bravery damage taken more than majority of the cast.
|
- Vulnerable HP links can limit Cloud's opportunities for HP damage against characters who can escape with Assist Change more often.
- Floaty air dodges and lack of instant defensive moves can make air dodging more susceptible to dodge punishment at higher levels of play.
- Relative linearity - Cloud has good tools for close-range combat, but well placed blocks, traps and vertical positioning can give him a bit of trouble. This can manifest as higher risk on whiff, unfavorable trades or demand for precise dashes. Without ground projectiles, his ground combat is about on par with aerial combat which will require strong fundamentals and micro-optimizations to compensate.
|
Bravery Attacks
Ground
|
| Base Damage
|
7, 13 (20)
|
| Startup Frame
|
13F
|
| Damage Type
|
Physical
|
| Priority
|
Melee Low
|
| EX Force
|
90
|
| Effects
|
Chase
|
| Cancels
|
Dodge, Block, Attack
|
| Assist Gain (Hit)
|
|
| CP (Mastered)
|
30 (15)
|
| [Close] Quick slash. Low power, fast execution. |
Unlocked at
level 1 |
Mastered at
100 AP
|
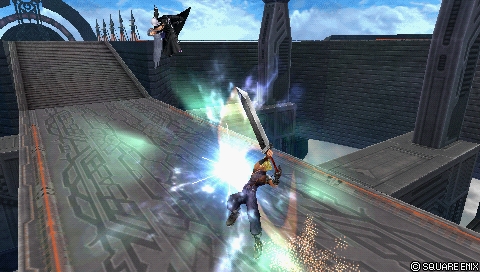
Double Cut is Cloud's close-range poke. It is a 2-part attack that moves Cloud forward during the first swing. It has fast startup, short recovery and multiple cancel options for the first hit that are useful in mind games. This is an effective move for building assist gauge with and generates a good 90 EX on hit.
If Double Cut connects, Cloud has a decent amount of time to confirm the follow-up slash. It has average knockback that leads to Chase, but it can lead to an assist combo against a wall [1]. With a fast ground assist, Double Cut's first hit also functions as an assist combo starter. It can even anti-air aerial opponents close to the ground and combo into Cross-slash. [2]
Cloud has a variety of grounded moves, but none of them are as fast as Double Cut. Even though it's usually low reward, it can help tie his ground combat together. Double Cut is a good bravery with an aerial version that is arguably even more important to Cloud.
|
| Base Damage
|
8, 12, 25 (45)
|
| Startup Frame
|
21F
|
| Damage Type
|
Physical
|
| Priority
|
Melee Low
|
| EX Force
|
30
|
| Effects
|
Wall Rush, Absorb
|
| Cancels
|
Dodge
|
| Assist Gain (Hit)
|
|
| CP (Mastered)
|
30 (15)
|
| [Close] Strike with three powerful blows. Sends foe flying. |
Unlocked at
level 22 |
Mastered at
120 AP
|
Sonic Break is a slower, secondary poke for Cloud. It's a 3-hit combo attack with good wall rush potential, and a dedicated HP link after the second hit. Cloud moves forward during the first slash, but it has more range in practice; Thanks to the absorb property that was added in Dissidia 012, Sonic Break can be used more reliably as a whiff punisher and occasionally as a gap closer on the ground. It pulls nearby opponents towards Cloud, with an effective range of roughly 1.8 tiles in World of Darkness. The pull has very short vertical coverage, but can guarantee a block punish against airborne opponents close to ground.
The base damage is pretty good by itself, and the threat of a wall rush HP link makes Sonic Break one of Cloud's more potent ground attacks. Cloud has plenty of time to confirm each follow-up input when Sonic Break hits, making it easier to use as an assist combo starter as well.
The absorb property is accompanied by distinct wind visuals and a sound effect during startup. They can make Sonic Break easier to react to even though the move itself is fairly fast to come out.
|
| Base Damage
|
3 x 4, 8, 15 (35)
|
| Startup Frame
|
27F
|
| Damage Type
|
Physical
|
| Priority
|
Melee Low
|
| EX Force
|
30
|
| Effects
|
Wall Rush
|
| Cancels
|
Dodge
|
| Assist Gain (Hit)
|
|
| CP (Mastered)
|
30 (15)
|
| [Mid] Charging attack. Slow strike, easy to wall rush. |
Unlocked at
level 1 |
Mastered at
100 AP
|
Climhazzard is Cloud's slowest melee bravery on the ground. It usually functions as a punish move or as a combo move. This attack is telegraphed and moves Cloud forward the most out of all his ground braveries, but it also contributes greatly to his ground combo damage. The reason is two-pronged; The base damage isn't as high as Sonic Break, but the second hit can naturally combo into his air braveries for more damage and assist gauge. Because of this link, it also empowers any combos that use Fire and assists with ground wall rush.
Like Cloud's other braveries, each hit must be pressed separately with circle (![]()
 ). It can set up ground wall rushes and assist follow-ups with ease
When locked off, Climhazzard will move Cloud in the direction he is facing. This can be used as a gimmicky way to retreat or move to an opponent's side. If Climhazzard hits without lock on, Cloud can still finish the combo sequence without major issues.

|
| Base Damage
|
15, 5, 10 (30)
|
| Startup Frame
|
37F
|
| Damage Type
|
Magical
|
| Priority
|
Melee Mid (sword), Ranged Low (projectile)
|
| EX Force
|
90
|
| Effects
|
Chase
|
| Cancels
|
Dodge
|
| Assist Gain (Hit)
|
|
| CP (Mastered)
|
30 (15)
|
| [Mid] Launch shockwave. Fast, but has weak homing. |
Unlocked at
level 35 |
Mastered at
100 AP
|
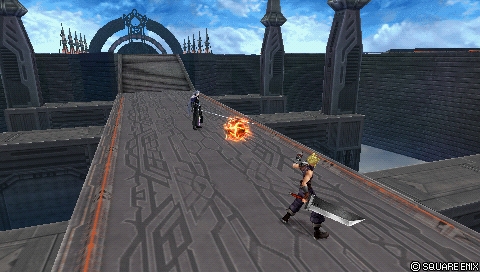
Blade Beam is a low priority projectile that moves quickly in a linear arc once fired. The attack is composed of two parts - The stationary sword swing which is melee mid priority and the projectile itself. Blade Beam travels along the ground and explodes when it reaches maximum travel distance or hits the opponent. This explosion creates a chase prompt and it can even combo into Kuja assist after a dodge cancel. [3] The majority of EX Force is also generated with the explosion (60), which is important to note when using this move from a distance.
This is not a must-have move for Cloud in most scenarios. However, it is useful for sniping air dodges close to the ground [4]. The mid priority sword can be used to reflect Ranged Mid projectiles such as Lightning's Watera, but this is not usually needed, practical or without risk.
Blade Beam itself doesn't have tracking, but Cloud will realign the projectile until it appears. In rare instances, it is possible to only get hit by the moving projectile and have the explosion miss.
|
| Base Damage
|
each (7, 10)
|
| Startup Frame
|
25F
|
| Damage Type
|
Magical
|
| Priority
|
Ranged Mid
|
| EX Force
|
0
|
| Effects
|
-
|
| Cancels
|
Dodge
|
| Assist Gain (Hit)
|
|
| CP (Mastered)
|
30 (15)
|
[Long] Shoot three fireballs.
Short range, but can restrain opponent with explosions. |
Unlocked at
level 31 |
Mastered at
80 AP
|
Firaga is Cloud's mid-range poke. Three mid priority fireballs spread out in front of him. Cloud can use this move to keep opponents at a distance thanks to the ranged mid priority. Each fireball can hit twice for 17 base damage per fireball. When used during assist combos, this can be a devastating 51 base damage that shreds through bravery in very close range.
The fireballs have decent vertical tracking, as they can curve to a roughly 80~90 degree angle upwards. But they don't enable assist conversions on hit without assist storage glitch due to relatively short hit stun period. The knockback isn't high either. However, since Firaga is mid priority, it will stagger a blocking opponent which assists can follow up on.
There aren't many uses cases for Firaga outside of occasional ranged zoning and combo fillers. It doesn't act as an end point for Cloud's gameplan, nor is it usable in the air. Cloud stands still for the entire animation, and the fireballs don't have enough coverage against assists with fast startup or at high altitude. The recovery has a late cancel window, which makes repeated uses much riskier for Cloud. Firaga still loses to higher priority command blocks and well placed invincibility (air dodges, Tifa's feints).
|
| Base Damage
|
5 x 3 (15)
|
| Startup Frame
|
25F
|
| Damage Type
|
Magical
|
| Priority
|
Ranged Low
|
| EX Force
|
0
|
| Effects
|
-
|
| Cancels
|
Dodge
|
| Assist Gain (Hit)
|
|
| CP (Mastered)
|
30 (15)
|
| [Long] Hurl fireball. Faster than Fire. |
Unlocked at
level 18 |
Mastered at
80 AP
|
Fira is the odd one out of the three Fire spells Cloud can use. It is a single fireball with fastest travel time out of the three with multiple low knockback hits on contact. The total base damage is shared with Fire, but without its other benefits. The vertical tracking is weak and the projectile is still low priority as well. Fira offers no combo utility without assist [5] or close positioning near a wall.
All this can make Fira difficult to justify in competitive play. Cloud's other projectiles can achieve more for similar or lower risk. And when there are only 3 slots available for ground braveries, Fira ends up being outclassed in an already competitive bravery slot economy.
|
| Base Damage
|
10
|
| Startup Frame
|
25F
|
| Damage Type
|
Magical
|
| Priority
|
Ranged Low
|
| EX Force
|
0
|
| Effects
|
-
|
| Cancels
|
Dodge
|
| Assist Gain (Hit)
|
|
| CP (Mastered)
|
30 (15)
|
| [Long] Hurl fireball. Slowly tracks opponent. |
Unlocked at
level 15 |
Mastered at
80 AP
|
Fire is a single hit projectile that slowly moves towards the opponent. It stays on the field for roughly 5 seconds. Up to 2 Fires can be on the stage at the same time. Its low priority and slow movement make it less ideal for zoning, but it is also less threatening when reflected back. The vertical tracking is the best out of Cloud's bravery projectiles, but Fire's overall duration keeps the travel distance in check.
Where Fire really shines is in combos. Fire forces landing lag on hit, which is great for close-range solo combos and extending assist combos to their logical extreme. That puts Fire in an interesting spot, where it's a low stakes projectile that can occasionally disrupt an interaction if left unattended, but also enable some of the highest damaging combos Cloud can do. When used in conjunction with Climhazzard, a clean combo can pay off well.
If Fire is used without being locked on to opponent, it will travel in the direction it was shot. However, locking onto an opponent will cause the projectile to track the opponent. Given the overall duration of the projectile and its slow movement, this is not known to be very practical for tricking vigilant players.Aerial
|
| Base Damage
|
5, 10, 25 (40)
|
| Startup Frame
|
21F
|
| Damage Type
|
Physical
|
| Priority
|
Melee Low
|
| EX Force
|
30
|
| Effects
|
Wall Rush
|
| Cancels
|
Dodge
|
| Assist Gain (Hit)
|
|
| CP (Mastered)
|
30 (15)
|
| [Close] Powerful slashes. Change combo with analog stick. |
Unlocked at
level 1 |
Mastered at
220 AP
|
Cloud advances forward with two horizontal slashes, followed by a third slash that knocks downwards. Slashing Blow is one of Cloud's most important braveries due to its overall versatility and damage potential. It has high base damage and knockback, as well as the HP link Omnislash Version 5 which is a great wall rush move and an assist combo starter. It is a staple punish move after blocking, a gap closer and a whiff punisher against slower moves. It works as a filler during assist combos as well.
While Slashing Blow has many comparable traits with Sonic Break, it does not have the absorb property. Also important to note is the tracking; Slashing Blow has good lateral tracking when used at the same height as the opponent. But if they are above or below Cloud (1-2 jumps height), using this move will barely move Cloud anywhere.
Slashing Blow has a downward slash as the default finisher. By holding up on the analog stick (![]()
 ), Cloud can perform an upward slash that sends opponents up instead. This is good for confirming a wall rush near the ceiling, but functions similarly otherwise.
Cloud can transition into Omnislash Version 5 even if only the second hit connects. [6] [7]
|
| Base Damage
|
25
|
| Startup Frame
|
25F
|
| Damage Type
|
Physical
|
| Priority
|
Melee Low
|
| EX Force
|
0
|
| Effects
|
Wall Rush
|
| Cancels
|
Dodge
|
| Assist Gain (Hit)
|
|
| CP (Mastered)
|
30 (15)
|
| Diving attack, scooping foe with sword. Useful from above. |
Unlocked at
level 1 |
Mastered at
100 AP
|
Aerial Fang moves Cloud down before blowing the opponent at a diagonal upward angle. This move is best suited for punishing attacks below Cloud, especially in air-to-ground scenarios. The knockback isn't huge, but the base damage is average. The overall reward on hit isn't high without a wall rush and assist, though.
If Cloud is not positioned above opponent before using Aerial Fang, Cloud will stay almost stationary during the attack. The recovery isn't very long, so whiffing it is not punished often.
This is one of the two midair braveries that are interchangeable with Rising Fang.
|
| Base Damage
|
3, 1 x 10, 17 (30)
|
| Startup Frame
|
21F
|
| Damage Type
|
Physical
|
| Priority
|
Melee Low
|
| EX Force
|
33
|
| Effects
|
Wall Rush
|
| Cancels
|
Dodge
|
| Assist Gain (Hit)
|
|
| CP (Mastered)
|
30 (15)
|
| Powerful upward lunge. Effective near ceiling. |
Unlocked at
level 4 |
Mastered at
100 AP
|
Rising Fang is an upward air-to-air move. It is the opposite of Aerial Fang in many ways; Rising Fang moves Cloud upward, and on hit it will transition into a multi-hitting barrage that wall rushes upwards. The wall rush hit can also destroy Old Chaos Shrine's platform. [8] The recovery is longer when whiffed, but the attack is also active for a long time, the majority of Cloud's ascent. [9]
Rising Fang has no tracking once Cloud begins ascending. If Cloud is not directly below the opponent, he will move towards them before rising with the actual attack. [10] [11] [12] The startup speed remains the same either way. If this move is done elsewhere, Cloud will simply stay still before ascending.
This is one of the two midair braveries that are interchangeable with Aerial Fang. Rising Fang will move Cloud upwards even when it won't track the opponent, which can be good for evasive movement.
If Rising Fang hits an assist character, Cloud will not transition into the follow-up.
|
| Base Damage
|
7, 13 (20)
|
| Startup Frame
|
13F
|
| Damage Type
|
Physical
|
| Priority
|
Melee Low
|
| EX Force
|
90
|
| Effects
|
Chase
|
| Cancels
|
Dodge, Block, Attack
|
| Assist Gain (Hit)
|
|
| CP (Mastered)
|
30 (15)
|
| [Close] Quick slash. Low power, fast execution. |
Unlocked at
level 25 |
Mastered at
100 AP
|
Midair Double Cut functions like the grounded version, except it can be done in the air. An essential move for Cloud that's great for poking and building assist gauge safely through whiffs [13]. All of the ground version's good qualities are shared, including the variety of cancel options and short recovery.
Because it's Cloud's fastest aerial move, Double Cut can be used as a consistent low damage punisher in most situations where other braveries may be too slow. It can punish air dodges after Free Air Dash [14] [15], and follow up after staggering with LV2 Assist Change. [16] Double Cut won't lead to HP damage without assist, but each hit adds up over time due to the 90 EX it generates.
The first hit can combo into Cloud's commonly used assists, but the hit stun is somewhat short for doing it on reaction. Like the ground version, the second hit leads to chase. Since Cloud is considered airborne during this move, he can call Aerith assist and create a guaranteed setup for follow-ups. Note, that the second hit can be delayed long enough for it to miss the opponent if done late. [17]HP Attacks
Ground
|
| Base Damage
|
5, 5 (10)
|
| Startup Frame
|
41F
|
| Damage Type
|
Physical
|
| Priority
|
Melee High
|
| EX Force
|
30
|
| Effects
|
Wall Rush
|
| Cancels
|
Dodge
|
| Assist Gain (Hit)
|
|
| CP (Mastered)
|
30 (15)
|
| [Close] Break through defenses with cross-shaped slashes. |
Unlocked at
level 1 |
Mastered at
130 AP
|
A 3-hit combo with high knockback. Cloud moves towards the opponent with each slash, and the maximum travel distance for individual slashes is long. The tracking works whenever the opponent is in Cloud's general direction. Cross-slash has great reach against grounded opponents, and it's pretty effective against most ground dodges. If Cloud anti-airs with Double Cut, Cross-slash can be used as a solo follow-up for HP damage. The base damage isn't high, but it can wall rush from afar, which is good for starting assist combos.
If the opponent is above Cloud, his movement is almost completely compromised. The same is true when Cross-slash is done against a ledge. The first vertical slash can anti-air opponents close to ground, but other slashes have no vertical coverage. That means it won't work well against forward ground dodge and aerial opponents in general. Cloud cannot cancel the attack once it starts, which makes Cross-slash a rather risky move overall.
|
| Base Damage
|
each (10)
|
| Startup Frame
|
21F (up), 81F (down)
|
| Damage Type
|
Magical
|
| Priority
|
Ranged Mid (up), Ranged High (down)
|
| EX Force
|
each 60
|
| Effects
|
-
|
| Cancels
|
Dodge
|
| Assist Gain (Hit)
|
|
| CP (Mastered)
|
30 (15)
|
| [Long] Send countless meteors towards opponent. |
Unlocked at
level 9 |
Mastered at
130 AP
|
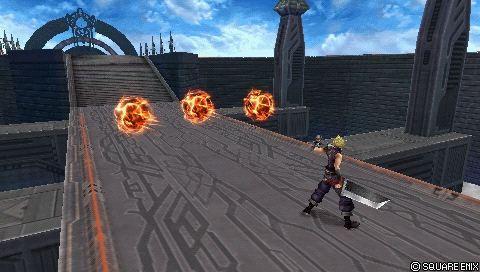
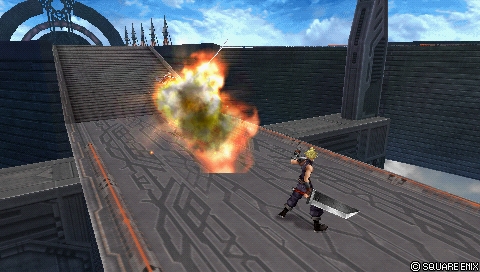
Meteors rise above Cloud before pursuing the opponent. Meteorain is Cloud's only ranged priority HP, but its long startup restricts its uses as a projectile. The meteor projectiles are fired as a barrage, with each projectile acting as a 1-hit HP attack. The maximum height from which they are fired is somewhat low. [18] However, the projectiles have horizontal tracking, which can technically protect Cloud against some air-to-ground punish attempts. The projectiles have a bravery hitbox when going up, which can combo into the projectiles going down. [19] [20]
They can also catch side dodges on the ground and there is enough hit stun for an assist combo near the wall.
Meteorain's recovery is long and Cloud has no innate protection outside of the projectiles. He can be pushed away from the projectiles with a dash during startup for a punish. The projectiles also cannot instantly realign to opponent's assist with Auto Assist Lock On once the projectiles are coming down.
|
| Base Damage
|
1 x 4, 2 x 5 (+ = 34)
|
| Startup Frame
|
?
|
| Damage Type
|
Physical
|
| Priority
|
Melee High
|
| EX Force
|
27
|
| Effects
|
Wall Rush
|
| Cancels
|
Dodge
|
| Assist Gain (Hit)
|
|
| CP (Mastered)
|
30 (15)
|
Branching from Sonic Break.
[Combo] A whirlwind of attacks. |
Unlocked at
level |
Mastered at
130 AP
|
A rising flurry of attacks that end with a downward slam. This is the HP link that amplifies Sonic Break's power as a grounded bravery. The overall base damage isn't massive, but the wall rush enables a variety of assist combos for big damage. Finishing Touch sends down at a diagonal angle, so if it's done near a ledge, the opponent is sent off the platform. This is not a problem on a stage like Lunar Subterrane, but other stages such as Orphan's Cradle have banish traps around platforms. That can reduce Finishing Touch's damage due to the missing wall rush. Some assists, like Kuja and Tidus can convert into a combo even without the wall rush. [21] [22]
Cloud is vulnerable to attacks if an opponent escapes with LV1 Assist Change. However, the time period for doing this is short, at the end of the move. Normally, Cloud will continue to ascend after a LV1 Assist Change and then stop after the final slash. If Cloud has Auto Assist Lock On equipped, he will stop moving and attack in place instead.Aerial
|
| Base Damage
|
2, 1 x N (4+)
|
| Startup Frame
|
47F
|
| Damage Type
|
Physical
|
| Priority
|
Melee High
|
| EX Force
|
each 15
|
| Effects
|
Wall Rush
|
| Cancels
|
Dodge
|
| Assist Gain (Hit)
|
|
| CP (Mastered)
|
30 (15)
|
| [Close] Midair charge. Effective against any height. |
Unlocked at
level 1 |
Mastered at
130 AP
|
Braver is an advancing homing move that transitions into a downward dive on hit. The bravery damage is low, but each hit generates a bit of EX. If Braver connects, the dive will cause damage for a maximum of 8 hits. The attack will finish at that point regardless of remaining height, sending the opponent down. If Cloud reaches floor during Braver, he will land on the ground and send the opponent up at a diagonal angle. [23] Braver can generate up to 135 EX when all 9 hits connect (based on Force to Courage ![]() ).
).
Braver has tracking all around Cloud, which is good for vertically aligned punishes. The long active frames are good for reflecting mid & high priority projectiles such as Vaan's Windburst. However, Braver also has short reach. Punishing air dodges and blocks from mid range is difficult, but the wall can mitigate this issue against dodges. Its risky to use though, as its telegraphed startup and relatively long recovery leave him vulnerable if he misses. This is also true when reflecting projectiles, so caution is advised.
Regardless, this is a staple HP attack for Cloud. It's a faster, safer alternative for ending assist combos and Cloud's only high priority mixup against immediate blocks in the air.
|
| Base Damage
|
each (10)
|
| Startup Frame
|
21F (up), 81F (down)
|
| Damage Type
|
Magical
|
| Priority
|
Ranged Mid (up), Ranged High (down)
|
| EX Force
|
each 60
|
| Effects
|
-
|
| Cancels
|
Dodge
|
| Assist Gain (Hit)
|
|
| CP (Mastered)
|
30 (15)
|
| [Long] Send countless meteors towards opponent. |
Unlocked at
level 28 |
Mastered at
130 AP
|
Meteorain's aerial version is mostly similar to the ground version, but with one key difference; When the projectiles come down, they have no horizontal tracking. As a result, it has less applications out in the open. Therefore, Meteorain is best used against static targets; Meteorain avoids LV2 Assist Change staggers during combos and it can even generate an obscene amount of EX in the corner with a proper setup. [24]
If an assist character stays out on the field for a while, Cloud can target them with aerial Meteorain and generate lots of EX Force that way. [25] Cloud gets some EX from the Assist Lock, but a portion of the EX will remain on the field. This can be done after escaping a combo with LV1 Assist Change, or by simply evading the assist attack and punishing it. A mistimed assist punish against a Cloud with Auto Assist Lock On can also cause this interaction. Cloud's mileage will vary depending on the assist, as some attacks keep the assist on the field longer than others.
Just like the ground version, aerial Meteorain causes enough hit stun that allows combos, even with EX Revenge. Assists can follow up near the wall [26], and assist storage glitch alleviates that restriction. [27]
|
| Base Damage
|
2 x 4, 5, 7 (+ = 35)
|
| Startup Frame
|
?
|
| Damage Type
|
Physical
|
| Priority
|
?
|
| EX Force
|
36
|
| Effects
|
Wall Rush
|
| Cancels
|
Dodge
|
| Assist Gain (Hit)
|
|
| CP (Mastered)
|
30 (15)
|
Branching from Slashing Blow.
[Combo] Series of speedy slices. |
Unlocked at
level |
Mastered at
150 AP
|
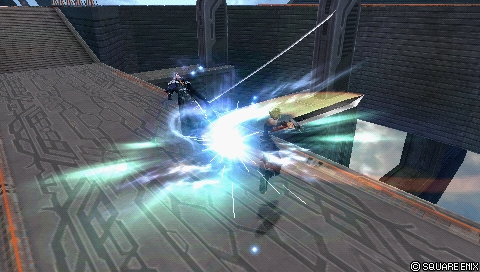
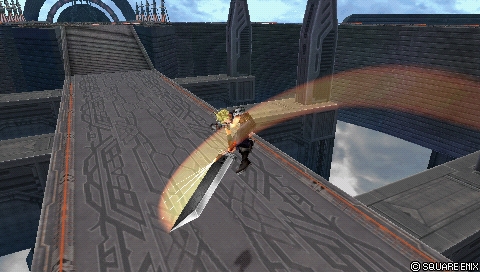
Omnislash Version 5 is Cloud's aerial HP link from Slashing Blow, and arguably one of the character-defining attacks for him. Similar to Finishing Touch, Omnislash Ver. 5 is what makes Slashing Blow as dangerous as it is, with the HP wall rush that has very high downward knockback. It is what enables high damaging assist combos from a variety of positions. The nature of an HP link gives Cloud some independence from the assist mechanic, but it also empowers him greatly with Side by Side ![]() . This strength is shared with Finishing Touch, which gives Cloud his HP linker archetype, but it is even more valuable on an aerial move.
. This strength is shared with Finishing Touch, which gives Cloud his HP linker archetype, but it is even more valuable on an aerial move.
The long animation gives Cloud plenty of time to recover to base bravery after starting an assist combo with HP attack. But it also works against him; Escaping from this move with LV1 Assist Change gives the opponent plenty of time to attack Cloud who is stuck in the animation. [28] On a similar note, if Cloud hits the assist character during Assist Change, he can attempt to dodge cancel a hit reaction from a punish.
[29]
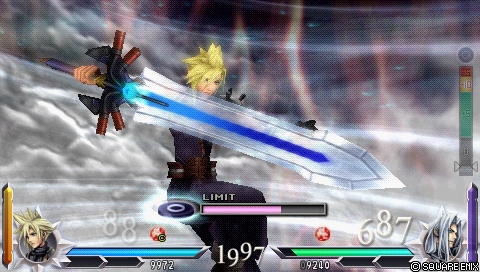
Cloud will dive towards the ground before inflicting HP damage with a separate explosion. Cloud will land on his feet if he reaches the ground during the dive. The opponent will be left close to Cloud, behind his back, so he must be careful to avoid getting broken. If Cloud doesn't land on the ground at the end, he will remain airborne and is at much bigger frame advantage for EX Cores, assist combo fillers [30] or even pressure.EX Mode: Equipped Ultima Weapon!
Effects:
- Regen
- Critical Boost
- Ultima Weapon (CRUSH)
- Ultima Weapon (ATK)
Cloud's EX mode is quite strong due to its additional effects. The more health he has, the more damage his braveries will do. This extends to his EX Burst, which is one of the strongest bursts in the game when Cloud is at full health. Having high priority on most braveries also makes many interactions advantageous for Cloud if he gets close to his opponent.
If Cloud activates EX Mode while in his Alt 1 appearence, the EX mode will be called "The power of mako!" This does not change how Cloud's EX mode works.
Ultima Weapon (CRUSH)

[Always active while in EX Mode]
Each attack becomes even heavier, crushing all attempts at blocking.
All melee priority attacks become Melee High priority. This is the same as HP attacks in the game, which makes blocking Cloud very dangerous. High priority command blocks such as Jecht Block and Exdeath's Omni Block can still stagger Cloud.
The high priority becomes active as soon as Cloud activates EX mode. This can be done during a bravery attack to break through an unsuspecting opponent's block.
The only bravery attacks that are unaffected by the priority change are Fire, Fira, Firaga and Blade Beam (projectile).
Ultima Weapon (ATK)
[Always active while in EX Mode]
The higher the user's HP, the sharper the weapon's blade.
Damage multiplier scales to x1~x2 accordingly to current HP%, round down to nearest integer.
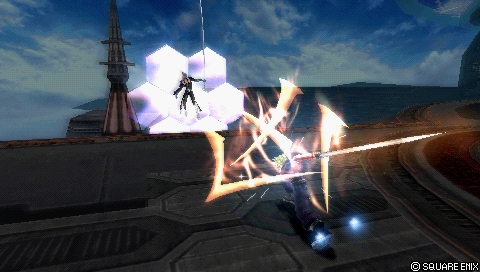
EX Burst: Omnislash
An attack slicing the opponent over and over. Repeatedly press circle to raise the gauge.
| Damage multiplier (initial) |
Damage multiplier (rest) |
Type
|
| 14, 14 (28) |
2 x 20 (40) (68 total) |
Physical
|
Omnislash is one of the weakest and most damaging EX Bursts in the game depending on how much health Cloud has left. Higher health means more damage, 2x at most. At 2x damage, the base damage for the initial two hits alone is over 50 % of the average EX Burst's damage. That's where much of Omnislash's damage comes from, but the subsequent barrage of slashes isn't bad either.
The input requirement is straightforward; Press circle (![]() ) repeatedly until the gauge is filled.
) repeatedly until the gauge is filled.
Combos
Main article: Cloud (Combos)
Solo
Cloud has multiple solo combos thanks to Fire starters and Climhazzard second hit's natural recovery. While Climhazzard (2)'s followups are limited to two braveries, they're good and require no prior setup. Fire is a bit different here; Technically just about any move can be followed up after Fire, but this requires the projectile hitting later, after Cloud can move. But even in close range Cloud can at least chain Fire into other ground braveries, provided he isn't too close to the opponent.
| Condition
|
Combo
|
Base Damage
|
EX
|
Notes
|
|
| Ground starter
|
Climhazzard (2) > Double Cut
|
40
|
120
|
Video
|
| Base Damage (Breakdown): 8, 12 > 20 |
Opponent Assist (Comrade's Vow): 60 |
EX Force (Breakdown): 30 > 90 |
| More EX compared to Slashing Blow, and has easier timing. If in doubt, do this, because Cloud can still combo into an assist with Double Cut. Repeatedly pressing Double Cut is fairly reliable. |
|
|
| Projectile starter
|
Fire > LL > Sonic Break (2) > Finishing Touch
|
44 + HP WR
|
57
|
Video
|
| Base Damage (Breakdown): 10 > 8, 12 > 14 |
Opponent Assist (Comrade's Vow): 66 |
EX Force (Breakdown): 0 > 30 > 27 |
|
|
| Ground starter, must hit airborne opponent
|
Double Cut (1) > Cross-slash
|
17 + HP WR
|
60
|
Video
|
| Base Damage (Breakdown): 7 > 5, 5 + HP WR |
Opponent Assist (Comrade's Vow): 25 |
EX Force (Breakdown): 30 > 30 |
| If the opponent misses their dodge after landing, or performs a neutral dodge, Cross-slash can have an even easier time connecting... assuming the opponent doesn't have Precision Evasion equipped. Please do not confuse this for being a fake combo; The timing is relatively strict, so there is room for human error. |
|
|
EX Revenge
| Condition
|
Combo
|
Base Damage
|
EX
|
Notes
|
|
Air starter, close to opponent
Full EX Gauge
|
Double Cut > Double Cut > Double Cut > Double Cut > Slashing Blow (1) > Omnislash Ver. 5
|
115 + HP WR
|
~36+
|
Video
|
| Base Damage (Breakdown): 20 > 20 > 20 > 20 > 35 + HP WR |
Opponent Assist (Comrade's Vow): 172 |
EX Force (Breakdown): 0-30 + ~36 |
A staple close-range EX Revenge combo. Easy to do, good damage and works in most areas. Cloud must be close to the opponent to land all four Double Cuts. If he activates EX Revenge from further distance, he has to settle for three or even two Double Cuts before doing Slashing Blow.
Cloud generates no EX with Double Cuts during EX Revenge, and he has to land Slashing Blow before Double Cut's pushback pushes the opponent away. Therefore it is likely that Cloud may not get as much EX from Slashing Blow as he normally would. |
|
|
Assist
Cloud's wall rushes are great for starting assist combos. Since he has many moves that can wall rush, most of his attacks are good combo starters. Some assists can also pick up from unfinished braveries, of which Double Cut first hit (midair) is among the most important starters.
Cloud normally ends combos with the Omnislash Version 5 HP link for damage. If Cloud wants more EX Force, he can use Braver. However, the attack is much shorter, so bravery won't have as much time to recover if he started an assist combo with an HP attack.
Kuja
Main article: Cloud Combos (Kuja Assist)
| Condition
|
Combo
|
Base Damage
|
EX
|
Notes
|
|
| Punish starter, no Wall Rush
|
Climhazzard (2) > AST BRV > AC > Slashing Blow (1) > Omnislash 5
|
105 + HP WR
|
96
|
Video
|
| Base Damage (Breakdown): 20 > 50 (Kuja) > 35 + HP WR |
Opponent Assist (Comrade's Vow): 157 |
EX Force (Breakdown): 30 > 30 + 36 |
| If Climhazzard's last hit were to send the opponent into a banish trap, Kuja can be called earlier to avoid it. |
|
|
| Poke / Punish starter, Wall Rush
|
Sonic Break > WR > AST BRV > AC > Slashing Blow (1) > Omnislash Ver. 5
|
130 + WR + HP WR
|
96
|
Video
|
| Base Damage (Breakdown): 45 + WR > 50 > 35 + HP WR |
Opponent Assist (Comrade's Vow): 232 |
EX Force (Breakdown): 30 > 30 + 36 |
| Basic wall rush combo. Good damage and relatively easy to do. |
|
|
| HP starter, Wall Rush
|
Cross-slash > WR > AST BRV > AC > Slashing Blow (1) > Omnislash 5
|
95 + HP WR x2
|
96
|
Video
|
| Base Damage (Breakdown): 10 + HP WR > 50 (Kuja) > 35 + HP WR |
Opponent Assist (Comrade's Vow): 145 |
EX Force (Breakdown): 30 > 30 + 36 |
| Basic wall rush combo. Cross-slash is good at pursuing grounded opponents and the reward is decent, even though the move itself is risky to use. |
|
|
| Poke starter, no wall
|
Double Cut (1) > AST BRV > AC > Slashing Blow (1) > Omnislash 5
|
92
|
96
|
Video
|
| Base Damage (Breakdown): 7 > 50 > 35 + HP WR |
Opponent Assist (Comrade's Vow): 138 |
EX Force (Breakdown): 30 > 30 + 36 |
| One of Cloud's primary air combo starters. The first hit has just enough hit stun for an assist conversion, but there isn't much time to react. A basic, but valuable combo at all levels of play. |
|
|
| Gap closer / Punish starter, Wall Rush
|
Slashing Blow (1) > Omnislash 5 > WR > AST BRV > Firaga > AC > S. Blow (1) > Omnislash 5
|
~168 + HP WR x2
|
132
|
Video
|
| Base Damage (Breakdown): 35 + HP WR > 47 (Kuja) + 51 > 35 + HP WR |
Opponent Assist (Comrade's Vow): 255 |
EX Force (Breakdown): 30 + 36 > 0 > 30 + 36 |
| One of the highest damaging staple combos for Cloud. Cloud is positioned very well to do a Firaga filler during Kuja's multi-hits for a lot of damage. Firaga should hit as Kuja's multi-hits begin and subsequently shred through opponent's bravery. |
|
|
Builds
Main article: Cloud (012) Builds
Cloud has a lot of flexibility with builds. He can be built for damage via raw attack, high base bravery and wall rush. EX Core and Assist oriented builds with Side by Side ![]() are also great.
are also great.
Hybrid (EX Intake + Seal of Lufenia)
| Stats
|
| HP |
10299
|
| CP |
450
|
| BRV |
996
|
| ATK |
178
|
| DEF |
183
|
| LUK |
60
|
| Max Booster |
x3.5
|
Special Effect: Seal of Lufenia
| Equipment
|
| Assist |
Kuja
|
Weapon ![]()  |
Heaven's Cloud
|
Hand ![]()  |
Lufenian Dirk ![]() 
|
Head ![]()  |
Lufenian Headband ![]()
|
Body ![]()  |
Lufenian Vest
|
| Accessory 1 |
![]()  Muscle Belt Muscle Belt
|
| Accessory 2 |
![]() Battle Hammer Battle Hammer
|
| Accessory 3 |
![]()  Large Gap in HP Large Gap in HP
|
| Accessory 4 |
![]() Summon Unused Summon Unused
|
| Accessory 5 |
![]() Pre-EX Mode Pre-EX Mode
|
| Accessory 6 |
![]() Pre-EX Revenge Pre-EX Revenge
|
| Accessory 7 |
![]() White Drop White Drop
|
| Accessory 8 |
![]() White Drop White Drop
|
| Accessory 9 |
![]() White Gem White Gem
|
| Accessory 10 |
![]() Tenacious Attacker Tenacious Attacker
|
Summon ![]() 
|
Rubicante
|
| Bravery attacks
|
| Ground |
Aerial
|
![]() Sonic Break Sonic Break |
![]() Slashing Blow Slashing Blow
|
|
|
![]()  Branch: Finishing Touch Branch: Finishing Touch |
![]() Branch: Omnislash Version 5 Branch: Omnislash Version 5
|
↑+![]() Double Cut Double Cut |
↑+![]() Double Cut Double Cut
|
|
|
|
|
↓+![]() Firaga Firaga |
↓+![]() Rising Fang Rising Fang
|
|
|
|
|
| HP attacks
|
| Ground |
Aerial
|
![]() Cross-slash Cross-slash |
![]() Braver Braver
|
|
|
|
↓+![]() Meteorain Meteorain
|
![]() indicates a "Gear" extra ability or the use of Equip Glitch. The total Capacity Point cost assumes the equip glitch is done.
indicates a "Gear" extra ability or the use of Equip Glitch. The total Capacity Point cost assumes the equip glitch is done.
| Actions
|
| Ground Evasion
|
| Midair Evasion
|
| Ground Block
|
| Midair Block
|
| Aerial Recovery
|
| Recovery Attack
|
| Controlled Recovery
|
| Wall Jump
|
| Air Dash
|
| Free Air Dash
|
| Ground Dash
|
| Multi Air Slide
|
| Free Air Dash Boost
|
| Assist Gauge Up Dash
|
| Jump Times Boost+
|
| Ground Evasion Boost
|
| Midair Evasion Boost
|
| Evasion Boost
|
| Descent Speed Boost
|
| Support
|
| Always Target Indicator
|
| EX Core Lock On
|
| Assist Lock On
|
| Extra
|
| Precision Evasion
|
| Counterattack
|
| Sneak Attack
|
| Gambler's Spirit
|
| Disable Counterattack
|
| EXP to Assist
|
Build Overview
This is an EX build that focuses on EX absorption via accessories and Heaven's Cloud's ![]() EX intake range. White Drops
EX intake range. White Drops ![]() and White Gem
and White Gem ![]() increase EX absorption by 20 % in total. Heaven's Cloud doesn't have top-of-the-line ATK, but the EX intake range boost makes it much easier to grab EX Force. Tenacious Attacker
increase EX absorption by 20 % in total. Heaven's Cloud doesn't have top-of-the-line ATK, but the EX intake range boost makes it much easier to grab EX Force. Tenacious Attacker ![]() lets Cloud absorb EX even when he is attacking. This way he doesn't have to chase after landing Double Cut. The more Double Cuts Cloud lands, the faster the EX gauge fills up. Firaga doesn't generate any EX, but it's a high damage filler move during ground Kuja assist, perfect after Omnislash Version 5.
lets Cloud absorb EX even when he is attacking. This way he doesn't have to chase after landing Double Cut. The more Double Cuts Cloud lands, the faster the EX gauge fills up. Firaga doesn't generate any EX, but it's a high damage filler move during ground Kuja assist, perfect after Omnislash Version 5.
Seal of Lufenia's special effect has a good amount of EX depletion on it. Every time Cloud gets an HP wall rush, the depletion happens twice. That adds up quickly in assist combos that start with an HP link, such as Omnislash Version 5. Lufenian Dirk ![]() has 72 DEF instead of 73, but the boost in ATK is nice when Heaven's Cloud only has 67 ATK.
has 72 DEF instead of 73, but the boost in ATK is nice when Heaven's Cloud only has 67 ATK.
Jump Times Boost+ adds two air jumps, which can be used to safely move around while airborne. Extra abilities Counterattack and Sneak Attack increase critical hit rate for bravery damage and Precision Evasion can get Cloud out of tight spots if he dodges just before he gets hit.
CP Allocation
15 points are available for basic action abilities (jump boost, speed boost), support abilities (Auto Assist Lock On) or extra abilities (Precision Jump, Achy, First Strike).
Attacks (Staple)
These attacks are recommended regardless of matchup, stage or player preference.
- Double Cut (ground & midair)
Safe pokes that generate the most EX out of Cloud's braveries.
- Slashing Blow + Omnislash Version 5
Tried-and-true BRV > HP link with high damage potential.
Attacks (Flexible)
These attacks are great to have, but can be swapped or removed depending on matchup, stage or player preference.
- Blade Beam
Cloud's only BRV projectile with good EX generation. Even if Blade Beam hits from a distance, Cloud can dodge towards the opponent and get most of the EX force.
- Firaga
Mid priority keepout and high damage filler during ground Kuja assist. Doesn't generate EX force.
Attacks (Avoid)
Generally not recommended due to being outclassed by other attacks or having little to no distinct utility.
- Fira
Doesn't provide any notable utility compared to other projectiles.
Assist
Cloud's assist data
| Type |
Attack |
Startup |
Position |
Spawn |
Damage multiplier |
Effects
|
| BRV |
Sonic Break |
21F |
Ground |
Opponent |
8, 12, 25 (45) |
Wall Rush
|
| BRV |
Slashing Blow |
21F |
Air |
Opponent |
5, 10, 25 (40) |
Wall Rush
|
| HP |
Cross-slash |
41F |
Ground |
Opponent |
5, 5 (10) |
Wall Rush
|
| HP |
Braver |
47F |
Air |
Opponent |
2, 1 x N (4+) |
Wall Rush
|
Cloud Assist Overview
Cloud assist is one of the weaker assists in the game. While his braveries are relatively fast and high damage, he doesn't hold the opponent for long and finishes his attacks quickly with huge knockback. All of his attacks wall rush, which can be difficult to utilize in open spaces. Because of this, Cloud assist works more consistently in small stages such as Pandaemonium - Top Floor and Edge of Madness. And even then he is not best in class for whiff punishment and converting overall.
His HP attacks can pursue the opponent (Cross-slash moreso), but this is an expensive price to pay for brief stage presence. Combined with the common weakness against LV2 Assist Change (melee attacks get staggered), Cloud doesn't provide much utility that would rival the best assists in the game.
Further reading: Cloud overview in assist tier list.
Synergies
One of Cloud's distinct strengths is his synergy with many assists. Kuja, Aerith and Jecht are all staples, but he can see some success with other assists as well.
- Kuja
- High damage, reliable conversions off of all key moves (with and without wall rush) and additional utility with HP assists make Kuja one of Cloud's strongest assists. Cloud's wall rushes enable damaging assist combos, and ground wall rush makes Kuja's Flare Star HP safe against LV2 Assist Change. Strong combo fillers are possible during ground Kuja BRV. If Cloud gets to chase after Double Cut, Kuja's Force Symphony can enforce an HP attack near walls. [31] Kuja can also work with situational conversions, such as Meteorain near wall [32] or Double Cut dodge cancel with assist storage glitch. [33]
- Aerith
- Aerith's bravery damage potential isn't as high as Kuja, but she can set up HP attacks for Cloud anywhere in a stage with Seal Evil. This is done by hitting Double Cut, calling Aerith before chasing and doing a chase HP attack. If the opponent dodges it, Aerith hits them and Cloud is free to follow up however he wants. This is good in aerial matchups such as Sephiroth, where Cloud may have to rely more on Double Cut than his HP links for damage. Because initiating chase attracts all EX Force to the attacker, Aerith assist complements Cloud's EX gain. Tenacious Attacker
![]() is not mandatory, which frees up an accessory slot for utility or more damage.
is not mandatory, which frees up an accessory slot for utility or more damage.
In addition, Aerith's holding potential with Seal Evil lets Cloud set up grounded solo combos with Fire and / or Climhazzard. Omnislash Ver. 5 is one of the most common and highest damaging starters in this regard, but Aerith must be called before Cloud becomes grounded. Aerith's whiff punishment isn't prevalent, but the synergy with aerial moves and situational utility elsewhere are enough to offset that.
- Jecht
- Jecht assist converts off of Cloud's wall rushes and Double Cuts (1st hit) reliably. He gives Cloud plenty of time to set up two Fires near the ground which can be used to greatly increase Cloud's maximum damage potential. Grounded wall rushes won't lead to as much damage as with Kuja assist, but Cloud can always get a Slashing Blow > Omnislash Ver. 5 for decent damage.
Having fast ground and midair braveries can help Cloud with whiff punishment, but this is not usually a high priority for Cloud. But he does work well with it when needed.
- Tidus
- Tidus provides less damage on average than other assists, but his air bravery is a great whiff punisher. Even though its hit stun is short, assist chase lets Cloud follow up with Slashing Blow consistently. Braver also works if Cloud is close to the opponent. This is not a commonly used assist for Cloud, but it can be very useful against The Emperor.
- Sephiroth
- "Budget" Kuja assist with better whiff punishment and more reliance on Slashing Blow finishers. Depending on the assist chase angle, even Slashing Blow can partially miss. Hell's Gate assist can be used in scramble situations, though its cost can be difficult to justify at times.
- Yuna
- Ranged priority air BRV is safe against LV2 Assist Change. Allows consistent combos near the ground, but not with ground wall rushes.
- Cecil
- Air BRV that holds the opponent in place for long. Good near the ground, lets Cloud set up Fire combos.
- Onion Knight
- Ranged priority ground BRV is safe against LV2 Assist Change, good for any ground wall rush confirms. Air BRV also converts off of Double Cut with chase, but this usually requires a wall to work.
- Ultimecia
- Niche, but potent near walls. Cloud can call Ultimecia before chase to enforce HP damage or high damage BRV wall rush from Ultimecia's Knight's Axe. If Cloud avoids opponent's chase attack and they get wall rushed by Ultimecia, Cloud can follow up with Slashing Blow for HP damage. [34]
References
Navigation
Wiki Roadmap (012 Cloud Strife)
Please edit this page's roadmap template when relevant additions and changes are made.
| Page |
Completed |
In progress |
To-do |
Score
|
| General |
|
|
|
35 / 86
|
| Pros / Cons |
Mostly done. |
|
|
2 / ?
|
| Overview / Character Data |
Done. |
|
Rewrite the overview to be shorter. Distribute its contents more evenly across Cloud sections and pages. |
1 / 2
|
| Bravery Attacks |
Ability info, images, overviews. |
Edit based on feedback. |
|
5 / 5
|
| HP Attacks |
Ability info, images, overviews. |
Edit based on feedback. |
|
5 / 5
|
| EX Mode |
Basic info, image(s). |
|
|
3 / 3
|
| Combos |
Solo combos. Kuja assist combos. |
|
Add more assists than just Kuja. |
7 / 7
|
| Builds |
2 builds. |
|
Add recommended attacks like on Tifa's page. Add more builds and overviews like with Tifa as well. |
2 / 10
|
| Assist |
Assist data, Cloud assist overview and synergies for Cloud. |
Edit based on feedback. |
|
3 / 3
|
| Matchups |
|
|
Create page. Matchup tips and analysis. |
0 / 32
|
| Frame Data |
|
|
Create page. |
0 / 1
|
| Starter Guide |
|
Edit based on feedback. |
|
7 / 8
|
| Strategy |
|
|
Create page. Strategies and counterplays. |
0 / 10
|