|
|
| (14 intermediate revisions by the same user not shown) |
| Line 6: |
Line 6: |
| |name=Prishe (プリッシュ) | | |name=Prishe (プリッシュ) |
| |origin=Final Fantasy XI | | |origin=Final Fantasy XI |
| |weapon=Thrown Weapons, Grappling Weapons, Instruments,<br> Poles, Parrying Weapons
| |
| |armor=Bangles, Gauntlets, Hats, Hairpins, Headbands,<br> Clothing, Light Armor, Chestplates
| |
| |atk=109 (Low) | | |atk=109 (Low) |
| |def=110 (Low) | | |def=110 (Low) |
| Line 14: |
Line 12: |
| |fall=75 (Normal, Above Average), 71 (EX Mode, Fast) | | |fall=75 (Normal, Above Average), 71 (EX Mode, Fast) |
| |fallr=21 (Normal, Very Fast), 14 (EX Mode, Very Fast) | | |fallr=21 (Normal, Very Fast), 14 (EX Mode, Very Fast) |
| | |fastestbrv=11F (Combo One) |
| | |fastesthp=43F (Asuran Fists, Auroral Uppercut) |
| | |1hithp=Yes (Nullifying Dropkick, Banishga max range) |
| | |hplinks=No |
| | |cmdblock=No |
| | |weapon=Thrown Weapons, Grappling Weapons, Instruments,<br> Poles, Parrying Weapons |
| | |armor=Bangles, Gauntlets, Hats, Hairpins, Headbands,<br> Clothing, Light Armor, Chestplates |
| |exclusives=Koenigs Knuckles, Spharai, Glanzfaust | | |exclusives=Koenigs Knuckles, Spharai, Glanzfaust |
| | |unlock= |
| | |alignment=Cosmos |
| | |vajp=[https://en.wikipedia.org/wiki/Aya_Hirano Aya Hirano] |
| | |vaeng=[https://en.wikipedia.org/wiki/Julie_Nathanson Julie Nathanson] |
| }} | | }} |
| | |
| | = Overview = |
| | Prishe is a fast close-range fighter with a variety of melee braveries that can chain into each other. When certain braveries are equipped, they create a "Skillchain" reaction for extra bravery damage. |
| | |
| | Prishe is known for her risk-averse defensive play in close quarters. Raging Fists and One-Inch Punch are the standouts here: Fast startup, short recovery and rewarding on hit. Threaten the opponent with delayable advancing strikes, charge One-Inch Punch to crush blocks and dodge out of the way if they miss. Her air dodges are difficult to punish due to her fast fall speed. Also, Prishe's dash speed is among the fastest, which helps her chase down opponents and EX Cores when necessary. Fast, safe and hard to hit, Prishe is a textbook example of effective "hit and run" in Dissidia 012. Patience is rewarded greatly, as Prishe is very capable of playing the war of attrition. |
| | |
| | Prishe’s builds usually focus on EX and bravery damage. Adamant Chains accentuates her safe air dodges even further. Side by Side {{accsp}} is not recommended due to her average HP attacks and lack of solo HP combos. |
| | |
| | Her weaknesses are more nuanced; While braveries are difficult to punish, she cannot cancel them into blocks or other attacks. This limits her maximum potential for defensive {{keyword|mind games|mindgame=1}}, though it’s already effective. Most of her attacks have lackluster vertical tracking and suffer against long active disjoints (e.g. {{012emp}} Thunder Crest, {{012seph}} Godspeed). Her 1-hit HPs are also situational in EX Revenge checkmate situations. And lastly, Prishe suffers from a bravery slot dilemma similar to Vaan due to the abundance of viable combo chains. |
| | |
| | In competitive play, Prishe has been frequently ranked as one of the strongest characters in the game. Her strategy is consistent and relatively easy to execute in most {{keyword|matchups|matchup=1}}, making her a notable choice for {{keyword|blind picks|blindpick=1}}. She provides steady gameplay to aspiring competitors even if she is not at clear advantage. |
|
| |
|
| {{ProConTable | | {{ProConTable |
| |pros= | | |pros= |
| | * '''Mobility''' - High dash speed makes Prishe strong in offense and EX Core races. She falls fast after air dodges, which makes it much safer to dodge on average. |
| | * '''{{keyword|Turtling|turtling=1}}''' - Prishe has fast braveries with short {{keyword|recovery|recovery=1}} and strong {{keyword|mixup|mixup=1}} potential thanks to fully charged high priority One Inch Punch. Prishe can fight with little risk, which makes her difficult to hit. |
| | * '''Safe and Reliable''' - Prishe's defense and synergy with {{012aer}} assist lets her play the long game with EX gauge and bravery stacking. |
| | * '''High Bravery Damage''' - Despite low base ATK, charged One Inch Punch and EX Mode combos hurt, particularly if Prishe gets a guard break. |
| | |
| |cons= | | |cons= |
| | * '''Mediocre HP attacks''' - Compared to her braveries, HP attacks have poor tracking and coverage. |
| | * '''Low Base DEF''' - If Prishe gets hit, it will hurt a lot |
| | * '''Three Slot Dilemma''' - Her competitive loadouts are strong, but she cannot have full coverage with them. |
| | * '''EX Revenge Checkmates''' - Prishe's 1-hit HP attacks are situational at best (Nullifying Dropkick on ground, max range Banishga midair), so she relies on movement and assist to resolve these situations. |
| | * '''Relies on {{keyword|Dodge Cancels|dc=1}}''' - More of a weakness at high level, but this limits her maximum mixup potential and punishes relentless {{keyword|whiffs|whiff=1}} in EX Core races. |
| }} | | }} |
|
| |
| = Overview =
| |
|
| |
|
| |
|
| = Bravery Attacks = | | = Bravery Attacks = |
| Line 40: |
Line 67: |
|
| |
|
| {{AbilityInfo | | {{AbilityInfo |
| | |image=https://dissidia.wiki/images/4/42/Brv_prishe_combo_1.jpeg |
| | |imgpos= |
| |damage=2, 2, 4 (8) | | |damage=2, 2, 4 (8) |
| |startup=11F | | |startup=11F |
| Line 47: |
Line 76: |
| |effect=- | | |effect=- |
| |cp=20 (10) | | |cp=20 (10) |
| | |cancels= |
| | |astatk= |
| | |asthit= |
| | |level= |
| | |ap= |
| | |gametext=[Close] Quick three-punch combo. Generates extra EX Force. Can combo without hitting. |
| }} | | }} |
| ''[Close] Quick three-punch combo. Generates extra EX Force. Can combo without hitting.''
| | |
|
| |
|
| |-|Howling Fist (One)= | | |-|Howling Fist (One)= |
| Can be chained into another bravery. | | Can be chained into another bravery. |
|
| |
|
| When used as a finisher (Two), the required charge time is considerably shorter.
| | {{AbilityInfo2 |
| | | |ver1=Normal |
| {{AbilityInfoUltimecia | | |damage1='''10''' (1 x 3, 7) |
| |damage1=1 x 3, 7 (10) | |
| |startup1=17F | | |startup1=17F |
| |type1=Physical | | |type1=Physical |
| |priority1=Melee Low | | |priority1=Melee Low |
| |ex1=15 (One) / 60 (Two) | | |ex1=15 |
| |effect1=- | | |effect1=- |
| |cp1=20 (10) | | |cancels1=Dodge |
| |damage2=1 x 13, 7 (20) | | |asthit1= |
| | |gametext=[Mid] Charge at opponent with fists. <br>Charge to increase its strength. |
| | |level=25 |
| | |ap=150 |
| | |cp=20 (10) |
| | |ver2=Charged |
| | |damage2='''20''' (1 x 13, 7) |
| |startup2=32F (charge), 2F (release) | | |startup2=32F (charge), 2F (release) |
| |type2=Physical | | |type2=Physical |
| |priority2=Melee Mid | | |priority2=Melee Mid |
| |ex2=15 (One) | | |ex2=15 |
| |effect2=- | | |effect2=- |
| |cp2=- | | |cancels2=Dodge |
| | |asthit2= |
| }} | | }} |
| ''[Mid] Charge at opponent with fists. Charge to increase its strength.''
| |
|
| |
|
| |-|Dragon Kick (One)= | | |-|Dragon Kick (One)= |
| {{AbilityInfoUltimecia | | |
| |damage1=15 | | {{AbilityInfo2 |
| | |ver1=Normal |
| | |damage1='''15''' |
| |startup1=17F | | |startup1=17F |
| |type1=Physical | | |type1=Physical |
| |priority1=Melee Low | | |priority1=Melee Low |
| |ex1=15 (One) | | |ex1=15 |
| |effect1=- | | |effect1=- |
| |cp1=20 (10) | | |cancels1=Dodge |
| |damage2=15, 10 (25) | | |asthit1= |
| | |gametext=[Mid] Use a leg sweep. <br>Charge for additional hit. |
| | |level=19 |
| | |ap=150 |
| | |cp=20 (10) |
| | |ver2=Charged |
| | |damage2='''25''' (15, 10) |
| |startup2=26F (charge), 10F (release) | | |startup2=26F (charge), 10F (release) |
| |type2=Physical | | |type2=Physical |
| |priority2=Melee Low (kick), Ranged Mid (projectile) | | |priority2=Melee Low (kick), Ranged Mid (projectile) |
| |ex2=15 (One) | | |ex2=15 |
| |effect2=Chase | | |effect2=- |
| |cp2=- | | |cancels2=Dodge |
| | |asthit2= |
| }} | | }} |
| ''[Mid] Use a leg sweep. Charge for additional hit.''
| |
|
| |
|
| |-|Shoulder Tackle (One)= | | |-|Shoulder Tackle (One)= |
| Line 159: |
Line 207: |
|
| |
|
| |-|One Inch Punch (One)= | | |-|One Inch Punch (One)= |
| {{AbilityInfoUltimecia | | |
| |damage1=2, 1 x 3, 2 (7) | | {{AbilityInfo2 |
| | |ver1=Normal |
| | |damage1='''7''' (2, 1 x 3, 2) |
| |startup1=13F | | |startup1=13F |
| |type1=Physical | | |type1=Physical |
| |priority1=Melee Low | | |priority1=Melee Low |
| |ex1=15 (One) | | |ex1=15 |
| |effect1=- | | |effect1=- |
| |cp1=20 (10) | | |cancels1=Dodge |
| |damage2=2 x 14, 7 (35) | | |asthit1= |
| | |gametext=[Close] Pummel energy shards into foe. <br>Charge to increase strength. |
| | |level=33 |
| | |ap=150 |
| | |cp=20 (10) |
| | |ver2=Charged |
| | |damage2='''35''' (2 x 14, 7) |
| |startup2=32F (charge), 4F (release) | | |startup2=32F (charge), 4F (release) |
| |type2=Physical | | |type2=Physical |
| |priority2=Melee High | | |priority2=Melee High |
| |ex2=15 (One) | | |ex2=15 |
| |effect2=- | | |effect2=- |
| |cp2=- | | |cancels2=Dodge |
| | |asthit2= |
| }} | | }} |
| ''[Close] Pummel energy shards into foe. Charge to increase strength.''
| |
|
| |
|
| |-|Holy= | | |-|Holy= |
| Line 206: |
Line 262: |
| |effect=Chase | | |effect=Chase |
| |cp=10 (5) | | |cp=10 (5) |
| | |level=1 |
| | |ap=150 |
| }} | | }} |
| ''Branching from _ (One) [Combo] Three-punch combo.'' | | ''Branching from _ (One) [Combo] Three-punch combo.'' |
| Line 213: |
Line 271: |
| When (Two) is used as a finisher, the required charge time is considerably shorter. | | When (Two) is used as a finisher, the required charge time is considerably shorter. |
|
| |
|
| {{AbilityInfoUltimecia | | {{AbilityInfo2 |
| |damage1=1 x 3, 7 (10) | | |ver1=Normal |
| | |damage1='''10''' (1 x 3, 7) |
| |startup1=17F | | |startup1=17F |
| |type1=Physical | | |type1=Physical |
| |priority1=Melee Low | | |priority1=Melee Low |
| |ex1=60 (Two) | | |ex1=60 |
| |effect1=Chase | | |effect1=Chase |
| |cp1=20 (10) | | |cancels1=Dodge |
| |damage2=1 x 13, 7 (20) | | |asthit1= |
| | |gametext=Branching from _ (One) <br>[Combo] Charge foe with fists. |
| | |level=19 |
| | |ap=150 |
| | |cp=10 (5) |
| | |ver2=Charged |
| | |damage2='''20''' (1 x 13, 7) |
| |startup2=32F (charge), 2F (release) | | |startup2=32F (charge), 2F (release) |
| |type2=Physical | | |type2=Physical |
| |priority2=Melee Mid | | |priority2=Melee Mid |
| |ex2=0 (Two) | | |ex2=0 |
| |effect2=Wall Rush | | |effect2=Wall Rush |
| |cp2=- | | |cancels2=Dodge |
| | |asthit2= |
| }} | | }} |
| ''Branching from _ (One) [Combo] Charge foe with fists.''
| |
|
| |
|
| |-|Dragon Kick (Two)= | | |-|Dragon Kick (Two)= |
| {{AbilityInfoUltimecia | | |
| |damage1=15 | | {{AbilityInfo2 |
| | |ver1=Normal |
| | |damage1='''15''' |
| |startup1=17F | | |startup1=17F |
| |type1=Physical | | |type1=Physical |
| |priority1=Melee Low | | |priority1=Melee Low |
| |ex1=60 (Two) | | |ex1=60 |
| |effect1=Chase | | |effect1=Chase |
| |cp1=20 (10) | | |cancels1=Dodge |
| |damage2=15, 10 (25) | | |asthit1= |
| | |gametext=Branching from _ (One) <br>[Combo] Use a leg sweep. |
| | |level=25 |
| | |ap=150 |
| | |cp=10 (5) |
| | |ver2=Charged |
| | |damage2='''25''' (15, 10) |
| |startup2=26F (charge), 10F (release) | | |startup2=26F (charge), 10F (release) |
| |type2=Physical | | |type2=Physical |
| |priority2=Melee Low (kick), Ranged Mid (projectile) | | |priority2=Melee Low (kick), Ranged Mid (projectile) |
| |ex2=75 (Two) | | |ex2=75 |
| |effect2=Chase | | |effect2=Chase |
| |cp2=- | | |cancels2=Dodge |
| | |asthit2= |
| }} | | }} |
| ''Branching from _ (One) [Combo] Use a leg sweep.''
| |
|
| |
|
| |-|Shoulder Tackle (Two)= | | |-|Shoulder Tackle (Two)= |
| Line 258: |
Line 331: |
| |ex=0 (Two) | | |ex=0 (Two) |
| |effect=Wall Rush | | |effect=Wall Rush |
| |cp=20 (10) | | |cp=10 (5) |
| | |level=29 |
| | |ap=150 |
| }} | | }} |
| ''Branching from _ (One) [Combo] Attack with body slam.'' | | ''Branching from _ (One) [Combo] Attack with body slam.'' |
| Line 270: |
Line 345: |
| |ex=0 (Two) | | |ex=0 (Two) |
| |effect=Wall Rush | | |effect=Wall Rush |
| |cp=20 (10) | | |cp=10 (5) |
| | |level=4 |
| | |ap=150 |
| }} | | }} |
| ''Branching from _ (One) [Combo] Strike w/backhand blow.'' | | ''Branching from _ (One) [Combo] Strike w/backhand blow.'' |
| Line 282: |
Line 359: |
| |ex=0 (Two) | | |ex=0 (Two) |
| |effect=Wall Rush | | |effect=Wall Rush |
| |cp=20 (10) | | |cp=10 (5) |
| | |ap=150 |
| | |level=1 |
| }} | | }} |
| ''Branching from _ (One) [Combo] Upward lunge attack.'' | | ''Branching from _ (One) [Combo] Upward lunge attack.'' |
| Line 294: |
Line 373: |
| |ex=72 (Two) | | |ex=72 (Two) |
| |effect=Chase | | |effect=Chase |
| |cp=20 (10) | | |cp=10 (5) |
| | |ap=150 |
| | |level=22 |
| }} | | }} |
| ''Branching from _ (One) [Combo] Five-punch combo.'' | | ''Branching from _ (One) [Combo] Five-punch combo.'' |
| Line 302: |
Line 383: |
| When used as a (Two) finisher, the required charge time is considerably shorter. The exact timing is undocumented. | | When used as a (Two) finisher, the required charge time is considerably shorter. The exact timing is undocumented. |
|
| |
|
| {{AbilityInfoUltimecia | | {{AbilityInfo2 |
| |damage1=2, 1 x 3, 2 (7) | | |ver1=Normal |
| | |damage1='''7''' (2, 1 x 3, 2) |
| |startup1=13F | | |startup1=13F |
| |type1=Physical | | |type1=Physical |
| |priority1=Melee Low | | |priority1=Melee Low |
| |ex1=0 (Two) | | |ex1=0 |
| |effect1=Wall Rush | | |effect1=Wall Rush |
| |cp1=20 (10) | | |cancels1=Dodge |
| |damage2=2 x 14, 7 (35) | | |asthit1= |
| | |gametext=Branching from _ (One) <br>[Combo] Beat w/energy shards. |
| | |level=33 |
| | |ap=150 |
| | |cp=10 (5) |
| | |ver2=Charged |
| | |damage2='''35''' (2 x 14, 7) |
| |startup2=32F (charge), 4F (release) | | |startup2=32F (charge), 4F (release) |
| |type2=Physical | | |type2=Physical |
| |priority2=Melee High | | |priority2=Melee High |
| |ex2=0 (Two) | | |ex2=0 |
| |effect2=Wall Rush | | |effect2=Wall Rush |
| |cp2=- | | |cancels2=Dodge |
| | |asthit2= |
| }} | | }} |
| ''Branching from _ (One) [Combo] Beat w/energy shards.''
| |
|
| |
|
| </tabber> | | </tabber> |
| Line 401: |
Line 489: |
| }} | | }} |
|
| |
|
| = Prishe's mechanics (Skillchain) = | | = Unique Mechanics: Skillchain = |
| {|class="wikitable" | | {|class="wikitable" |
| |- | | |- |
| Line 439: |
Line 527: |
| Backhand Blow finishers are great for setting up {{012kuja}} assist combos and the Skillchain activates off of her most practical starters. That makes Detonation one of the more practical Skillchains. Howling Fist finisher provides a bit more flexibility in setting up aerial assist combos (Chase or Wall Rush) at the cost of bravery damage or EX Force depending on its charge level. | | Backhand Blow finishers are great for setting up {{012kuja}} assist combos and the Skillchain activates off of her most practical starters. That makes Detonation one of the more practical Skillchains. Howling Fist finisher provides a bit more flexibility in setting up aerial assist combos (Chase or Wall Rush) at the cost of bravery damage or EX Force depending on its charge level. |
|
| |
|
| Skillchains usually provide less reward on hit compared to other chains with no distinct utility of their own. Since Prishe can only assign one bravery attack chain per bravery slot, Skillchains compete with other well known chains such as Raging Fists > Dragon Kick, Raging Fists > Raging Fists and One Inch Punch > One Inch Punch. One Inch Punch and Dragon Kick synergize well with other starters and assists for plenty of EX Force, damage or wall rush without ever activating a Skillchain. As a result, this mechanic is not commonly seen in competitive play or known to be essential for high level Prishe gameplay. | | Skillchains are often Prishe's 3rd best choices for follow-up; They are good on select high bravery damage focused sets, but are otherwise outclassed in reward or utility by Prishe's other follow-ups. Prishe can only assign one bravery attack chain per bravery slot, which restricts the viability of Skillchains overall. However, the input timing for connecting charged attacks during Skillchains is more generous compared to more optimal follow-ups. This is not due to the Skillchain system specifically, but the synergy between bravery attacks in a chain (frame data and hit stun). |
|
| |
|
| = Combos = | | = Combos = |
| Line 549: |
Line 637: |
| == Prishe Assist Overview == | | == Prishe Assist Overview == |
|
| |
|
| Prishe is one of the weaker assists in the game with couple notable strengths and plenty of weaknesses to offset them. She can provide practical combos off of ground wall rushes and represent a '''[[Attack_Priority_(Dissidia_012)|Melee High]]''' priority hitbox in Backhand Blow. However, her short combo time, reliance on wall rush and slow startup on her air bravery limit Prishe's viability overall. Backhand Blow is still Melee High priority however, which | | Prishe is one of the weaker assists in the game with couple notable strengths and plenty of weaknesses to offset them. She can provide practical combos off of ground wall rushes and represent a '''[[Attack_Priority_(Dissidia_012)|Melee High]]''' priority hitbox in Backhand Blow. However, her short combo time, reliance on wall rush and slow startup on her air bravery limit Prishe's viability overall. |
|
| |
|
| === Howling Fist === | | === Howling Fist === |
| Combo: Howling Fist (One) > Raging Fists (Two)
| | '''Combo:''' Howling Fist (One) > Raging Fists (Two) |
|
| |
|
| Prishe works best off of ground wall rushes with this move. Prishe won't charge Howling Fist which makes this a relatively fast assist on startup. The Raging Fists ender has decent hold, but moves the opponent quickly in one direction. The Assist Chase ender is what ties everything together and '''[[Glossary_(Dissidia_012)#HP_linker|HP linkers]]''' who can wall rush on the floor like {{012clo}} and {{012jec}} have no problem following up. | | Prishe works best off of ground wall rushes with this move. Prishe won't charge Howling Fist which makes this a relatively fast assist on startup. The Raging Fists ender has decent hold, but moves the opponent quickly in one direction. The Assist Chase ender is what ties everything together and '''[[Glossary_(Dissidia_012)#HP_linker|HP linkers]]''' who can wall rush on the floor like {{012clo}} and {{012jec}} have no problem following up. |
| Line 559: |
Line 647: |
|
| |
|
| === Backhand Blow === | | === Backhand Blow === |
| Combo: Backhand Blow (One) > Shoulder Tackle (Two)
| | '''Combo:''' Backhand Blow (One) > Shoulder Tackle (Two) |
|
| |
|
| Backhand Blow is quite slow on startup to be used reliably as a midair assist combo starter, but Prishe can still pick up opponents off of regular wall rushes. Its quick wall rush finisher makes follow-ups difficult if not impractical though. However, it can work as a 1-bar checkmate against high priority blocks such as '''[[Jecht_(Dissidia_012)#Jecht_Block_(midair)-2|Jecht Block]]''' thanks to its high priority and tracking during startup. | | Backhand Blow is quite slow on startup to be used reliably as a midair assist combo starter, but Prishe can still pick up opponents off of regular wall rushes. Its quick wall rush finisher makes follow-ups difficult if not impractical though. Being the only 1-bar Melee High air BRV assist in the game offers the unique utility of setting up checkmate situations where other assists cannot, such as against '''[[Jecht_(Dissidia_012)#Jecht_Block_(midair)-2|Jecht Block]]'''. |
|
| |
|
| Aerial bravery assists are most commonly used in whiff punishes and combos alike, so Backhand Blow being the way it is leaves a lot to be desired. | | Aerial bravery assists are most commonly used in whiff punishes and combos alike, so Backhand Blow being the way it is leaves a lot to be desired. |
| Info
|
|
| Name |
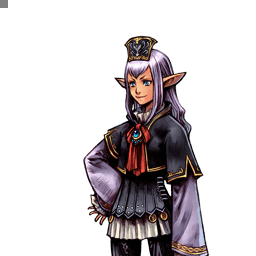
Prishe (プリッシュ)
|
| Original game |
Final Fantasy XI
|
| Base ATK (LV100) |
109 (Low)
|
| Base DEF (LV100) |
110 (Low)
|
| Run Speed |
5 (Normal, Above Average), 2 (EX Mode, Fast)
|
| Dash Speed |
73 (Normal, Fast), 69 (EX Mode, Very Fast)
|
| Fall Speed |
75 (Normal, Above Average), 71 (EX Mode, Fast)
|
| Fall Speed Ratio After Dodge |
21 (Normal, Very Fast), 14 (EX Mode, Very Fast)
|
| Fastest BRV |
11F (Combo One)
|
| Fastest HP |
43F (Asuran Fists, Auroral Uppercut)
|
| 1-Hit HP |
Yes (Nullifying Dropkick, Banishga max range)
|
| HP Links |
No
|
| Command Block |
No
|
| Weapon |
Thrown Weapons, Grappling Weapons, Instruments,
Poles, Parrying Weapons
|
| Armor |
Bangles, Gauntlets, Hats, Hairpins, Headbands,
Clothing, Light Armor, Chestplates
|
| Exclusive weapons |
Koenigs Knuckles, Spharai, Glanzfaust
|
| Unlock |
|
| Alignment |
Cosmos
|
| Voice Actor (JP) |
Aya Hirano
|
| Voice Actor (ENG) |
Julie Nathanson
|
Overview
Prishe is a fast close-range fighter with a variety of melee braveries that can chain into each other. When certain braveries are equipped, they create a "Skillchain" reaction for extra bravery damage.
Prishe is known for her risk-averse defensive play in close quarters. Raging Fists and One-Inch Punch are the standouts here: Fast startup, short recovery and rewarding on hit. Threaten the opponent with delayable advancing strikes, charge One-Inch Punch to crush blocks and dodge out of the way if they miss. Her air dodges are difficult to punish due to her fast fall speed. Also, Prishe's dash speed is among the fastest, which helps her chase down opponents and EX Cores when necessary. Fast, safe and hard to hit, Prishe is a textbook example of effective "hit and run" in Dissidia 012. Patience is rewarded greatly, as Prishe is very capable of playing the war of attrition.
Prishe’s builds usually focus on EX and bravery damage. Adamant Chains accentuates her safe air dodges even further. Side by Side ![]()
 is not recommended due to her average HP attacks and lack of solo HP combos.
Her weaknesses are more nuanced; While braveries are difficult to punish, she cannot cancel them into blocks or other attacks. This limits her maximum potential for defensive mind games, though it’s already effective. Most of her attacks have lackluster vertical tracking and suffer against long active disjoints (e.g. The Emperor Thunder Crest, Sephiroth Godspeed). Her 1-hit HPs are also situational in EX Revenge checkmate situations. And lastly, Prishe suffers from a bravery slot dilemma similar to Vaan due to the abundance of viable combo chains.
In competitive play, Prishe has been frequently ranked as one of the strongest characters in the game. Her strategy is consistent and relatively easy to execute in most matchups, making her a notable choice for blind picks. She provides steady gameplay to aspiring competitors even if she is not at clear advantage.
| Strengths |
Weaknesses
|
- Mobility - High dash speed makes Prishe strong in offense and EX Core races. She falls fast after air dodges, which makes it much safer to dodge on average.
- Turtling - Prishe has fast braveries with short recovery and strong mixup potential thanks to fully charged high priority One Inch Punch. Prishe can fight with little risk, which makes her difficult to hit.
- Safe and Reliable - Prishe's defense and synergy with Aerith assist lets her play the long game with EX gauge and bravery stacking.
- High Bravery Damage - Despite low base ATK, charged One Inch Punch and EX Mode combos hurt, particularly if Prishe gets a guard break.
|
- Mediocre HP attacks - Compared to her braveries, HP attacks have poor tracking and coverage.
- Low Base DEF - If Prishe gets hit, it will hurt a lot
- Three Slot Dilemma - Her competitive loadouts are strong, but she cannot have full coverage with them.
- EX Revenge Checkmates - Prishe's 1-hit HP attacks are situational at best (Nullifying Dropkick on ground, max range Banishga midair), so she relies on movement and assist to resolve these situations.
- Relies on Dodge Cancels - More of a weakness at high level, but this limits her maximum mixup potential and punishes relentless whiffs in EX Core races.
|
Bravery Attacks
Many of Prishe's bravery attacks can be chained into a separate, equippable bravery followup. The starting bravery is noted as "(One)" and the followup is noted as "(Two)" in the game.
The list of followups remain the same for every bravery attack starter and thus, will be listed separately.
Ground
Can be chained into another bravery.
If your attack starts with Combo, the finisher will yield about 10 % more EX force.

|
| Base Damage
|
2, 2, 4 (8)
|
| Startup Frame
|
11F
|
| Damage Type
|
Physical
|
| Priority
|
Melee Low
|
| EX Force
|
39 (One)
|
| Effects
|
-
|
| Cancels
|
|
| Assist Gain (Hit)
|
|
| CP (Mastered)
|
20 (10)
|
| [Close] Quick three-punch combo. Generates extra EX Force. Can combo without hitting. |
Unlocked at
level |
Mastered at
AP
|
Can be chained into another bravery.
![]()
|
|
Normal |
Charged
|
| Base Damage
|
10 (1 x 3, 7) |
20 (1 x 13, 7)
|
| Startup Frame
|
17F |
32F (charge), 2F (release)
|
| Damage Type
|
Physical |
Physical
|
| Priority
|
Melee Low |
Melee Mid
|
| EX Force
|
15 |
15
|
| Effects
|
- |
-
|
| Cancels
|
Dodge |
Dodge
|
| Assist Gain (Hit)
|
|
|
| CP (Mastered)
|
20 (10)
|
[Mid] Charge at opponent with fists.
Charge to increase its strength. |
Unlocked at
level 25 |
Mastered at
150 AP
|
![]()
|
|
Normal |
Charged
|
| Base Damage
|
15 |
25 (15, 10)
|
| Startup Frame
|
17F |
26F (charge), 10F (release)
|
| Damage Type
|
Physical |
Physical
|
| Priority
|
Melee Low |
Melee Low (kick), Ranged Mid (projectile)
|
| EX Force
|
15 |
15
|
| Effects
|
- |
-
|
| Cancels
|
Dodge |
Dodge
|
| Assist Gain (Hit)
|
|
|
| CP (Mastered)
|
20 (10)
|
[Mid] Use a leg sweep.
Charge for additional hit. |
Unlocked at
level 19 |
Mastered at
150 AP
|
![]()
|
| Base Damage
|
12
|
| Startup Frame
|
45F
|
| Damage Type
|
Physical
|
| Priority
|
Melee Low
|
| EX Force
|
15 (One)
|
| Effects
|
Dodge
|
| Cancels
|
|
| Assist Gain (Hit)
|
|
| CP (Mastered)
|
20 (10)
|
| |
Unlocked at
level |
Mastered at
AP
|
[Dodge] Backflip then charge at foe. Evade foe's attack on start.
![]()
|
| Base Damage
|
10
|
| Startup Frame
|
31F
|
| Damage Type
|
Magical
|
| Priority
|
Ranged Low
|
| EX Force
|
15
|
| Effects
|
-
|
| Cancels
|
|
| Assist Gain (Hit)
|
|
| CP (Mastered)
|
30 (15)
|
| |
Unlocked at
level |
Mastered at
AP
|
[Long] Fire high-speed pearls of light at opponent.Aerial
![]()
|
| Base Damage
|
18
|
| Startup Frame
|
29F
|
| Damage Type
|
Physical
|
| Priority
|
Melee High
|
| EX Force
|
15 (One)
|
| Effects
|
-
|
| Cancels
|
|
| Assist Gain (Hit)
|
|
| CP (Mastered)
|
20 (10)
|
| |
Unlocked at
level |
Mastered at
AP
|
[Close] Strike down with a backhand blow. Useful for attacking from above.
![]()
|
| Base Damage
|
1 x 4, 11 (15)
|
| Startup Frame
|
23F
|
| Damage Type
|
Physical
|
| Priority
|
Melee Low
|
| EX Force
|
15 (One)
|
| Effects
|
Absorb
|
| Cancels
|
|
| Assist Gain (Hit)
|
|
| CP (Mastered)
|
20 (10)
|
| |
Unlocked at
level |
Mastered at
AP
|
[Close] Lunge upwards with fists. Great for attacking from below.
![]()
|
| Base Damage
|
2 x 4, 7 (15)
|
| Startup Frame
|
13F
|
| Damage Type
|
Physical
|
| Priority
|
Melee Low
|
| EX Force
|
15 (One)
|
| Effects
|
-
|
| Cancels
|
|
| Assist Gain (Hit)
|
|
| CP (Mastered)
|
20 (10)
|
| |
Unlocked at
level |
Mastered at
AP
|
[Close] Five-punch combo. Can combo without hitting.
![]()
|
|
Normal |
Charged
|
| Base Damage
|
7 (2, 1 x 3, 2) |
35 (2 x 14, 7)
|
| Startup Frame
|
13F |
32F (charge), 4F (release)
|
| Damage Type
|
Physical |
Physical
|
| Priority
|
Melee Low |
Melee High
|
| EX Force
|
15 |
15
|
| Effects
|
- |
-
|
| Cancels
|
Dodge |
Dodge
|
| Assist Gain (Hit)
|
|
|
| CP (Mastered)
|
20 (10)
|
[Close] Pummel energy shards into foe.
Charge to increase strength. |
Unlocked at
level 33 |
Mastered at
150 AP
|
![]()
|
| Base Damage
|
10
|
| Startup Frame
|
19F
|
| Damage Type
|
Magical
|
| Priority
|
Ranged Low
|
| EX Force
|
15
|
| Effects
|
-
|
| Cancels
|
|
| Assist Gain (Hit)
|
|
| CP (Mastered)
|
30 (15)
|
| |
Unlocked at
level |
Mastered at
AP
|
[Long] Fire pearls of light. Slow speed, strong homing.Followups
Attack data is mostly shared with (One) versions, but (Two) followups generate a different amount of EX and can also wall rush or initiate chase. These braveries also cost less CP to equip.
![]()
|
| Base Damage
|
2, 2, 4 (8)
|
| Startup Frame
|
11F
|
| Damage Type
|
Physical
|
| Priority
|
Melee Low
|
| EX Force
|
75 (Two)
|
| Effects
|
Chase
|
| Cancels
|
|
| Assist Gain (Hit)
|
|
| CP (Mastered)
|
10 (5)
|
| |
Unlocked at
level 1 |
Mastered at
150 AP
|
Branching from _ (One) [Combo] Three-punch combo.When (Two) is used as a finisher, the required charge time is considerably shorter.
![]()
|
|
Normal |
Charged
|
| Base Damage
|
10 (1 x 3, 7) |
20 (1 x 13, 7)
|
| Startup Frame
|
17F |
32F (charge), 2F (release)
|
| Damage Type
|
Physical |
Physical
|
| Priority
|
Melee Low |
Melee Mid
|
| EX Force
|
60 |
0
|
| Effects
|
Chase |
Wall Rush
|
| Cancels
|
Dodge |
Dodge
|
| Assist Gain (Hit)
|
|
|
| CP (Mastered)
|
10 (5)
|
Branching from _ (One)
[Combo] Charge foe with fists. |
Unlocked at
level 19 |
Mastered at
150 AP
|
![]()
|
|
Normal |
Charged
|
| Base Damage
|
15 |
25 (15, 10)
|
| Startup Frame
|
17F |
26F (charge), 10F (release)
|
| Damage Type
|
Physical |
Physical
|
| Priority
|
Melee Low |
Melee Low (kick), Ranged Mid (projectile)
|
| EX Force
|
60 |
75
|
| Effects
|
Chase |
Chase
|
| Cancels
|
Dodge |
Dodge
|
| Assist Gain (Hit)
|
|
|
| CP (Mastered)
|
10 (5)
|
Branching from _ (One)
[Combo] Use a leg sweep. |
Unlocked at
level 25 |
Mastered at
150 AP
|
![]()
|
| Base Damage
|
12
|
| Startup Frame
|
45F
|
| Damage Type
|
Physical
|
| Priority
|
Melee Low
|
| EX Force
|
0 (Two)
|
| Effects
|
Wall Rush
|
| Cancels
|
|
| Assist Gain (Hit)
|
|
| CP (Mastered)
|
10 (5)
|
| |
Unlocked at
level 29 |
Mastered at
150 AP
|
Branching from _ (One) [Combo] Attack with body slam.
![]()
|
| Base Damage
|
18
|
| Startup Frame
|
29F
|
| Damage Type
|
Physical
|
| Priority
|
Melee High
|
| EX Force
|
0 (Two)
|
| Effects
|
Wall Rush
|
| Cancels
|
|
| Assist Gain (Hit)
|
|
| CP (Mastered)
|
10 (5)
|
| |
Unlocked at
level 4 |
Mastered at
150 AP
|
Branching from _ (One) [Combo] Strike w/backhand blow.
![]()
|
| Base Damage
|
1 x 4, 11 (15)
|
| Startup Frame
|
23F
|
| Damage Type
|
Physical
|
| Priority
|
Melee Low
|
| EX Force
|
0 (Two)
|
| Effects
|
Wall Rush
|
| Cancels
|
|
| Assist Gain (Hit)
|
|
| CP (Mastered)
|
10 (5)
|
| |
Unlocked at
level 1 |
Mastered at
150 AP
|
Branching from _ (One) [Combo] Upward lunge attack.
![]()
|
| Base Damage
|
2 x 4, 7 (15)
|
| Startup Frame
|
13F
|
| Damage Type
|
Physical
|
| Priority
|
Melee Low
|
| EX Force
|
72 (Two)
|
| Effects
|
Chase
|
| Cancels
|
|
| Assist Gain (Hit)
|
|
| CP (Mastered)
|
10 (5)
|
| |
Unlocked at
level 22 |
Mastered at
150 AP
|
Branching from _ (One) [Combo] Five-punch combo.When used as a (Two) finisher, the required charge time is considerably shorter. The exact timing is undocumented.
![]()
|
|
Normal |
Charged
|
| Base Damage
|
7 (2, 1 x 3, 2) |
35 (2 x 14, 7)
|
| Startup Frame
|
13F |
32F (charge), 4F (release)
|
| Damage Type
|
Physical |
Physical
|
| Priority
|
Melee Low |
Melee High
|
| EX Force
|
0 |
0
|
| Effects
|
Wall Rush |
Wall Rush
|
| Cancels
|
Dodge |
Dodge
|
| Assist Gain (Hit)
|
|
|
| CP (Mastered)
|
10 (5)
|
Branching from _ (One)
[Combo] Beat w/energy shards. |
Unlocked at
level 33 |
Mastered at
150 AP
|
HP Attacks
Ground
![]()
|
| Base Damage
|
3 x 7 (21)
|
| Startup Frame
|
43F
|
| Damage Type
|
Physical
|
| Priority
|
Melee High
|
| EX Force
|
15
|
| Effects
|
Wall Rush
|
| Cancels
|
|
| Assist Gain (Hit)
|
|
| CP (Mastered)
|
30 (15)
|
| |
Unlocked at
level |
Mastered at
AP
|
[Close] Quickly charge and pummel foe. Good vs any height.
![]()
|
| Base Damage
|
-
|
| Startup Frame
|
49F
|
| Damage Type
|
-
|
| Priority
|
Melee High
|
| EX Force
|
0
|
| Effects
|
Wall Rush
|
| Cancels
|
|
| Assist Gain (Hit)
|
|
| CP (Mastered)
|
40 (20)
|
| |
Unlocked at
level |
Mastered at
AP
|
[Mid] Hit foe with charging dropkick. Slow start, good range.Aerial
![]()
|
| Base Damage
|
2 x 5 (10)
|
| Startup Frame
|
43F
|
| Damage Type
|
Physical
|
| Priority
|
Melee High
|
| EX Force
|
15
|
| Effects
|
Wall Rush
|
| Cancels
|
|
| Assist Gain (Hit)
|
|
| CP (Mastered)
|
30 (15)
|
| |
Unlocked at
level |
Mastered at
AP
|
[Rise] Quick upward punch. Great for attacking from below.
![]()
|
| Base Damage
|
2 x 5 (10)
|
| Startup Frame
|
47F
|
| Damage Type
|
Physical
|
| Priority
|
Ranged High
|
| EX Force
|
0
|
| Effects
|
Wall Rush
|
| Cancels
|
|
| Assist Gain (Hit)
|
|
| CP (Mastered)
|
40 (20)
|
| |
Unlocked at
level |
Mastered at
AP
|
[Mid] Emit shockwave of light. Effective horizontal attack.EX Mode: Two-Hour Ability!
Effects:
- Regen
- Critical Boost
- Hundred Fists
Hundred Fists
[Always active while in EX Mode] Chains up to three weapon skills and increases movement speed.
EX Burst: The Five Lights
Throws a glowing shard of Magicite at an opponent. Enter the commands shown in clockwise fashion to increase the number of blows dealt.
| Damage multiplier (initial) |
Damage multiplier (rest) |
Type
|
| 3 x 5, 5 (20) |
12 x 5, 20 (80) (100 total) |
??
|
Unique Mechanics: Skillchain
| Damage multiplier |
Type |
EX Force
|
| 5 |
Physical |
0
|
When certain bravery attacks are chained together, Prishe will activate a Skillchain. This is a burst of energy that deals additional bravery damage, which occurs alongside Prishe's current attack. When a Skillchain is activated, its name will also be displayed at the top of the screen, much like HP attacks and EX Mode activations.
Skillchains only activate with physical bravery attack chains. Banish, Holy and HP attacks will not activate a Skillchain.
The following table lists all viable combinations for a Skillchain.
| Skillchain |
Starter |
Finisher
|
| Compression |
Howling Fist |
One Inch Punch
|
| Detonation |
Combo
Howling Fist
One Inch Punch
Raging Fists
Shoulder Tackle
Spinning Attack |
Backhand Blow
|
| Fusion |
Spinning Attack |
Combo
Howling Fist
Raging Fists
Shoulder Tackle
Spinning Attack
|
| Gravitation |
Backhand Blow |
One Inch Punch
|
| Impaction |
Shoulder Tackle |
Combo
Howling Fist
Raging Fists
Shoulder Tackle
Spinning Attack
|
| Liquefaction |
Combo
Howling Fist
Raging Fists |
Spinning Attack
|
| Reverberation |
Howling Fist |
Shoulder Tackle
|
| Transfixion |
One Inch Punch |
Howling Fist
|
Backhand Blow finishers are great for setting up Kuja assist combos and the Skillchain activates off of her most practical starters. That makes Detonation one of the more practical Skillchains. Howling Fist finisher provides a bit more flexibility in setting up aerial assist combos (Chase or Wall Rush) at the cost of bravery damage or EX Force depending on its charge level.
Skillchains are often Prishe's 3rd best choices for follow-up; They are good on select high bravery damage focused sets, but are otherwise outclassed in reward or utility by Prishe's other follow-ups. Prishe can only assign one bravery attack chain per bravery slot, which restricts the viability of Skillchains overall. However, the input timing for connecting charged attacks during Skillchains is more generous compared to more optimal follow-ups. This is not due to the Skillchain system specifically, but the synergy between bravery attacks in a chain (frame data and hit stun).
Combos
Solo
Assist
Builds
Builds here.
Assist
Prishe Assist Data
| Type |
Attack |
Startup |
Position |
Spawn |
Damage multiplier |
Effects
|
| BRV |
Howling Fists |
17F |
Ground |
Opponent |
1 x 3, 7, 2 x 4, 7 (25) |
Chase
|
| BRV |
Backhand Blow |
29F |
Air |
Opponent |
18, 12 (30) |
Wall Rush
|
| HP |
Nullifying Dropkick |
49F |
Ground |
Opponent |
- |
Wall Rush
|
| HP |
Auroral Uppercut |
43F |
Air |
Opponent |
2 x 5 (10) |
Wall Rush
|
Prishe Assist Overview
Prishe is one of the weaker assists in the game with couple notable strengths and plenty of weaknesses to offset them. She can provide practical combos off of ground wall rushes and represent a Melee High priority hitbox in Backhand Blow. However, her short combo time, reliance on wall rush and slow startup on her air bravery limit Prishe's viability overall.
Howling Fist
Combo: Howling Fist (One) > Raging Fists (Two)
Prishe works best off of ground wall rushes with this move. Prishe won't charge Howling Fist which makes this a relatively fast assist on startup. The Raging Fists ender has decent hold, but moves the opponent quickly in one direction. The Assist Chase ender is what ties everything together and HP linkers who can wall rush on the floor like Cloud and Jecht have no problem following up.
The total bravery damage is rather low, but it is better than nothing.
Backhand Blow
Combo: Backhand Blow (One) > Shoulder Tackle (Two)
Backhand Blow is quite slow on startup to be used reliably as a midair assist combo starter, but Prishe can still pick up opponents off of regular wall rushes. Its quick wall rush finisher makes follow-ups difficult if not impractical though. Being the only 1-bar Melee High air BRV assist in the game offers the unique utility of setting up checkmate situations where other assists cannot, such as against Jecht Block.
Aerial bravery assists are most commonly used in whiff punishes and combos alike, so Backhand Blow being the way it is leaves a lot to be desired.
Nullifying Dropkick
Nullifying Dropkick is slow on startup, but it can be used sparingly as a hard callout tool against grounded opponents thanks to its active frames and lateral reach. Because it is a single hit HP, it can quickly end a match if the opponent is not prepared for it.
Assists
Prishe works well with Kuja and Aerith assists.
References
Navigation
Wiki Roadmap (012 Prishe)
Please edit this page's roadmap template when relevant additions and changes are made.
| Page |
Completed |
In progress |
To-do |
Score
|
| General |
|
|
Add skillchains. |
1 / 5 / 86
|
| Pros / Cons |
|
|
Pros and cons. |
0 / 5 / ?
|
| Overview / Character Data |
|
|
Overview |
0 / 5 / 2
|
| Bravery Attacks |
Ability info |
|
overviews and images. |
1 / 5 / 5
|
| HP Attacks |
Ability info |
|
overviews and images. |
1 / 5 / 5
|
| EX Mode |
Basic info |
|
Add overview |
1 / 5 / 3
|
| Combos |
|
|
Add solo and assist combos with video examples. |
0 / 5 / 7
|
| Builds |
1 build. |
|
Add more builds with overviews as seen on Tifa's page. |
1 / 5 / 10
|
| Assist |
Assist data |
|
Common viable assists with overviews. |
1 / 5 / 3
|
| Matchups |
|
|
Matchup analysis and tips. |
0 / 5 / 32
|
| Frame Data |
|
|
|
/ 1
|
| Starter Guide |
|
|
Concise pvp guide with core concepts and essentials. |
0 / 5 / 8
|
| Strategy |
|
|
Strategies and counterplays. |
0 / 5 / 10
|
 Hyper Ring
 Summon Unused