(6 intermediate revisions by the same user not shown)
Line 61:
Line 61:
Tifa can feint during the {{keyword|startup|startup=1}} by pressing Cross {{pspcro}}, which lets Tifa evade any incoming blows and strike back. This is useful in the context of '''[[Dodge_(Dissidia_012)#Dodge_punishment|dodge punishment]]''', because Beat Rush feint is Tifa's fastest way to protect herself after a ground dodge. Tifa can go behind opponents with the feint, which also works as an offensive approach.
Tifa can feint during the {{keyword|startup|startup=1}} by pressing Cross {{pspcro}}, which lets Tifa evade any incoming blows and strike back. This is useful in the context of '''[[Dodge_(Dissidia_012)#Dodge_punishment|dodge punishment]]''', because Beat Rush feint is Tifa's fastest way to protect herself after a ground dodge. Tifa can go behind opponents with the feint, which also works as an offensive approach.
In terms of damage potential, Beat Rush isn't quite as potent as Waterkick's {{keyword|HP link|hplink=1}}. It requires assist for HP damage, and Tifa needs omit the third hit, which deals the most damage. But it also has some of the highest base damage out of Tifa's ground braveries. If Tifa can utilize the evasive feint, she can get a decent amount of bravery as a reward.
In terms of damage potential, Beat Rush isn't quite as potent as Waterkick's {{keyword|HP link|hplink=1}}. It requires assist for HP damage, and doing so is often more practical with the first two punches. It's reliable, but the bravery damage is a bit low. Tifa can optimize this by going for a {{keyword|knockback cancel|knockbackcancel=1}} with the third hit. This can be pretty difficult to do, but it is also rewarding due to its high 35 base damage. If Tifa can utilize the evasive feint, she can get a decent amount of bravery this way, especially with Sneak Attack extra ability.
|-|Blizzard=
|-|Blizzard=
Line 129:
Line 129:
}}
}}
Blizzaga is the slowest Blizzard-type spell for Tifa, but also the most rewarding on hit. It has respectable 30 base damage (same as {{012gar}}'s Bardiche) and wall rushes on the ground. That means assist combos are still possible, much like with Blizzara. It is too slow to be used reliably after blocking a melee attack, but it can catch opponents who were expecting to block another Blizzard spell instead.
Blizzaga is the slowest Blizzard-type spell for Tifa, but also the most rewarding on hit. It has respectable 30 base damage (same as {{012gar}}'s Bardiche) and wall rushes on the ground. That means assist combos are still possible, much like with Blizzara. It is too slow to be used reliably after blocking a melee attack. However, if the opponent is expecting a different Blizzard spell when a match starts, Tifa can catch them with this as a one-time trick.
There are few key differences compared to Blizzara. It is not used to occupy space in front of Tifa, because it always spawns above the opponent. The spawn has a maximum height limit, but it can catch unaware opponents who may be air dodging towards Tifa. Blizzaga also hits late enough for Tifa to be actionable at the same time, which lets her combo into Waterkick or Meteor Strike if she's near the opponent. This isn't as common in the {{keyword|neutral|neutral=1}} as it may sound, but it is one of the only solo combo routes Tifa has.
There are few key differences compared to Blizzara. It is not used to occupy space in front of Tifa, because it always spawns above the opponent. The spawn has a maximum height limit, but it can catch unaware opponents who may be air dodging towards Tifa. Blizzaga also hits late enough for Tifa to be actionable at the same time, which lets her combo into Waterkick or Meteor Strike if she's near the opponent. This isn't as common in the {{keyword|neutral|neutral=1}} as it may sound, but it is one of the only solo combo routes Tifa has. Rolling Blaze can also technically combo after Blizzaga, but it is more reliable when done during assist.
Blizzaga has the longest {{keyword|recovery|recovery=1}} out of all Blizzard spells. That means Tifa is even more vulnerable to {{keyword|assist punishes|assistpunish=1}} on reaction. Tifa is considered airborne when using Blizzaga, so fast air BRV assists can catch her if she is not careful.
Blizzaga has the longest {{keyword|recovery|recovery=1}} out of all Blizzard spells. That means Tifa is even more vulnerable to {{keyword|assist punishes|assistpunish=1}} on reaction. Tifa is considered airborne when using Blizzaga, so fast air BRV assists can catch her if she is not careful.
Line 156:
Line 156:
Waterkick's range is short, but it has plenty of {{keyword|active|active=1}} frames. Tifa can use that to {{keyword|option select|optionselect=1}} Somersault by repeatedly pressing Square {{pspsqu}} and then dodging when the first kick is recovering. Tifa can dodge quickly after the first kick, so she won't get {{keyword|whiff punished|whiffpunish=1}} very easily on reaction.
Waterkick's range is short, but it has plenty of {{keyword|active|active=1}} frames. Tifa can use that to {{keyword|option select|optionselect=1}} Somersault by repeatedly pressing Square {{pspsqu}} and then dodging when the first kick is recovering. Tifa can dodge quickly after the first kick, so she won't get {{keyword|whiff punished|whiffpunish=1}} very easily on reaction.
Feint can be done while Tifa is doing the second hit. If the first hit connected, Tifa can use feint to move behind her opponent and hit them in a different direction instead. This can be useful for switching sides if Tifa has her back against a wall.
If Tifa blocks an airborne opponent and staggers them, Waterkick will usually miss. Tifa can do the second hit even if Waterkick misses, but it needs to wall rush to do meaningful damage with assist. Tifa can only feint the second hit, so it's done more as a defensive-offensive {{keyword|mixup|mixup=1}}, instead of protecting her after a ground dodge. Regardless, finishing Waterkick once in a while can disorient opponents, and Tifa needs every bit of advantage she can get.
If Tifa blocks an airborne opponent and staggers them, Waterkick will usually miss. Tifa can do the second hit even if Waterkick misses, but it needs to wall rush to do meaningful damage with assist. Tifa can only feint the second hit, so it's done more as a defensive-offensive {{keyword|mixup|mixup=1}}, instead of protecting her after a ground dodge. Regardless, finishing Waterkick once in a while can disorient opponents, and Tifa needs every bit of advantage she can get.
Line 182:
Line 184:
}}
}}
Elbow Smash is Tifa's main air {{keyword|poke|poke=1}}. It's a multi-purpose move that can start offense, build assist gauge, {{keyword|whiff punish|whiffpunish=1}} attacks with short {{keyword|recovery|recovery=1}} and fend off nearby opponents. She moves slightly forward with both hits, moreso with the first. Elbow Smash's fast {{keyword|startup|startup=1}} is unreactable, and it's good at punishing most air dodges when used after Free Air Dash. Tifa can also '''[[Assist_(Dissidia_012)#Assist_Lock|lock]]''' the opponent's assist after '''[[Assist_(Dissidia_012)#Assist_Change|Assist Change]]''' with this move, while only being briefly vulnerable.
Elbow Smash is Tifa's main air {{keyword|poke|poke=1}}. It's a multi-purpose move that can start offense, build assist gauge, {{keyword|whiff punish|whiffpunish=1}} attacks with short {{keyword|recovery|recovery=1}} and fend off nearby opponents. She moves slightly forward with both hits, moreso with the first. Elbow Smash's fast {{keyword|startup|startup=1}} is unreactable, and it's her main tool for punishing air dodges after a Free Air Dash. Tifa can also '''[[Assist_(Dissidia_012)#Assist_Lock|lock]]''' the opponent's assist after '''[[Assist_(Dissidia_012)#Assist_Change|Assist Change]]''' with this move, while only being briefly vulnerable.
Elbow Smash is one of the primary ways to safely {{keyword|convert|conversion=1}} to HP damage with assist in the air. This can be done with the first hit, but there isn't much time to react due to short {{keyword|hit stun|hitstun=1}}. The assist combos are great for Tifa, but the low base damage and limited combo routes heavily affect the total damage. Since Tifa is expected to use Elbow Smash often, she can sometimes struggle to establish good momentum even when this move hits. The low damage and melee priority can skew the risk / reward ratio in opponent's favor, as her other {{keyword|mixups|mixup=1}} are more committal. Other similar pokes such as {{012clo}}'s Double Cut and {{012wol}}'s Dayflash generate 90 EX, in addition to having other useful traits. Elbow Smash only generates 30 EX, and has situational utility for its feint.
Elbow Smash is one of the primary ways to safely {{keyword|convert|conversion=1}} to HP damage with assist in the air. This can be done with the first hit, but there isn't much time to react due to short {{keyword|hit stun|hitstun=1}}. The assist combos are great for Tifa, but the low base damage and limited combo routes heavily affect the total damage. Since Tifa is expected to use Elbow Smash often, she can sometimes struggle to establish good momentum even when this move hits. The low damage and melee priority can skew the risk / reward ratio in opponent's favor, as her other {{keyword|mixups|mixup=1}} are more committal. Other similar pokes such as {{012clo}}'s Double Cut and {{012wol}}'s Dayflash generate 90 EX, in addition to having other useful traits. Elbow Smash only generates 30 EX, and has situational utility for its feint.
Line 188:
Line 190:
Despite Elbow Smash's lackluster damage, Tifa has to rely on this move. Having a poke with short recovery is essential in competitive play, so it's very valuable regardless. Just like Waterkick, Tifa can finish Elbow Smash even if it misses. Similarly, it can wall rush for assist combos, though the damage is still not especially high.
Despite Elbow Smash's lackluster damage, Tifa has to rely on this move. Having a poke with short recovery is essential in competitive play, so it's very valuable regardless. Just like Waterkick, Tifa can finish Elbow Smash even if it misses. Similarly, it can wall rush for assist combos, though the damage is still not especially high.
Feint can be done while Tifa is doing the second hit. If the first hit connected, Tifa can use feint to move behind her opponent and hit the opponent in a different direction instead. This can be useful for switching sides if Tifa has her back against a wall.
Feint can be done while Tifa is doing the second hit. If the first hit connected, Tifa can use feint to move behind her opponent and hit them in a different direction instead. This can be useful for switching sides if Tifa has her back against a wall.
|-|Falcon's Dive=
|-|Falcon's Dive=
Line 235:
Line 237:
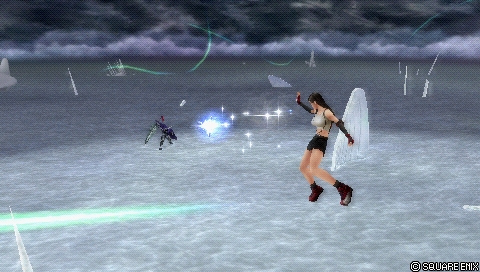
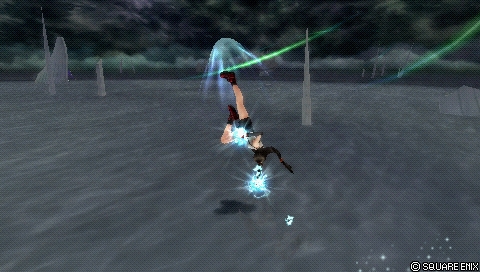
In some ways, Moonsault Kick can be considered an aerial version of Beat Rush in its application. It's a relatively high damaging bravery with instant feint and good EX generation. It's more rewarding when used as a {{keyword|punish|punish=1}}, and it supports Tifa's Elbow Smash as a {{keyword|mixup|mixup=1}} tool. As such, Moonsault Kick is a staple in competitive play.
In some ways, Moonsault Kick can be considered an aerial version of Beat Rush in its application. It's a relatively high damaging bravery with instant feint and good EX generation. It's more rewarding when used as a {{keyword|punish|punish=1}}, and it supports Tifa's Elbow Smash as a {{keyword|mixup|mixup=1}} tool. As such, Moonsault Kick is a staple in competitive play.
Tifa has two feints with Moonsault Kick. She can feint before the first part or the second part. Both feints can be done in a row, but the opponent can dodge in between feints if Tifa is slow and / or predictable with this. The main draw with this technique is to get more critical hits from Sneak Attack extra ability. It also works as a callout against opponents who are expecting Tifa to lunge into a block from a distance.
If Tifa uses Moonsault Kick while '''[[Lock_Off|locked off]]''', she can move in any direction she is facing. This is useful for building assist gauge safely in large stages, because Tifa creates distance from opponent, and she cannot be blocked.
If Tifa uses Moonsault Kick while '''[[Lock_Off|locked off]]''', she can move in any direction she is facing. This is useful for building assist gauge safely in large stages, because Tifa creates distance from opponent, and she cannot be blocked.
Line 524:
Line 528:
== Unique Mechanics - Feints ==
== Unique Mechanics - Feints ==
Many of Tifa's bravery and HP attacks can be cancelled into an invincible dash that can go through opponents. Press Cross {{pspcro}} during an attack's {{keyword|startup|startup=1}} to feint it. After a feint, Tifa can continue with the preceding attack or wait until the feint state ends. For example, Beat Rush > Cross {{pspcro}} > Beat Rush (hits).
Tifa can {{keyword|cancel|cancel=1}} most of her attacks into a feint. This is an invincible dash that can go through opponents. Press Cross {{pspcro}} during an attack's {{keyword|startup|startup=1}} to feint it. For example, Beat Rush > Cross {{pspcro}} > Beat Rush (hits). After feint happens, Tifa can continue with the preceding attack or wait until the feint ends.
{|class=wikitable
{|class=wikitable
Line 555:
Line 563:
|}
|}
Feints allow Tifa to delay her attack for about one (1) full second before being locked into unactionable {{keyword|recovery frames|recovery}}. This can be used to extend an attack's range and increase ambiguity on the attack timing, most notably with Rolling Blaze.
Feints allow Tifa to delay her attack for about one (1) full second before being locked into unactionable {{keyword|recovery frames|recovery=1}}. This can be used to extend an attack's range and increase ambiguity on the attack timing. Rolling Blaze is notorious for this, but braveries also benefit from the delayed timing. This is because Tifa can wait until opponent's block won't guard attacks anymore, and then strike hard.
Because Tifa is invincible during a feint, it is possible to use it as a post-dodge defensive option. This is great for staying safe against dodge punish attempts.
Tifa will move forward whenever she feints. She will only move behind opponent if she is close enough to them. The direction cannot be altered manually. Tifa cannot {{keyword|mixup|mixup=1}} with a different attack after feinting, either. However, feints are good as a defensive option, since Tifa is invincible during it. This is great for staying safe against dodge punish attempts, and it's one of the few options in the game with invincibility.
Tifa can be hit after the feint teleport and during its recovery period, which make her vulnerable to interruptions. One way to cover this is to have assist gauge ready for opponent’s interaction. Escaping damage or intercepting the opponent’s approach can work out well, but there will inevitably be a little bit of guessing involved depending on the matchup.
Tifa can be hit after the feint teleport and during its recovery period, which make her vulnerable to attacks. One way to cover this is to have assist gauge ready for opponent’s interaction. Escaping damage or intercepting the opponent’s approach can work out well, but there will inevitably be a little bit of guessing involved depending on the {{keyword|matchup.|matchup=1}}
Feints are better used sparingly early in the match to see how the opponent reacts to them. Once you get a good idea of how they respond, you can adjust your strategy accordingly.
Feints are better used sparingly early in the match to see how the opponent reacts to them. Once you get a good idea of how they respond, you can adjust your strategy accordingly.
Tifa is a close range character with fast movement speed and the ability to feint attacks. Ground combat is bolstered by mid priority projectiles and an HP link, while aerial combat is supported by moves with vertical tracking. Decent EX gain and one of the highest damaging EX Bursts in the game the more EX meter she has remaining. Damage potential is high with HP attacks thanks to high base bravery and Aerith assist specifically. Low average bravery damage, limited utility on feints and below average vertical prowess while airborne limit her overall effectiveness, however.
[Close~Mid] A flurry of punches. Can combo without hitting.
Unlocked at level 1
Mastered at 80 AP
Beat Rush is a 3-hit combo that is used as a grounded punish tool, a defensive option with its feint and to poke occasionally. Each hit can be delayed, which can be used to hit confirm assist combos. It has good EX generation at 90 EX, and it hits higher than her main ground poke Waterkick.
Tifa can feint during the startup by pressing Cross , which lets Tifa evade any incoming blows and strike back. This is useful in the context of dodge punishment, because Beat Rush feint is Tifa's fastest way to protect herself after a ground dodge. Tifa can go behind opponents with the feint, which also works as an offensive approach.
In terms of damage potential, Beat Rush isn't quite as potent as Waterkick's HP link. It requires assist for HP damage, and doing so is often more practical with the first two punches. It's reliable, but the bravery damage is a bit low. Tifa can optimize this by going for a knockback cancel with the third hit. This can be pretty difficult to do, but it is also rewarding due to its high 35 base damage. If Tifa can utilize the evasive feint, she can get a decent amount of bravery this way, especially with Sneak Attack extra ability.
[Long] Fire ice crystals. Slow speed, but long range.
Unlocked at level 20
Mastered at 80 AP
Blizzard is a low priority projectile. Its main applications are building assist gauge on whiff and using it as a midrange poke. The startup is reactable, but the projectile moves at a decent speed. Blizzard has fairly good vertical tracking while it's moving, and Tifa can fire it at sharp vertical angles. That lets Tifa poke at opponents who are above her without always committing to Rolling Blaze.
The reward on hit is often negligible due to its low damage, short hit stun and knockback, so Tifa won't benefit much even if it hits. If opponent is against a wall, Kuja assist can convert the moment Blizzard hits, though this is situational and difficult to do. The Ranged Low priority means it can lose to dashes and leave Tifa vulnerable afterwards. Therefore it is recommended to be used sparingly to interrupt opponents who aren't immediately going on the offense. Blizzard's recovery is short enough for Tifa to avoid reactive assist punishes, though. As a result, Blizzard is a projectile with low risk and low reward when used appropriately.
[Mid] Fire multiple ice crystals. Strike opponent down.
Unlocked at level 2
Mastered at 80 AP
Blizzara is an advancing projectile that wall rushes on the ground. Compared to Blizzard, Blizzara's maximum distance is shorter and it can only travel at lower diagonal angles at most. It won't be able to reach aerial opponents as consistently in close-range, but the move is more potent in other aspects. After Blizzara hits, or has traveled its maximum amount of distance, it turns into a lingering Ranged Mid projectile. It can occupy space from midrange and call out whiffs from that distance. Blizzara travels fast enough to punish dodges as well with a good read. And because it wall rushes on the ground, it can set up assist combos as well. This is good for Tifa, as she can keep her distance from opponent and create some momentum without committing to close-range mixups.
Blizzara remains active while it's exploding as a mid priority move. It will go through its multi-hits even if it misses. The projectile can hit late and wall rush immediately as a result. This is can be harder for Tifa to react to, but it's still a good source of HP damage for her with assist.
Some caution is still advised; Blizzara is still Ranged Low priority at first, so it can lose to dashes and melee attacks. Blizzara also has longer recovery than Blizzard, which makes Tifa vulnerable to assist punishes on reaction. Tifa is considered airborne when using Blizzara, so fast air BRV assists can catch her if she is not careful.
[Long] Drop ice crystals on foe to surprise opponent.
Unlocked at level 27
Mastered at 80 AP
Blizzaga is the slowest Blizzard-type spell for Tifa, but also the most rewarding on hit. It has respectable 30 base damage (same as Garland's Bardiche) and wall rushes on the ground. That means assist combos are still possible, much like with Blizzara. It is too slow to be used reliably after blocking a melee attack. However, if the opponent is expecting a different Blizzard spell when a match starts, Tifa can catch them with this as a one-time trick.
There are few key differences compared to Blizzara. It is not used to occupy space in front of Tifa, because it always spawns above the opponent. The spawn has a maximum height limit, but it can catch unaware opponents who may be air dodging towards Tifa. Blizzaga also hits late enough for Tifa to be actionable at the same time, which lets her combo into Waterkick or Meteor Strike if she's near the opponent. This isn't as common in the neutral as it may sound, but it is one of the only solo combo routes Tifa has. Rolling Blaze can also technically combo after Blizzaga, but it is more reliable when done during assist.
Blizzaga has the longest recovery out of all Blizzard spells. That means Tifa is even more vulnerable to assist punishes on reaction. Tifa is considered airborne when using Blizzaga, so fast air BRV assists can catch her if she is not careful.
[Close] A low-to-high kick combo. Can combo without hitting.
Unlocked at level 1
Mastered at 170 AP
Waterkick is Tifa's main close-range poke and punish tool. It's very fast at 11 frames and leads to her Somersault HP link on hit, which can start assist combos. It's an important move in all ground combat scenarios, including punishing ground dodges. Somersault assist combos can do considerable damage anywhere with high base bravery, so Tifa can encourage opponents to become airborne just to avoid it.
Waterkick's range is short, but it has plenty of active frames. Tifa can use that to option select Somersault by repeatedly pressing Square and then dodging when the first kick is recovering. Tifa can dodge quickly after the first kick, so she won't get whiff punished very easily on reaction.
Feint can be done while Tifa is doing the second hit. If the first hit connected, Tifa can use feint to move behind her opponent and hit them in a different direction instead. This can be useful for switching sides if Tifa has her back against a wall.
If Tifa blocks an airborne opponent and staggers them, Waterkick will usually miss. Tifa can do the second hit even if Waterkick misses, but it needs to wall rush to do meaningful damage with assist. Tifa can only feint the second hit, so it's done more as a defensive-offensive mixup, instead of protecting her after a ground dodge. Regardless, finishing Waterkick once in a while can disorient opponents, and Tifa needs every bit of advantage she can get.
[Close] Elbow smash combo. Can combo without hitting.
Unlocked at level 1
Mastered at 80 AP
Elbow Smash is Tifa's main air poke. It's a multi-purpose move that can start offense, build assist gauge, whiff punish attacks with short recovery and fend off nearby opponents. She moves slightly forward with both hits, moreso with the first. Elbow Smash's fast startup is unreactable, and it's her main tool for punishing air dodges after a Free Air Dash. Tifa can also lock the opponent's assist after Assist Change with this move, while only being briefly vulnerable.
Elbow Smash is one of the primary ways to safely convert to HP damage with assist in the air. This can be done with the first hit, but there isn't much time to react due to short hit stun. The assist combos are great for Tifa, but the low base damage and limited combo routes heavily affect the total damage. Since Tifa is expected to use Elbow Smash often, she can sometimes struggle to establish good momentum even when this move hits. The low damage and melee priority can skew the risk / reward ratio in opponent's favor, as her other mixups are more committal. Other similar pokes such as Cloud's Double Cut and Warrior of Light's Dayflash generate 90 EX, in addition to having other useful traits. Elbow Smash only generates 30 EX, and has situational utility for its feint.
Despite Elbow Smash's lackluster damage, Tifa has to rely on this move. Having a poke with short recovery is essential in competitive play, so it's very valuable regardless. Just like Waterkick, Tifa can finish Elbow Smash even if it misses. Similarly, it can wall rush for assist combos, though the damage is still not especially high.
Feint can be done while Tifa is doing the second hit. If the first hit connected, Tifa can use feint to move behind her opponent and hit them in a different direction instead. This can be useful for switching sides if Tifa has her back against a wall.
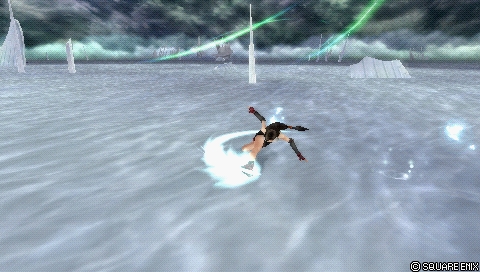
Tifa's divekick acts as a secondary aerial poke and a punish move against grounded opponents. It is also her strongest combo move in EX Revenge, and strongest combo filler during Kuja assist, who is one of her better assists.
Falcon's Dive has short recovery, which can be cancelled quickly. It's fairly safe to throw out, but it can be hard to hit if she's not above her opponent. Tifa doesn't move forward much before descending, so she has to make sure she is at a good angle before using Falcon's Dive. Once it connects, Falcon's Dive can wall rush in a blink of an eye, and go for an assist combo.
The 26 base damage and wall rush make this one of Tifa's more damaging air braveries overall. And because Tifa has more use for downward attacks than rising attacks, Falcon's Dive is also equipped often. It's a good move for its relative safety, even if it requires wall rush and assist to really shine.
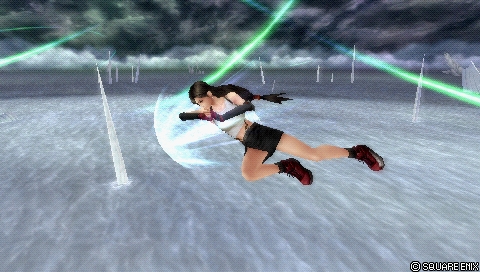
Moonsault Kick is an advancing two-stage attack that ends with a quick forward dive. The startup is slow enough to be reactable, but its other strengths can offset this. For one, Tifa can feint instantly (similar to Beat Rush) to protect herself or hit behind blocks. It has the highest base damage out of Tifa's entire move list, which scales well with critical hits. It can start assist combos reliably without walls and it has decent lateral range as well.
In some ways, Moonsault Kick can be considered an aerial version of Beat Rush in its application. It's a relatively high damaging bravery with instant feint and good EX generation. It's more rewarding when used as a punish, and it supports Tifa's Elbow Smash as a mixup tool. As such, Moonsault Kick is a staple in competitive play.
Tifa has two feints with Moonsault Kick. She can feint before the first part or the second part. Both feints can be done in a row, but the opponent can dodge in between feints if Tifa is slow and / or predictable with this. The main draw with this technique is to get more critical hits from Sneak Attack extra ability. It also works as a callout against opponents who are expecting Tifa to lunge into a block from a distance.
If Tifa uses Moonsault Kick while locked off, she can move in any direction she is facing. This is useful for building assist gauge safely in large stages, because Tifa creates distance from opponent, and she cannot be blocked.
Moonsault Kick's finishing lunge is a multi-hit attack. If Tifa calls assist at a very specific time during this lunge, Moonsault Kick's knockback is negated.
[Rise] Uppercut in the form of a dolphin. Useful from below.
Unlocked at level 16
Mastered at 100 AP
Tifa ascends with a multi-hit uppercut. It may have the same startup as Falcon's Dive, but Tifa moves slightly slower during the attack. Dolphin Blow can whiff punish opponents who are above Tifa. Similar to Falcon's Dive, it needs wall rush to deal the most damage with assists. Dolphin Blow has the second highest base damage out of Tifa's air braveries. So if Tifa gets a ceiling wall rush, Dolphin Blow is Tifa's go-to assist combo filler for bravery damage.
Dolphin Blow takes longer to finish than Falcon's Dive, but it can be cancelled very early during its recovery. In that sense, it also works as a relatively safe secondary poke in the neutral. What makes this move a bit more situational is the reliance on ceiling wall rushes; Many stages are vertically tall, and Tifa doesn't get much reward on hit without ceilings. There aren't many matchups where she could use this reliably even when ceiling is available. Ultimecia is a good example of this with her charged Knight's Lance strategies. She may fight at the ceiling, but Tifa cannot use Dolphin Blow to get past Ultimecia's high priority trap. Dolphin Blow won't wall rush immediately like Falcon's Dive, so it won't necessarily trade in Tifa's favor either.
As such, Dolphin Blow is usually a secondary consideration for Tifa.
[Long] Fire ice crystals. Slow speed, but long range.
Unlocked at level 1
Mastered at 80 AP
Midair Blizzard is very similar to ground Blizzard. Low damage, short hit stun and good vertical tracking. The short recovery lets Tifa avoid assist punishes that aren't predicted as well. Just like ground Blizzard, the midair version can barely combo into Kuja assist if Tifa is sure it will hit against a cornered opponent.
Blizzard's aerial version is not often prioritized, because it provides very few benefits compared to Tifa's essential melee moves. However, it still remains a "low risk, low reward" midrange poke that lets Tifa keep her distance from opponents. Tifa can build assist gauge with Blizzard and occasionally try to interrupt her opponent's flow. With enough patience, Tifa could potentially invite opponent to approach her.
[Close] Kick upwards, then strike down. Vertically limited.
Unlocked at level 1
Mastered at 130 AP
Meteodrive is a close-range HP that wall rushes on the ground. The range is short, but it can be used as a block punisher. The feint covers a decent amount of distance, which can help move behind opponents. Tifa will complete the attack even if it misses, but the animation isn't the longest out of her ground HPs.
Tifa's other ground HPs cover more situations while having higher damage potential. As a result, Meteodrive is not often prioritized in competitive play.
[Close~Long] Charge at foe. Hold button to change distance.
Unlocked at level 36
Mastered at 130 AP
Meteor Strike is an advancing combo HP that's used for high damage potential. It has the highest base damage out of Tifa's ground HPs and works well as follow-up to Blizzaga or assists. Tifa can charge Meteor Strike by holding Square , which increases bravery damage and travel distance. When charged, Tifa will pursue the opponent on the ground with good tracking and long active frames.
Meteor Strike is effective in assist combos, both as a starter and ender. It can wall rush on the ground in most stages, which synergizes very well with high base bravery and Side by Side builds. If Tifa started a combo with an HP, the charged versions also give more time for base bravery to recover. In those cases, Meteor Strike is good as a general assist combo ender on the ground.
Tifa can use Meteor Strike defensively as well. She takes a low crouching stance during startup. She can evade some air-to-ground attacks this way, and then immediately strike back. Tifa cannot feint during startup, but she can feint while the move is active. After a feint, Tifa can start charging Meteor Strike again. That makes Meteor Strike a relatively safe move to whiff, as Tifa can prevent herself from becoming vulnerable right in front of her opponent. Reflecting high priority projectiles is also possible in this manner.
If Meteor Strike connects, but the opponent escapes with Assist Change, Tifa will attempt to move behind opponent and hit them. This is not guaranteed damage against dodges, and Tifa has a relatively low maximum height limit. Blizzaga can cause a hit glitch for Meteor Strike, which can put unaware opponents into a damaging assist combo.
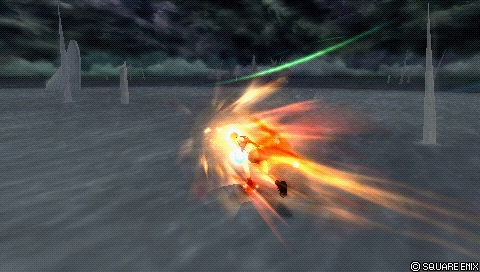
Burning Arrow is Tifa's only 1-hit HP. Tifa advances forward in a straight line, and the attack is active during its entire movement. Burning Arrow works as a midrange punish tool, usually against ground dodges. It can reflect high priority projectiles reliably. As a 1-hit HP, it is also important for resolving EX Revenge checkmates.
Most of Tifa's ground HPs wall rush on the ground, but Burning Arrow wall rushes on walls specifically. That limits her combo routes and the move's overall power, but it's still effective with Kuja or Tidus assists. Tifa can feint right before the kick, and then kick afterwards. That can be useful as a reactive emergency brake, in case Tifa did not make a good read on her opponent.
[Rise] Grab foe and throw to ground. Short horizontal range.
Unlocked at level 23
Mastered at 130 AP
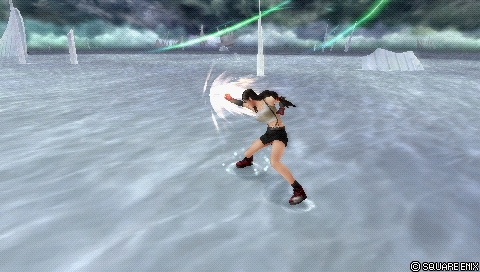
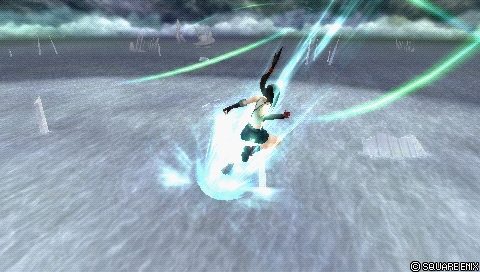
Rolling Blaze, as seen before it connects.
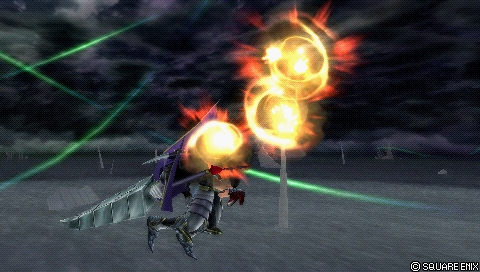
Rolling Blaze is Tifa's primary anti-air attack. Tifa moves quickly at a diagonal angle while going up, while having a constant high priority hitbox. Tifa uses Rolling Blaze to threaten air space, challenge whiffs and punish dodges (forward ground dodge and air dodges). If it hits, Tifa can wall rush on the ground for big damage with assist. As such, Rolling Blaze is a very important move for Tifa.
Tifa can feint Rolling Blaze during the initial lunge to cancel it early. She can follow up with another Rolling Blaze after the feint, which greatly extends Rolling Blaze's maximum range. This is great for Tifa, as she is only vulnerable for a very brief period during the feint. Punishing her feint requires precise timing, so Tifa can get away with using Rolling Blaze out of respect for the danger she presents.
Rolling Blaze is quite powerful in close-range, but it also has weak lateral range. It cannot reliably hit opponents who move away with directional dashes and backward dodges. Tifa also cannot travel across large stages with Rolling Blaze, so it only has presence in close-range near the ground. If Rolling Blaze clashes with a lower priority move, Tifa staggers the opponent, but won't drag them down with her. Assists can convert off of that, but it impacts her ability to get reward against clashes specifically.
This is considered a staple move for Tifa. It has good neutral applications and it yields good reward for Tifa if it connects. Similar to Burning Arrow, Rolling Blaze can also reflect higher priority projectiles.
Branching from Waterkick. [Combo] Kick opponent upwards.
Unlocked at level
Mastered at 130 AP
Somersault is Tifa's only HP link, and it's pretty powerful at that. It has very fast startup and leads to assist combos anywhere. As an HP link, it also fills assist gauge with Side by Side and leads to lots of damage with high base bravery builds.
This move is the reason Waterkick is as strong as it is; It encourages opponents to block or give up their grounded position altogether. Even if the opponent escapes with LV1 Assist Change, Tifa cannot be punished afterwards, which is a boon for an HP link. The overall safety and effectiveness of Somersault make it another staple move for Tifa.
[Dive] Grab foe and throw to ground. Short horizontal range.
Unlocked at level 12
Mastered at 130 AP
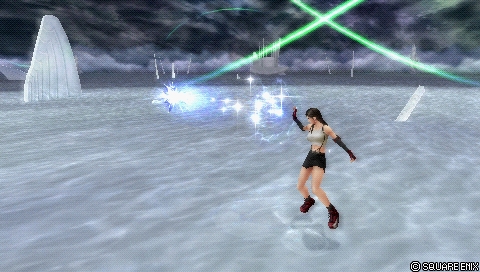
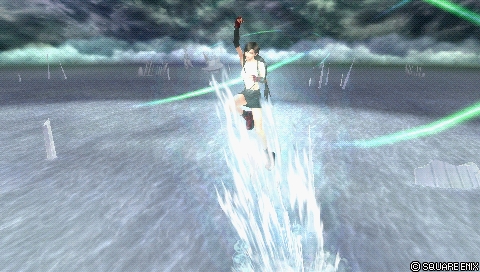
Rolling Blaze, as seen before it connects.
Aerial Rolling Blaze is similar to grounded version in many aspects. The main difference is Tifa moves at a downward angle instead of upward. It's equally important for Tifa as a threatening air-to-ground move and an assist combo tool. It still wall rushes on the ground, so Tifa can deal great damage with assist. And thanks to the generous active frames, it can threaten space below Tifa as well.
Since Rolling Blaze is used from above, Tifa can damage the opponent even when it clashes with a lower priority move. Feints still increase Rolling Blaze's range a lot, so it's effective at controlling space and shutting down opponents frantically whiffing and dodging.
The weaknesses are also similar to the ground version. Midair Rolling Blaze has strong downward tracking, but weak lateral range. If Tifa staggers an opponent by blocking, she can miss at equal height if she is not in point blank range. Opponents can move away from Tifa with directional dashes and dodges. The lack of upward movement means Tifa cannot catch opponents jumping above her, either. And though Tifa is briefly vulnerable during the feint, she can still be hit out of it.
Rolling Blaze is capable of extraordinary damage output with high base bravery builds and Aerith assist. If Tifa has two assist gauges, she can call Aerith for a second time before following through with another Rolling Blaze. This is one of Tifa's most rewarding combo routes, though the conditions for it cannot always be met in the air.
[Close~Mid] Unleash a flurry of attacks. Increase charge speed with button hold.
Unlocked at level 1
Mastered at 130 AP
Meteor Crusher is a chargeable HP attack that transitions into a combo on hit. It's a common block punisher and assist combo ender in the air due to its speed and range when charged. Meteor Crusher is tied for fastest startup with uncharged Meteor Strike, and the recovery is relatively short for an HP attack.
Tifa can charge Meteor Crusher by holding Square , which has some benefits in the neutral. Meteor Crusher gets a considerable range increase with a charge. When Tifa releases the charge, she moves quickly towards opponent before attacking. The charge can be held for a couple seconds after reaching max charge, and Tifa can feint while moving towards opponent. These make raw Meteor Crusher safer to use, and its effective for punishing air dodges on reaction. If Tifa feints, she cannot charge again and must instead do Meteor Crusher in place.
The initial hitbox is a bit small and the range is very short without a charge. A charged Meteor Crusher does not move Tifa high up if she is far from opponent. And if she chooses to charge, she is vulnerable when moving towards opponent. Meteor Crusher does not have strong downward tracking, though it can pick up opponents after clashing with a lower priority move. As a multi-hit, Tifa cannot use this to circumvent EX Revenge checkmates, which is relevant, since air combat is very common. Tifa is vulnerable to attacks after LV1 Assist Change, but her movement and dodge cancel window make it hard for opponents to punish her
Overall, Meteor Crusher is an important move for Tifa. It covers angles that aerial Rolling Blaze cannot, while providing some midscreen utility. It's lower reward due to lack of wall rush, but assists can still combo if opponent is against a wall.
EX Mode: Equipped Premium Heart!
Effects:
Regen
Critical Boost
Premium Heart
Premium Heart
[Always active while in EX Mode]
The fuller the EX Gauge, the more damage dealt.
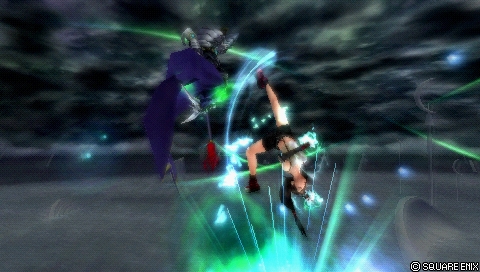
EX Burst: Final Heaven
A flurry of attacks ending in one ferocious tackle. Watch your timing and stop the reels. The better the combo, the more damage dealt.
Maximum EX
Minimum EX
Base Damage (Initial)
15, 25 (40)
8, 13 (21)
Base Damage (Rest)
13 x 7 (91) (131 total)
7 x 7 (49) (70 total)
Type
??
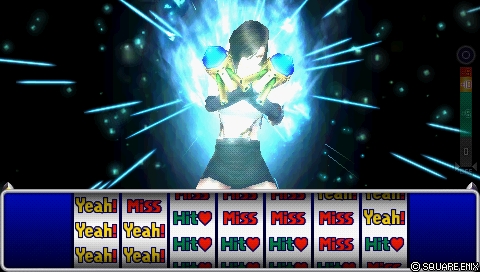
Final Heaven requires stopping all seven slots on a "Yeah!" symbol for a perfect version. A slot stops when Cross is pressed. When all slots have been stopped, Tifa will follow through with seven attacks. The damage for each hit depends on the symbol; Yeah is a full damage attack, hit is a lower damage attack, and miss will do no damage at all. Tifa can do any combination of yeahs, hits and misses.
Contrary to their appearance, the symbols aren't that random. Several yeah symbols scroll down in one go, so it is possible to react to them and stop the reel there. Once the first yeah has been confirmed, the remaining yeahs can be aligned with a relatively steady rhythm of one button press per ~1-1.5 seconds. Getting this timing may require a bit of practice. Auto EX Command Ω won't require any player input at all, but costs 20 capacity points.
The base damage scales with remaining EX gauge. More EX means higher damage. As such, Final Heaven is best used as soon as EX mode has been activated. Missing out on bravery critical hits during assist combos may sound bad, but it's worth noting that Final Heaven with max EX gauge is one of the strongest EX Bursts in the game.
Unique Mechanics - Feints
Tifa can cancel most of her attacks into a feint. This is an invincible dash that can go through opponents. Press Cross during an attack's startup to feint it. For example, Beat Rush > Cross > Beat Rush (hits). After feint happens, Tifa can continue with the preceding attack or wait until the feint ends.
Attacks with feints
Attack
Feint window
Post-feint action
Beat Rush
Before first hit
Beat Rush
Waterkick
Before second hit
Second bravery hit of Waterkick
Moonsault Kick
Before either hit
First part or second part depending on feint timing
Falcon's Dive
Before first hit
Falcon's Dive
Dolphin Blow
Before first hit
Dolphin Blow
Meteodrive
Before first hit
Meteodrive
Meteor Strike
Before / during first hit
Meteor Strike (can be charged)
Burning Arrow
Before first hit
Burning Arrow
Rolling Blaze (both)
During first part
Rolling Blaze
Meteor Crusher
Before attack connects
Meteor Crusher (cannot be charged)
Feints allow Tifa to delay her attack for about one (1) full second before being locked into unactionable recovery frames. This can be used to extend an attack's range and increase ambiguity on the attack timing. Rolling Blaze is notorious for this, but braveries also benefit from the delayed timing. This is because Tifa can wait until opponent's block won't guard attacks anymore, and then strike hard.
Tifa will move forward whenever she feints. She will only move behind opponent if she is close enough to them. The direction cannot be altered manually. Tifa cannot mixup with a different attack after feinting, either. However, feints are good as a defensive option, since Tifa is invincible during it. This is great for staying safe against dodge punish attempts, and it's one of the few options in the game with invincibility.
Tifa can be hit after the feint teleport and during its recovery period, which make her vulnerable to attacks. One way to cover this is to have assist gauge ready for opponent’s interaction. Escaping damage or intercepting the opponent’s approach can work out well, but there will inevitably be a little bit of guessing involved depending on the matchup.
Feints are better used sparingly early in the match to see how the opponent reacts to them. Once you get a good idea of how they respond, you can adjust your strategy accordingly.
Common counterstrategies to feints include;
Running or jumping out of range
Interrupting with fast attacks (e.g. Squall’s Beat Fang, Yuna’s Diamond Dust)
Chasing with a homing attack (e.g. Cloud's Braver, Vaan's Inferno)
Reacting with assist and using it in tandem to pincer her.
Combos
Solo
Assist
All assists use their designated bravery attack unless stated otherwise.
Tifa's easiest air assist combo enders are Moonsault Kick (bravery damage and EX) and Meteor Crusher (HP). Meteor Crusher has very short range if it's uncharged, so it is recommended to finish an assist combo by charging Meteor Crusher for roughly 0.6 seconds. This is enough time for the Assist Chase teleport slowdown to end without sacrificing much hit stun in the process.
Ground
Tifa combos well with wall rush and her damage output increases exponentially with ground wall rushes thanks to Kuja bravery assist's holding potential.
Starter
Combo
Damage
EX Force
Notes
Video
Waterkick > Somersault
--
8 + HP
90 (30, 60)
--
--
Kuja > AC > Meteor Crusher
68 + HP x2 (8, HP, 50, 10)
177 (30, 60, 87)
Basic HP link combo that leaves Tifa airborne. Charge Meteor Crusher for roughly 0.6 seconds to increase tracking and hit the opponent consistently.
video
Beat Rush (2nd hit)
--
19 (8, 11)
??
BRV starter, either after approaching or defending with feint after a dodge.
video
Kuja > AC > Meteor Crusher
79 (8, 11, 50, 10 + HP)
??
--
video
Blizzara
--
24 (1, 2 x 10, 3)
0
Wall Rush.
--
WR > Kuja > Falcon's Dive > DC (towards Kuja) > Falcon's Dive > DC (towards Kuja) > AC > Meteor Crusher
The later Blizzara hits, the more time Tifa has to fit in two Falcon's Dives during ground Kuja BRV assist.
video
Blizzaga
--
30 (1, 2 x 10, 9)
0
Wall Rush. Blizzaga is Tifa's highest damaging ground BRV combo starter, but due to it's slow startup it is difficult to land it in practical situations.
WR > Kuja > DC (up or towards Kuja) > Falcon's Dive > DC (towards Kuja) > Falcon's Dive > DC > AC > Meteor Crusher
139 (30 + WR, 47, 26 + WR, 26 + WR, 10 + HP)
87 (0, 0, 0, 87)
Tifa is actionable before Blizzaga wall rushes with a dodge cancel. Use that to add Falcon's Dives during the ground Kuja BRV assist.
Burning Arrow
--
0 + HP WR
0
Wall Rush. Dodge punishment combo starter.
--
WR > Kuja > AC > Meteor Crusher
60 + HP x2 & WR (0 + HP WR, 50, 10 + HP)
87 (0, 87)
Base bravery HP damage is usually enough for base bravery to mostly recover during Meteor Crusher.
video
Rolling Blaze
--
1x7 + HP WR
3 per hit (max 21)
Wall Rush. Works after staggering with a block or anti-airing.
--
WR > Kuja > DC (towards Kuja) > Falcon's Dive > DC (towards Kuja) > Falcon's Dive > DC > AC > Meteor Crusher
116 (7 + HP WR, 47, 26 + WR, 26 + WR, 10)
108 (21, 87)
Wall Rush. Falcon's Dive is Tifa's highest damaging assist combo filler, but it can be easy to miss the opponent or dodge cancel the dive slightly late.
video
Aerial
Tifa doesn't have access strong assist combo fillers and her aerial combo starters aren't particularly stronger compared to the ground combo starters. She can still get ground Kuja assist with Falcon's Dive and Rolling Blaze, but they're not easy to land against airborne opponents. Nevertheless, even though the combo routes are basic, they're all functional.
Starter
Combo
Damage
EX Force
Notes
Video
Elbow Smash (1st hit)
--
8
??
Quick air poke combo starter.
--
Kuja > AC > Meteor Crusher
68 (8, 50, 10 + HP)
?? + 87
Basic.
video
Elbow Smash
--
20 (8, 12)
30
Wall Rush.
--
WR > Kuja > DC (pincer the opponent) > Moonsault Kick (1st part) > DC > AC > Meteor Crusher
98 + HP (8, 12, 50, 9, 9, 10 + HP)
?? (30, ??, 87)
Wall Rush. Moonsault Kick is an easy filler during Kuja's air brv assist. Dodge behind the opponent so that Tifa and Kuja are attacking from both sides.
video
Moonsault Kick (1st part)
--
18 (9, 9)
??
Air combo starter. No wall required. Can be used after approaching or doing a feint.
--
Kuja > DC (pincer the opponent) > Moonsault Kick (1st part) > DC > AC > Meteor Crusher
96 (9, 9, 50, 9, 9, 10 + HP)
?? (??, ??, 87)
Moonsault Kick (1st) works as a filler here as well. Just like with the Elbow Smash WR, dodge behind the opponent to attack the opponent from both sides, without pushing them out of Kuja assist.
video
Moonsault Kick
--
40 (9, 9, 2x3, 16)
90
Wall / corner only. High damage combo starter when ground wall rush is not available.
Wall / corner only. Call Kuja before chase prompt and initiate chase as Kuja hits the opponent. Don't do anything during chase (also known as empty chase and follow up as usual.
video
Falcon's Dive
--
26 + WR
0
Wall Rush. Commonly used in air-to-ground situations or otherwise fighting an opponent who is below Tifa. Note that wall rush can happen on both floors and walls. If the dodge direction keeps Tifa close and slightly above the opponent, Falcon's Dive also works after staggering with a blodge.
--
Wall Rush > Kuja > DC (towards Kuja) > Falcon's Dive > DC (towards Kuja) > Falcon's Dive > DC > AC > Meteor Crusher
135 (26 + WR, 47, 26 + WR, 26 + WR, 10 + HP)
87 (0, 0, 0, 87)
Wall Rush.
video
Dolphin's Blow
--
29 (1x5, 24)
30
Wall Rush. Ceiling only. Dolphin Blow overall speed and vertical tracking are only average, so this won't be used too often. As a filler, it is stronger than Falcon's Dive but only in Dolphin Blow conversions specifically.
WR > Kuja > DC (pincer the opponent) > Dolphin Blow (WR) > DC > AC > Meteor Crusher
118 (29 + WR, 50, 29 + WR, 10 + HP)
147 (30, 30, 87)
Wall Rush. Ceiling only. Similiar to Moonsault Kick fillers, dodge behind the opponent and attack them from both sides. Dolphin Blow's recovery can be dodge cancelled early, which makes timing the filler Dolphin Blow much easier.
indicates a "Gear" extra ability or the use of CP / Equipment glitch. The total CP cost will assume the glitch is done.
Bravery attacks
Ground
Aerial
Beat Rush
Moonsault Kick
Waterkick
Falcon's Dive
Blizzaga
Elbow Smash
HP attacks
Ground
Aerial
Rolling Blaze
Meteor Crusher
Burning Arrow
Rolling Blaze
Somersault (from Waterkick)
Basic Abilities
Actions
Support
Extra
Ground Evasion
Always Target Indicator
Precision Evasion
Midair Evasion
EX Core Lock On
Counterattack
Ground Block
Assist Lock On
Assist Critical Boost
Midair Block
Disable Sneak Attack
Aerial Recovery
EXP to HP
Recovery Attack
Master Guardsman
Controlled Recovery
Wall Jump
Free Air Dash
Ground Dash
Free Air Dash Boost
Assist Gauge Up Dash
Speed Boost
Jump Times Boost
Ground Evasion Boost
Midair Evasion Boost
Evasion Boost
Build overview
A Side by Side build that doesn't specialise in damage, but instead focuses on a good balance of offense and defense. Most equipment come with useful effects to help with defense (Hero's Shield's Wall Rush HP defense for example), and accessories lean towards meter depletion and bravery boost on block and dodge. Side by Side synergises well with the three boosters for a consistent x2.7 multiplier throughout the match.
Tifa's bravery damage output is often average if not below average, which is where higher base bravery, her exclusive weapon and Assist Critical Boost come in. Landing any HP attack outside of assist combos will produce a chunk of assist bar which will help Tifa stay competitive with the meter.
Kuja assist combos off of wall rushes, staggers and unfinished bravery sequences (e.g. Elbow Smash 1st hit), which is great for learning and applying basic assist combo theory. Tifa also has access to her highest damaging assist combo filler (2x Falcon's Dive) if she wall rushes with Falcon's Dive, Meteor Strike or Rolling Blaze.
Because Side by Side freezes Tifa's EX gauge, she cannot gain EX at all. Be sure to collect any EX Cores that appear to prevent the opponent from taking advantage of the EX Force that Tifa generates.
CP allocation
This build has no spare CP. If you wish to use additional CP to support your playstyle, you will have to replace an accessory with Hero's Essence .
Substitutes
Substitutes here.
Attacks
Staple
These attacks are recommended regardless of matchup, stage or player preference.
Bravery attacks
Ground
Aerial
Beat Rush
Elbow Smash
Waterkick
Falcon's Dive
HP attacks
Ground
Aerial
Rolling Blaze
Meteor Crusher
Somersault (from Waterkick)
Rolling Blaze
Waterkick: Poke and an assist combo starter with Somersault HP link.
Beat Rush: Poke and post-dodge defensive option. Can hit confirm the Kuja assist reliably with the first two hits.
Elbow Smash: Aerial close range poke, dodge punisher. An important assist combo starter either with the first hit or after wall rushing. Practice confirming this visually.
Falcon's Dive: Relatively safe downward (air-to-ground) poke, post-dodge defense with Feint. Assist combo starter with wall rush and for Kuja assist specifically, Tifa's strongest assist combo filler.
Rolling Blaze (ground): Assist combo starter and an anti-air.
Somersault: HP link from Waterkick. Assist combo starter and increases Waterkick's overall threat.
Meteor Crusher: Air assist combo ender, block punisher and pre-emptive dodge punisher when fully charged. Can combo into Kuja when sending the opponent into a corner (the wall / corner reduces knockback distance).
Rolling Blaze (midair): Air assist combo ender, air-to-ground dodge punisher / clash / space occupation.
Flexible
These attacks are great to have, but can be swapped or removed depending on matchup, stage or player preference.
Bravery attacks
Ground
Aerial
Blizzara
Moonsault Kick
Blizzaga
Dolphin Blow
HP attacks
Ground
Aerial
Meteor Strike
--
Burning Arrow
--
Blizzara: Ranged low projectile that becomes mid priority when it explodes at max range. It can convert to assist combo on hit after wall rushing. Occupies space in front of Tifa, but be wary of the initial low priority.
Blizzaga: Ranged mid projectile, can convert to assist combo on hit after wall rushing. Spawns on top of opponent and has limited vertical reach, but it is mid priority all the way through, staggering regular blocks.
Moonsault Kick: Slower close range poke with higher brv damage, post-dodge defense with Feint. Assist combo starter with a chase setup that doesn't require a wall, making this a good recommendation for Aerith assist specifically.
Dolphin Blow: Upward poke that is slightly faster than microdash Elbow Smash. Also works as a post-dodge defense tool with Feint. Assist combo starter with wall rush and it is Tifa's highest damaging bravery filler during air Kuja assist at the ceiling. Recommended vs. Sephiroth and Cecil.
Meteor Strike: Pseudo-poke with forward movement, slight low-profile, longer active frames and bravery damage than Rolling Blaze when charged. Leads to ground Kuja brv assist combos and of course, let's Tifa add damage with Falcon's Dive.
Burning Arrow: Single hit HP. Kuja assist can follow up after a wall rush, which increases Burning Arrow's damage potential. Because it doesn't inflict bravery damage, it also avoids EX Revenge counters with EX depletion. Good as a ground dodge punish, ground block punish or as an otherwise hard callout move.
Avoid
Generally not recommended due to being outclassed by other attacks or having no distinct utility.
Bravery attacks
Ground
Aerial
Blizzard
--
HP attacks
Ground
Aerial
Meteodrive
--
Blizzard: Low priority projectile with longest reach out of the Blizzard type spells. With other spells already having higher priority and providing better reward on hit, Blizzard is not recommended for this build. It does have enough hit stun to combo into Kuja brv assist, but this requires calling him pre-emptively for consistency.
Meteodrive: Low brv damaging HP with wall rush. The wall rush lets Kuja follow up, but otherwise it is not particuarly noteworthy compared to Tifa's other HP attacks. Meteodrive does have better feint than Meteor Strike and short animation overall, however.
indicates a "Gear" extra ability or the use of CP / Equipment glitch. The total CP cost will assume the glitch is done.
Bravery attacks
Ground
Aerial
Waterkick
Moonsault Kick
Beat Rush
Elbow Smash
Blizzara
Falcon's Dive
HP attacks
Ground
Aerial
Rolling Blaze
Meteor Crusher
Meteor Strike
Rolling Blaze
Somersault (from Waterkick)
Basic Abilities
Actions
Support
Extra
Ground Evasion
Always Target Indicator
Precision Evasion
Midair Evasion
EX Core Lock On
Disable Counterattack
Ground Block
Assist Lock On
EXP to Assist
Midair Block
Best Dresser
Aerial Recovery
Recovery Attack
Controlled Recovery
Wall Jump
Air Dash
Free Air Dash
Ground Dash
Multi Air Slide
Free Air Dash Boost
Assist Gauge Up Dash
Speed Boost
Jump Boost
Jump Times Boost+
Ground Evasion Boost
Midair Evasion Boost
Evasion Boost
Descent Speed Boost
Build Overview
A Side by Side damage build that invests in high base bravery and HP wall rush to increase Tifa's damage output exponentially with Aerith assist specifically. The idea is simple: Land an HP, combo into Aerith's Seal Evil and do another HP late enough for base bravery to fully recover. A single assist combo can do over 3000 HP damage.
In match-ups where Tifa can compete with her Somersault HP link or Rolling Blaze such as Cloud and Firion, she can output a lot of HP damage without relying on high attack stat or critical hits. Any HP guarantees an Aerith followup (Meteor Crusher only at wall) and bravery hits still work well enough to secure at least one HP attack in an assist combo. Aerith is the only competitive assist that lets Tifa assist combo off of a completed Moonsault Kick without walls.
The infamous double assist combo is also possible and it's where this build really shines. If Tifa can wall rush again and use another assist meter during the first Seal Evil, she can do Rolling Blaze and call Aerith once more. Needless to say, this increases damage even further.
CP Allocation
15 CP is available for another ground HP attack, the Auto-Assist Lock On support ability or additional action abilities. Removing Air Dash and Descent Speed Boost frees up another 10 CP for a total of 25 CP.
Substitutes
Substitutes
Equipment
Replacement
Notes
Muscle Belt
Zephyr Cloak / BRV = 0 / Hero's Essence / Great Gospel / Hero's Seal / Winged Boots
Muscle Belt isn't crucial for damage output, so it can be replaced with one of the listed accessories for increased survivability, CP (extra abilities for increased crit rate, base HP or BRV) or bravery recovery.
Back-Breaking Straw
Together as One / accessory of your choice
Back-Breaking Straw negates Thornlet's bravery boost penalty on dodge and block. The damage output is still high even with the penalties, so if it doesn't feel deterring, it can be replaced with Together as One for more assist meter at the start which is good for stability. Otherwise this can be exchanged to suit the player preference or match-up.
Muscle Belt and Summon Unused
Battle Hammer and BRV = 0
This is for adding assist depletion to the build. Muscle Belt doesn't benefit from BRV = 0 booster, whereas Battle Hammer does, so the booster is swapped out for something stronger and more consistent. BRV = 0 applies to wall rush damage and meter depletion.
Best Dresser (extra ability)
Master Guardsman (extra ability)
The base bravery (1623) can be reduced by 100 to raise the maximum health above 10,000 instead.
Attacks
Tifa has a good selection of viable bravery and HP attacks, with a bit of room to accomodate different circumstances.
Staple
These attacks are recommended regardless of matchup, stage or player preference.
Bravery attacks
Ground
Aerial
Waterkick
Moonsault Kick
Beat Rush
Elbow Smash
HP attacks
Ground
Aerial
Rolling Blaze
Meteor Crusher
Somersault (from Waterkick)
Rolling Blaze
Waterkick: Poke and an assist combo starter with Somersault HP link.
Beat Rush: Poke and post-dodge defensive option. Cannot combo into Aerith, but can synergise with her Planet Protector or even Holy if the situation allows Tifa to initiate chase.
Moonsault Kick: Slower close range poke with higher brv damage, post-dodge defense with Feint. Assist combo starter with a chase setup that doesn't require a wall, making this a good recommendation for Aerith assist specifically.
Elbow Smash: Aerial close range poke, dodge punisher. Assist combo starter with wall rush.
Rolling Blaze (ground): Assist combo starter, extender and an anti-air.
Somersault: HP link from Waterkick. Assist combo starter and increases Waterkick's overall threat.
Meteor Crusher: Air assist combo ender, block punisher and pre-emptive dodge punisher when fully charged. Can combo into Aerith at wall.
Rolling Blaze (midair): Air assist combo ender, double assist combo extender, air-to-ground dodge punisher / clash / space occupation.
Flexible
These attacks are great to have, but can be swapped or removed depending on matchup, stage or player preference.
Tifa has good contenders for the remaining BRV (1 ground, 1 midair) and HP slots (2 ground):
Bravery attacks
Ground
Aerial
Blizzara
Falcon's Dive
Blizzaga
Dolphin Blow
HP attacks
Ground
Aerial
Meteor Strike
--
Burning Arrow
--
Blizzara: Ranged low projectile that becomes mid priority when it explodes at max range. It can convert to assist combo on hit. Occupies space in front of Tifa, but be wary of the initial low priority.
Blizzaga: Ranged mid projectile, can convert to assist combo on hit. Spawns on top of opponent and has limited vertical reach, but it is mid priority all the way through, staggering regular blocks.
Falcon's Dive: Downward (air-to-ground) poke, post-dodge defense with Feint. Assist combo starter with wall
Dolphin Blow: Upward poke that is slightly faster than microdash Elbow Smash. Also works as a post-dodge defense tool with Feint. Assist combo starter with wall rush. Recommended vs. Sephiroth and Cecil.
Meteor Strike: Pseudo-poke with forward movement, slight low-profile, longer active frames and bravery damage than Rolling Blaze. Great to have.
Burning Arrow: Single hit HP. Doesn't combo into Aerith, but avoids EX Revenge counters with EX depletion.
Avoid
Generally not recommended due to being outclassed by other attacks or having little to no distinct utility.
Bravery attacks
Ground
Aerial
Blizzard
--
HP attacks
Ground
Aerial
Meteodrive
--
Blizzard: Low priority projectile with longest reach out of the Blizzard type spells. With other spells already having higher priority and providing better reward on hit, Blizzard is not recommended for this build.
Meteodrive: Low brv damaging HP with wall rush. Doesn't combo into Aerith, but has better feint than Meteor Strike and short animation overall.
indicates a "Gear" extra ability or the use of CP / Equipment glitch. The total CP cost will assume the glitch is done.
Bravery attacks
Ground
Aerial
Waterkick
Moonsault Kick
Beat Rush
Elbow Smash
Blizzaga
Dolphin Blow
HP attacks
Ground
Aerial
Rolling Blaze
Meteor Crusher
Meteor Strike
Rolling Blaze
Somersault (from Waterkick)
Basic Abilities
Actions
Support
Extra
Ground Evasion
Always Target Indicator
Precision Evasion
Midair Evasion
EX Core Lock On
Disable Counterattack
Ground Block
Assist Lock On
EXP to HP
Midair Block
Best Dresser
Aerial Recovery
Recovery Attack
Controlled Recovery
Wall Jump
Air Dash
Free Air Dash
Ground Dash
Multi Air Slide
Free Air Dash Boost
Assist Gauge Up Dash
Jump Boost
Jump Times Boost+
Ground Evasion Boost
Midair Evasion Boost
Evasion Boost
A build that provides bravery every time an attack is evaded with a dodge. This style of build is often reserved for specific match-ups where a character may struggle to land hits and are dealing with projectiles often. Against Sephiroth this is good for discouraging Shadow Flare use. The Emperor and Ultimecia also create situations with projectiles frequently, but all three are difficult match-ups for Tifa even with this build. Landing an HP is challenging and often carries a lot of risk, so having more bravery can justify taking the plunge.
The boosters don't depend on the opponent as much (no summon unused for example), but are weaker than a fully optimized set with boosters reliant on the other player's build. At maximum booster multiplier, a single dodge generates 146 bravery.
25 CP is available for Auto Assist Lock On support ability, another ground HP attack, additional basic actions or extra abilities.
Substitutes
Equipment
Replacement
Notes
After 30 Seconds
Opponent Summon Unused
1.2 booster to 1.3 booster, a slight increase. The opponent does not have to equip a summon, so if they don't have a summon for the fight, this booster is useless.
Dismay Shock
Opponent Empty EX Gauge
If the opponent has Side by Side equipped, this is another good 1.3 booster with consistent uptime.
Tenacious Attacker
Free choice
--
Assist
Tifa's Assist Data
Type
Attack
Startup
Position
Spawn
Damage multiplier
Effects
BRV
Beat Rush
21F
Ground
Opponent
8, 11, 16 (35)
Chase
BRV
Falcon's Dive
23F
Air
Opponent
26
Wall Rush
HP
Meteodrive
39F
Ground
Opponent
15
Wall Rush
HP
Rolling Blaze
45F
Air
Opponent
1 x 7
Wall Rush
Synergies
Poke and wall rush conversions, high brv damage, high risk of being locked when used.
Poke and wall rush conversions, lower damage, but faster startup and shorter animation on air BRV assist, making Tidus safer to use even if the opponent escapes it with LV1 Assist Change.
If you don't need Kuja or Tidus for whiff punishments or conversions, Aerith can boost your damage near the ground with triple HP combos or reliably set up HP damage off of Moonsault Kick's chase. Recommended for Side by Side and / or high base bravery builds.


 builds. If Tifa started a combo with an HP, the charged versions also give more time for base bravery to recover. In those cases, Meteor Strike is good as a general assist combo ender on the ground.


 Block Ring
 Empty EX Gauge