|
|
| (39 intermediate revisions by 2 users not shown) |
| Line 1: |
Line 1: |
| [[Category:Dissidia 012 Final Fantasy]] | | [[Category:Dissidia 012 Final Fantasy]] |
| | |
| | {{012CharNavTer}} |
|
| |
|
| {{CharacterInfo | | {{CharacterInfo |
| | |portrait=https://resources.dissidia.wiki/ddff/portraits/ddff-port-terra.png |
| |name=Terra Branford (ティナ・ブランフォード) | | |name=Terra Branford (ティナ・ブランフォード) |
| |origin=Final Fantasy VI | | |origin=Final Fantasy VI |
| |weapon=Daggers, Instruments, Rods, Staves
| |
| |armor=Bangles, Clothing, Hairpins, Hats, Headbands, Ribbons, Robes
| |
| |atk= 111 (High) | | |atk= 111 (High) |
| |def= 110 (Low) | | |def= 110 (Low) |
| Line 12: |
Line 13: |
| |fall=85 (Average) | | |fall=85 (Average) |
| |fallr=43 (Slow) | | |fallr=43 (Slow) |
| | |fastestbrv=17F (Blizzard Combo) |
| | |fastesthp=43F (Tornado) |
| | |1hithp=Yes (Multiple) |
| | |hplinks=Yes |
| | |cmdblock=No |
| | |weapon=Daggers, Instruments, Rods, Staves |
| | |armor=Bangles, Clothing, Hairpins, Hats,<br>Headbands, Ribbons, Robes |
| |exclusives=Chain Flail, Morning Star, Maduin's Horn | | |exclusives=Chain Flail, Morning Star, Maduin's Horn |
| | |unlock= |
| | |alignment=Chaos (012) <br>Cosmos ('''[[Glossary_(Dissidia_012)#013|013]]''') |
| | |vajp=[https://en.wikipedia.org/wiki/Yukari_Fukui Yukari Fukui] |
| | |vaeng=Natalie Lander |
| }} | | }} |
| | |
| | == Overview == |
| | |
| | Terra is a defensive spell caster who fights with projectiles from longer distances. |
| | Her main strategy involves sniping with Thundara, charging Meltdown to harass opponents, and casting Holy Combo. If the opponent gets too close, Terra can {{keyword|poke|poke=1}} with Blizzard Combo to keep them out. Terra is also an effective user of Reverse Free Air Dash, as it creates distance for using magic and fills Assist gauge more safely. |
| | |
| | Terra can do HP damage in {{keyword|neutral|neutral=1}} via Meltdown, {{keyword|HP links|hplink=1}} or various '''[[Glitch_(Dissidia_012)#Hit_Glitch|hit glitch]]''' setups from her other moves. She benefits a lot from '''[[Multiplayer_Build_Guide_(Dissidia_012)#Side_by_Side|Side by Side and high base bravery builds]]''' as a result. Terra struggles to fill EX gauge, but her EX Mode is one of the strongest in the game; Chainspell duplicates all projectiles for stronger space control and damage output. Terra is also one of the few characters who can safely {{keyword|Empty Chase|emptychase=1}} anywhere without getting punished by Recovery Attacks, due to Thundara’s generous {{keyword|hit stun|hitstun=1}}. |
| | |
| | Terra has glaring weaknesses mostly due to her defense; The most notable issue is being weak against aggressive opponents. Most attacks are telegraphed, slow to come out and Ranged Low priority, which lose to Free Air Dash. Terra’s close-range poke Blizzard Combo is slower and less rewarding on average. Other options involve mixing up timing with Meltdown and blocks, which are also risky. Furthermore, Terra’s air dodges leave her stationary for longer than most characters, which make her vulnerable to attacks. Combined with below average mobility and low '''[[Statistic_(Dissidia_012)#Attack_(ATK)_and_Defense_(DEF)|base DEF]]''', Terra takes big risks to compete and suffers a lot if she fails. |
| | |
| | Over the years Terra has been considered one of the weakest characters in the game. Her defense suffers against {{keyword|rushdown|rushdown=1}}, but getting momentum with assist can offset some of her shortcomings. Her long-range abilities make it easier to fight {{012ulti}}, who is challenging for many close-range characters. Terra presents an uphill battle for aspiring competitors, but provides a distinct play style that only few characters have. |
|
| |
|
| {{ProConTable | | {{ProConTable |
| |pros= | | |pros= |
| | * '''Range''' – Terra can attack from long distances with Thundara, Meteor, Holy Combo and Meltdown. They complement each other and lead to assist combos on hit. |
| | |
| | * '''Damage''' – Synergy with high base BRV builds and various hit glitch setups into Ultima allow Terra to do plenty of HP damage. |
| | |
| | * '''EX Mode''' – One of the strongest EX Modes in the game. Chainspell duplicates projectiles, which occupy more space and further increase Terra’s damage output. Holy (Combo) also becomes much faster, which also helps with space control. |
| | |
| | * '''Safe Empty Chase''' – Thundara is one of the few moves in the game that allow Chase without getting punished by Recovery Attacks anywhere. Effective for getting EX and denying opponent’s current position. |
| |cons= | | |cons= |
| | * '''Defense''' – Terra can struggle to keep opponents away due to below average close-range moves and long-range moves that are slow and low priority. Air dodging is riskier due to slow fall speed and low defense stat increases bravery damage Terra takes. |
| | |
| | * '''Risky Zoning''' – Terra relies on telegraphed projectiles that have long startup. They often lose to Free Air Dash, and leave Terra vulnerable to assist attacks as well. |
| | |
| | * '''Reversing momentum''' – By the same token, Terra has to take big risks with blocks and other moves to make comebacks. |
| | |
| | * '''EX Generation''' – Most of her key moves produce little to no EX Force, which limits her EX intake to EX Cores and Fire on the ground. |
| }} | | }} |
|
| |
|
| = Overview = | | == Bravery Attacks == |
| Terra is a playable character in Dissidia 012.
| |
| | |
| = Bravery Attacks = | |
|
| |
|
| Blizzard Combo and Holy Combo have separate damage multipliers when used during EX mode. These values are outlined after the regular damage multipliers and highlighted in bold. | | Blizzard Combo and Holy Combo have separate damage multipliers when used during EX mode. These values are outlined after the regular damage multipliers and highlighted in bold. |
|
| |
|
| == Ground == | | === Ground === |
|
| |
|
| <tabber> | | <tabber> |
| Line 39: |
Line 73: |
| |effect=Wall Rush | | |effect=Wall Rush |
| |cp=30 (15) | | |cp=30 (15) |
| | |image=https://dissidia.wiki/images/5/51/Brv_terra_blizzard_combo_g.jpeg |
| | |imgpos= |
| | |cancels= |
| | |asthit= |
| | |level= |
| | |ap= |
| | |gametext=[Close] Shoot ice shards. <br>Change combo with analog stick. |
| }} | | }} |
| ''[Close] Shoot ice shards. Change combo with analog stick.''
| |
|
| |
|
| This attack has an upward version. The sum of damage multipliers is identical with the regular verison. It can only wall rush on the side and not at the ceiling. | | This attack has an upward version. Base damage is the same. It can only wall rush on the side and not at the ceiling. |
|
| |
|
| {{AbilityInfo | | {{AbilityInfo |
| Line 51: |
Line 91: |
| |ex=30 | | |ex=30 |
| |cp=- | | |cp=- |
| | |image=https://dissidia.wiki/images/c/c6/Brv_terra_blizzard_combo_a_up.jpeg |
| | |imgpos= |
| }} | | }} |
|
| |
|
| Line 62: |
Line 104: |
| |effect=Magic Block, Wall Rush | | |effect=Magic Block, Wall Rush |
| |cp=30 (15) | | |cp=30 (15) |
| | |image=https://dissidia.wiki/images/5/5d/Brv_terra_blizzara_g.jpeg |
| | |imgpos=50% |
| | |cancels= |
| | |asthit= |
| | |level= |
| | |ap= |
| | |gametext=[Mid] Fire large ice block. <br>On hit, add ice shard attack. |
| }} | | }} |
| ''[Mid] Fire large ice block. On hit, add ice shard attack.''
| |
|
| |
|
| |-|Fire= | | |-|Fire= |
| Line 74: |
Line 122: |
| |effect=Chase | | |effect=Chase |
| |cp=30 (15) | | |cp=30 (15) |
| | |image=https://dissidia.wiki/images/8/8e/Brv_terra_fire.jpeg |
| | |imgpos= |
| | |cancels= |
| | |asthit= |
| | |level= |
| | |ap= |
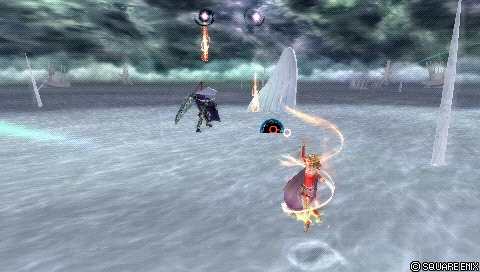
| | |gametext=[Mid] Shoot low fireballs <br>that home in on foe and explode. |
| }} | | }} |
| ''[Mid] Shoot low fireballs that home in on foe and explode.''
| | |
| | [[File:Brv_terra_fire_2.jpeg|thumb|300px|]] |
|
| |
|
| |-|Graviga= | | |-|Graviga= |
| Line 86: |
Line 142: |
| |effect=Absorb, Wall Rush | | |effect=Absorb, Wall Rush |
| |cp=30 (15) | | |cp=30 (15) |
| | |image=https://dissidia.wiki/images/3/3a/Brv_terra_graviga.jpeg |
| | |imgpos=60% |
| | |cancels= |
| | |asthit= |
| | |level= |
| | |ap= |
| | |gametext=[Long] Drop gravity sphere. <br>Can aim with the analog stick. |
| }} | | }} |
| ''[Long] Drop gravity sphere. Can aim with the analog stick.''
| |
|
| |
|
| |-|Meteor= | | |-|Meteor= |
| Line 98: |
Line 160: |
| |effect=- | | |effect=- |
| |cp=30 (15) | | |cp=30 (15) |
| | |image=https://dissidia.wiki/images/e/e3/Brv_terra_meteor.jpeg |
| | |imgpos= |
| | |cancels= |
| | |asthit= |
| | |level= |
| | |ap= |
| | |gametext=[Long] Rain down fire on foe. <br>Powerful, not very accurate. |
| }} | | }} |
| ''[Long] Rain down fire on foe. Powerful, not very accurate.''
| |
|
| |
|
| Contains 7 hits. The 3rd and 7th hits always spawn right above the opponent's head. Others spawn randomly. | | Contains 7 hits. The 3rd and 7th hits always spawn right above the opponent's head. Others spawn randomly. |
| Line 105: |
Line 173: |
| </tabber> | | </tabber> |
|
| |
|
| == Aerial == | | === Aerial === |
|
| |
|
| <tabber> | | <tabber> |
|
| |
|
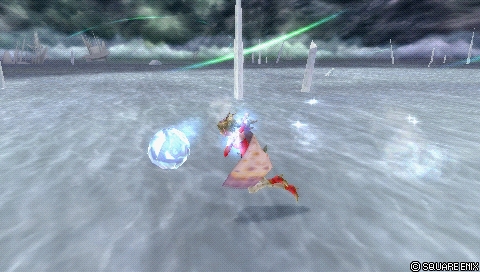
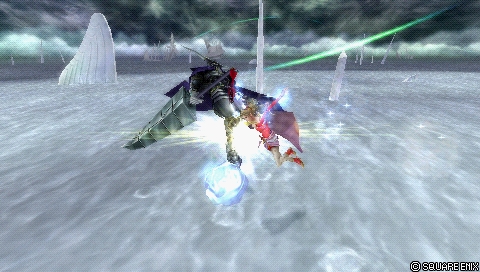
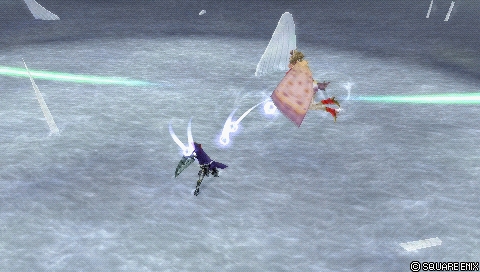
| |-|Blizzard Combo (midair)= | | |-|Blizzard Combo (midair)= |
| {{AbilityInfo | | |
| |damage=4, 3, 3, 10 (20) / '''4, 3, 3, 14, 2 x 3 (30)''' | | {{AbilityInfo2 |
| |startup=17F | | |ver1=Normal |
| |type=Magical | | |damage1='''20''' (4, 3, 3, 10) <br>'''20''' (Upward. 4, 6, 10) |
| |priority=Melee Low | | |startup1=17F |
| |ex=30 | | |type1=Magical |
| |effect=Wall Rush | | |priority1=Melee Low |
| | |ex1=30 |
| | |effect1=Wall Rush |
| | |cancels1=Dodge |
| | |asthit1= |
| | |gametext=[Close] Shoot ice shards. <br>Change combo with analog stick. |
| | |level= |
| | |ap= |
| |cp=30 (15) | | |cp=30 (15) |
| | |ver2=EX Mode |
| | |damage2='''30''' (4, 3, 3, 14, 2 x 3) <br>'''30''' (Upward. 4, 6, 14, 2 x 3) |
| | |startup2=17F |
| | |type2=Magical |
| | |priority2=Melee Low |
| | |ex2=30 |
| | |effect2=Wall Rush (Side only) |
| | |cancels2=Dodge |
| | |asthit2= |
| | |image=https://dissidia.wiki/images/6/64/Brv_terra_blizzard_combo_a.jpeg |
| | |imgpos=40% |
| }} | | }} |
| ''[Close] Shoot ice shards. Change combo with analog stick.'' | | |
| | * Press Circle {{pspcir}} once for two follow-up hits. Aim the analog stick {{pspana}} up to send the opponent flying upwards. |
| | |
| | Blizzard Combo is a close-range {{keyword|poke|poke=1}} and one of Terra's most important moves. It's a fast close-range {{keyword|keepout|keepout=1}} tool with melee priority. Terra can use this defensively to {{keyword|whiff punish|whiffpunish=1}}, interrupt approaches and dashes. The first hit can combo into assists for HP damage. As such, Blizzard Combo represents a threat in close-range, where Terra is not usually at her strongest. |
| | |
| | Blizzard Combo has the fastest {{keyword|startup|startup=1}} out of Terra's moves at 17 frames, so she won't always get blocked on reaction. The relatively short animation and {{keyword|dodge cancel|dc=1}} window makes Blizzard Combo decent for filling assist gauge on {{keyword|whiff|whiff=1}} occasionally. Terra needs to be wary of dodge punish attempts that may follow, however. |
| | |
| | This is an important move for Terra, but it's not without flaws. Blizzard Combo may be fast, but it's on the slower end compared to similar pokes like {{012clo}}'s Double Cut (13F) or {{012squ}}'s Beat Fang (15F). Terra can only combo into assists with the first hit which has a short window, or wall rush which isn't consistent in most positions. The base damage for first hit is one of the lowest in the game, which limits Blizzard Combo's damage potential. This is a reliable move for generating EX Force, but 30 EX is pretty low for a poke. The knockback is relatively weak for creating space, which is what Terra usually aims for. Furthermore, this is Terra's only melee low priority move. That means Terra has to take risks with delayed timing and HPs, or risk getting staggered from blocks. |
|
| |
|
| |-|Blizzara (midair)= | | |-|Blizzara (midair)= |
| Line 130: |
Line 223: |
| |effect=Magic Block, Wall Rush | | |effect=Magic Block, Wall Rush |
| |cp=30 (15) | | |cp=30 (15) |
| | |gametext=[Mid] Fire large ice block. <br>On hit, add ice shard attack. |
| | |image=https://dissidia.wiki/images/f/f7/Brv_terra_blizzara_a.jpeg |
| | |imgpos=50% |
| | |cancels=Dodge |
| | |asthit= |
| | |level= |
| | |ap= |
| }} | | }} |
| ''[Mid] Fire large ice block. On hit, add ice shard attack.''
| |
|
| |
|
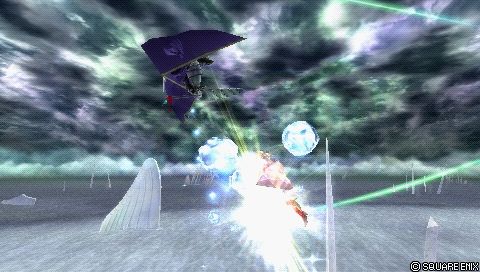
| |-|Holy Combo= | | |-|Holy Combo= |
| Line 142: |
Line 241: |
| |effect=- | | |effect=- |
| |cp=30 (15) | | |cp=30 (15) |
| | |gametext=[Long] Shoot light projectiles. <br>If Holy hits, follow with Flare. |
| | |image=https://dissidia.wiki/images/0/0d/Brv_terra_holy_combo_1.jpeg |
| | |imgpos= |
| | |cancels= |
| | |asthit= |
| | |level= |
| | |ap= |
| | |
| }} | | }} |
| ''[Long] Shoot light projectiles. If Holy hits, follow with Flare.''
| | |
| | [[File:Brv_terra_holy_combo_2.jpeg|thumb|300px]] |
| | |
|
| |
|
| |-|Thundara= | | |-|Thundara= |
| Line 154: |
Line 263: |
| |effect=Chase | | |effect=Chase |
| |cp=30 (15) | | |cp=30 (15) |
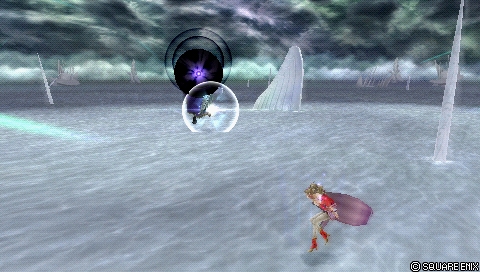
| | |gametext=[Long] Surround foe with contracting ring of lightning. |
| | |image= |
| | |imgpos= |
| | |cancels= |
| | |asthit= |
| | |level= |
| | |ap= |
| | |
| }} | | }} |
| ''[Long] Surround foe with contracting ring of lightning.''
| | |
|
| |
|
| |-|Holy= | | |-|Holy= |
| Line 166: |
Line 283: |
| |effect=Chase | | |effect=Chase |
| |cp=- | | |cp=- |
| | |gametext=[Long] Shoot light projectiles. <br>Normal speed, strong homing. |
| | |image= |
| | |imgpos= |
| | |cancels= |
| | |asthit= |
| | |level= |
| | |ap= |
| | |
| }} | | }} |
| ''[Long] Shoot light projectiles. Normal speed, strong homing.''
| | |
|
| |
|
| </tabber> | | </tabber> |
|
| |
|
| = HP Attacks = | | == HP Attacks == |
|
| |
|
| == Ground == | | === Ground === |
|
| |
|
| <tabber> | | <tabber> |
| Line 185: |
Line 310: |
| |effect=- | | |effect=- |
| |cp=30 (15) | | |cp=30 (15) |
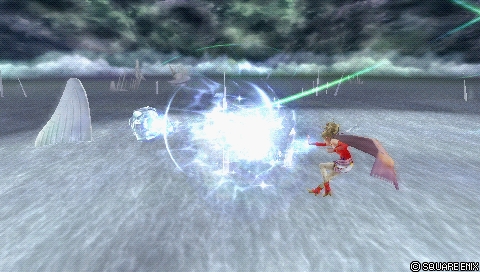
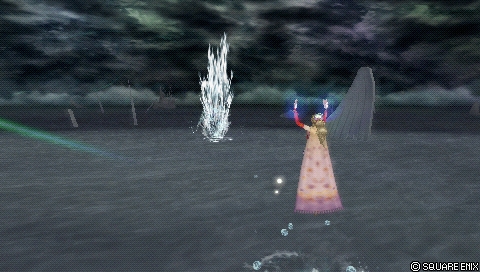
| | |gametext=[Long] Generate three water pillars <br>at opponent's position |
| | |image=https://dissidia.wiki/images/3/33/Hp_terra_flood.jpeg |
| | |imgpos= |
| | |level= |
| | |ap= |
| | |cancels= |
| | |asthit= |
| }} | | }} |
| ''[Long] Generate three water pillars at opponent's position.''
| | |
| | Flood is a secondary ground HP for Terra. Its main application is interrupting attacks with long {{keyword|startup|startup=1}} (e.g. {{012clo}} Meteorain, {{012gar}} Cyclone etc.) or punishing air dodges with short movement. Terra conjures two water pillars at opponent's position, which explode in rapid succession. These pillars are true unblockable priority, so they cannot be reflected or blocked. |
| | As such, Flood encourages opponents to move. The second pillar spawns at opponent's position once it goes off, so it can catch '''[[Landing_lag|landing lag]]''' if opponent dodges near the ground. Flood knocks straight up on hit with a lot of {{keyword|hit stun|hitstun=1}}, which can start assist combos. |
| | |
| | Flood is not often used due to its slow speed and low coverage against movement or {{keyword|halo camping|halocamp=1}}. Terra is vulnerable to attacks while casting and the pillars can be dodged consistently with Evasion Boost. |
| | |
| | In EX Mode, Terra casts Flood two times, for a total of 6 water pillars. This can be harder to dodge, as the pillars cover more space. |
|
| |
|
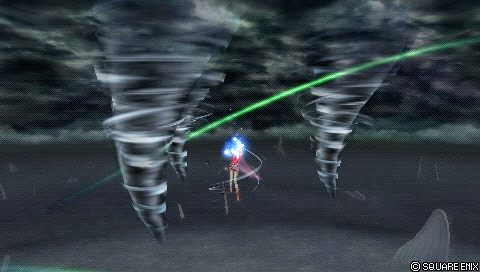
| |-|Tornado (ground)= | | |-|Tornado (ground)= |
| Line 197: |
Line 335: |
| |effect=Absorb, Wall Rush | | |effect=Absorb, Wall Rush |
| |cp=30 (15) | | |cp=30 (15) |
| | |image=https://dissidia.wiki/images/b/b2/Hp_terra_tornado_g.jpeg |
| | |imgpos= |
| | |level= |
| | |ap= |
| | |cancels= |
| | |asthit= |
| | |gametext=[Close] Summon tornado around self. <br>Can be moved. |
| }} | | }} |
| ''[Close] Summon tornado around self. Can be moved.''
| |
|
| |
|
| |-|Firaga= | | |-|Firaga= |
| Line 209: |
Line 353: |
| |effect=Wall Rush | | |effect=Wall Rush |
| |cp=30 (15) | | |cp=30 (15) |
| | |image=https://dissidia.wiki/images/f/ff/Hp_terra_firaga.jpeg |
| | |imgpos= |
| | |level= |
| | |ap= |
| | |cancels= |
| | |asthit= |
| | |gametext=Branching from Fire. <br>[Combo] Ignite explosions on foe. |
| }} | | }} |
| ''Branching from Fire. [Combo] Ignite explosions on foe.''
| |
|
| |
|
| </tabber> | | </tabber> |
|
| |
|
| == Aerial == | | === Aerial === |
|
| |
|
| <tabber> | | <tabber> |
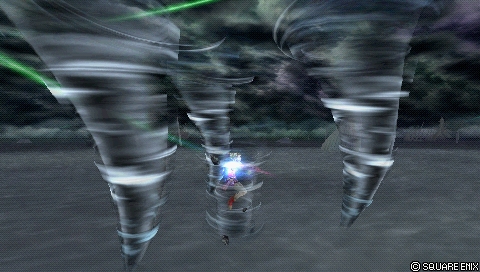
| |-|Tornado (midair)= | | |-|Tornado (midair)= |
| {{AbilityInfo | | {{AbilityInfo |
| |damage=1 x 10 (10) | | |damage='''10''' (1 x 10) |
| |startup=43F | | |startup=43F |
| |type=Magical | | |type=Magical |
| Line 226: |
Line 376: |
| |effect=Absorb, Wall Rush | | |effect=Absorb, Wall Rush |
| |cp=30 (15) | | |cp=30 (15) |
| | |gametext=[Close] Summon tornado around self. <br>Can be moved. |
| | |image=https://dissidia.wiki/images/9/91/Hp_terra_tornado_a.jpeg |
| | |imgpos= |
| | |level= |
| | |ap= |
| | |cancels= |
| | |asthit= |
| }} | | }} |
| ''[Close] Summon tornado around self. Can be moved.''
| | |
|
| |
|
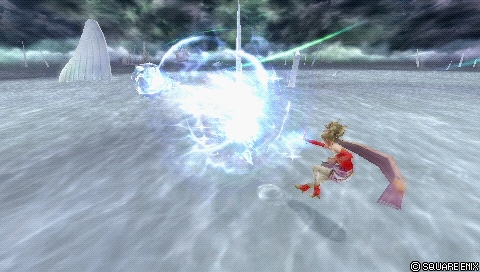
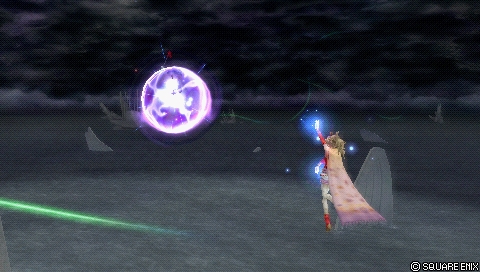
| |-|Meltdown= | | |-|Meltdown= |
| {{AbilityInfo | | {{AbilityInfo |
| |damage=- | | |damage=- |
| |startup=55F / 91F / 145F | | |startup=55F (LV1) / 91F (LV2) / 145F (LV3) |
| |type=- | | |type=- |
| |priority=Ranged High | | |priority=Ranged High |
| Line 238: |
Line 395: |
| |effect=Wall Rush | | |effect=Wall Rush |
| |cp=30 (15) | | |cp=30 (15) |
| | |gametext=[Long] Shoot fireball at foe. <br>Charge to change its strength. |
| | |image= |
| | |imgpos= |
| | |level= |
| | |ap= |
| | |cancels= |
| | |asthit= |
| }} | | }} |
| ''[Long] Shoot fireball at foe. Charge to change its strength.'' | | |
| | * LV1 Meltdown travels a short distance quickly, and explodes |
| | * LV2 Meltdown appears in front of Terra, and then starts slowly accelerating towards opponent. |
| | * LV3 Meltdown travels a short distance quickly, and then starts slowly accelerating towards opponent. |
| | |
| | Meltdown is Terra's only 1-hit HP attack in the air and one of her main self-defense tools. It is used to occupy space and threaten air dodges. Meltdown is a key move for pressuring opponents, as long as Terra can cast it safely. |
| | |
| | Meltdown has two versions: Uncharged and charged. Uncharged Meltdown is a close-range fire blast, which is useful after block staggers or as a {{keyword|mixup|mixup=1}} to her charged versions. Uncharged Meltdown travels very quickly once fired, and it has limited maximum distance. If opponent is expecting a charged version, uncharged Meltdown can catch them. Both versions can wall rush. |
| | |
| | Meltdown's charged versions are done by holding Square {{pspsqu}}. LV2 must be released before 145 frames and LV3 happens at max charge. This is a large homing fireball with long {{keyword|active|active=1}} duration and maximum travel distance. Both versions, especially LV3 can be used to harass opponents from afar and force them to approach Terra. Since charged Meltdown stays active for a while, Terra can act alongside the projectile. This can provide a lot of screen presence and force close-range characters into making a mistake, such as dodging into Terra's next move. Charged Meltdown can also hit off-camera from behind, as it bounces off of solid ground and walls. |
| | |
| | This move has long {{keyword|startup|startup=1}} and {{keyword|recovery|recovery=1}}. Terra's reliance on Meltdown makes her more vulnerable to {{keyword|whiff punishes|whiffpunish=1}} and {{keyword|assist punishes|assistpunish=1}} whenever it misses. Furthermore, opponents can use assist in close-range to take HP damage from Meltdown and then '''[[Bravery_(Dissidia_012)#Bravery_Break|Bravery Break]]''' Terra. Due to Ranged High priority, charged Meltdowns can be reflected back by high priority attacks, such as {{012clo}}'s Braver, {{012squ}}'s Blasting Zone and {{012jec}} Block. Charged Meltdown will also vanish if Terra gets hit, so it cannot protect her in those cases. Charged Meltdown also has medium max speed, so opponents can attempt to '''[[Blodge|blodge]]''' it, or activate Precision Evasion against it. |
|
| |
|
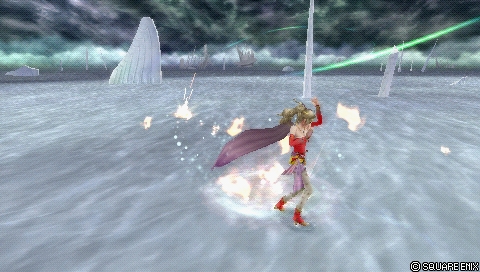
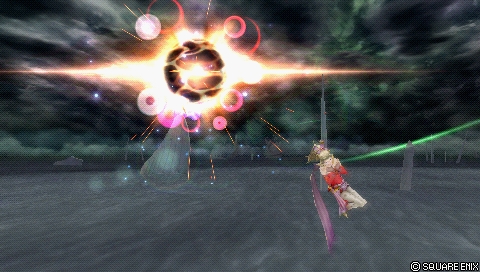
| |-|Ultima= | | |-|Ultima= |
| {{AbilityInfo | | {{AbilityInfo |
| |damage=1 x 7 (7) | | |damage='''7''' (1 x 7) |
| |startup=? | | |startup=? |
| |type=Magical | | |type=Magical |
| Line 250: |
Line 425: |
| |effect=Absorb, Wall Rush | | |effect=Absorb, Wall Rush |
| |cp=30 (15) | | |cp=30 (15) |
| | |gametext=Branching from Holy Combo. <br>[Combo] Cast the ultimate spell. |
| | |image=https://dissidia.wiki/images/f/f9/Hp_terra_ultima.jpeg |
| | |imgpos= |
| | |level= |
| | |ap= |
| | |cancels= |
| | |asthit= |
| }} | | }} |
| ''Branching from Holy Combo. [Combo] Cast the ultimate spell.''
| | |
|
| |
|
| </tabber> | | </tabber> |
|
| |
|
| = EX Mode: Trance! = | | == EX Mode: Trance! == |
| Effects: | | Effects: |
| * Regen | | * Regen |
| Line 262: |
Line 444: |
| * Chainspell | | * Chainspell |
|
| |
|
| == Glide == | | === Glide === |
| ''[Activate by holding X in midair]] Uses the esper power hidden within to move freely through the air.'' | | ''[Activate by holding X in midair]] Uses the esper power hidden within to move freely through the air.'' |
|
| |
|
| == Chainspell == | | === Chainspell === |
| ''[Cast, then press circle or square to activate] | | ''[Cast, then press circle or square to activate] |
| Embraces the spirit of a magus to raise magical poower and cast the same spell again.'' | | Embraces the spirit of a magus to raise magical poower and cast the same spell again.'' |
|
| |
|
| == EX Burst: Riot Blade == | | === EX Burst: Riot Blade === |
| ''Power is focused in both hands and fired as countless blades. Repeatedly press left and circle to raise the gauges on the left and righht.'' | | ''Power is focused in both hands and fired as countless blades. Repeatedly press left and circle to raise the gauges on the left and righht.'' |
|
| |
|
| Line 278: |
Line 460: |
| }} | | }} |
|
| |
|
| = Builds = | | == Combos == |
| | |
| | === Solo === |
| | |
| | === Assist === |
| | |
| | == Builds == |
| Builds here. | | Builds here. |
|
| |
|
| Line 322: |
Line 510: |
|
| |
|
| == Combo == | | == Combo == |
| Once Terra confirms an assist combo with Jecht (or Aerith), the goal is to inflict enough damage to bravery break, reset to base bravery and wall rush for extra damage. Prepare an EX Mode Meltdown which casts two HP projectiles instead of one. As long as one Meltdown connects, Terra can chain Holy Combo into Ultima which is plenty of damage as it is, but the second Meltdown will reset base bravery recovery on hit. After using Holy Combo, be sure to delay the first Ultima to unlock your assist bar and catch the opponent's dodge. Without [[Dodge_(Dissidia_012)#Evasion_Boost|'''Evasion Boost''']] and [[Dodge_(Dissidia_012)#Precision_Evasion|'''Precision Evasion''']], Ultima is basically guaranteed and can lead to another wall rush assist combo if Terra has more assist meter to spend. Depending on the circumstances and the opponent's build, this can outright finish the opponent. | | Once Terra confirms an assist combo with Jecht (or Aerith), the goal is to inflict enough damage to bravery break, reset to base bravery and wall rush for extra damage. Prepare an EX Mode Meltdown which casts two HP projectiles instead of one. As long as one Meltdown connects, Terra can chain Holy Combo into Ultima which is plenty of damage as it is, but the second Meltdown will reset base bravery recovery on hit. |
| | |
| | After using Holy Combo, be sure to delay the first Ultima to unlock your assist bar and catch the opponent's dodge. Without [[Dodge_(Dissidia_012)#Evasion_Boost|'''Evasion Boost''']] and [[Dodge_(Dissidia_012)#Precision_Evasion|'''Precision Evasion''']], Ultima is basically guaranteed and can lead to another wall rush assist combo if Terra has more assist meter to spend. Depending on the circumstances and the opponent's build, this can outright finish the opponent. |
|
| |
|
| If the opponent is at the wall, it is possible to throw a quick Meltdown during Jecht assist before using Holy Combo. | | If the opponent is at the wall, it is possible to throw a quick Meltdown during Jecht assist before using Holy Combo. |
|
| |
|
| |-|Build #2= | | |-|Side by Side= |
| {{Build | | {{Build |
| |hp= | | |hp=9683 |
| |cp= | | |cp=450 |
| |brv= | | |brv=1284 |
| |atk= | | |atk=178 |
| |def= | | |def=183 |
| |luk= | | |luk=60 |
| |booster= | | |booster=x4.6 |
| |setbonus= | | |setbonus=Judgment of Lufenia |
| |ast= | | |ast={{012jec}} / {{012aer}} / {{012seph}} |
| |wpn= | | |wpn=Lufenian Claw {{equip}} |
| |hand= | | |hand=Lufenian Shield {{equip}} |
| |head= | | |head=Thornlet |
| |armor= | | |armor=Lufenian Armor {{equip}} |
| |acc1= | | |acc1={{accbas}} Protect Stud |
| |acc2= | | |acc2={{accbas}} Dismay Shock |
| |acc3= | | |acc3={{accbas}} Battle Hammer |
| |acc4= | | |acc4={{accboo}} Empty EX Gauge |
| |acc5= | | |acc5={{accboo}} Summon Unused |
| |acc6= | | |acc6={{accboo}} Pre-EX Mode |
| |acc7= | | |acc7={{accboo}} Pre-EX Revenge |
| |acc8= | | |acc8={{accboo}} Opponent Summon Unused |
| |acc9= | | |acc9={{accsp}} Together As One |
| |acc10= | | |acc10={{accsp}} Side By Side |
| |summon= | | |summon=Rubicante |
| }} | | }} |
|
| |
|
| </tabber> | | </tabber> |
|
| |
|
| = Assist = | | == Assist == |
|
| |
|
| == Terra's assist data == | | === Terra's Assist Data === |
|
| |
|
| {{012Assist | | {{012Assist |
| Line 391: |
Line 581: |
| }} | | }} |
|
| |
|
| == Assists == | | === Synergies === |
| Terra works well with Aerith, Kuja and Jecht. | | Terra works well with Aerith, Kuja and Jecht. |
|
| |
|
| Line 402: |
Line 592: |
|
| |
|
| </tabber> | | </tabber> |
| | |
| | == References == |
| | <references /> |
| | |
| | {{navbox012}} |
| | |
| | {{roadmap012ter}} |


 Hyper Ring
 Large Gap in HP
 Cyan Drop