|
|
| (23 intermediate revisions by the same user not shown) |
| Line 169: |
Line 169: |
| |cancels3=Dodge | | |cancels3=Dodge |
| |asthit3= | | |asthit3= |
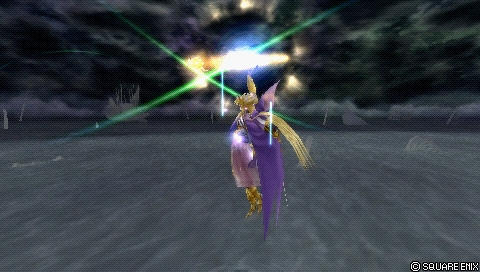
| | |image=https://dissidia.wiki/images/3/31/Brv_the_emperor_dynamite_g_1.jpeg |
| }} | | }} |
| | |
| | [[File:Brv_the_emperor_dynamite_g_3.jpeg|thumb|Dynamite sticks to surfaces.]] |
| | |
| | [[File:Brv_the_emperor_dynamite_g_4.jpeg|thumb|Dynamite explodes after some time.]] |
| | |
| | [[File:Brv_the_emperor_dynamite_g_5.jpeg|thumb|Dynamite can be aimed as well.]] |
|
| |
|
| Dynamite's ground version is mostly identical with the aerial version. It puts The Emperor airborne, which is useful for placing the projectile in front of The Emperor. Aerial Dynamite can't shoot straight down, so this covers a niche angle if needed in a pinch. This is also useful for maintaining Pre-Jump {{accboo}} accessory booster. | | Dynamite's ground version is mostly identical with the aerial version. It puts The Emperor airborne, which is useful for placing the projectile in front of The Emperor. Aerial Dynamite can't shoot straight down, so this covers a niche angle if needed in a pinch. This is also useful for maintaining Pre-Jump {{accboo}} accessory booster. |
|
| |
|
| Since The Emperor becomes airborne with this attack, he becomes more vulnerable to air brv {{keyword|assist punishes|assistpunish=1}}. This is notable when fighting anyone with {{012kuja}} or {{012tid}} assist, for example. | | Since The Emperor becomes airborne with this attack, he becomes more vulnerable to air brv {{keyword|assist punishes|assistpunish=1}}. This is notable when fighting anyone with {{012kuja}} or {{012tid}} assist, for example. |
| | |
| | For more information, please refer to the aerial version. |
|
| |
|
| |-|Thunder Crest= | | |-|Thunder Crest= |
| Line 189: |
Line 198: |
| |ap= | | |ap= |
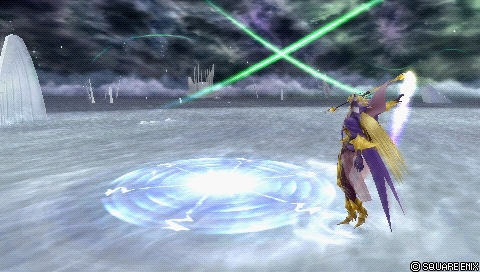
| |gametext=[Mid] Draw sigil on the ground. <br>Paralyzes foe when in range. | | |gametext=[Mid] Draw sigil on the ground. <br>Paralyzes foe when in range. |
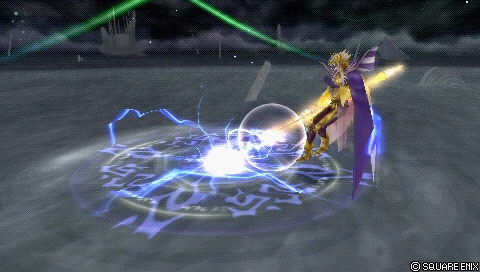
| | |image=https://dissidia.wiki/images/5/5e/Brv_the_emperor_thunder_crest_1.jpeg |
| | |imgpos=60% |
| }} | | }} |
| | |
| | [[File:Brv_the_emperor_thunder_crest_2.jpeg|thumb|300px|Thunder Crest holds the opponent in place. Excellent for combos.]] |
|
| |
|
| * Only 1 idle Thunder Crest can be on the field. | | * Only 1 idle Thunder Crest can be on the field. |
| Line 216: |
Line 229: |
| |effect=Absorb | | |effect=Absorb |
| |cp=30 (15) | | |cp=30 (15) |
| |image= | | |image=https://dissidia.wiki/images/1/15/Brv_the_emperor_mine_1.jpeg |
| |imgpos=
| |
| |cancels= | | |cancels= |
| |asthit= | | |asthit= |
| Line 224: |
Line 236: |
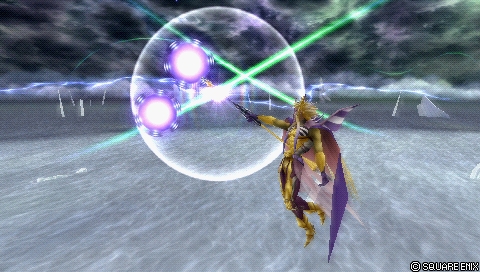
| |gametext=[Close] Drop mine. <br>Multiples OK; they will persist a long time. | | |gametext=[Close] Drop mine. <br>Multiples OK; they will persist a long time. |
| }} | | }} |
| | |
| | [[File:Brv_the_emperor_mine_2.jpeg|thumb|A maximum of 8 Mines can be set.]] |
|
| |
|
| * Up to 8 Mines can be on the field. | | * Up to 8 Mines can be on the field. |
| Line 242: |
Line 256: |
| |effect=- | | |effect=- |
| |cp=30 (15) | | |cp=30 (15) |
| |image= | | |image=https://dissidia.wiki/images/b/be/Brv_the_emperor_light_crest_a_1.jpeg |
| |imgpos=
| |
| |cancels= | | |cancels= |
| |asthit= | | |asthit= |
| Line 250: |
Line 263: |
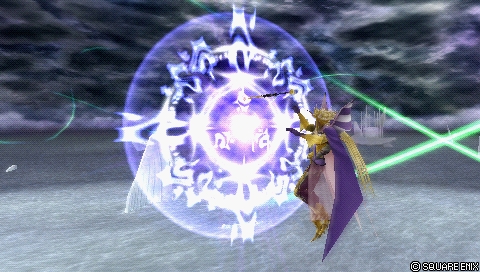
| |gametext=[Mid] Draw horizontal light sigil. Fires when <br>foe enters range; faces opponent's direction. | | |gametext=[Mid] Draw horizontal light sigil. Fires when <br>foe enters range; faces opponent's direction. |
| }} | | }} |
| | |
| | [[File:Brv_the_emperor_light_crest_a_2.jpeg|thumb|]] |
|
| |
|
| * Only 1 midair Light Crest can be on the field. | | * Only 1 midair Light Crest can be on the field. |
| Line 255: |
Line 270: |
| Midair Light Crest is more horizontally aligned, but acts similarly to ground version otherwise. It is still a secondary tool, best used as a preemptive {{keyword|anti-air|anti-air=1}}, or stopping slow moves above The Emperor, such as {{012exd}}'s Black Hole. | | Midair Light Crest is more horizontally aligned, but acts similarly to ground version otherwise. It is still a secondary tool, best used as a preemptive {{keyword|anti-air|anti-air=1}}, or stopping slow moves above The Emperor, such as {{012exd}}'s Black Hole. |
|
| |
|
| It has a huge activation range vertically, and strong 360° detection range. Unfortunately this makes it easy to disarm with movement alone. If opponents gets close, Light Crest fires 5 projectiles at them with same {{keyword|hit stun|hitstun=1}} and {{keyword|homing|tracking=1}} as ground version. On its own the hit stun is not that threatening, but it still has potential to chain into other traps with vacuum effect (Dreary Cell, Mine). Wall hits can help with {{keyword|converting|convert=1}} to assist combos. | | It has a huge activation range vertically, and strong 360° detection range. Unfortunately this makes it easy to disarm with movement alone. If opponents gets close, Light Crest fires 4 projectiles at them with same {{keyword|hit stun|hitstun=1}} and {{keyword|homing|tracking=1}} as ground version. On its own the hit stun is not that threatening, but it still has potential to chain into other traps with vacuum effect (Dreary Cell, Mine). Wall hits can help with {{keyword|converting|conversion=1}} to assist combos. |
|
| |
|
| If the opponent is not careful, Light Crest can also activate '''[[Assist_(Dissidia_012)#Assist_Charge|Assist Charge]]''', which greatly benefits The Emperor. | | If the opponent is not careful, Light Crest can also activate '''[[Assist_(Dissidia_012)#Assist_Charge|Assist Charge]]''', which greatly benefits The Emperor. |
| Line 293: |
Line 308: |
| |cancels3=Dodge | | |cancels3=Dodge |
| |asthit3= | | |asthit3= |
| | |image=https://dissidia.wiki/images/f/f2/Brv_the_emperor_dynamite_a_lv1.jpeg |
| }} | | }} |
| | |
| | [[File:Brv_the_emperor_dynamite_a_lv2.jpeg|thumb|LV2 Dynamite is larger than uncharged.]] |
| | |
| | [[File:Brv_the_emperor_dynamite_a_lv3.jpeg|thumb|LV3 Dynamite is even larger.]] |
|
| |
|
| Dynamite is used as a tool for pressure and combos. Charging it increases priority, which staggers or crushes blocks the longer it is charged. This, along with strong pull effect and generous {{keyword|hit stun|hitstun=1}} make it good for starting assist combos whether it hits or gets blocked. The max charge (LV3) Dynamite can also combo naturally into the sticking ball against characters on the ground / at a wall. LV3 Dynamite holds the opponent in place long enough to knock them into other traps, such as Flares or Dreary Cells. | | Dynamite is used as a tool for pressure and combos. Charging it increases priority, which staggers or crushes blocks the longer it is charged. This, along with strong pull effect and generous {{keyword|hit stun|hitstun=1}} make it good for starting assist combos whether it hits or gets blocked. The max charge (LV3) Dynamite can also combo naturally into the sticking ball against characters on the ground / at a wall. LV3 Dynamite holds the opponent in place long enough to knock them into other traps, such as Flares or Dreary Cells. |
| Line 317: |
Line 337: |
| |effect=Absorb, Wall Rush, Block Low (Ranged) | | |effect=Absorb, Wall Rush, Block Low (Ranged) |
| |cp=30 (15) | | |cp=30 (15) |
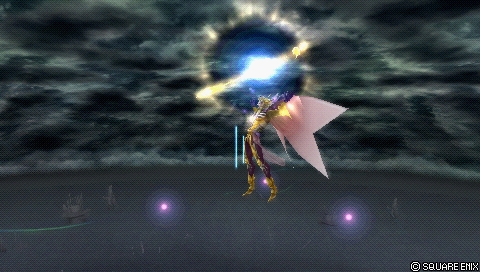
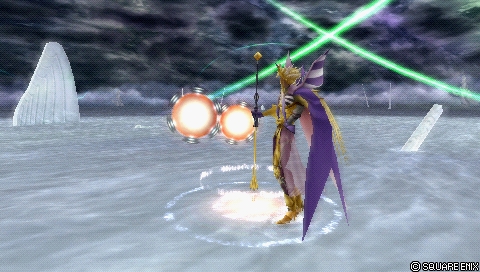
| | |image=https://dissidia.wiki/images/a/aa/Hp_the_emperor_starfall_g_1.jpeg |
| | |imgpos= |
| | |cancels= |
| | |asthit= |
| | |level= |
| | |ap= |
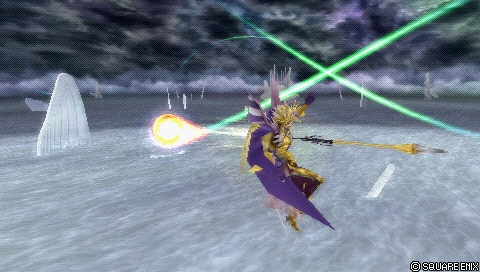
| | |gametext=[Long] Call down giant meteor. <br>Long cast. Aim with analog stick. |
| }} | | }} |
| ''[Long] Call down giant meteor. Long cast. Aim with analog stick.''
| |
|
| |
|
| Your win condition and the reason they should be scared of you with its own utility over the air version
| | <gallery mode="packed" widths=165 heights=170> |
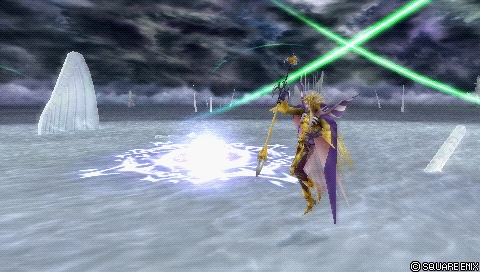
| | File:Hp_the_emperor_starfall_g_2.jpeg|(1) Sigils are drawn as Starfall reaches completion... |
| | File:Hp_the_emperor_starfall_g_3.jpeg|(2) Once completed, projectiles rain down. |
| | File:Hp_the_emperor_starfall_g_4.jpeg|(3) The Emperor can move while the meteor falls! |
| | </gallery> |
| | |
| | [[File:Hp_the_emperor_starfall_g_5.jpeg|thumb|Traps can protect The Emperor while casting.]] |
| | |
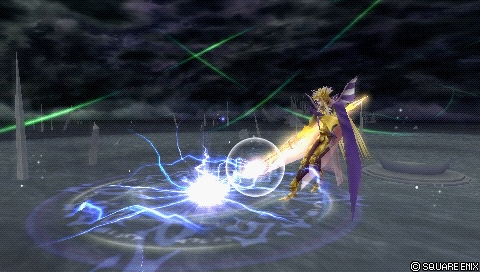
| | Starfall is The Emperor's signature long-range pressure tool. It is used to get quick access to low altitude air HP attacks, fill assist gauge quickly with repeated button presses, and force HP damage on anyone who plays too passively. Casting Starfall takes over 8,5 seconds, but it hits almost anywhere and becomes borderline inescapable without meter. The long attack duration and the ability to move while Starfall does damage allow repositioning and casting more Starfalls. In essence, this is a provocation tool and a unique win condition with Side by Side {{accsp}}, since The Emperor gets enough assist gauge from Starfall hits to loop it with {{012jec}} assist multiple times. |
|
| |
|
| Functionally its identical to Air Starfall, but it's much more effective to use over Thunder Crest due to its innate spacing, shutting down a ton of moves that could stop Emperor from casting.
| | The Emperor can move while casting, and is completely actionable once he is finished casting. When Starfall is successfully cast, The Emperor also gets brief {{keyword|invincibility|invincibility=1}} before his casting state ends. |
|
| |
|
| Due to slightly popping up off the ground, it can also be used to avoid using ground jump which is relevant for Pre-Jump{{accboo}} in builds. Additionally that slight pop up can be used to dodge certain grounded moves on the fly, like Tifa's Waterkick.
| | The Emperor blocks Ranged Low attacks while casting, which is great for protecting against moves such as {{012seph}}'s Shadow Flare, {{012lig}}'s Blizzara and {{012shan}}'s Stun. If Starfall is only pressed briefly, The Emperor becomes actionable very quickly. This is great for filling assist gauge faster, but it also functions as a type of {{keyword|command block|commandblock=1}} for The Emperor. |
|
| |
|
| Grounded Starfall will likely mostly be used for Thunder Crest setups and to get quick access to low-to-the-ground air HPs with good spacing to threaten grounded characters.
| | Starfall's grounded version is mostly identical with the midair version, which is used more often. However, the slight initial upward movement lets The Emperor avoid very low grounded attacks, such as {{012tifa}}'s Waterkick and {{012cec}}'s Valiant Blow. Since Starfall puts The Emperor airborne, it also preserves the Pre-Jump {{accboo}} booster without actually using a jump. Overall a great attack, even if it does not activate all that often. |
|
| |
|
| |-|Flare (ground)= | | |-|Flare (ground)= |
| Line 337: |
Line 371: |
| |effect=- | | |effect=- |
| |cp=30 (15) | | |cp=30 (15) |
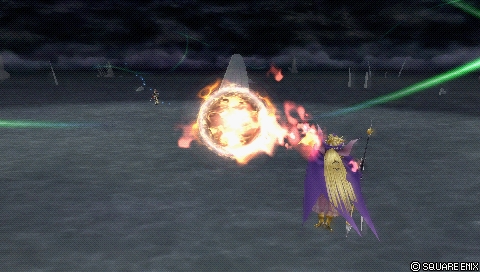
| | |image=https://dissidia.wiki/images/b/b8/Hp_the_emperor_flare_g1.jpeg |
| | |imgpos= |
| | |cancels= |
| | |asthit= |
| | |level= |
| | |ap= |
| | |gametext=[Mid] Gather globe of blue light <br>that slowly homes in on opponent. |
| }} | | }} |
| ''[Mid] Gather globe of blue light that slowly homes in on opponent.''
| |
|
| |
|
| Commonly known as Blue Flare. Mateus throws out a blue Flare ball that slowly homes in. '''Throwing out a Blue Flare will despawn all the ones currently belonging to your side.'''
| | [[File:Hp_the_emperor_flare_g2.jpeg|thumb|Blue Flare follows the opponent for long distances.]] |
|
| |
|
| A matchup defining tool, hard to deal with for characters that have risky or no ways to reflect it and leaving them open for Mateus to punish them. Functionally a stop sign to approaching opponents, leaving them to deal with it somehow. Although it can be punished, it requires often either a good read or reaction, leaving him to play mindgames with it aswell.
| | * Only 1 Flare can be set at a time. |
| | * If Flare is reflected, The Emperor can set another Flare. |
| | * The Emperor can reclaim Flares by reflecting with Bombard, but using Flare again removes all reclaimed Flares. |
|
| |
|
| The Flare itself has little hitstun and doesn't lead to much, but the homing makes it good for annoying the opponent and scare them from approaching recklessly. It can take out assists, shield from most moves, and to sneak in a hit on committal moves. | | Blue Flare is one of The Emperor's signature moves. It is often used to occupy space and make it harder for opponents to fight near The Emperor. It is also used in Thunder Crest combos for solo HP damage. Flare can force opponents to move or reflect it with an HP attack, which gives The Emperor a chance to strike back. Flare has little {{keyword|hit stun|hitstun=1}} and mostly leads to situational combos, but it can take out assists with Auto Assist Lock On and protect The Emperor against various melee attacks. |
|
| |
|
| If the opponent keeps reflecting them they can be reflected back with '''Bombard''' for as many times as they last. Mateus only means to reflecting it being grounded needs to be accounted for in his strategy, as it can backfire without cover up.
| | While Flare is a good move, The Emperor is briefly vulnerable to counterattacks after using it. This requires good reactions from the opponent, but caution is advised anyway. Watch out for characters dodging through Flare, or assists hitting from the sides. High priority command blocks (Jecht Block, {{012exd}} Omni Block) and Bravery Boost on Dodge builds also work against The Emperor here. |
|
| |
|
| If the opponent decides to reflect it, throwing out another or setting up more important traps buys time and builds assist, while keeping them busy with dealing with Flare. Overall an amazing trap just to have some passive pressure flying around. | | If blue Flare is reflected, The Emperor can reflect it back with Bombard as many times as he wants while they last. The opponent's choice to reflect Flare can be used to set up more traps or fill assist gauge. |
|
| |
|
| |-|Dreary Cell (ground)= | | |-|Dreary Cell (ground)= |
| Line 359: |
Line 401: |
| |effect=Absorb | | |effect=Absorb |
| |cp=30 (15) | | |cp=30 (15) |
| | |image=https://dissidia.wiki/images/1/1b/Hp_the_emperor_dreary_cell_g1.jpeg |
| | |imgpos= |
| | |cancels= |
| | |asthit= |
| | |level= |
| | |ap= |
| | |gametext=[Close] Set discreet light trap. <br>Detonates when foe approaches. |
| }} | | }} |
| ''[Close] Set discreet light trap. Detonates when foe approaches.''
| |
|
| |
|
| Grounded Cell. Mateus places a cell, a sigil flashing afterwards before it remains as a spark. '''Can only have 3 Cells out at a time.'''
| | [[File:Hp_the_emperor_dreary_cell_g2.jpeg|thumb|Dreary Cell activates when the opponent gets close...]] |
|
| |
|
| The sigil that flashes as its placed indicates its activation range, requiring the opponent to touch it in order for Dreary Cell to activate and turn into unblockable bombs that pop up and vacuum in. Dreary Cell by itself vacuums in opponents in hitstun even when not activated, and has stronger vacuum than Mine, making it able to be used to drag opponents into Flares or more Mines.
| | [[File:Hp_the_emperor_dreary_cell_g3.jpeg|thumb|... and stops them from pressuring The Emperor.]] |
|
| |
|
| Setting them up wisely and spaced well can limit your opponent immensely as it outright punishes alot of moves and assists on hit when Mateus is caught inside. Take care of moves that avoid the sigil however, as the characters hurtbox has to touch it to activate the trap.
| | * Up to 3 Dreary Cells can be set, regardless of version. |
| | |
| | Dreary Cell is a single hit trap that detonates once the opponent gets close to it. Similar to other traps, Dreary Cell is used for area denial, disrupting aggressive play and solo HP combos. Even if The Emperor gets hit, Dreary Cell can stop the opponent afterwards. The unblockable priority ignores other moves, so opponents must evade the explosion to avoid damage. Since Dreary Cell only does HP damage after detonating, it also activates meter depletion and Side by Side {{accsp}} assist gain effects. For these reasons, Dreary Cell is very effective as an anti-melee character tool. If that's not enough, the absorb effect pulls in anyone without strong momentum or short {{keyword|recovery|recovery=1}} for their attacks. Many assists can also get caught in the blast, which makes Dreary Cell even safer to use. |
| | |
| | The ground version is often used in tandem with Thunder Crest for support. The Emperor has no innate protection while using Dreary Cell, so watch out for projectiles and other midrange attacks that avoid the sigil; {{012squ}}'s Thunder Barret, {{012kuja}}'s Snatch Shot and {{012fir}}'s Reel Axe to name a few. Dreary Cell also has an innate weakness against '''[[Multiplayer_Build_Guide_(Dissidia_012)#Bravery_Boost_on_Dodge|Bravery Boost on Dodge]]''' builds, though that's normal for The Emperor. |
| | |
| | The placed sigil is rather small, but it depicts the activation range pretty accurately. The absorb effect works even when the sigil is idle and the opponent is in {{keyword|hit stun|hitstun=1}}. The pull effect is stronger than Mine, so it has more potential to drag opponents into Flares and Mines. |
|
| |
|
| </tabber> | | </tabber> |
| Line 376: |
Line 430: |
| {{AbilityInfo | | {{AbilityInfo |
| |damage=each (3) | | |damage=each (3) |
| |startup=521F | | |startup=521F (8.6 seconds) |
| |type=Magical | | |type=Magical |
| |priority=Unblockable | | |priority=Unblockable |
| Line 382: |
Line 436: |
| |effect=Absorb, Wall Rush, Block Low (Ranged) | | |effect=Absorb, Wall Rush, Block Low (Ranged) |
| |cp=30 (15) | | |cp=30 (15) |
| | |image=https://dissidia.wiki/images/3/3b/Hp_the_emperor_starfall_a1.jpeg |
| | |imgpos= |
| | |cancels= |
| | |asthit= |
| | |level= |
| | |ap= |
| | |gametext=[Long] Call down giant meteor. <br>Long cast. Aim with analog stick. |
| }} | | }} |
| ''[Long] Call down giant meteor. Long cast. Aim with analog stick.''
| |
|
| |
|
| Your win condition and the reason they should be scared of you....but in the air!
| | [[File:Hp_the_emperor_starfall_a_2.jpeg|thumb|The Emperor can still move while the meteor falls.]] |
|
| |
|
| Mateus starts casting, and after 8.6 secs (521F), 3 small meteors and a giant meteors starts coming down on the opponent.
| | [[File:Hp_the_emperor_starfall_a_3.jpeg|thumb|Traps can protect The Emperor while casting.]] |
|
| |
|
| Without full casting it's already useful as it has a constant Magic Shield while casting, its great for assist building, dodge chains are slightly faster by casting and dodge cancelling, and pops Mateus up slightly for positioning. During casting can float around at a set speed, letting Mateus position more precisely and avoid certain moves that follow and home in.
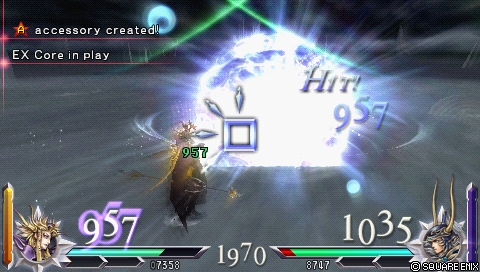
| | Starfall's midair version is mostly identical with the ground version, but it is even more important. This is used more often since it's an aerial move. The practical applications are the same; Forced HP damage, constant magic shield while casting and quick assist gains by tapping Square {{pspsqu}} and dodging. The Emperor wants to use Starfall after the traps have been set, since it forces most opponents to approach and interact with his traps. This can be difficult for some characters to deal with, such as {{012tifa}}, {{012zid}} and {{012jec}}, as it creates disproportionate risk for them to stop the situation. |
|
| |
|
| Once its done casting, it's '''completely unblockable''' and stays out even if Mateus gets hit. 3 small meteors start coming down to lock them down, and a giant meteor afterwards that deals some damage and the HP hit. Always knocks them down to the ground regardless of distance.
| | If The Emperor succeeds, the opponent is forced to take HP damage or spend Assist / EX gauge to avoid it. The {{keyword|frame advantage|frameadvantage=1}} is huge; Thanks to {{012jec}} assist, and Side by Side's {{accsp}} assist gain effect, a successful Starfall enables further Starfalls that are pretty much guaranteed. At bare minimum, Starfall's grounded Wall Rush ensures the second Starfall can be cast halfway. |
| Important to note is that it also tracks assists with assist lock on, and after it did will instantly switch target to the opponent.
| |
|
| |
|
| The frame advantage Emperor gets once it hits is insane compared to most moves in the game, letting him charge half a Starfall while its still active up to the groundrush. Using it paired with already set traps and assist can be hard to deal with for certain characters and practically guarantee either another or a punish should they be forced to play risky into traps. | | Once Starfall is cast, it can be very overwhelming. The Emperor gets invincibility as he recovers from the cast. Starfall is completely unblockable and stays out even if The Emperor gets hit somehow. It hits almost anywhere. Auto Assist Lock On ability stops the opponent's assist and then switches back to the main target afterwards. |
|
| |
|
| | | This is easily one of the most important moves for The Emperor. It rounds out his screen pressure, so building intuition for {{keyword|checkmate|checkmate=1}} situations, when to fake out and when to just move while casting are crucial for effective high level play |
| By far the most important move he has. Getting an idea how to checkmate with it, when to go for it and when to fake out into block or dodge is key to his playstyle and completes his pressure. Make your opponent scared with this and force them to engage and take risks, Mateus traps will do the rest.
| |
|
| |
|
| |-|Flare (midair)= | | |-|Flare (midair)= |
| Line 408: |
Line 466: |
| |effect=Wall Rush | | |effect=Wall Rush |
| |cp=30 (15) | | |cp=30 (15) |
| | |image=https://dissidia.wiki/images/e/e1/Hp_the_emperor_flare_a1.jpeg |
| | |imgpos=60% |
| | |cancels= |
| | |asthit= |
| | |level= |
| | |ap= |
| | |gametext=[Mid] Gather globe of red light <br>that awaits remote detonation. |
| }} | | }} |
| ''[Mid] Gather globe of red light that awaits remote detonation.''
| |
|
| |
|
| Commonly known as Red Flare. Mateus throws out a Flare ball, but instead only homes in for a short time before it stops in place and stays out. '''Can only have 1 out at a time.'''
| | * Only 1 red Flare can be set on the field. |
| | * Wall Rushes downward on hit. |
|
| |
|
| Unlike Blue Flare it's a more defensive trap, staying out to hide behind as a shield, for tricky setups with Mines and Dreary Cell vacuum, and stop reckless dashing in the air. Just like Blue Flare, as soon as it spawns it will come out regardless if Mateus was hit.
| | [[File:Hp_the_emperor_flare_a2.jpeg|thumb|Red Flare travels a little, then stays in place for some time.]] |
|
| |
|
| Red Flare instead causes a wallrush straight down when it hits for huge damage and assist conversions. Good to keep in mind to maximize damage from Thunder Crest confirms.
| | The red Flare is also used for area denial, protection and combos. It has two main differences; It Wall Rushes downwards for more HP damage and assist combos, which is great for Thunder Crest combos. It also {{keyword|tracks|tracking=1}} the opponent for a short period, and then stays in place for some time. This is more of a defensive trap by comparison. The Emperor can use it to stop reckless air dashes and create tricky setups with Mines and Dreary Cell vacuum effect. Just like blue Flare, it will stay on the field after {{keyword|startup|startup=1}} no matter what. That means it can {{keyword|trade|trade=1}} with opponent's attacks. |
|
| |
|
| Mateus can also use it to create some nasty oki setups if he has enough time that can be tricky to deal with.
| | If given enough time, The Emperor can also use Flare to create tricky {{keyword|okizeme|okizeme=1}} setups. |
|
| |
|
| |-|Dreary Cell (midair)= | | |-|Dreary Cell (midair)= |
| Line 428: |
Line 493: |
| |effect=Absorb | | |effect=Absorb |
| |cp=30 (15) | | |cp=30 (15) |
| | |image=https://dissidia.wiki/images/1/11/Hp_the_emperor_dreary_cell_a.jpeg |
| | |imgpos= |
| | |cancels= |
| | |asthit= |
| | |level= |
| | |ap= |
| | |gametext=[Close] Set discreet light trap. <br>Detonates when foe approaches. |
| }} | | }} |
| ''[Close] Set discreet light trap. Detonates when foe approaches.''
| |
|
| |
|
| Air Cell. Mateus places a cell, a sigil flashing afterwards before it remains as a spark. '''Can only have 3 Cells out at a time.'''
| | * Up to 3 Dreary Cells can be set, regardless of version. |
|
| |
|
| The sigil that flashes as its placed indicates its activation range, requiring the opponent to touch it in order for Dreary Cell to activate and turn into unblockable bombs that pop up and vacuum in.
| | [[File:Hp_the_emperor_dreary_cell_a2.jpeg|thumb|A maximum of 3 Dreary Cells can be set.]] |
| Dreary Cell by itself vacuums in opponents in hitstun even when not activated, and has stronger vacuum than Mine, making it able to be used to drag opponents into Flares or more Mines. | |
|
| |
|
| Setting them up wisely and spaced well can limit your opponent immensely as it outright punishes alot of moves and assists on hit when Mateus is caught inside. Take care of moves that avoid the sigil however, as the characters hurtbox has to touch it to activate the trap.
| | Aerial Dreary Cell substitutes Thunder Crest in the air, which makes this version more important for The Emperor. It can be placed anywhere, although only three Dreary Cells can be set at a time. Its traits are otherwise shared with the ground version, including the single hit HP, absorb effect and vulnerability to Bravery Boost on Dodge builds. |
| | |
| | This Dreary Cell is still effective against close-range attacks with longer {{keyword|recovery|recovery=1}}, such as Jecht Stream, Cloud's Slashing Blow and {{012ok}}'s Turbo-Hit. However, The Emperor should watch out for attacks with strong aerial momentum and medium range; {{012squ}}'s Beat Fang and {{012pri}}'s Raging Fists can evade the explosion, while {{012yuna}}'s Sonic Wings can pierce through without activating Dreary Cell. Tidus air BRV assist is also a universal {{keyword|whiff punish|whiffpunish=1}} option against air Dreary Cell, so caution is advised when opponent has assist gauge. |
|
| |
|
| </tabber> | | </tabber> |
|
| |
|
| = EX Mode: Power of Hellfire! = | | == EX Mode: Power of Hellfire! == |
| Effects: | | Effects: |
| * Regen | | * Regen |
| Line 446: |
Line 518: |
| * Blood Magic | | * Blood Magic |
|
| |
|
| == Blood Magic == | | The Emperor's EX mode is fairly powerful, despite the compact perks. Critical hits are great for Thunder Crest and Landmines, while Blood Magic restores enough health for a serious momentum shift. The Emperor generates a decent amount of EX with his key moves, and playing the long game with Starfall complements his traps and EX Core races alike. He may not be the fastest to reach EX mode, but the effects are devastating once he activates it. |
| | |
| | === Blood Magic === |
| | |
| | {{image|https://dissidia.wiki/images/8/84/Ex_mode_the_emperor.jpeg}} |
| | |
| ''[Activates when HP attack hits] Absorbs HP equivalent to damage dealt.'' | | ''[Activates when HP attack hits] Absorbs HP equivalent to damage dealt.'' |
|
| |
|
| A seemingly unfitting EX Mode but with an evil twist. Blood Magic heals back all HP dealt. | | Blood Magic heals the same amount of HP damage that The Emperor inflicts on the opponent. This is quite potent when considering The Emperor's high bravery damage output and his ability to connect HP attacks. A single assist combo can prove to be very beneficial. Having EX Mode is already good for the assist gauge drain and its guaranteed match finishes, but it is also very effective for creating comebacks and cementing huge health leads. |
|
| |
|
| Having EX is already good, but with his high damage and ability to stack high amounts of bravery, Emperor can make comebacks through the Blood Magic perk and heal back loads of damage with a guaranteed assist conversion. Health is a resource for Emperor, and being able to heal alot of it back quickly can change the round entirely.
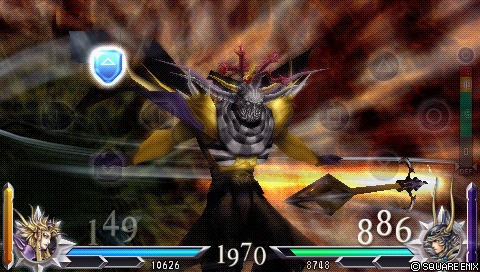
| | === EX Burst: Absolute Dominion === |
|
| |
|
| While the guaranteed finish and assist drain from EX Mode is appreciated too, healing back 5000 through a single Thunder Crest confirm is very satisfying.
| | {{image|https://dissidia.wiki/images/1/17/Ex_burst_the_emperor.jpeg}} |
|
| |
|
| == EX Burst: Absolute Dominion ==
| |
| ''An attack that takes over the opponent's mind. Absorbs HP damage dealt. Enter the commands that display on screen. | | ''An attack that takes over the opponent's mind. Absorbs HP damage dealt. Enter the commands that display on screen. |
|
| |
|
| Line 464: |
Line 540: |
| }} | | }} |
|
| |
|
| = Combos = | | Absolute Dominion is a relatively straightforward EX Burst to execute. Tap whatever button is shown on screen five times to get a perfect EX Burst. Even if character movement is set to directional buttons {{pspdpad}}, they must always be used when prompted. No analog stick inputs for this EX Burst. |
| | |
| | == Combos == |
| | |
| | ''Main combo article pending'' |
| | |
| | === Solo === |
| | |
| | The Emperor has various combos, though most of the practical combos revolve around Thunder Crest. |
| | |
| | {{ComboLegend-012}} |
| | |
| | {{Combo-012 |
| | | data = |
| | {{Combo-012Data |
| | |combo='''Thunder Crest''' > Flare |
| | |condition={{keyword|Punish|punish=1}} / Trap Starter |
| | |requirement=Ground |
| | |purpose=Staple BRV > HP Combo |
| | |damage=~40 + HP |
| | |damagehits=2 x 17, 6 + HP |
| | |ex=120 |
| | |exhits=60 > 60 |
| | |meteropp= |
| | |video= |
| | |notes=The Emperor's staple solo combo for HP damage. A {{keyword|bread-and-butter|bnb=1}}, so to speak. This can be done whenever Thunder Crest connects and The Emperor is close to opponent. Block staggers, {{keyword|trades|trade=1}} or just stray hits are all ok. If Thunder Crest connects before The Emperor can move afterwards, the grounded blue Flare can be pressed repeatedly and it works consistently. |
| | }} |
| | {{Combo-012Data |
| | |combo='''Thunder Crest''' > {{clr|dc=1}} (↑) > Flare (Midair) |
| | |condition={{keyword|Punish|punish=1}} / Trap Starter |
| | |requirement=Ground |
| | |purpose=Higher HP Damage |
| | |damage=17~ + HP & WR |
| | |damagehits=2 x 17 > HP + WR |
| | |ex=120~ |
| | |exhits=60? > 60 |
| | |meteropp= |
| | |video= |
| | |notes=In close range, The Emperor can also dodge upwards and combo into the red midair Flare for more HP damage with Wall Rush. The {{keyword|dodge cancel|dc=1}} can be pressed repeatedly and the Flare has enough time to connect afterwards. Since red Flare forces ground Wall Rush, an early hit can take away max damage from Thunder Crest. This is often negligible, as The Emperor benefits a lot from assist combos and Side by Side's {{accsp}} assist gain. |
| | |
| | <br>For assist combos, it is best to call assist right before red Flare Wall Rushes. This is to ensure The Emperor can do another Thunder Crest as a follow-up. |
| | }} |
| | {{Combo-012Data |
| | |combo='''Thunder Crest''' > Move Closer {{pspana}} > Landmine |
| | |condition={{keyword|Punish|punish=1}} / Trap Starter |
| | |requirement=Ground |
| | |purpose=BRV Damage |
| | |damage=110 |
| | |damagehits=2 x 17 > 35 + 35 |
| | |ex=60 |
| | |exhits=60 > 0 + 0 |
| | |meteropp= |
| | |video= |
| | |notes=This combo capitalizes on Landmine's high damage for Bravery. To ensure both Landmines connect, move closer to the opponent for a split-second before using the attack. This can be made slightly easier if Landmines are set to up ↑ + Circle {{pspcir}}. That makes it so that The Emperor only has to hold up and press Circle {{pspcir}} when appropriate. |
| | }} |
| | }} |
| | |
| | === Assist (Jecht) === |
| | |
| | The Emperor primarily uses Jecht's air BRV assist for assist combos. The downward slam makes it ideal for additional Thunder Crest combos. Whenever Thunder Crest connects, Jecht air BRV can follow up. Use that if nothing else works. Optimizing damage for Thunder Crest routes takes some work, but it is worth the effort. |
| | |
| | {{ComboLegend-012}} |
| | |
| | {{Combo-012 |
| | | data = |
| | {{Combo-012Data |
| | |combo='''Thunder Crest''' > Move Closer {{pspana}} > Landmine > {{clr|astbrv=1}} > Move Closer {{pspana}} > Thunder Crest > Jump > Flare (Midair) |
| | |condition={{keyword|Punish|punish=1}} / Trap Starter |
| | |requirement=Ground |
| | |purpose=BRV Damage, HP |
| | |damage=190 + HP & WR |
| | |damagehits=40 > 35 + 35 (Landmine) > 40 (AST) > 40 > HP + WR |
| | |ex=180~ |
| | |exhits=60 > 0 + 0 > 60~ > 60 |
| | |meteropp= |
| | |video= |
| | |notes=A fairly standard mid level Thunder Crest combo with Landmine {{keyword|fillers|filler=1}} and HP Wall Rush. The following notes assume that Thunder Crest is done close to opponent. |
| | |
| | <br>After Thunder Crest, The Emperor must move closer to connect both Landmines consistently. The BRV damage is high enough to outclass several combo fillers in the game, so it's recommended to practice this. Call assist immediately after doing Landmine, but before they connect. When done correctly, Landmines should hit and Jecht assist still picks up successfully. |
| | |
| | <br>After Jecht assist connects, move towards opponent with basic movement {{pspana}} or a Ground Dash. Then use Thunder Crest after Jecht assist has done two downward hits (he says "I'll give it to you!" during this). If done correctly, Jecht slams the opponent down and Thunder Crest connects smoothly afterwards. If Thunder Crest hits a bit later, The Emperor has more time to jump and midair Flare more easily. |
| | }} |
| | {{Combo-012Data |
| | |combo='''Thunder Crest''' > Flare > {{clr|astbrv=1}} > Move Closer {{pspana}} > Thunder Crest > Jump > Flare (Midair) |
| | |condition={{keyword|Punish|punish=1}} / Trap Starter |
| | |requirement=Ground |
| | |purpose=Combo After Side by Side {{accsp}} Assist Gain |
| | |damage=114~ + HP & WR |
| | |damagehits=40 + HP > 40 (AST) > 34~ + HP & WR |
| | |ex=180~ |
| | |exhits=60 + 60 > 60~ + 0 |
| | |meteropp= |
| | |video= |
| | |notes=If The Emperor needs assist gauge from HP attacks (EXP to Assist or Side by Side {{accsp}}), this is a useful route for air BRV assist. The timing is a bit strict though; Call assist almost immediately after blue Flare does HP damage. If done correctly, Jecht assist should pick up before Thunder Crest knocks the opponent too far. Afterwards the execution is fairly straightforward. Move closer to opponent and use Thunder Crest again. If Thunder Crest hits a bit later, The Emperor has more time to jump and midair Flare more easily. |
| | }} |
| | {{Combo-012Data |
| | |combo='''1st Starfall''' > {{clr|dc=1}} > 2nd Starfall (Hold {{pspsqu}}, Move Away {{pspana}}) > 1st Starfall {{clr|wr=1}} > {{clr|astbrv=1}} > 2nd Starfall OK > {{clr|dc=1}} > Repeat... |
| | |condition=HP Starter |
| | |requirement=Starfall, 1 Assist Gauge, Side by Side {{accsp}} |
| | |purpose=Starfall Loop |
| | |damage=69+ HP & WR |
| | |damagehits=~9 x 3 + HP & WR > 42 + WR (AST) > Repeat... |
| | |ex=0 |
| | |exhits=0 > 0... |
| | |meteropp= |
| | |video=https://www.youtube.com/watch?v=Y-r0hk6Xm9k |
| | |notes=The infamous Starfall loop. This is what The Emperor works towards in any given match, so if he gets this far, victory is pretty much guaranteed. If Starfall activates, The Emperor can use Jecht assist to buy himself enough time to cast another Starfall before the opponent can interrupt it. Side by Side {{accsp}} causes subsequent Starfalls to fill assist gauge even with the initial bravery hits, which guarantees assist for each repetition. This may not be intended by developers, but it is a very strong side effect for The Emperor. |
| | |
| | <br>The mileage of Starfall loop can vary greatly depending on the {{keyword|matchup|matchup=1}} and the stage, but the general rule is longer distance means higher chance of Starfall activation. If the opponent has no long-range attacks to stop The Emperor, that is even better. This is best done in large stages such as Order's Sanctuary or Old Chaos Shrine, where Jecht assist can create larger gaps while The Emperor is running away. |
|
| |
|
| == Solo ==
| | <br>The Emperor must start casting the second Starfall while the first one is raining down. Assist must be called after the Wall Rush, while still casting Starfall. To ensure only BRV assist is used, hold Square {{pspsqu}} and Circle {{pspcir}}, then press L {{pspl}}. This can be tricky to perform with the face buttons, but it is the most consistent way to do it with 2 full assist gauges. Remember to move away from the opponent {{pspana}} while casting Starfall as well. |
|
| |
|
| == Assist == | | <br>Once Starfall has activated, the only thing opponent can do is use Assist or EX to escape. If they mistime Assist Change early (see video example), they can still get hit by Starfall and suffer the loop regardless. Without Side by Side {{accsp}}, The Emperor cannot guarantee nearly as many Starfalls even with 2 assist gauges. This is still unavoidable HP damage, but naturally it gets cut off much earlier, while relying on existing resources. This is one reason to use Side by Side builds over others. |
| | }} |
| | }} |
| | |
| | == Builds == |
| | |
| | ''Main page: '''[[The_Emperor_(Dissidia_012)/Builds|The Emperor (012) Builds]]''' '' |
| | |
| | The Emperor works well with various builds. He can use EX as an inevitable factor or invest into bravery damage. Side by Side {{accsp}} is also very effective for a couple reasons; The Emperor commonly lands HP attacks without assist, so he benefits from the assist gain effect every time it happens. It also lets The Emperor get assist gauge consistently with subsequent Starfalls once the first Starfall has been cast. This leads to the notorious Starfall loop with Jecht assist. |
| | |
| | Because of this, Side by Side builds are very powerful for The Emperor. However, his synergy with other build styles leave room for player expression without compromising his other strengths. |
|
| |
|
| = Builds = | | === Side by Side + High Base BRV === |
| Builds here.
| |
|
| |
|
| <tabber>
| |
| |-|Side by Side=
| |
| {{Build | | {{Build |
| |hp=10172 | | |hp=9683 |
| |cp=450 | | |cp=450 |
| |brv=1157 | | |brv=1683 |
| |atk=177 | | |atk=177 |
| |def=186 | | |def=184 |
| |luk=61 | | |luk=60 |
| |booster= | | |booster=x3.5 |
| |setbonus=Succubus' Soul | | |setbonus= |
| |ast={{012yuna}} | | |ast={{012jec}} / {{012yuna}} |
| |wpn=Blood Sword {{equip}} | | |wpn=Piggy's Stick {{equip}} <br>(Peltast's Gear) |
| |hand=Sanguine Shield {{equip}} | | |hand=Chainsaw {{equip}} <br>(Equip Machines) |
| |head=Blood Helm {{equip}} | | |head=Thornlet |
| |armor=Blood Armor {{equip}} | | |armor=Maximillian {{equip}} <br>(Cavalier's Gear) |
| |acc1={{accbas}} Earring | | |acc1=Bravery Orb {{accbas}} |
| |acc2={{accbas}} Bravery Orb | | |acc2=Dismay Shock {{accbas}} |
| |acc3={{accbas}} Dismay Shock | | |acc3=Battle Hammer {{accbas}} |
| |acc4={{accbas}} Battle Hammer | | |acc4=Empty EX Gauge {{accboo}} |
| |acc5={{accbas}} A Comrade's Vow | | |acc5=Summon Unused {{accboo}} |
| |acc6={{accboo}} Empty EX Gauge | | |acc6=Pre-EX Mode {{accboo}} |
| |acc7={{accboo}} Pre-EX Mode | | |acc7=Pre-EX Revenge {{accboo}} |
| |acc8={{accsp}} Blue Gem | | |acc8=Blue Gem {{accsp}} |
| |acc9={{accsp}} Miracle Shoes | | |acc9=Hero's Seal {{accsp}} |
| |acc10={{accsp}} Side by Side | | |acc10=Side by Side {{accsp}} |
| |summon=Rubicante | | |summon=Rubicante |
| | |dataBRV= |
| | {{Build-AttackData |
| | |brv1-g=Landmine |
| | |branch-1gbrv= |
| | |branch-1ghp= |
| | |brv2-g=Bombard |
| | |branch-2gbrv= |
| | |branch-2ghp= |
| | |brv3-g=Thunder Crest |
| | |branch-3gbrv= |
| | |branch-3ghp= |
| | |brv1-a=Mine |
| | |branch-1abrv= |
| | |branch-1ahp= |
| | |brv2-a=Dynamite |
| | |branch-2abrv= |
| | |branch-2ahp= |
| | |brv3-a=Light Crest |
| | |branch-3abrv= |
| | |branch-3ahp= |
| }} | | }} |
| | | dataHP = |
| | {{Build-AttackDataHP |
| | |hp1-g=Flare |
| | |hp2-g= |
| | |hp3-g=Dreary Cell |
| | |hp1-a=Flare |
| | |hp2-a=Starfall |
| | |hp3-a=Dreary Cell |
| | }} |
| | }} |
| | |
| | {{Build-Ability |
| | |action= |
| | {{Build-AbilitySet |
| | |1=Ground Evasion}} |
| | {{Build-AbilitySet |
| | |1=Midair Evasion}} |
| | {{Build-AbilitySet |
| | |1=Ground Block}} |
| | {{Build-AbilitySet |
| | |1=Midair Block}} |
| | {{Build-AbilitySet |
| | |1=Aerial Recovery}} |
| | {{Build-AbilitySet |
| | |1=Recovery Attack}} |
| | {{Build-AbilitySet |
| | |1=Controlled Recovery}} |
| | {{Build-AbilitySet |
| | |1=Wall Jump}} |
| | {{Build-AbilitySet |
| | |1=Omni Air Dash+}} |
| | {{Build-AbilitySet |
| | |1=Omni Ground Dash+}} |
| | {{Build-AbilitySet |
| | |1=Speed Boost++}} |
| | {{Build-AbilitySet |
| | |1=Jump Boost++}} |
| | {{Build-AbilitySet |
| | |1=Jump Times Boost++}} |
| | {{Build-AbilitySet |
| | |1=Ground Evasion Boost}} |
| | {{Build-AbilitySet |
| | |1=Midair Evasion Boost}} |
| | {{Build-AbilitySet |
| | |1=Evasion Boost}} |
| | {{Build-AbilitySet |
| | |1=Descent Speed Boost}} |
| | |support= |
| | {{Build-AbilitySet |
| | |1=Always Target Indicator}} |
| | {{Build-AbilitySet |
| | |1=EX Core Lock On}} |
| | {{Build-AbilitySet |
| | |1=Auto Assist Lock On}} |
| | |extra= |
| | {{Build-AbilitySet |
| | |1=Perseverance}} |
| | {{Build-AbilitySet |
| | |1=Disable Counterattack}} |
| | {{Build-AbilitySet |
| | |1=EXP to HP}} |
| | {{Build-AbilitySet |
| | |1=Machinery}} |
| | |cp=450 / 450 |
| | }} |
| | |
| | === Build Overview === |
| | |
| | This high base bravery with Side by Side is very similar to the ones that {{012zid}}, {{012fir}} and {{012bez}} use. The idea is also similar: High burst damage with each HP attack and assist combo that follows. The Emperor can build lots of momentum against close-range characters who struggle to break through traps, such as {{012jec}} and Zidane. If The Emperor can cast Starfall successfully, the subsequent '''[[The_Emperor_(Dissidia_012)#Assist_(Jecht)|Starfall loops]]''' can end the match very quickly and decisively. |
| | |
| | == Assist == |
| | |
| | === Synergies === |
| | |
| | |
| | ;Jecht |
| | :One of The Emperor’s strongest assists. Jecht trades some range issues from Yuna for fast braveries, long setup time for traps and deadly win condition with Starfall. He holds the opponent long enough to enable the infamous Starfall loops from a successful Starfall cast. This is very strong with assist gauge depletion, Side by Side and in large stages especially. |
| | :Jecht also sets up Thunder Crest follow-ups, similar to Yuna and Gilgamesh. Jecht’s ground BRV is also useful for converting from stray midair Flare or Dynamite Wall Rush on reaction. It’s great for building momentum, though The Emperor can struggle to combo afterwards from afar. In this regard, jecht assist provides notable benefits both in large stages and small stages. |
| | :Jecht’s usual downsides are in effect here. He gets locked from LV2 Assist Change easily. If the opponent escapes with LV1 Assist Change, The Emperor can struggle to protect Jecht or get high reward due to missing fast aerial melee attacks. |
| | |
| | ;Yuna |
| | :One of the strongest and reliable assists for The Emperor. Yuna's air BRV is the main draw here. It has immunity against LV2 Assist Change staggers. It {{keyword|converts|conversion=1}} reliably from Thunder Crest and Bombard. It has adequate range for {{keyword|whiff punishes|whiffpunish=1}} and interruptions. The air BRV also leads to Thunder Crest on the ground consistently, though the short attack duration makes it hard sometimes in {{keyword|neutral|neutral=1}}. Yuna can also stabilize trap setups, and is one of the safest assists against Assist Change > Assist Lock attempts. This is great for keeping assist gauge advantage. |
| | :Yuna's ground BRV is less reliable, but it allows The Emperor to do Dynamite combos even from far away. Yuna's air HP is also fast and save against LV2 Assist Change if needed for interruptions or combos. Ground HP is not as fast, but nice for scramble situations or interrupting opponents when casting Starfall. |
| | :Yuna assist has a few downsides too. Her lateral range is lacking, and she sometimes struggles to pierce through projectiles. Her Wall Rush range is on the shorter side too, and the short attack duration on air BRV makes it harder to combo with out of the blue in {{keyword|neutral|neutral=1}}. Her HP assists cannot reflect back blue Flare easily despite ground HP having a Melee High priority {{keyword|hitbox|hitbox=1}}. |
| | |
| | <tabber> |
| | |-|Gilgamesh= |
| | Something akin to a "Melee Yuna", Gilgamesh trades LV2 Assist Change immunity for more range, melee HP attacks. Air BRV is slower than Yuna for whiff punishes, but it has more range and BRV damage (with Excalibur). It combos reliably from Thunder Crest and Bombard, and the ground Wall Rush lets The Emperor set up another Thunder Crest for more damage. Gilgamesh air BRV has similar duration as Yuna's, so setups only need minimal adjustment. His ground BRV Wall Rushes from longer distances, and if it doesn't, The Emperor can try to salvage the combo with Flare in close-range. |
| | |
| | Gilgamesh's air HP is a fast melee HP for whiff punishment, and it can reflect back blue Flares. Ground HP is considerably slower, but it can be a decent (albeit expensive) option for finishing matches in grounded scramble situations. |
|
| |
|
| | Similar to Yuna, Gilgamesh has no Assist Chase and relies on mid-range ground Wall Rush. Gilgamesh is less reliable with vacuum effect setups and he is more vulnerable to LV2 Assist Change staggers than Yuna. |
|
| |
|
| Equip Master Protector extra ability.
| | |-|Tidus= |
| | Tidus assist has no height requirement for HP combos, and he is safer against Assist Lock attempts than most assists. |
|
| |
|
| |-|Damage Build with Earthbreaker=
| | The air BRV Hop Step is once again the main draw here. Its fast {{keyword|startup|startup=1}} is great for {{keyword|whiff punishing|whiffpunish=1}} on reaction. A delayed Assist Chase lets The Emperor combo into Flare or Mine, so the basic needs are met. |
| {{Build
| |
| |hp=9644
| |
| |cp=420
| |
| |brv=1095
| |
| |atk=180
| |
| |def=183
| |
| |luk=60
| |
| |booster=6.4x
| |
| |setbonus=Seal of Lufenia
| |
| |ast={{012yuna}},{{012gil}},{{012cec}}
| |
| |wpn=Earthbreaker {{equip}} | |
| |hand=Lufenian Dirk {{equip}} | |
| |head=Lufenian Hairpin {{equip}}
| |
| |armor=Lufenian Jacket | |
| |acc1={{accbas}} Earring | |
| |acc2={{accbas}} Hyper Ring
| |
| |acc3={{accbas}} Power Ring
| |
| |acc4={{accboo}} Grounded
| |
| |acc5={{accboo}} (etc) Summon Unused
| |
| |acc6={{accboo}} Pre-EX Mode
| |
| |acc7={{accboo}} Pre-EX Revenge
| |
| |acc8={{accboo}} Pre-Jump
| |
| |acc9={{accboo}} (Opp) Summon Unused
| |
| |acc10={{accsp}} Glutton
| |
| |summon=Rubicante
| |
| }} | |
|
| |
|
| Equip Best Dresser Extra Ability for +100 {{keyword|base BRV|basebrv=1}}.
| | Ground BRV allows consistent combos from red Flare, though there is little time to react. It can lead to Thunder Crest follow-ups on flat ground though. Air HP Slice n Dice can also pin opponents down and deal HP damage even if The Emperor's traps happen to hit too early. Spiral Cut can punish some attacks, but it's not used often. |
|
| |
|
| Damage build focused on maximizing damage from TC, Dynamite and assist confirms into ground wall rush. It also makes random Mine and Dynamite tags hurt way harder. And it still keeps EX open as a resource with Glutton {{accsp}} to win the endgame
| | |-|Cecil= |
| | A helpful assist when long lateral reach is needed. |
|
| |
|
| {| class="wikitable" | | Air BRV has huge range for both unique {{keyword|whiff punishes|whiffpunish=1}} and {{keyword|conversions|conversion=1}} from weird hits, where even Gilgamesh might not reach. It also provides a ground Wall Rush to work with, and works fine from his important hits. Ground BRV is a niche {{keyword|punish|punish=1}} tool, only really used if The Emperor is in range to convert from the Wall Rush. |
| !scope="row" 3 colspan="4" | Basic Abilities
| |
| |-
| |
| !Actions !! Support !! colspan="2"|Extra
| |
| |-
| |
| |Ground Evasion || Always Target Indicator || Precision Evasion
| |
| |-
| |
| |Midair Evasion || EX Core Lock On || Best Dresser
| |
| |-
| |
| |Ground Block || rowspan="16"|Auto Assist Lock On
| |
| |-
| |
| |Midair Block ||
| |
| |-
| |
| |Aerial Recovery ||
| |
| |-
| |
| |Recovery Attack
| |
| |-
| |
| |Controlled Recovery
| |
| |-
| |
| |Wall Jump
| |
| |-
| |
| |Free Air Dash
| |
| |-
| |
| |Ground Dash
| |
| |- | |
| |Free Air Dash Boost
| |
| |-
| |
| |Assist Gauge Up Dash
| |
| |-
| |
| |Speed Boost++
| |
| |-
| |
| |Jump Boost++
| |
| |-
| |
| |Ground Evasion Boost
| |
| |-
| |
| |Midair Evasion Boost
| |
| |-
| |
| |Evasion Boost
| |
| |-
| |
| |Descent Speed Boost
| |
| |} | |
|
| |
|
| = Build Overview =
| | Air HP can be very annoying for the opponent if put into a bad situation by traps, as well as catch floaty air dodges when anticipated. And it gives a ground Wall Rush too for a nice damaging combo. |
|
| |
|
| == Point Allocation ==
| | Ground HP is once again a niche punish, although a fine one at that. It can catch ground dodges if anticipated, but it's often avoided like the ground BRV. |
| 30 Capacity Points are available to put into either Disable Counterattack, Jump Boosts, Gamblers Spirit or other preferences like Multi Air Slide.
| |
|
| |
|
| '''Pre-Jump requires to have no Jump Times Boosts''' | | Cecil's huge air BRV and HP range makes him good for The Emperor, as he can uniquely punish and deal with moves that can otherwise completely shut him down with how safe they are. Not the first choice, but worth considering when weighing options. |
|
| |
|
| == Substitutes == | | |-|Kuja= |
| | Duodecim's top tier assist, reliable when you need him. He has few notable traits for The Emperor, but far from the worst choice in general. |
|
| |
|
| {| class="wikitable" | | Not the most optimal of combo {{keyword|conversions|conversion=1}}, but still has a great air BRV {{keyword|whiff punisher|whiffpunish=1}} and a decent ground BRV for catching dodges. Both BRVs have Assist Chase and lots of {{keyword|hit stun|hitstun=1}}, which makes Kuja most reliable for Assist Chase combos specifically. The air BRV is particularly noteworthy, because it moves forward and up so much, that it largely ignores reflected Blue Flares. Kuja's BRVs have strong {{keyword|tracking|tracking=1}}, so Dreary Cell's vacuum can easily pull in nearby opponents. |
| |+colspan="3"|Substitutes | |
| ! Equipment !! Replacement !! Notes
| |
| |-
| |
| | Pre-Jump{{accboo}} ||
| |
| * After 30 Seconds{{accboo}}
| |
| * Hero's Essence{{accsp}}
| |
| || A more stable alternative since Pre-Jump can be finnicky to play around for a 5.5x max booster instead of 6.4x. Otherwise if more Jumps are preferred, Hero's Essence can also be substituted in to get the CP
| |
| |-
| |
| | Grounded{{accboo}} ||
| |
| * Aerial{{accboo}}
| |
| * Large Gap in HP{{accboo}}
| |
| || If air play is favored in the matchup, Aerial can keep the boost up consistently. Large Gap in HP can be triggered very easily through an early lead on either side, making it an alternative to push advantage or for comeback potential.
| |
| |-
| |
| | Power Ring{{accbas}} ||
| |
| * Dismay Shock{{accbas}}
| |
| * Battle Hammer{{accbas}}
| |
| * Bravery Orb{{accbas}}
| |
| || If depletion is wanted, Power Ring is easy to replace for minimal damage loss. Higher bravery recovery through Bravery Orb can help with reducing the risk of post-HP hit situations where sitting at 0 bravery for too long might risk a bravery break too easily.
| |
| |}
| |
|
| |
|
| = Attacks =
| | Kujas HPs are also very notable: Air HP is one more thing to throw into scramble situations with The Emperor's traps. Ground HP works as a possible dodge punish, whiff punish and Red Flare combo extender if it's ever needed to close the match. |
|
| |
|
| == Staple == | | |-|Sephiroth= |
| These attacks are recommended regardless of matchup, stage or player preference.
| | A niche {{keyword|matchup|matchup=1}} specific assist. Yet another option for The Emperor in case other assists are not cutting it. |
|
| |
|
| {| class="wikitable" | | His range is a point of interest, as his air and ground BRV are both good {{keyword|whiff punish|whiffpunish=1}} tools, and can poke through certain moves. They also lead to Assist Chase, but The Emperor needs to manually delay his follow-up to combo afterwards. |
| !scope="row" 3 colspan="3" | Basic Abilities
| |
| |-
| |
| !Actions !! Support !! Extra
| |
| |-
| |
| | || ||
| |
| |}
| |
| == Flexible ==
| |
| These attacks are great to have, but can be swapped or removed depending on matchup, stage or player preference.
| |
|
| |
|
| {| class="wikitable"
| | Sephiroth's air HP is even more of a niche punish and scramble glue. It has strong homing in such situations, and it can cover plenty of space. It can be hard to avoid when traps have been set. Ground HP is much the same, but least notable for The Emperor. |
| !scope="row" 3 colspan="3" | Basic Abilities
| |
| |-
| |
| !Actions !! Support !! Extra
| |
| |-
| |
| | || ||
| |
| |}
| |
| == Avoid ==
| |
| </tabber> | | </tabber> |
|
| |
|
| = Assist = | | === The Emperor Assist Data === |
| | |
| == The Emperor's assist data == | |
|
| |
|
| {{012Assist | | {{012Assist |
| Line 669: |
Line 871: |
| }} | | }} |
|
| |
|
| == Assists == | | === Assist Overview === |
| <tabber>
| |
| |-|Yuna=
| |
| One of the strongest assists and most reliable for Mateus to have in every way. Air BRV converts reliably off of Thunder Crest, Bombard, and in setups; stabilizing them. She is also one of the safest on assist change, fantastic to keep the meter advantage.
| |
| | |
| She has great whiff punish BRVs for Mateus to use. Air BRV is fast and has huge range, Ground BRV less reliable but giving a wallrush to confirm off of with Dynamite even from far away. Air HP is also fast and safe on lvl2 assist change, and Ground HP while not as fast is huge and great to throw into scramble situations or to punish risky moves into Starfall.
| |
| | |
| One of her biggest upsides however is the reliable spacing she gives when comboing off of Thunder Crest. Her air BRV is one of the most reliable groundrushes to space around and get the optimal distance for Thunder Crest followups, letting him double his BRV damage output easily.
| |
| | |
| Yuna does have some disadvantages to substitute her for other assists though. She can't reflect Blue Flare with her HP assist, a bit lacking in range, and sometimes unable to punish attacks with projectile shielding.. Her wallrush range is on the shorter side too, along with her short attack duration sometimes making converting off her in air neutral quite difficult. Her Ground BRV being generally a poor combo assist can also be unfortunate in most stages.
| |
| | |
| Despite being so good, other assists can do better and similar jobs in some cases to maybe consider changing around for certain matchups. Still, Yuna is likely the assist Mateus will learn to love the most.
| |
| | |
| |-|Gilgamesh=
| |
| Lovably calling him "Melee Yuna".
| |
| | |
| Gilgamesh gives similar benefits to Yuna for Mateus. Air BRV is slower than Kuja for whiff punishes but with more range, and converts reliably off of Thunder Crest, Bombard, but on the less reliable side with vacuum setups. He has more groundrush range than Yuna and lasts just as long so setups barely have to be adjusted. His Ground BRV has larger wallrush range too and can be hit into with Flare to try and salvage should he not get a wallrush.
| |
| | |
| His HPs are great too. Air HP is a fast, melee HP for whiff punish, and has the benefit of reflecting Blue Flare back while punishing HPs Yuna struggles with in reflect scenarios. Ground HP is on the slower side again but spawns far away, also has a deceptively big hitbox that can end up killing scrambles in grounded footsies.
| |
| | |
| He has the same downsides as Yuna with no assist chase and relying on mid-range wall rush, trades safety on assist change for way more range and Melee HPs, but keeps the amazing combo friendliness that Mateus loves to make stray hits hurt.
| |
|
| |
|
| |-|Jecht= | | The Emperor assist is niche, but powerful under certain circumstances. He enables various ground combos with Thunder Crest, and Mines do lots of damage after long holds and early ground Wall Rush assist calls. Contrary to most assists, The Emperor is difficult to '''[[Assist_(Dissidia_012)#Assist_Lock|Assist Lock]]''' due to his priorities ignoring '''[[Assist_(Dissidia_012)#LV2_Assist_Change|LV2 Assist Change]]''' staggers. Hitting The Emperor manually is also challenging, since he disappears quickly after his attacks. This gives him a distinct advantage, even if it comes at the cost of accessible assist combos for many characters. |
| A top tier assist for a reason in 012.
| |
|
| |
|
| Jecht has both fast air and ground BRVs for whiff punishes and gives plenty of time to line up setups to pick up from. His ground assist can be difficult to combo off of for Mateus from large ranges, requiring him to be fairly close. More importantly, it lets Mateus combo off of stray groundrush hits from Red Flare and Dynamite on reaction, which can be a huge gamechanger in certain matchups.
| | The main thing that limits The Emperor's combo potential is having his attack tied to the player's position; Thunder Crest only comes out if the player character is on the ground, and Mine only comes out if the character is in the air. That being said, The Emperor is one of the few assists viable for double assist combos thanks to his disappearance before Thunder Crest (and sometimes Mine) combo disables assist gauge temporarily. {{012squ}} is especially effective at capitalizing on The Emperor's strengths and combo potential. {{012pri}} can also combo into Mines with delayed Raging Fists, creating elaborate high damaging air combos. Other than that, The Emperor assist is not commonly used in competitive play. |
|
| |
|
| His HPs are both on the slower side making them harder to use for punishes, but can still solve some scramble situations. They are huge, move forward fast and cover some nasty angles paired with traps.
| | Further reading: '''[[Tier_List_(Assist)#The_Emperor|The Emperor (Assist Tier List)]]''' |
| | |
| Most important however, is that Jecht holds the opponent so long he enables a '''pseudo-infinite with Starfall''' and [[Assist_(Dissidia_012)#Side_by_Side|'''Side by Side''']] {{accsp}}, by comboing off of the Starfall groundrush with Ground/Air BRV and charging another Starfall during that window. It's a pseudo-loop that few characters can truly escape from, especially on larger stages, making it a powerful win condition. Especially when it's possible to be set up from Thunder Crest and Dynamite hits even.
| |
| | |
| He's not without downsides however, as aside from the usual downsides of melee assist hits against Lvl2 Assist Change, Mateus has a hard time covering his assist if they Lvl1 Assist Change out aswell making him easily and safely locked by alot of characters.
| |
| | |
| He trades some range issues and consistent setup spacing for a powerful wincon for Mateus, effectively changing the threat level of Starfall going off immensely. '''Paired with Assist Depletion and [[Assist_(Dissidia_012)#Side_by_Side|'''Side by Side''']] {{accsp}}''', Jecht is the one to let Mateus kill someone in possibly a single Starfall.
| |
| | |
| |-|Tidus=
| |
| Another fantastic whiff punish assist. Notable for his BRVs' unique utilities on Emperor.
| |
| | |
| Hop Step, the fastest Air melee BRV assist for reaction whiff punishes into assist chase that Mateus can combo from with a delayed assist chase into Flare or Mine. Likely the reason you ever want to consider him as Mateus.
| |
| | |
| Ground BRV re-ground rushing allows for consistent conversions off Red Flare on stages with flat ground into Thunder Crest and more.
| |
| | |
| Air HP Slice n Dice can also be great for pinning down an opponent, with its strong tracking helping consistency even when hitting Emperor's traps. Ground HP Spiral Cut can punish some moves, but very few and the least notable trait when most other assists can do the same and some more.
| |
| | |
| Mateus might want to consider Tidus assist if he needs a reliable air reaction whiff punish from anywhere. Having no height requirement like Yuna, Gilgamesh and Cecil and more safety than Jecht puts him above them in that regard.
| |
| | |
| |-|Cecil=
| |
| A helpful assist when someone with insane range is needed.
| |
| | |
| Air BRV has huge range to use for both unique whiff punishes and conversions from weird hits where even Gilgamesh might not reach anymore. It also gives him a groundrush to work with and works perfectly fine from his important hits as it should optimally. Ground BRV is a niche punish mostly to be avoided being used unless Mateus is in range to confirm off of the wallrush.
| |
| | |
| Air HP can be very annoying for the opponent if put into a bad situation by traps, aswell as catch floaty dodges when anticipated. And it gives a groundrush too to get possibly a nice damaging combo off of.
| |
| Ground HP is once again a niche punish, although a fine one at that and can catch ground dodges if anticipated too, more to be avoided like the Ground BRV.
| |
| | |
| His huge Air BRV and HP range makes him wanted if ever for Mateus, as he can uniquely punish and deal with moves that can otherwise completely shut him down with how safe they are. Not the first choice, but not to be forgotten when he might be really useful.
| |
| | |
| |-|Kuja=
| |
| Top Tier assist of 012, reliable when you need him.
| |
| | |
| Not the most optimal of combo conversions, but once more a great whiff punish Air BRV and a decent ground BRV for catching dodges, and both having assist chase with loads of hitstun to work with, meaning he is the most reliable if Mateus wants the assist chase. His Air BRV in particular is of interest for him because it moves forward and up so much it largely ignores reflected Blue Flares, and his BRVs have a great homing so that the vacuum of DC can easily pull them in during if near.
| |
| | |
| His HPs are notable for him the most, Air HP giving one more thing to throw into scramble situations with his traps and Ground HP as a possible dodge punish, whiff punish and conversion from Red Flare if its worth the cost.
| |
| | |
| An overall top assist with few notable traits for Mateus, but nonetheless a solid choice to have.
| |
| | |
| |-|Sephiroth=
| |
| A niche matchup specific assist.
| |
| | |
| His range is what should interest Mateus as his Air and Ground BRV are both good whiff punishes and can poke through certain moves, and lead both into assist chase that he needs to manually delay to combo off of.
| |
| | |
| Air HP is even more of a niche punish and scramble glue, having great homing and covering a huge space which can be hard to avoid with traps all around. Ground HP is much the same and the least notable for Mateus.
| |
| | |
| Worth considering to solve matchup woes that can come up while still being perfectly usable in all the ways needed.
| |
| </tabber>
| |
|
| |
|
| = References = | | = References = |

 builds.


 accessory booster.