Garland is a defensive close / mid-range character. His strengths are defined by his braveries that are good at whiff punishing, combos and accumulating EX and bravery.
On the ground, Garland pokes with Deathblow to fill assist gauge safely and threaten anyone approaching him from the air. Lance Charge, ground HP attacks and timing mixups complement the defensive strategy.
Garland fights in the air with a mixture of offense and defense. Twist Drill anti-airs opponents, Bardiche comes down with high damage potential, Cyclone provides area denial and Chain Cast is a whiff punisher and a solo combo starter rolled into one.
Garland has above average base ATK and DEF stats, but his other attributes are a bit lacking. Below average movement speed, no solo HP links and floaty air dodges. His offensive options are limited against air dodges, while his own options for protection after evading are also risky. Not to mention, his air braveries are telegraphed by their specified range.
Historically Garland has been considered a low tier character. However, his representation in competitive play in recent years present a case for a higher position. His grounded defense shuts down many close-range aerial approaches, and most hits lead to lots of bravery and EX. Garland's win condition is defined by his full EX gauge and high bravery stack, where he can end matches with one EX Revenge 5x Bardiche combo. He can exploit the opponent's positioning as a defender on the ground, but his aerial offense is much more linear and restricted by comparison. Garland's long-term strategy is strong, but it always requires multiple hits and resources to guarantee a win.
Strengths
Weaknesses
Whiff Punishment - Several braveries allow Garland to react from various angles.
Bravery Damage - Bardiche, Kuja assist and Chain Cast solo combos can bravery break quickly.
Safe Ground Neutral - Deathblow lets Garland define the pace with less risk than most characters.
EX Gauge Economy - Generates and collects EX efficiently through combos. He can kill earlier with EX Revenge than any other character thanks to Bardiche and Bravery stacking.
Disjoints that can go through projectiles.
Good ground-to-ground presence against close-range characters
Below average movement - Garland is slightly slower on all fronts.
Post-dodge vulnerability - Garland's air dodges leave him vulnerable, and Chain Cast does not protect with invincibility.
Limited aerial dodge punish capability - HPs, Twist Drill and Bardiche need specific angles to hit. Garland struggles to hit fast fallers (e.g. Kain) and back air dodges. Offensive momentum can be difficult to create in these cases.
Flawed aerial neutral and mixups - He can struggle against block in the air, and air HPs provide little utility against most characters.
Fast + long range vulnerability - Air braveries are slower on average, so Garland can get interrupted more easily in face-offs. His anti-zoning options are mostly limited to dashing and Bravery Boost on Dodge builds.
[Close] Broad sword sweep. Change combo with input timing.
Unlocked at level 1
Mastered at 100 AP
Round Edge (Short)Round Edge (Long).
Three sword swipes with two different follow-ups. Press circle before the third swipe for a wall rush finisher, or press circle after it for a chase finisher. Garland's movement can be controlled freely during the first two swipes.
Round Edge is a high commitment attack, which is mainly used after block staggers or to catch opponents by surprise. It is risky to use due to its long startup and animation length. Garland cannot dodge until the first three slashes are done. However, this move also provides notable reward on hit thanks to the precise Deathblow follow-ups; Bravery damage, EX and assist gauge are all great for Garland. Even without Deathblow follow-ups, Round Edge still provides assist combos, above average base damage and EX on the long finisher.
Round Edge is not very safe or effective as a neutral tool. It is quite slow and has little coverage against opponent's defensive options. The second and third round slashes have higher priority which can work sometimes, but given the overall speed, this is easier for opponents to anticipate. Since Garland stops moving by the third slash, its high priority can be difficult to use against moving opponents. It is recommended to use this move with caution.
When locked off, Garland can move in any direction on the ground with Round Edge.
[Mid] High-speed sword thrust. Vertically limited, good range.
Unlocked at level 8
Mastered at 100 AP
Lance Charge is a staple move for Garland. It's a very strong ground-to-ground bravery for its speed, mid priority and assist combos on hit. This is a midrange gap closer and a whiff punisher that goes in a straight line. It's quite effective when used in tandem with Deathblow, such as against blocks, low priority attacks and ground dodges.
Lance Charge staggers regular blocks, and it can follow up with a ground wall rush even if it was blocked. The ground wall rush finisher sets up high damaging Kuja assist combos, so Lance Charge's reward is pretty high with meter. It can punish landing lag and counter opponents after a successful backwards / sideways blodge. Lance Charge travels pretty quickly once active and the range extends slightly past the weapon visuals. It can be a difficult move to punish at ground level due to its short recovery and mid priority
However, this move is quite linear. It loses to fast sideways and upward movement, and higher priority in general. If Lance Charge misses, Garland is left airborne. He is vulnerable to attacks from above and fast assists, and his air dodge can put him in an even worse situation. It will not see much use in aerial focused matchups either, such as against Sephiroth.
[Mid] Swift upwards sword swipe. Low accuracy, quick strike.
Unlocked at level 1
Mastered at 100 AP
One of Garland's strongest bravery attacks. It's a safe poke, anti-air and a combo starter. The active frames are long, the tracking is strong and it recovers quickly, which make this a difficult move to contest. Deathblow is great for filling assist gauge and threatening nearby opponents. Garland does not have to dodge to make this move safe, which is very rare in this game. On hit, it combos into jump > Twist Drill, assist and generates lots of EX Force as a result.
Deathblow is a must-have for close-range ground combat. It ties Garland's defensive gameplay together very well. Even so, it is important to mix things up, so the opponent doesn't catch Garland at a bad time. It still loses to higher priority attacks and well timed blocks. And because it's a ground move, it does little to contest halo camping. It does make it easier to fight with full assist gauge, though.
[Mid] Swing sword upwards. Change combo with input timing.
Unlocked at level 32
Mastered at 100 AP
Highbringer (Low). Press Circle for a chain stab.Highbringer (High). Press Circle for a combo attack.
Highbringer functions as a poke, post-block punisher and an assist combo starter. It is best used as an secondary ground bravery, particularly for aspiring players learning Garland. Highbringer is an uppercut with two built-in follow-up attacks. For low version, tap Circle twice for a chase ender and 90 EX. For high version, hold Circle to become airborne and then tap again for wall rush attack.
Highbringer is quite fast, and it is more beginner friendly for assist combos compared to Deathblow. Both low and high versions can anti-air, and the hit stun and wall rush allow a variety of assist combo routes. The first slash also looks and acts very similarly to Deathblow, so Highbringer often goes uncontested.
However, this attack is is outclassed by Deathblow at higher levels of play. It has much longer recovery, so dodges are needed for long term safety. Highbringer does not lead to the consistent Twist Drill follow-ups, so the reward on hit is weaker and more reliant on assist gauge. The high version has more requirements for notable reward such as short reaction time, assist and sometimes wall rush. It also leaves Garland airborne even if it misses, where he has to avoid getting caught after a dodge.
As a side note, Highbringer (High) first hit can also be dodge cancelled early on hit. However, if Highbringer (Low) first hit connects, the dodge cancel cannot be done as quickly.
[Long] Call down lightning strikes that home in on opponent.
Unlocked at level 19
Mastered at 100 AP
Three bolts spawn on the opponent in a sequence, and push the opponent away. Thundaga is a long range poke, that is mostly used to interrupt opponents. It bypasses solid objects and lingering projectiles, but the damage is low and it needs wall for combos. Garland is vulnerable to attacks during the animation, but the recovery is rather short for a move like this. It can be difficult to whiff punish from a distance. Just watch out for opponent's Free Air Dash and assist.
Thundaga is not used in competitive play often due to its low damage, EX generation and situational combos.
About the wall combos: If opponent is against a wall, the bolts can combo into each other. Garland can follow up with Flare, Chain Cast and even air bravery assists. The upward knockback's direction is also based on where the player's camera is facing.
[Mid] Swipe with twin blades. Approaches foe; limited height.
Unlocked at level 1
Mastered at 100 AP
Garland's primary aerial bravery that advances forward. It's fast, but not fast enough to be always unreactable, though the start-up is tricky to see. Given how Garland's other braveries are telegraphed by their effective range, Twin Swords is similarly linear in application; Twin Swords' main strength lies in having some tracking in all directions, which makes it a consistent counter attack after blocking.
Despite that, Twin Swords' range is average and the homing period is brief. The animation is also rather long. This means it can be dangerous to whiff Twin Swords, and the need for wall rushes skews the risk/reward ratio against Garland. In small stages with low ceilings, Twin Swords can represent a threat more consistently in air-to-air situations. It is not a staple in Garland's aerial kit, but it's not entirely without merit either. Generally speaking it can be difficult to justify over Bardiche, Twist Drill and Chain Cast which provide more utility and reward on hit overall.
[Mid] Swing chain. Low accuracy, but effective against any height.
Unlocked at level 1
Mastered at 100 AP
Garland positions himself above in relation to the opponent for two vertical attacks. Air combo starter, air-to-ground whiff punisher and Garland's primary post-dodge defensive option in the air. It is not invincible, but the movement can help him evade slower dodge punish attempts. On hit, Garland can dodge cancel and combo into Twist Drill for a total of 180 EX (almost 20 % of an EX bar) or Bardiche / Twin Swords at the wall. Chain Cast's consistent damage output, meter generation and applications in the neutral make it an appealing choice for a third bravery slot along with Bardiche and Twist Drill.
Chain Cast has enough hit stun to make empty chase attempts safer on average, although it is not entirely safe to use in all instances. It can also hit behind the opponent's block, though exact conditions are unclear. Being significantly below or above the opponent helps, though.
The hitbox has some oddities. It has gaps and possibly slight deadzones between the chain itself and the tip. Before reaching proper down-forward hitbox there may be a gap just below level height. It could have a small deadzone right in front of Garland as well. This requires further research.
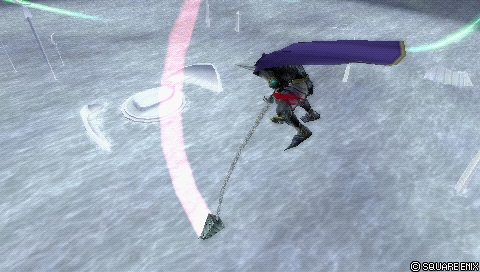
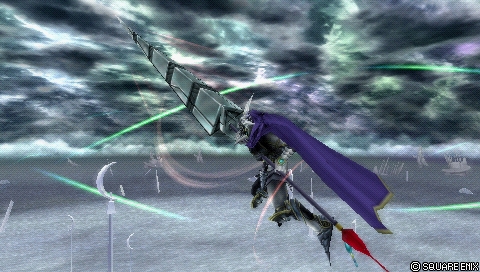
[Dive] Mighty axe swing. Great for attacking from above.
Unlocked at level 4
Mastered at 100 AP
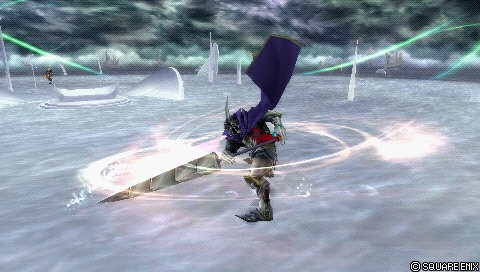
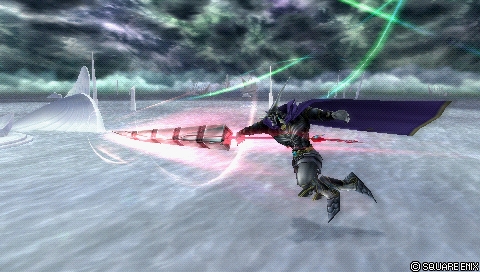
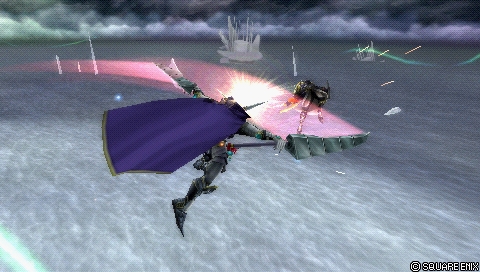
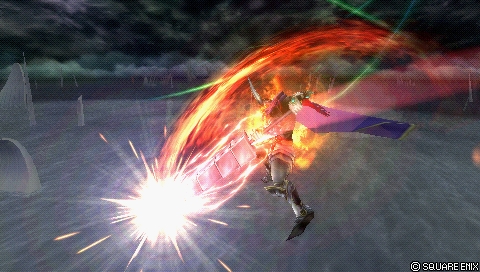
Garland's iconic crushing swing. A staple in Garland's kit due to its speed, average whiff recovery and infamous damage output. It can be used to build assist gauge on whiff and punish long recovery attacks below Garland. Bardiche is primarily run for its reward on hit, namely with ground wall rush assist combos and EX Revenge. The high base damage makes Garland one of the best users of wall rush bravery enhancements (primarily Booster).
Outside of combos, Bardiche's reward is lacking with no EX, short assist confirm window and no automatic Sneak Attack activations. Its other applications in the neutral are also weak due to it exclusively tracking downwards, having a small hitbox and flawed mixup options to support it. It is a loud, telegraphed and relatively slow to start low priority move on a character whose other downward attacks are all slower than 40 frames.
Despite these flaws, Bardiche is commonly used because the damage output is high enough to outweigh the cons.
[Rise] Upwards lunge with sword. Great for attacking from below.
Unlocked at level 28
Mastered at 100 AP
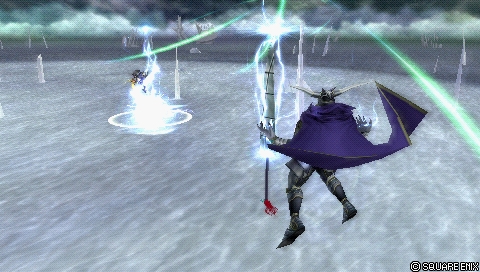
Fast anti-air attack with good combo potential, damage and EX output. Twist Drill primarily tracks opponents above Garland, and it is used as a whiff punisher or an occasional aerial poke. It has good range and can be combo'd into from Deathblow for 180 EX.
Twist Drill has lots of hitstun. It is one of the few moves in the game that provide a safe empty chase anywhere. This is great for both assist combos and taking EX force reliably. A late dodge cancel window and empty chase are both viable starters for Garland's commonly used assists. While Garland is safe after an empty chase, he can still lose to command blocks if he attempts to push his advantage immediately. Challenging recovery attack pokes depends on the matchup and stage positioning as well; Chasing at a corner can leave Garland closer to the opponent than usual.
Twist Drill's whiff recovery is long enough for it to be punishable on reaction. It has a blind spot above Garland's head, and it's only effective at dodge punishing from below. If the opponent has a good read on Garland, they can even use an air BRV assist to shut down Twist Drill.
Even so, Twist Drill is a staple in Garland's air combat. The disjointedhitbox allows him to poke through projectiles and traps, such as Ultimecia charged Knight's Lance. The first part can be dodge cancelled early enough to contest The Emperor's Dreary Cells, and the startup speed can be difficult to react to without practice.
Twist Drill can also hit behind the opponent's block at the right distance and angle below the opponent.
[Long] Call down lightning strikes that home in on opponent.
Unlocked at level 25
Mastered at 100 AP
Same as the ground version, except it can be done anywhere in the air. A valid option against mages and characters with poor mobility, it's main application is still interrupting opponents.
[Close] Split ground with axe. Steals bravery, then takes HP.
Unlocked at level 1
Mastered at 130 AP
Earthquake is a decent mixup against aggressive ground opponents in close range. It tracks well, has strong knockback and the unblockable rocks ignore LV2 Assist Change entirely. Earthquake can anti-air forward ground dodges, particularly with the axe slam. The rocks can anti-air as well. This is an effective move when used sparingly.
Because the rocks act independently, Earthquake can be used to clash with Melee High attacks, such as Tifa's Rolling Blaze or Squall's Revolver Drive and punish them for it. If it trades, the situation is also often in Garland's favor. Earthquake is difficult to punish without mid range attacks or assist, but use it with caution. Aerial attacks can still hit Garland. He often has to dodge to reduce the recovery, which is risky. And assist is the primary way to make it safer on whiff as well. That can be expensive for Garland despite his ground neutral capability.
[Long] Shoot multiple fireballs that chase opponent.
Unlocked at level 16
Mastered at 130 AP
Homing fireballs that can be dodged with well placed dodge. The ground version is not used often, since he already has relatively complete kit on the ground.
Blaze has a bad deadzone in front of Garland, and each fireball can inflict meter depletion on hit. These are traits that carry over to its aerial version, which sees much more use in competitive play.
[Mid] Hurl chain sword. Vertically limited, very accurate.
Unlocked at level 36
Mastered at 130 AP
Tsunami is a tracking, high risk, high reward option against ground dodges. It is also a post-dodge defensive option thanks to the swift upward movement during startup. Tsunami catches ground dodges consistently, and leads to assist combos on hit. That makes this move something of an instigator when assist gauge is available.
Against opponents without command blocks, doing Tsunami and reacting with an assist can be effective for a checkmate interaction. Tsunami can also hit aerial opponents who are close to Garland at the time of impact. Lastly, if Garland staggers an opponent with a blodge (backwards / sideway dodge), Tsunami is guaranteed.
If Tsunami misses, Garland is vulnerable to counter attacks for a few seconds. Assist is needed to offset this drawback, but Garland must be sure the opponent is going to strike back.
[Long] Shoot multiple fireballs that chase opponent.
Unlocked at level 1
Mastered at 130 AP
Blaze is a secondary long range harassment tool, often used with Cyclone for safe zoning. The projectiles track towards the opponent, and they all focus on a singular point of impact. This reduces their screen presence, but each fireball can hit the opponent. That is notable, because each fireball activates the meter depletion effect with Battle Hammer and the like.
Despite the projectiles' speed and relatively brief duration, it is possible to reflect one of them back at Garland. That is rarely a concern for Garland though. A more common downside to Blaze is the lack of protection around Garland once the projectiles have been fired; There is enough time to hit Garland out of Blaze after firing the projectiles, but before he can act again. Using Blaze without protection from Cyclone (or even assist) can lead to unfavorable trades with opponent's assist (Blaze hits, opponent's assist breaks Garland), or assist punishes.
Blaze is a staple for Garland, despite not having strong neutral applications. It has a low hit rate at high level play, but also low risk when used sparingly from a distance. It supports Garland at a range where he doesn't have much presence, and if his opponent struggles to deal with Cyclone, it makes Blaze that much more prominent.
If the opponent has Auto Assist Lock On equipped, and the opponent escapes an assist combo as Garland uses Blaze, the projectiles won't track to the opponent. They will disperse instead.
Cyclone is used as a passive defensive tool, assist combo extender or a safer combo finisher after assist. It has good reward on hit thanks to its EX generation and hit stun - It combos into assists on hit, and even Garland can follow up if Cyclone hits late. Cyclone plays an important role in optimizing Garland's air combos for EX, namely at the ceiling and / or after EX Revenge.
Cyclone consists of two Ranged High projectiles that linger for a moment. But they don't protect Garland from all angles. Disjointed attacks such as Sephiroth's Sudden Cruelty and Aerith's Seal Evil can hit Garland out of it. Advancing high priority moves such as Cloud's Braver and Squall's Rough Divide can also power through Cyclone. Because Garland cannot act again early and or take advantage of Cyclone for long, it is not suited for building offensive momentum.
However, Cyclone can exploit certain shortcomings: Characters without Aerith assist, projectiles, command blocks, disjointed hitbox or a relatively fast advancing Melee High attack. In these cases, Cyclone provides a consistent defensive barrier for Garland.
[Mid] Strike with greatsword, causing large explosion on hit.
Unlocked at level 22
Mastered at 130 AP
Garland's primary HP attack after blocking and finishing assist combos. It tracks the opponent, though it's bad at turning around shortly before moving. The knockback has high wall rush potential, which adds more damage consistently after bravery breaks.
Flare's active frames are very brief and as such, it is not effective at punishing early blocks and catching aerial dodges with Evasion Boost. It also has plenty of recovery frames, which leave Garland vulnerable to attacks for a moment.
If Flare makes contact, Garland will transition into the second hit that deals HP damage. This is true whether the opponent escapes with LV1 Assist Change afterwards or he clashes with a lower priority melee move. It doesn't have particularly strong tracking and Garland can be hit during the animation. Cyclone and Blaze can make up for this weakness, but Flare remains a staple in Garland's arsenal regardless. It is his only consistent aerial HP for block counters.
EX Mode: Class Change!
Effects:
Regen
Critical Boost
Indomitable Resolve
Garland's EX mode is conventionally strong due to his damage output. The threat of his high damaging EX Revenge combos also complements his EX mode, which depletes the opponent's assist gauge upon activation. There aren't many unique perks here, but because Garland can fill his EX gauge effectively through combos, he can get more opportunities to close out matches with it.
Indomitable Resolve
[Active while attacking] Even while taking damage, attacks can be performed without flinching.
Rare instance of super armor in Dissidia 012. During an attack animation, Garland will not flinch from any attack that does not inflict HP damage. This can be good as a surprise attack, and it can also work in a pinch against characters with HP links (Cyclone, anyone?), but remember that EX mode does not alter Garland's attack properties; He can still be blocked.
EX Burst: Soul of Chaos
An attack terrible enough to shake the heavens. Repeatedly press circle to add strength to the attack.
Damage multiplier (initial)
Damage multiplier (rest)
Type
12, 12 (24)
4x3, 3x4, 16, 16, 5x4 (100 total)
Physical
Soul of Chaos requires filling the gauge by repeatedly pressing circle . It's not the strongest EX Burst in the game, but well above average in power thanks to Garland's high base ATK, good initial hits and bravery stacking with a full EX gauge.
Garland has a handful of solo combos, but his most practical ones start with Deathblow or Chain Cast. Both can lead to Twist Drill for plenty of damage and EX, which is great for Garland.
Staple combo. High EX and leads to damaging Kuja assist combos for even more EX. Move and jump as quickly as possible. The later Deathblow hits, the more time Garland has to combo into Twist Drill.
Staple air combo, commonly used as a punish or an assist combo ender. 180 EX is great, which Garland can get by empty chasing immediately. If Garland has assist, he can also start an assist combo by dodge cancelling, or after empty chase ends.
If opponent is far after Chain Cast, Twist Drill may not land all initial hits. This combo does not require wall, but it can be easier to do near walls and corners due to reduced knockback. Garland should remain cautious when empty chasing at a corner, because being closer to the opponent makes him a bit more vulnerable to recovery attack attempts.
When wall is not nearby, Garland can dodge cancel towards opponent more reliably by moving camera sideways after Assist Chase, and then moving with a quarter-circle motion. For example, the camera is tilted to the right so Garland faces to the left. The quarter-circle motion would then be left > left/up > up. The initial left should be held for almost a split second.
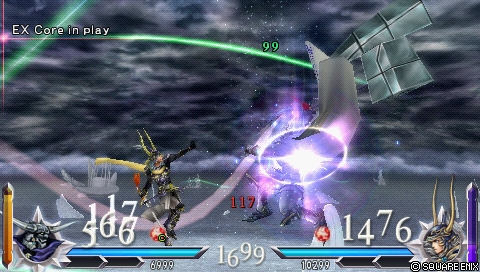
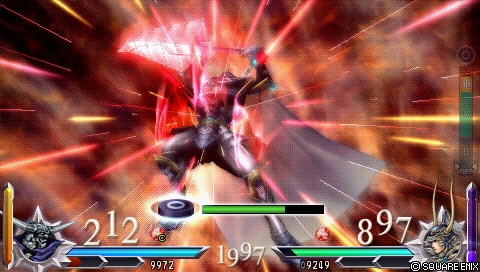
EX Revenge
Garland gets access to some of his strongest combos during EX Revenge, including the notorious Bardiche combo. With EX Revenge, Garland becomes very dangerous to interact with due to its damage potential.
Condition
Combo
Base Damage
EX
Notes
Air starter, close to opponent Full EX Gauge, near ground
Garland's EX Revenge combo is infamous for its insane damage output. It is one of, if not THE strongest EX Revenge combo in the game without assist. As long as Garland is close to the opponent, he can repeatedly use Bardiche up to five times. Each Bardiche can also wall rush, which adds even more damage near ground. This combo requires little adjustment for Garland and it should be fairly easy to execute, as long as pressing Circle repeatedly is not an issue.
This combo is the reason a full EX gauge is so beneficial for Garland. It practically guarantees a bravery break for Garland. And even if it doesn't, the wall rush still lets assists follow up. As a result, this combo can do far more damage than just the listed 165 + HP WR. 4,000 HP is practically killing range for Garland, while having more health usually means being put into Near Death state.
It is important to note, that wall rush contributes a lot to this combo's damage output. Therefore, if Garland cannot wall rush with Bardiche or especially Flare, he won't do nearly as much damage. Furthermore, if Garland needs to approach opponent from a distance, he has less time to do Bardiches. In order to ensure maximum damage, Garland should consider activating EX Revenge close to opponent, while being near ground. Garland can also consider dodging behind the opponent at the beginning to get more critical hits from Sneak Attack extra ability.
Assist
Garland has a well-rounded combo game with few competitive assists. He can start assist combos with most of his moves and any wall rush he gets. This is great for learning the character, but the combos also scale well with builds and a little bit of execution; Garland is capable of doing lots of bravery damage with Bardiche during ground assists, and Chain Cast solo combos generate lots of EX for Garland. Both are great for him, as a full EX gauge is a fantastic win condition.
Kuja does just about everything Garland would want from assist. Combos off of Garland's most important moves, great holding potential for Bardiche fillers and sets up Chain Cast combos for damage and EX.
Condition
Combo
Base Damage
EX
Notes
Poke starter Ground
Highbringer 1st hit (Low) > AST BRV > AC > Flare
70 + HP WR
48
Base Damage (Breakdown): 5 > 50 (Assist) > 15 + HP WR
Opponent Assist (Comrade's Vow): ???
EX Force (Breakdown): 18 > 30
Gap closer / Punish starter Ground
Lance Charge > WR > AST BRV > AC > Flare
92 + HP WR
60
Base Damage (Breakdown): 30 > 47 (Assist) > 15 + HP WR
Opponent Assist (Comrade's Vow): ???
EX Force (Breakdown): 30 > 30
Lance Charge can be used against blocks and for sniping landing lag, which leads to a consistent Kuja assist combo on the ground. If Lance Charge hits from afar or against a blocking opponent, it deals slightly less damage without critical hits. Call Kuja assist quickly after Garland wall rushes.
Poke / punish starter, Wall Rush Air
Bardiche > WR > AST BRV > AC > Flare
92 + HP WR
30
Base Damage (Breakdown): 30 + WR > 47 (Assist) > 15 + HP WR
Opponent Assist (Comrade's Vow): ???
EX Force (Breakdown): 0 > 30
Garland's infamous assist combo starter. Kuja's ground BRV assist is rather slow, so there is not much time to call Kuja assist after wall rush. It has to be done rather early, and reacting to it can be harder if Bardiche connects high above the ground. Once Kuja assist does connect, Garland has lots of time to prepare for Assist Chase or add more Bardiches for extra damage. This is an important combo starter for Garland, so getting used to this move will pay in dividends.
A basic, reliable assist combo that works intuitively for players not used to dodge cancel combos. Chain Cast into Twist Drill is still possible, adds another 15 base damage and 90 EX if Garland can manage it.
HP starter Ground
Tsunami > AST BRV > AC > Flare
77 + HP WR
111
Base Damage (Breakdown): 12 > 50 (Assist) > 15 + HP WR
Opponent Assist (Comrade's Vow): ???
EX Force (Breakdown): 96 > 15
Tsunami can catch ground dodges and blocks a bit easier than Earthquake, and it doesn't require a wall rush. Once Tsunami has dealt HP damage, the opponent will fly upwards a little bit. Call Kuja assist when the opponent is about to stop moving upwards.
HP starter, Wall Rush Air
Flare > WR > AST BRV > AC > Twist Drill
95 + HP WR
120
Base Damage (Breakdown): 15 + HP WR > 50 (Assist) > 30
Opponent Assist (Comrade's Vow): ???
EX Force (Breakdown): 30 > 90
Just like other wall rush starters, Garland can follow up with Kuja assist. Garland can go for another Flare after Kuja, but the reward won't be very good if base bravery doesn't fully recover. Instead, Twist Drill can help deal more bravery damage and fill EX gauge faster. This is a concept that Garland's core combos will capitalize on greatly.
indicates a "Gear" extra ability or the use of Equip Glitch. The total Capacity Point cost will assume the glitch is done.
Substitutes
Basic: Booster for Battle Hammer (assist depletion) or Dismay Shock (EX depletion).
A strong, versatile build. High bravery damage output, enhanced EX absorption and an initial boost for meter and bravery help Garland reach a full EX bar and a subsequent OHKO faster. Use this build as your default.
indicates a "Gear" extra ability or the use of Equip Glitch. The total Capacity Point cost will assume the glitch is done.
A dedicated EX Revenge build.
Against a Tidus with 184 DEF, a critical hit Bardiche can inflict 600+ bravery damage. It is possible to accumulate 5000 bravery during EX Revenge alone. Add two more Bardiches during a Kuja assist combo into a Flare and it amounts to about 7000 HP damage total. One way to mitigate damage from this combo is by equipping the extra ability Disable Sneak Attack.
Assist
Garland Assist Data
Type
Attack
Startup
Position
Spawn
Damage multiplier
Effects
BRV
Round Edge
23F
Ground
Opponent
2 x 4, 6, 16 (30)
Wall Rush
BRV
Bardiche
23F
Air
Opponent
30
Wall Rush
HP
Tsunami
45F
Ground
Opponent
2 x 6 (12)
Chase
HP
Cyclone
51F
Air
Opponent
-
Chase
Assist Overview
Garland is one of the weaker assists in the game. His holds are short, so he relies on wall rush for damage and combo opportunities. Bardiche is fast and it avoids LV2 Assist Change staggers easily if it hits in neutral, but it leaves very little time to follow up. Tsunami has high coverage on grounded opponents and leads to Assist Chase, but it also has high assist cost. Cyclone covers space, but it is difficult to combo into.
Generally speaking Garland assist does not see much use in competitive play, because he does not enable HP attacks consistently anywhere, or complement most characters' strengths otherwise.
Synergies
Garland works with most competitive assists.
Kuja
Kuja is the strongest assist for Garland, because he maximizes Garland's strengths on hit. Great combo potential, high damage output and retains whiff punish capability. Air BRV sets up Chain Cast combos in the air for lots of EX, while ground BRV holds the opponent for two damaging Bardiche fillers. Garland can stack bravery and EX gauge to force a checkmate situation, but Kuja's Force Symphony can help in Chase sequences. The main thing to watch out for is confirming Kuja ground BRV after Bardiche, as there is not much time to react. If opponent escapes from an assist combo early, Garland has to forgo the extra Bardiches to avoid an easy Assist Lock.
Sephiroth
Sephiroth assist has less damaging and versatile combo routes, but he attacks faster on the ground and has wider hitboxes. He is great for whiff punishing on the ground specifically. Bardiche ground combos are also easier to react with Sephiroth ground BRV. Bardiche fillers are still possible on the ground, and even in the air with air BRV assist. The strong pushback on Sephiroth's finishers makes Chain Cast follow-ups much less practical. Twist Drill, Bardiche and Flare still work though. That means Garland gets way less EX compared to Kuja assist, but still does competitive BRV damage with Sephiroth. And of course, Sephiroth cannot bypass LV2 Assist Change staggers as consistently as Kuja can.
Aerith
Aerith lets Garland avoid LV2 Assist Change staggers consistently at the cost of damage and whiff punish capability. Twist Drill and Chain Cast combo into Seal Evil consistently with empty chase, and long range Blaze completes the synergy. This can lead to stronger meter depletion, and Aerith still lets Garland get lots of EX with Chain Cast combos afterwards. Garland rarely needs Aerith to be competitive, but it is possible to use her for double assist combos with Cyclone if needed. If Garland lands Earthquake, Aerith does Cure because Garland is on the ground.
Tidus
Tidus assist provides one of the fastest air BRVs for whiff punishes and a slower ground BRV for extended ground combos. If Garland needs The Emperor to stop doing Dreary Cells, Tidus gets the job done. The ground BRV is also nice for people who want to practice Garland's solo ground combos. Garland does not benefit much from Tidus assist otherwise, even though the air BRV combos are functional.
Please edit this page's roadmap template when relevant additions and changes are made.
29,07 % done
Page
Completed
In progress
To-do
Score
General
Add images for attacks (from PSP if possible).
/ 86
Pros / Cons
Done.
Elaborate on bravery damage, whiff punishment and bad movement.
? / ?
Overview / Character Data
Done.
Review overview.
2 / 2
Bravery Attacks
Ability info, overviews and images.
5 / 5
HP Attacks
Ability info, overviews and images.
5 / 5
EX Mode
Basic info, EX mode effects and EX burst overview. Images.
3 / 3
Combos
Solo combos, most Kuja assist combos.
Add Kuja assist ceiling combo. EX Revenge combos. Add Sephiroth, Tidus and Aerith assist combos and video examples of them.
6 / 7
Builds
2 example build.
Create dedicated build page. Leave only 1 build in Garland's main page. More niche builds. Add build overviews, attack loadouts and substitutes as seen on Cloud's page.
2 / 10
Assist
Assist data and recommended assists added.
Add an overview for Tidus assist and Garland when used as an assist.
2 / 3
Matchups
Create the page, add matchup analysis and tips against every character.
0 / 32
Frame Data
Create the page. A concise PvP guide with core concepts and bare essentials explained concisely. Roughly 25 % of character's total page content.
0 / 1
Starter Guide
0 / 8
Strategy
Create the page and add basic offensive and defensive strategies. Use Jecht and Squall pages as examples.


.jpeg)
.jpeg)

 Booster).
 Large Gap in HP
 White Gem