|
|
| (10 intermediate revisions by the same user not shown) |
| Line 16: |
Line 16: |
| |exclusives=Official Ball, Striker, Grand Slam,<br>World Champion | | |exclusives=Official Ball, Striker, Grand Slam,<br>World Champion |
| |fastestbrv=11F (Hop Step) | | |fastestbrv=11F (Hop Step) |
| |fastesthp= | | |fastesthp=39F (Spiral Cut) |
| |1hithp=No | | |1hithp=No |
| |hplinks=Yes | | |hplinks=Yes |
| |cmdblock=No | | |cmdblock=No |
| |unlock= | | |unlock= |
| |alignment=Chaos (012),<br>Cosmos (013) | | |alignment=Chaos (012),<br>Cosmos ('''[[Glossary_(Dissidia_012)#013|013]]''') |
| |vajp=Masakazu Morita | | |vajp=Masakazu Morita |
| |vaeng=James Arnold Taylor | | |vaeng=James Arnold Taylor |
| Line 76: |
Line 76: |
| }} | | }} |
|
| |
|
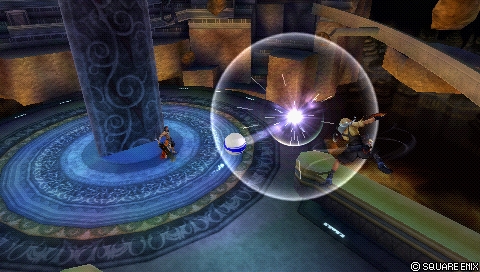
| A swift sword strike followed by a flying kick that pushes back both Tidus and the opponent. Hop Step is Tidus' key [[Glossary_(Dissidia_012)#Poke|'''poke''']] with fastest startup out of all his moves, low recovery and good EX gain at 90. On hit, the second hit can be confirmed with a lenient input window which leads to Chase, but it also works as an assist combo starter with {{012aer}} assist. The initial hit has short hit stun, but it is enough to combo into other assists as well. | | A swift sword strike followed by a flying kick that pushes back both Tidus and the opponent. Hop Step is Tidus' key [[Glossary_(Dissidia_012)#Poke|'''poke''']] with fastest startup out of all his moves, low recovery and good EX gain at 90. On hit, the second attack can be confirmed with a lenient input window which leads to Chase, but it also works as an assist combo starter with {{012aer}} assist. The initial sword slash has short hit stun, but it is enough to combo into other assists as well. |
|
| |
|
| The spinning motion during Hop Step's first hit causes Tidus to cover his vicinity with an active hitbox around him. This, along with the low recovery can make it difficult to whiff punish Hop Step without clashing. | | The spinning motion during Hop Step's first hit causes Tidus to cover his vicinity with an active hitbox around him. This, along with the low recovery can make it difficult to whiff punish Hop Step without clashing. |
| Line 165: |
Line 165: |
| Stick & Move's dodge cancel window on hit is quite late into the animation. However, the sword is capable of damaging the opponent even when it returns back to Tidus which provides just enough time to dodge cancel and combo into Hop Step. <ref>https://www.youtube.com/watch?v=oDOs-TVaqYg&t=18 Stick & Move return hit combo.</ref> This can be difficult to replicate against another human opponent, but it is worth noting as a solo dodge cancel combo starter regardless; It still generates additional meter and combos into commonly used assists. | | Stick & Move's dodge cancel window on hit is quite late into the animation. However, the sword is capable of damaging the opponent even when it returns back to Tidus which provides just enough time to dodge cancel and combo into Hop Step. <ref>https://www.youtube.com/watch?v=oDOs-TVaqYg&t=18 Stick & Move return hit combo.</ref> This can be difficult to replicate against another human opponent, but it is worth noting as a solo dodge cancel combo starter regardless; It still generates additional meter and combos into commonly used assists. |
|
| |
|
| Similiar to Full Slide, Stick & Move's vertical tracking is heavily influenced by assist calls. <ref>https://www.youtube.com/watch?v=KowbxKm8-DQ&t=101 Stick & Move vertical tracking during assist call.</ref> Stick & Move's increased tracking during assist call.</ref> That improves the attack's utility as a mid range whiff punisher against long recovery moves. | | Similiar to Full Slide, Stick & Move's vertical tracking is heavily influenced by assist calls. <ref>https://www.youtube.com/watch?v=KowbxKm8-DQ&t=101 Stick & Move vertical tracking during assist call.</ref> Stick & Move's increased tracking during assist call. That improves the attack's utility as a mid range whiff punisher against long recovery moves. |
|
| |
|
| Overall, Stick & Move has a lot going for it even if it is not a one-size-fits-all dodge attack. Using it on the ground can be a good way to defend against {{012fc}}'s Via Dolorosa HP or {{012squ}}'s Blasting Zone, but be wary of the opponent's assist. The base damage can vary slightly depending on when it hits, but the damage output is not particularly high either way. | | Overall, Stick & Move has a lot going for it even if it is not a one-size-fits-all dodge attack. Using it on the ground can be a good way to defend against {{012fc}}'s Via Dolorosa HP or {{012squ}}'s Blasting Zone, but be wary of the opponent's assist. The base damage can vary slightly depending on when it hits, but the damage output is not particularly high either way. |
| Line 244: |
Line 244: |
| }} | | }} |
|
| |
|
| Tidus' key poke becomes ever more prominent in aerial combat. Most traits are shared with the ground version, including the generous active frames that cover Tidus' body, lenient input window for the followup and frame data. Unlike the ground version, Hop Step floats standing opponents on hit. | | Tidus' key poke becomes even more prominent in aerial combat. Most traits are shared with the ground version, including the generous active frames that cover Tidus' body, lenient input window for the followup and frame data. Unlike the ground version, Hop Step floats standing opponents on hit. |
|
| |
|
| Hop Step's importance cannot be understated. It allows Tidus to build assist meter reliably, harass opponents and convert to Aerith assist which is arguably his strongest assist. Combined with Full Slide, fast post-air dodge fall speed and overall good movement, Hop Step is a textbook competent poke in the context of competitive Dissidia 012 and a staple part of Tidus' kit. | | Hop Step's importance cannot be understated. It allows Tidus to build assist meter reliably, harass opponents and convert to Aerith assist who is arguably his strongest assist. Combined with Full Slide, fast post-air dodge fall speed and overall good movement, Hop Step is a textbook competent poke in the context of competitive Dissidia 012 and a staple part of Tidus' kit. |
|
| |
|
| The low priority and base damage can increase risk against command blocks, but the low amount of hits also means critical hits are more likely to occur for the more damaging second hit. Landing Hop Step consistently is a recipe for success if not for (mental) damage, then for meter as the aerial version also generates 90 EX on hit. Finding ways to land this move will go a long way, though delaying Hop Step is one of the most common mixups for it. | | The low priority and base damage can increase risk against command blocks, but the low amount of hits also means critical hits are more likely to occur for the more damaging second hit. Landing Hop Step consistently is a recipe for success if not for (mental) damage, then for meter as the aerial version also generates 90 EX on hit. Finding ways to land this move will go a long way, though delaying Hop Step is one of the most common mixups for it. |
| Line 645: |
Line 645: |
| * Caladbolg (ATK) | | * Caladbolg (ATK) |
| * Caladbolg (DODGE) | | * Caladbolg (DODGE) |
| | |
| | = Overview = |
| | Tidus' EX mode supports his long term gameplan and comes with few good supporting perks. The big cherry on top is his Caladbolg (ATK) that scales bravery base damage up to 2x at full health. This applies to all of his attacks that deal bravery damage, including EX Burst. That alone makes it great for closing out matches with a good lead. EX Burst is one of the weakest in the game when Tidus is at low health, but because EX mode adds critical hit rate and depletes the opponent's assist gauge upon activation, this is still good for securing a win. |
|
| |
|
| == Mirror Dash == | | == Mirror Dash == |
| Line 659: |
Line 662: |
| ''[Always active while in EX Mode] The period of invincibility between dodging and attacking increases.'' | | ''[Always active while in EX Mode] The period of invincibility between dodging and attacking increases.'' |
|
| |
|
| Dodge frames, the invincibility period during a dodge is increased from 1-20 frames to 1-40 frames, which is the same as using the Evasion Boost basic ability. | | Dodge frames, the invincibility period during a dodge is increased from 1-20 frames to 1-40 frames, which is the same as using the Evasion Boost basic ability. This also applies to the dodge braveries such as Stick & Move, making them more reliable as high commitment counterpokes. |
|
| |
|
| == EX Burst: Blitz Ace == | | == EX Burst: Blitz Ace == |
| Line 725: |
Line 728: |
| Most attacks leave Tidus airborne, which allow him to call Aerith for Seal Evil combos. This includes grounded versions of Hop Step, Stick & Move, Cut & Run, Dart & Weave and Energy Rain. | | Most attacks leave Tidus airborne, which allow him to call Aerith for Seal Evil combos. This includes grounded versions of Hop Step, Stick & Move, Cut & Run, Dart & Weave and Energy Rain. |
|
| |
|
| Cut & Run (midair) > Quick Hit is a common, relatively high power assist combo ender for Tidus. That will be listed in the following combos most of the time. Other enders may be prioritized depending on the situation, such as Jecht Shot to avoid LV2 Assist Change stagger or Slice and Dice to confuse Assist Change retaliation attempts. | | Cut & Run (midair) > Quick Hit is a common, relatively high power assist combo ender for Tidus. That will be listed in the following combos most of the time. Any combo with "(behind opponent)" can do more damage if you have Sneak Attack extra ability equipped. Other enders may be prioritized depending on the situation, such as Jecht Shot to avoid LV2 Assist Change stagger or Slice and Dice to confuse Assist Change retaliation attempts. |
|
| |
|
| {| class="wikitable sortable" | | {| class="wikitable sortable" |
| Line 741: |
Line 744: |
| |Aerith > Chase HP > HP dodged > air jump (behind opponent) > Cut & Run > Quick Hit || 55-61 + HP WR (7, 13, 2x2~2x5, 24, 1x4, 3 + HP WR) || 195 (90, 15, 90) || If the opponent dodges the chase HP, this generates more EX and still lets Tidus follow up with more bravery damage. But ''only'' if it's evaded this way; Opting to eat the chase HP can end the combo early without wall rush. || [https://www.youtube.com/watch?v=oDOs-TVaqYg&t=136 '''Video'''] | | |Aerith > Chase HP > HP dodged > air jump (behind opponent) > Cut & Run > Quick Hit || 55-61 + HP WR (7, 13, 2x2~2x5, 24, 1x4, 3 + HP WR) || 195 (90, 15, 90) || If the opponent dodges the chase HP, this generates more EX and still lets Tidus follow up with more bravery damage. But ''only'' if it's evaded this way; Opting to eat the chase HP can end the combo early without wall rush. || [https://www.youtube.com/watch?v=oDOs-TVaqYg&t=136 '''Video'''] |
| |- | | |- |
| |rowspan="2"|Full Slide (2 parts) || -- || 19~25 (2x3~2x6, 5, 8) || 27 || Mid-stage combo starter, also works with Aerith assist when clashed with reduced damage. The further Tidus is from opponent, the less damage Full Slide will do on hit. || -- | | |rowspan="2"|Full Slide (2 parts) || -- || 19~25 (2x3~2x6, 5, 8) || 27 || Mid-stage combo starter, also works with Aerith assist after clashing with an attack. The further Tidus is from opponent, the less damage Full Slide will do on hit. || -- |
| |- | | |- |
| |Aerith > DC > Free Air Dash > Cut & Run > Quick Hit || 54~66 + HP WR (2x3~2x6, 5, 8, 2x2~2x5, 24, 1x4, 3 + HP WR) || 120 (30, 90) || Reliable wall-less combo. If ceiling is closer than wall, you can opt for Jech Shot ender instead for wall rush damage. || [https://www.youtube.com/watch?v=oDOs-TVaqYg&t=75 '''Video'''] | | |Aerith > DC > Free Air Dash > Cut & Run > Quick Hit || 54~66 + HP WR (2x3~2x6, 5, 8, 2x2~2x5, 24, 1x4, 3 + HP WR) || 120 (30, 90) || Reliable wall-less combo. If ceiling is closer than wall, you can opt for Jecht Shot ender instead for wall rush damage. || [https://www.youtube.com/watch?v=oDOs-TVaqYg&t=75 '''Video'''] |
| |- | | |- |
| |rowspan="2"|Full Slide (Wall Rush) || -- || 40 + WR (2x6, 5, 8, 15) || 30 || -- || -- | | |rowspan="2"|Full Slide (Wall Rush) || -- || 40 + WR (2x6, 5, 8, 15) || 30 || -- || -- |
| Line 799: |
Line 802: |
| |ast=Aerith | | |ast=Aerith |
| |wpn=World Champion | | |wpn=World Champion |
| |hand=Lufenian Dirk ([[CP_Glitch_(Dissidia_012)|'''CP Glitch''']]) | | |hand=Lufenian Dirk {{equip}} |
| |head=Lufenian Headband | | |head=Lufenian Headband |
| |armor=Lufenian Vest | | |armor=Lufenian Vest |
| Line 813: |
Line 816: |
| |acc10={{accboo}} Opponent Summon Unused | | |acc10={{accboo}} Opponent Summon Unused |
| |summon=Scarmiglione | | |summon=Scarmiglione |
| | |dataBRV= |
| | {{Build-AttackData |
| | |brv1-g=Hop Step |
| | |branch-1gbrv= |
| | |branch-1ghp= |
| | |brv2-g= |
| | |branch-2gbrv= |
| | |branch-2ghp= |
| | |brv3-g= |
| | |branch-3gbrv= |
| | |branch-3ghp= |
| | |brv1-a=Full Slide |
| | |branch-1abrv= |
| | |branch-1ahp= |
| | |brv2-a=Hop Step |
| | |branch-2abrv= |
| | |branch-2ahp= |
| | |brv3-a=Cut & Run (midair) |
| | |branch-3abrv= |
| | |branch-3ahp=Quick Hit F |
| | }} |
| | | dataHP = |
| | {{Build-AttackDataHP |
| | |hp1-g= |
| | |hp2-g= |
| | |hp3-g= |
| | |hp1-a=Slice & Dice |
| | |hp2-a=Energy Rain |
| | |hp3-a=Jecht Shot |
| | }} |
| }} | | }} |
|
| |
|
| {|class="wikitable" style="display: inline-table; margin-right: 50px; | | == Basic Abilities == |
| ! scope="row" colspan="2" | Bravery attacks
| | {{Build-Ability |
| |-
| | |action= |
| ! scope="col" | Ground
| | {{Build-AbilitySet |
| ! scope="col" | Aerial
| | |1=Ground Evasion}} |
| |- | | {{Build-AbilitySet |
| |- | | |1=Midair Evasion}} |
| |rowspan="3"|Hop Step || Full Slide | | {{Build-AbilitySet |
| |- | | |1=Ground Block}} |
| |Hop Step | | {{Build-AbilitySet |
| |- | | |1=Midair Block}} |
| |Cut & Run (midair) | | {{Build-AbilitySet |
| |-
| | |1=Aerial Recovery}} |
| ! scope="row" colspan="2" | HP attacks
| | {{Build-AbilitySet |
| |-
| | |1=Recovery Attack}} |
| ! scope="col" | Ground
| | {{Build-AbilitySet |
| ! scope="col" | Aerial
| | |1=Controlled Recovery}} |
| |-
| | {{Build-AbilitySet |
| |rowspan="4"| -- || Slice & Dice | | |1=Wall Jump}} |
| |- | | {{Build-AbilitySet |
| |Energy Rain (midair) | | |1=Free Air Dash}} |
| |- | | {{Build-AbilitySet |
| |Jecht Shot | | |1=Reverse Ground Dash}} |
| |- | | {{Build-AbilitySet |
| |Quick Hit E (from Cut & Run) | | |1=Multi Air Slide}} |
| |} | | {{Build-AbilitySet |
| | |1=Free Air Dash Boost}} |
| | {{Build-AbilitySet |
| | |1=Assist Gauge Up Dash}} |
| | {{Build-AbilitySet |
| | |1=Speed Boost++}} |
| | {{Build-AbilitySet |
| | |1=Jump Boost+}} |
| | {{Build-AbilitySet |
| | |1=Jump Times Boost++}} |
| | {{Build-AbilitySet |
| | |1=Ground Evasion Boost}} |
| | {{Build-AbilitySet |
| | |1=Midair Evasion Boost}} |
| | {{Build-AbilitySet |
| | |1=Evasion Boost}} |
| | {{Build-AbilitySet |
| | |1=Descent Speed Boost}} |
| | |support= |
| | {{Build-AbilitySet |
| | |1=Always Target Indicator}} |
| | {{Build-AbilitySet |
| | |1=EX Core Lock On}} |
| | {{Build-AbilitySet |
| | |1=Assist Lock On}} |
| | |extra= |
| | {{Build-AbilitySet |
| | |1=Precision Jump}} |
| | {{Build-AbilitySet |
| | |1=Precision Evasion}} |
| | {{Build-AbilitySet |
| | |1=Sneak Attack}} |
| | {{Build-AbilitySet |
| | |1=Disable Counterattack}} |
| | {{Build-AbilitySet |
| | |1=EXP to HP}} |
| | |cp=420 / 450 |
| | }} |
|
| |
|
| {| class="wikitable" | | {| class="wikitable" |
| Line 923: |
Line 993: |
| ! scope="col" | Aerial | | ! scope="col" | Aerial |
| |- | | |- |
| |rowspan="2"|Hop Step || Hop Step
| | |Hop Step || Hop Step |
| |- | | |- |
| |Full Slide | | |Full Slide |
| Line 1,490: |
Line 1,560: |
| Tidus is one of the established viable assists in competitive play. He is not a universally effective assist in the way that Kuja is, but what he brings to the table is nothing to sneeze at. Tidus' bravery assists provide a combination of easier whiff punishes in terms of frame data and extended ground combos, while his air HP can be used in chase sequences to set up inescapable damage. Ground HP can harass for a good few seconds if the opponent doesn't jump out of the way, but your mileage may vary. | | Tidus is one of the established viable assists in competitive play. He is not a universally effective assist in the way that Kuja is, but what he brings to the table is nothing to sneeze at. Tidus' bravery assists provide a combination of easier whiff punishes in terms of frame data and extended ground combos, while his air HP can be used in chase sequences to set up inescapable damage. Ground HP can harass for a good few seconds if the opponent doesn't jump out of the way, but your mileage may vary. |
|
| |
|
| '''Sonic Buster''' is slow not unlike Kuja's Snatch Blow, but it is one of the two grounded BRV assists in the game that can end with a ground wall rush. That's great news for Jecht, but also anyone else with an elaborate combo game like {{012cec}}, Cloud and {{012squ}}. Its tracking and holding potential is weaker overall though compared to Kuja, as Tidus moves the opponent around rapidly. Even the first two charges lift on hit and the knockback that occurs from the finishing kick is of good distance and high speed. The lack of tracking isn't a huge issue, but filler hits aren't really possible like with Kuja and Sephiroth assists. Instead, all the additional damage is often back-loaded to the wall rush and that is where the character's combo potential determines the mileage they'll get out of this move. Positioning with dashes and [[Abilities_(Dissidia_012)|'''Multi Air Slide''']] may be necessary to make the most of it.
| | === Sonic Buster === |
| | Sonic Buster is slow not unlike Kuja's Snatch Blow, but it is one of the two grounded BRV assists in the game that can end with a ground wall rush. That's great news for Jecht, but also anyone else with an elaborate combo game like {{012cec}}, Cloud and {{012squ}}. Its tracking and holding potential is weaker compared to Kuja though. The first two charges lift on hit and the knockback from the finishing kick is of good distance and high speed. The lack of tracking isn't a huge issue, but filler hits aren't feasible like with Kuja and Sephiroth assists. Instead, all the additional damage is often back-loaded to the wall rush. That is where the character's combo potential determines the mileage they'll get out of this move. Positioning with dashes and [[Abilities_(Dissidia_012)|'''Multi Air Slide''']] may be necessary to make the most of it. |
| | |
| | === Hop Step === |
| | Hop Step is a great move all on its own and the same is true for the assist. It retains the lightning fast startup which is great for whiff punishes in general. The movement and overall short duration leave ''very'' little time to Assist Change and lock him. Hop Step also provides '''[[Assist_(Dissidia_012)#Assist_Chase|Assist Chase]]''' on hit for reliable follow-ups. However, the bravery damage is pretty low and the time opponent spends in hit stun is brief. This means that interim hits are not possible during Hop Step either. Shorter hit stun also means Tidus assist won't always trade favorably if both players get hit by assists. Follow-ups may not be possible or worse, the player character gets combo'd anyway. |
|
| |
|
| '''Hop Step''' is a great move all on it's own and the same is true for the assist. It retains the lightning fast startup which is great for whiff punishes in general. The movement and overall short duration leave ''very'' little time to Assist Change and lock him and it provides [[Assist_(Dissidia_012)#Assist_Chase|'''Assist Chase''']] on hit for reliable followups. However, the bravery damage is pretty low and the time opponent spends in hit stun is ultimately rather brief. This means that interim hits are not possible during Hop Step either and trading blows with opponent's assist (both assists landed hits) may lock the player out of a followup or worse, they still get combo'd anyway. Another detail worth mentioning is Hop Step's range - When Tidus performs Hop Step, he does not exert much forward movement during startup, nor is the hitbox large. Kuja, Sephiroth and Jecht assists all exhibit these qualities to some extent which give them an advantage in conversions and whiff punishes. So when it comes to timing Tidus assist, calling him slightly later than usual can make a difference as that lets him spawn closer to the opponent. The reach is still shorter than the aforementioned assists though. At the end of the day, Hop Step is a reliable assist move, though it is not necessarily optimal for a lot of characters.
| | Another detail worth mentioning is Hop Step's range - When Tidus performs Hop Step, he does not exert much forward movement during startup. The hitbox is not large either. Kuja, Sephiroth and Jecht assists all exhibit these qualities to some extent which give them an advantage in conversions and whiff punishes. So when it comes to timing Tidus assist, calling him slightly later than usual can make a difference, as that lets him spawn closer to the opponent. The reach is still shorter than the aforementioned assists though. At the end of the day, Hop Step is a reliable assist move, though it is not necessarily optimal for a lot of characters. |
|
| |
|
| '''Spiral Cut''' is a grounded homing combo attack that ends with Assist Chase. Tidus is stuck on the ground the whole time. This is not usually worth the assist gauge, but players who are willing to bet on a misjudged reaction or capitalising on a dodge may find success at times.
| | === Spiral Cut === |
| | Spiral Cut is a grounded homing combo attack that ends with Assist Chase. Tidus is stuck on the ground the whole time. This is not usually worth the assist gauge, but players who are willing to bet on a misjudged reaction or capitalise on a dodge may find success at times. |
|
| |
|
| '''Slice & Dice''' is significantly slower to start than Spiral Cut and does not stay on the field nearly as long (on whiff), but it is not entirely without merit either. Slice & Dice has more tracking than Hop Step to help with interruptions and charge has enough reach to catch opponents during Chase. As long as the preceding attack does not have obscenely high knockback, it is possible to initiate Chase, perform an HP attack and have Tidus do the rest if the opponent dodged the first HP. On the off chance that both HPs connect and send the opponent flying, Slice & Dice homes in on the opponent very aggressively for long distances. And because this ''also'' yields Assist Chase, it pretty much guarantees a followup of some sort.
| | === Slice and Dice === |
| | Slice and Dice is significantly slower to start than Spiral Cut and does not stay on the field nearly as long (on whiff), but it is not entirely without merit either. Slice & Dice has more tracking than Hop Step to help with interruptions and charge has enough reach to catch opponents during Chase. As long as the preceding attack does not have obscenely high knockback, it is possible to initiate Chase, perform an HP attack and have Tidus do the rest if the opponent dodged the first HP. On the off chance that both HPs connect and send the opponent flying, Slice & Dice homes in on the opponent very aggressively for long distances. And because this ''also'' yields Assist Chase, it pretty much guarantees a followup of some sort. |
|
| |
|
| Tidus assist excels in many important areas, but in terms of damage potential he tends to fall behind in comparison to other competitive assists. He also doesn't have Ranged priority moves, which is a common detriment for assist characters. That being said, Assist Chase is surprisingly rare among air BRV assists, which helps keep Tidus assist afloat in the competition. But this is not always enough, his other attacks have to be of some value to the player (character) for him to truly shine. | | === Conclusion === |
| | Tidus assist excels in many important areas, but in terms of damage potential he tends to fall behind in comparison to other competitive assists. He also doesn't have Ranged priority moves, which is a common detriment for assist characters. That being said, Assist Chase is surprisingly rare among air BRV assists, which helps keep Tidus assist afloat in the competition. But this is not always enough. His other attacks have to be of some value to the player (character) for him to truly shine. |
|
| |
|
| == Assists == | | == Assists == |
| Line 1,514: |
Line 1,591: |
| Kuja assist is a staple pick in competitive Dissidia 012, with consistent followups, fast air bravery, good holding potential on the ground and just overall solid bravery damage and meter depletion on hit. Compared to Aerith, Kuja can whiff punish more reliably with Strike Energy BRV while still enabling followups for Tidus' HPs and dodge attacks. The long hit stun also helps him in situations where assists trade blows on player characters. The upward knockback on Strike Energy also helps facilitate ceiling wall rushes with Jecht Shot. And if Sphere Shot manages to stagger the opponent, Kuja can be called for an assist combo. This is easier to do on reaction if the opponent is airborne, as Kuja's Snatch Blow is significantly slower to come out. EX Revenge checkmates can also be circumvented this way, but only if opponent commits to blocking or whiffing at a bad time. It goes without saying that wall rush conversions are also practical. | | Kuja assist is a staple pick in competitive Dissidia 012, with consistent followups, fast air bravery, good holding potential on the ground and just overall solid bravery damage and meter depletion on hit. Compared to Aerith, Kuja can whiff punish more reliably with Strike Energy BRV while still enabling followups for Tidus' HPs and dodge attacks. The long hit stun also helps him in situations where assists trade blows on player characters. The upward knockback on Strike Energy also helps facilitate ceiling wall rushes with Jecht Shot. And if Sphere Shot manages to stagger the opponent, Kuja can be called for an assist combo. This is easier to do on reaction if the opponent is airborne, as Kuja's Snatch Blow is significantly slower to come out. EX Revenge checkmates can also be circumvented this way, but only if opponent commits to blocking or whiffing at a bad time. It goes without saying that wall rush conversions are also practical. |
|
| |
|
| Hot Step conversions become more difficult to perform on average, as Kuja must be called during the first hit instead of completing the attack first. This is true of most assists in the game, but it does mean that Tidus players have to be much more vigilant about timing the assist and finishing Hop Step. With walls, Tidus can push the opponent into them, call Kuja and initiate Chase to collect EX Force and follow up similiar to Aerith. But this is usually only possible when near a wall and outside of that, Kuja makes it more difficult to grab all the EX effectively from Hop Step without increased EX intake range and Tenacious Attacker {{accsp}}. | | Hot Step conversions become more difficult to perform on average, as Kuja must be called during the first hit instead of completing the attack first. This is true of most assists in the game, but it does mean that Tidus players have to be much more vigilant about timing the assist and finishing Hop Step. With walls, Tidus can push the opponent into them, call Kuja and initiate Chase to collect EX Force and follow up similiar to Aerith. But this is usually only possible when near a wall. Outside of that, Kuja makes it more difficult to grab all the EX effectively from Hop Step without increased EX intake range and Tenacious Attacker {{accsp}}. |
|
| |
|
| When using assist to boost Tidus' vertical tracking during certain attacks, Kuja will spawn near the opponent and attempt to attack with a flurry of blows. Connecting Stick & Move, Cut & Run or Slice & Dice in this way will usually cause Kuja to whiff (before or on hit), but Full Slide -a staple air bravery- can still work favorably. And if Tidus clashes, Kuja is in good position to follow up. The lack of ranged priority on Kuja's bravery assists means he is vulnerable to LV2 Assist Change staggers, but if the player is willing to spend both assist bars, Kuja's Force Symphony assist can help brute force HP damage during Hop Step chase sequences. | | When using assist to boost Tidus' vertical tracking during certain attacks, Kuja will spawn near the opponent and attempt to attack with a flurry of blows. Connecting Stick & Move, Cut & Run or Slice & Dice in this way will usually cause Kuja to whiff (before or on hit), but Full Slide -a staple air bravery- can still work favorably. And if Tidus clashes, Kuja is in good position to follow up. The lack of ranged priority on Kuja's bravery assists means he is vulnerable to LV2 Assist Change staggers, but if the player is willing to spend both assist bars, Kuja's Force Symphony assist can help brute force HP damage during Hop Step chase sequences. |
.jpeg)
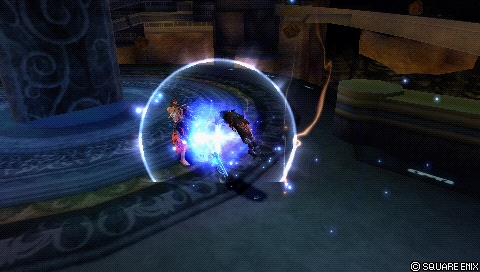

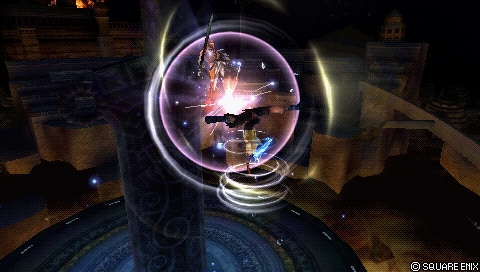

 Hyper Ring
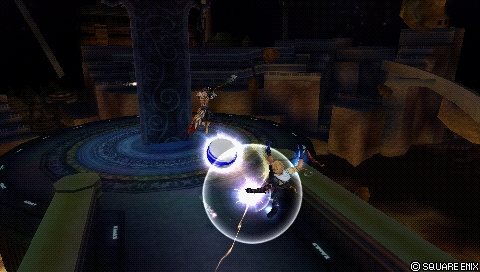
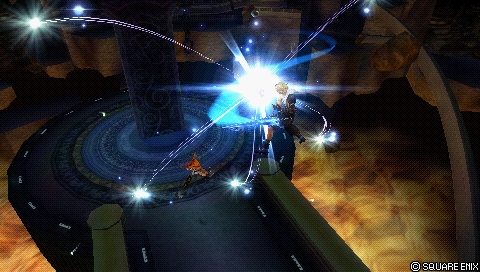
 Large Gap in HP
 .
.