|
|
| (16 intermediate revisions by the same user not shown) |
| Line 6: |
Line 6: |
| |name=Tidus (ティーダ) | | |name=Tidus (ティーダ) |
| |origin=Final Fantasy X | | |origin=Final Fantasy X |
| |weapon=Swords, Grappling Weapons, Daggers, Thrown Weapons | | |weapon=Daggers <br>Grappling Weapons <br>Swords <br>Thrown Weapons |
| |armor=Shields, Bangles, Hats, Helms, Clothing,<br> Light armor, Headbands, Chestplates | | |armor=Bangles <br>Chestplates <br>Clothing <br>Hats <br>Headbands <br>Helms <br>Light Armor <br>Shields |
| |atk=110 (Average) | | |atk=110 (Average) |
| |def=111 (Average) | | |def=111 (Average) |
| |runspeed=4 (Normal, Fast), 1.5 (EX Mode, Very Fast) | | |runspeed=4 (Normal, Fast),<br>1.5 (EX Mode, Very Fast) |
| |dash=73 (Normal, Fast), 65 (EX Mode, Fastest) | | |dash=73 (Normal, Fast)<br>65 (EX Mode, Fastest) |
| |fall=73 (Normal, Above Average), 65 (EX Mode, Fastest) | | |fall=73 (Above Average)<br>65 (EX Mode, Fastest) |
| |fallr=20 (Normal, Very Fast), 14 (EX Mode, Very Fast) | | |fallr=20 (Normal, Very Fast), 14 (EX Mode, Very Fast) |
| |exclusives=Official Ball, Striker, Grand Slam, World Champion | | |exclusives=Official Ball, Striker, Grand Slam,<br>World Champion |
| | |fastestbrv=11F (Hop Step) |
| | |fastesthp=39F (Spiral Cut) |
| | |1hithp=No |
| | |hplinks=Yes |
| | |cmdblock=No |
| | |unlock= |
| | |alignment=Chaos (012),<br>Cosmos ('''[[Glossary_(Dissidia_012)#013|013]]''') |
| | |vajp=Masakazu Morita |
| | |vaeng=James Arnold Taylor |
| }} | | }} |
| | |
| | = Overview = |
| | Tidus is an agile close-range fighter who can fight offensively and defensively as the situation demands. He is well rounded in close quarters, from the notorious Hop Step bravery to good call-out tools, meter gain and dodge punishment game. All of this is punctuated by his mobility; Every aspect of Tidus' movement ranks high or is flat out best in class. Creating distance and generating assist meter with linear dashes is no problem, nor is evading attacks with running and he is always competitive in EX Core races. On top of that, Tidus has one of the fastest post-air dodge fall ratios in the game which makes his aerial dodges a lot safer to use on average. And if the opponent is in range to punish his dodge, one of the three evasive bravery attacks can act a last resort retaliation to keep him safe. |
| | |
| | When it comes to builds, Tidus commonly works with both EX and Assist with an emphasis on damage or bravery boost on dodge. Compared to {{012wol}} and {{012clo}} who can specialise in several build styles, Tidus' competitive build variety is a bit less flexible. He is not a proficient user of [[Assist_(Dissidia_012)#Side_by_Side|'''Side by Side''']] and he relies on assist to land his HPs. His average ATK and DEF stats may not impress at first, but building for bravery damage is worth the investment, especially against characters without high base defense stat. At high health, Tidus can also take advantage of the increased damage multiplier during his EX Mode, which affects not just his braveries but also EX Burst; At full health Tidus can score one of the strongest EX Bursts in the game. And even without high-end damage, Tidus generates a good amount of EX from most of his moves and he tends to land one of them frequently (Hop Step). This means that Tidus can establish a solid lead with meter over time, whether the player invests into EX or not. |
| | |
| | Another one of his distinct strengths lies in unconventional use of assist - A handful of Tidus' attacks have greatly increased vertical tracking if they move Tidus ''during'' an assist call. This is great for surprise attacks and punishing air dodges or long-winded attacks from afar. The window for this is brief, but the movement is executed quickly. |
| | |
| | Tidus' weaknesses may not be immediately apparent, but they do exist. His reliance on Hop Step ''and'' assist lowers his burst damage potential for individual interactions, which can skew the risk / reward ratio against him without meter. The few projectiles he has have limited reach, poor conversion potential or long animations. The other disjoint in Stick & Move bravery is telegraphed and his vertical reach with attacks is mostly below average without assist. The dodge attacks in general are telegraphed with little utility outside of the initial invincibility. His assist synergy is a bit limited -albeit effective as is- without ground due to short hit stun starters, slow startup, high knockback Chase enders or inadequate tracking on HPs. The prowess of the Aerith assist's synergy can also leave some whiff punishes and meter depletion on the table. The HP attacks have long animations on hit, which can restrict Tidus' avenues for HP damage if the opponent can escape with Assist Change. The act of multi-hit braveries during HP attacks presents another problem; Tidus cannot resolve EX Revenge checkmates quickly with a fast single hit HP. |
| | |
| | In competitive play, Tidus has been ranked at mid tier or high tier. He exhibits strong fundamentals up close and his gameplan is straightforward and easy to pick up. His utility is largely shared across both ground and air moves, which can streamline his gameplay for players picking him up for the first time. Tidus can power through higher priority projectiles and even evade {{012emp}}'s infamous Dreary Cell on hit, but he can also struggle to capitalise on these interactions at times. Even so, playing the long game for meter advantage is a tried and true strategy and he does not rely on walls for high damage or stage pressure. Overall, Tidus is a strong character in many ways and he is capable of competing against most of the roster without major struggles. |
|
| |
|
| {{ProConTable | | {{ProConTable |
| Line 29: |
Line 49: |
| *'''Dodge attacks''' do not operate well against low recovery pokes due to slow startup, reducing their potential as cover for air dodges. | | *'''Dodge attacks''' do not operate well against low recovery pokes due to slow startup, reducing their potential as cover for air dodges. |
| }} | | }} |
|
| |
| = Overview =
| |
| Tidus is an agile close-range fighter who can fight offensively and defensively as the situation demands. He is well rounded in close quarters, from the notorious Hop Step bravery to good call-out tools, meter gain and dodge punishment game. All of this is punctuated by his mobility; Every aspect of Tidus' movement ranks high or is flat out best in class. Creating distance and generating assist meter with linear dashes is no problem, nor is evading attacks with running and he is always competitive in EX Core races. On top of that, Tidus has one of the fastest post-air dodge fall ratios in the game which makes his aerial dodges a lot safer to use on average. And if the opponent is in range to punish his dodge, one of the three evasive bravery attacks can act a last resort retaliation to keep him safe.
| |
|
| |
| When it comes to builds, Tidus commonly works with both EX and Assist with an emphasis on damage or bravery boost on dodge. Compared to {{012wol}} and {{012clo}} who can specialise in several build styles, Tidus' competitive build variety is a bit less flexible. He is not a proficient user of [[Assist_(Dissidia_012)#Side_by_Side|'''Side by Side''']] and he relies on assist to land his HPs. His average ATK and DEF stats may not impress at first, but building for bravery damage is worth the investment, especially against characters without high base defense stat. At high health, Tidus can also take advantage of the increased damage multiplier during his EX Mode, which affects not just his braveries but also EX Burst; At full health Tidus can score one of the strongest EX Bursts in the game. And even without high-end damage, Tidus generates a good amount of EX from most of his moves and he tends to land one of them frequently (Hop Step). This means that Tidus can establish a solid lead with meter over time, whether the player invests into EX or not.
| |
|
| |
| Another one of his distinct strengths lies in unconventional use of assist - A handful of Tidus' attacks have greatly increased vertical tracking if they move Tidus ''during'' an assist call. This is great for surprise attacks and punishing air dodges or long-winded attacks from afar. The window for this is brief, but the movement is executed quickly.
| |
|
| |
| Tidus' weaknesses may not be immediately apparent, but they do exist. His reliance on Hop Step ''and'' assist lowers his burst damage potential for individual interactions, which can skew the risk / reward ratio against him without meter. The few projectiles he has have limited reach, poor conversion potential or long animations. The other disjoint in Stick & Move bravery is telegraphed and his vertical reach with attacks is mostly below average without assist. The dodge attacks in general are telegraphed with little utility outside of the initial invincibility. His assist synergy is a bit limited -albeit effective as is- without ground due to short hit stun starters, slow startup, high knockback Chase enders or inadequate tracking on HPs. The prowess of the Aerith assist's synergy can also leave some whiff punishes and meter depletion on the table. The HP attacks have long animations on hit, which can restrict Tidus' avenues for HP damage if the opponent can escape with Assist Change. The act of multi-hit braveries during HP attacks presents another problem; Tidus cannot resolve EX Revenge checkmates quickly with a fast single hit HP.
| |
|
| |
| In competitive play, Tidus has been ranked at mid tier or high tier. He exhibits strong fundamentals up close and his gameplan is straightforward and easy to pick up. His utility is largely shared across both ground and air moves, which can streamline his gameplay for players picking him up for the first time. Tidus can power through higher priority projectiles and even evade {{012emp}}'s infamous Dreary Cell on hit, but he can also struggle to capitalise on these interactions at times. Even so, playing the long game for meter advantage is a tried and true strategy and he does not rely on walls for high damage or stage pressure. Overall, Tidus is a strong character in many ways and he is capable of competing against most of the roster without major struggles.
| |
|
| |
|
| = Bravery Attacks = | | = Bravery Attacks = |
| Line 67: |
Line 76: |
| }} | | }} |
|
| |
|
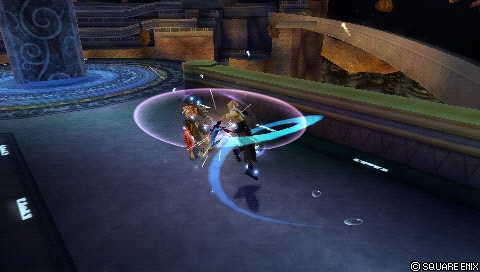
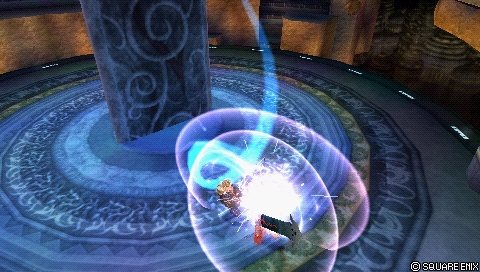
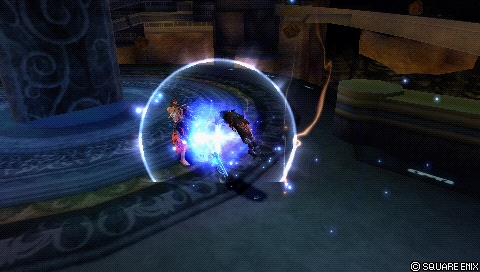
| A swift sword strike followed by a flying kick that pushes back both Tidus and the opponent. Hop Step is Tidus' key [[Glossary_(Dissidia_012)#Poke|'''poke''']] with fastest startup out of all his moves, low recovery and good EX gain at 90. On hit, the second hit can be confirmed with a lenient input window which leads to Chase, but it also works as an assist combo starter with {{012aer}} assist. The initial hit has short hit stun, but it is enough to combo into other assists as well. | | A swift sword strike followed by a flying kick that pushes back both Tidus and the opponent. Hop Step is Tidus' key [[Glossary_(Dissidia_012)#Poke|'''poke''']] with fastest startup out of all his moves, low recovery and good EX gain at 90. On hit, the second attack can be confirmed with a lenient input window which leads to Chase, but it also works as an assist combo starter with {{012aer}} assist. The initial sword slash has short hit stun, but it is enough to combo into other assists as well. |
|
| |
|
| The spinning motion during Hop Step's first hit causes Tidus to cover his vicinity with an active hitbox around him. This, along with the low recovery can make it difficult to whiff punish Hop Step without clashing. | | The spinning motion during Hop Step's first hit causes Tidus to cover his vicinity with an active hitbox around him. This, along with the low recovery can make it difficult to whiff punish Hop Step without clashing. |
| Line 156: |
Line 165: |
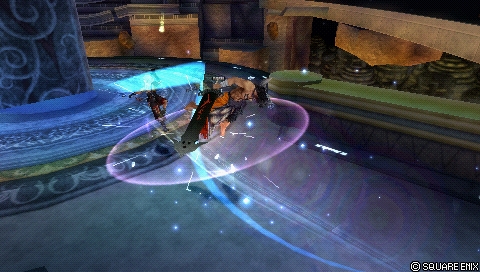
| Stick & Move's dodge cancel window on hit is quite late into the animation. However, the sword is capable of damaging the opponent even when it returns back to Tidus which provides just enough time to dodge cancel and combo into Hop Step. <ref>https://www.youtube.com/watch?v=oDOs-TVaqYg&t=18 Stick & Move return hit combo.</ref> This can be difficult to replicate against another human opponent, but it is worth noting as a solo dodge cancel combo starter regardless; It still generates additional meter and combos into commonly used assists. | | Stick & Move's dodge cancel window on hit is quite late into the animation. However, the sword is capable of damaging the opponent even when it returns back to Tidus which provides just enough time to dodge cancel and combo into Hop Step. <ref>https://www.youtube.com/watch?v=oDOs-TVaqYg&t=18 Stick & Move return hit combo.</ref> This can be difficult to replicate against another human opponent, but it is worth noting as a solo dodge cancel combo starter regardless; It still generates additional meter and combos into commonly used assists. |
|
| |
|
| Similiar to Full Slide, Stick & Move's vertical tracking is heavily influenced by assist calls. <ref>https://www.youtube.com/watch?v=KowbxKm8-DQ&t=101 Stick & Move vertical tracking during assist call.</ref> Stick & Move's increased tracking during assist call.</ref> That improves the attack's utility as a mid range whiff punisher against long recovery moves. | | Similiar to Full Slide, Stick & Move's vertical tracking is heavily influenced by assist calls. <ref>https://www.youtube.com/watch?v=KowbxKm8-DQ&t=101 Stick & Move vertical tracking during assist call.</ref> Stick & Move's increased tracking during assist call. That improves the attack's utility as a mid range whiff punisher against long recovery moves. |
|
| |
|
| Overall, Stick & Move has a lot going for it even if it is not a one-size-fits-all dodge attack. Using it on the ground can be a good way to defend against {{012fc}}'s Via Dolorosa HP or {{012squ}}'s Blasting Zone, but be wary of the opponent's assist. The base damage can vary slightly depending on when it hits, but the damage output is not particularly high either way. | | Overall, Stick & Move has a lot going for it even if it is not a one-size-fits-all dodge attack. Using it on the ground can be a good way to defend against {{012fc}}'s Via Dolorosa HP or {{012squ}}'s Blasting Zone, but be wary of the opponent's assist. The base damage can vary slightly depending on when it hits, but the damage output is not particularly high either way. |
| Line 235: |
Line 244: |
| }} | | }} |
|
| |
|
| Tidus' key poke becomes ever more prominent in aerial combat. Most traits are shared with the ground version, including the generous active frames that cover Tidus' body, lenient input window for the followup and frame data. Unlike the ground version, Hop Step floats standing opponents on hit. | | Tidus' key poke becomes even more prominent in aerial combat. Most traits are shared with the ground version, including the generous active frames that cover Tidus' body, lenient input window for the followup and frame data. Unlike the ground version, Hop Step floats standing opponents on hit. |
|
| |
|
| Hop Step's importance cannot be understated. It allows Tidus to build assist meter reliably, harass opponents and convert to Aerith assist which is arguably his strongest assist. Combined with Full Slide, fast post-air dodge fall speed and overall good movement, Hop Step is a textbook competent poke in the context of competitive Dissidia 012 and a staple part of Tidus' kit. | | Hop Step's importance cannot be understated. It allows Tidus to build assist meter reliably, harass opponents and convert to Aerith assist who is arguably his strongest assist. Combined with Full Slide, fast post-air dodge fall speed and overall good movement, Hop Step is a textbook competent poke in the context of competitive Dissidia 012 and a staple part of Tidus' kit. |
|
| |
|
| The low priority and base damage can increase risk against command blocks, but the low amount of hits also means critical hits are more likely to occur for the more damaging second hit. Landing Hop Step consistently is a recipe for success if not for (mental) damage, then for meter as the aerial version also generates 90 EX on hit. Finding ways to land this move will go a long way, though delaying Hop Step is one of the most common mixups for it. | | The low priority and base damage can increase risk against command blocks, but the low amount of hits also means critical hits are more likely to occur for the more damaging second hit. Landing Hop Step consistently is a recipe for success if not for (mental) damage, then for meter as the aerial version also generates 90 EX on hit. Finding ways to land this move will go a long way, though delaying Hop Step is one of the most common mixups for it. |
| Line 493: |
Line 502: |
|
| |
|
| {{AbilityInfo | | {{AbilityInfo |
| | |image=https://dissidia.wiki/images/9/94/Hp_tidus_jecht_shot.jpeg |
| | |imgpos=50% 0% |
| |damage=5 or 10 (moogle), 10 (15 / 20) | | |damage=5 or 10 (moogle), 10 (15 / 20) |
| |startup=61F | | |startup=61F |
| Line 500: |
Line 511: |
| |effect=Wall Rush | | |effect=Wall Rush |
| |cp=30 (15) | | |cp=30 (15) |
| | |cancels=Dodge |
| | |astatk= |
| | |asthit= |
| | |level= |
| | |ap=130 |
| | |gametext=[Long] Powerful triple kick. Long opening, but great range. |
| }} | | }} |
| ''[Long] Powerful triple kick. Long opening, but great range.''
| |
|
| |
|
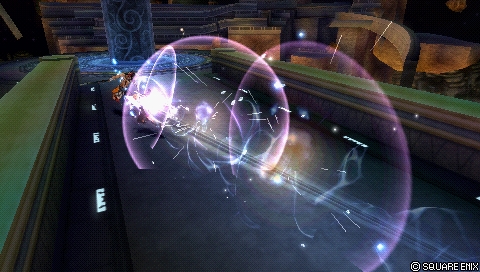
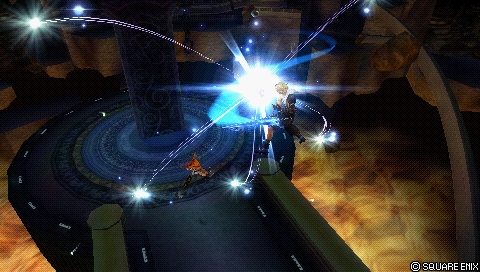
| Three blitzball shots with considerable wall rush knockback. The startup is too slow to punish simultaneous blocks and dodges or hit them before they can dodge again. Even so, this is his strongest HP in terms of base damage, wall rush potential and safety against LV2 Assist Change on hit. This safety comes from a few factors; Both Aerith's assist and Jecht Shot are Ranged priority which don't stagger Tidus when blocked with LV2 Assist Change. Jecht Shot also has enough reach to connect from a dodge's distance and the vertical tracking is adequate for the job. | | Three blitzball shots with considerable wall rush knockback. The startup is too slow to punish simultaneous blocks and dodges or hit them before they can dodge again. Even so, this is his strongest HP in terms of base damage, wall rush potential and safety against LV2 Assist Change on hit. This safety comes from a few factors; Both Aerith's assist and Jecht Shot are Ranged priority which don't stagger Tidus when blocked with LV2 Assist Change. Jecht Shot also has enough reach to connect from a dodge's distance and the vertical tracking is adequate for the job. |
| Line 513: |
Line 529: |
| |-|Energy Rain (midair)= | | |-|Energy Rain (midair)= |
| {{AbilityInfo | | {{AbilityInfo |
| | |image=https://dissidia.wiki/images/0/0d/Hp_tidus_energy_a.jpeg |
| | |imgpos=50% 40% |
| |damage=4, 1 x 6 (10) | | |damage=4, 1 x 6 (10) |
| |startup=53F | | |startup=53F |
| Line 520: |
Line 538: |
| |effect=- | | |effect=- |
| |cp=30 (15) | | |cp=30 (15) |
| | |cancels=Dodge |
| | |astatk= |
| | |asthit= |
| | |level= |
| | |ap=130 |
| | |gametext=[Close] Kick foe, then fire magic. Slow, effective vs. any height. |
| }} | | }} |
| ''[Close] Kick foe, then fire magic. Slow, effective vs. any height.''
| |
|
| |
|
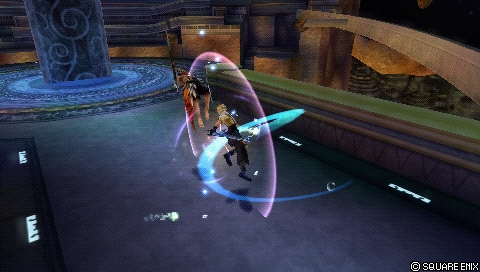
| Aerial version, but basically identical with ground version. Because Tidus does not have to be on the ground to use this, it is often preferable to equip the midair Energy Rain instead. Both versions leave him airborne, fire homing projectiles, do the same amount of damage and generate the same amount of EX. It is still not his strongest HP and it shares a similiar weakness with Jecht Shot of losing to Jecht's high priority block after Assist Change. | | Aerial version, but basically identical with ground version. Both versions leave him airborne, fire homing projectiles, do the same amount of damage and generate the same amount of EX. It is still not his strongest HP and it shares a similiar weakness with Jecht Shot of losing to Jecht's high priority block after Assist Change. |
|
| |
|
| |-|Slice & Dice= | | |-|Slice & Dice= |
| {{AbilityInfo | | {{AbilityInfo |
| | |image=https://dissidia.wiki/images/e/ef/Hp_tidus_slice.jpeg |
| | |imgpos=30% 40% |
| |damage=2 x 5 (10) | | |damage=2 x 5 (10) |
| |startup=53F | | |startup=53F |
| Line 534: |
Line 559: |
| |effect=- | | |effect=- |
| |cp=30 (15) | | |cp=30 (15) |
| | |cancels=Dodge |
| | |astatk= |
| | |asthit= |
| | |level= |
| | |ap=130 |
| | |gametext=[Mid] Rush forward with swimming movement. Vertically limited, but charges a long way. |
| }} | | }} |
| ''[Mid] Rush forward with swimming movement. Vertically limited, but charges a long way.''
| |
|
| |
|
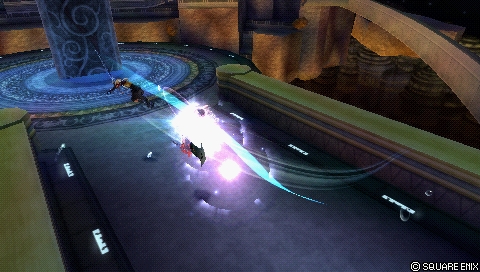
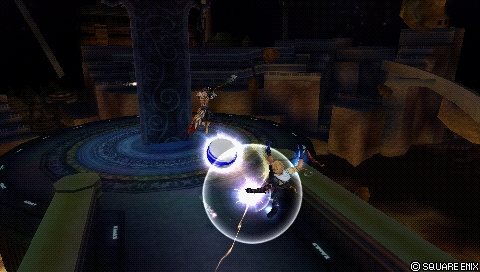
| A forward charge followed by a series of slices all around the opponent. A handful of attributes are shared with Energy Rain, including assist combo starters, but Slice & Dice has utility of its own. For one, it has glide before the initial charge happens, which gives it more horizontal reach or evasion than Energy Rain. Generally speaking Assist Changes are a bit of a pain point for Tidus when it comes to safety on hit. However, not only does Slice & Dice have ''excellent'' post-hit tracking, it is also very likely to hit the assist during the escape period, enabling an early dodge cancel were he to get hit afterwards. The general cancel window on hit is not very late either, given the overall length. | | A forward charge followed by a series of slices all around the opponent. A handful of attributes are shared with Energy Rain, including assist combo starters, but Slice & Dice has utility of its own. For one, it has glide before the initial charge happens, which gives it more horizontal reach or evasion than Energy Rain. Generally speaking Assist Changes are a bit of a pain point for Tidus when it comes to safety on hit. However, not only does Slice & Dice have ''excellent'' post-hit tracking, it is also very likely to hit the assist during the escape period, enabling an early dodge cancel were he to get hit afterwards. The general cancel window on hit is not very late either, given the overall length. |
| Line 545: |
Line 575: |
| |-|Quick Hit D= | | |-|Quick Hit D= |
| {{AbilityInfo | | {{AbilityInfo |
| | |image=https://dissidia.wiki/images/6/63/Hp_tidus_quick_d.jpeg |
| | |imgpos=40% 40% |
| |damage=1 x 4, 3 (+7) | | |damage=1 x 4, 3 (+7) |
| |startup=? | | |startup=? |
| Line 552: |
Line 584: |
| |effect=Wall Rush | | |effect=Wall Rush |
| |cp=30 (15) | | |cp=30 (15) |
| | |cancels=Dodge |
| | |astatk= |
| | |asthit= |
| | |level= |
| | |ap=160 |
| | |gametext=Branching from Stick & Move (midair) [Combo] All-out flurry of attacks. |
| }} | | }} |
| ''Branching from Stick & Move (midair) [Combo] All-out flurry of attacks.''
| |
|
| |
|
| Quick Hit from aerial Stick & Move. Same as other Quick Hits. | | Quick Hit from aerial Stick & Move. Same as other Quick Hits. |
| Line 559: |
Line 596: |
| |-|Quick Hit E= | | |-|Quick Hit E= |
| {{AbilityInfo | | {{AbilityInfo |
| | |image=https://dissidia.wiki/images/6/63/Hp_tidus_quick_d.jpeg |
| | |imgpos=40% 40% |
| |damage=1 x 4, 3 (+7) | | |damage=1 x 4, 3 (+7) |
| |startup=? | | |startup=? |
| Line 566: |
Line 605: |
| |effect=Wall Rush | | |effect=Wall Rush |
| |cp=30 (15) | | |cp=30 (15) |
| | |cancels=Dodge |
| | |astatk= |
| | |asthit= |
| | |level= |
| | |ap=160 |
| | |gametext=Branching from Dart & Weave (midair) [Combo] All-out flurry of attacks. |
| }} | | }} |
| ''Branching from Dart & Weave (midair) [Combo] All-out flurry of attacks.''
| |
|
| |
|
| Quick Hit from aerial Dart & Weave. Same as other Quick Hits. | | Quick Hit from aerial Dart & Weave. Same as other Quick Hits. |
| Line 573: |
Line 617: |
| |-|Quick Hit F= | | |-|Quick Hit F= |
| {{AbilityInfo | | {{AbilityInfo |
| | |image=https://dissidia.wiki/images/6/63/Hp_tidus_quick_d.jpeg |
| | |imgpos=40% 40% |
| |damage=1 x 4, 3 (+7) | | |damage=1 x 4, 3 (+7) |
| |startup=? | | |startup=? |
| Line 580: |
Line 626: |
| |effect=Wall Rush | | |effect=Wall Rush |
| |cp=30 (15) | | |cp=30 (15) |
| | |cancels=Dodge |
| | |astatk= |
| | |asthit= |
| | |level= |
| | |ap=160 |
| | |gametext=Branching from Cut & Run (midair) [Combo] All-out flurry of attacks. |
| }} | | }} |
| ''Branching from Cut & Run (midair) [Combo] All-out flurry of attacks.''
| |
|
| |
|
| Quick Hit from aerial Cut & Run. Same as other Quick Hits. | | Quick Hit from aerial Cut & Run. Same as other Quick Hits. |
| Line 594: |
Line 645: |
| * Caladbolg (ATK) | | * Caladbolg (ATK) |
| * Caladbolg (DODGE) | | * Caladbolg (DODGE) |
| | |
| | = Overview = |
| | Tidus' EX mode supports his long term gameplan and comes with few good supporting perks. The big cherry on top is his Caladbolg (ATK) that scales bravery base damage up to 2x at full health. This applies to all of his attacks that deal bravery damage, including EX Burst. That alone makes it great for closing out matches with a good lead. EX Burst is one of the weakest in the game when Tidus is at low health, but because EX mode adds critical hit rate and depletes the opponent's assist gauge upon activation, this is still good for securing a win. |
|
| |
|
| == Mirror Dash == | | == Mirror Dash == |
| Line 608: |
Line 662: |
| ''[Always active while in EX Mode] The period of invincibility between dodging and attacking increases.'' | | ''[Always active while in EX Mode] The period of invincibility between dodging and attacking increases.'' |
|
| |
|
| Dodge frames, the invincibility period during a dodge is increased from 1-20 frames to 1-40 frames, which is the same as using the Evasion Boost basic ability. | | Dodge frames, the invincibility period during a dodge is increased from 1-20 frames to 1-40 frames, which is the same as using the Evasion Boost basic ability. This also applies to the dodge braveries such as Stick & Move, making them more reliable as high commitment counterpokes. |
|
| |
|
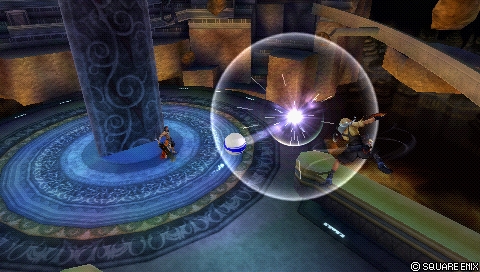
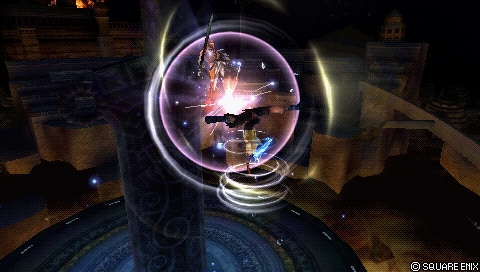
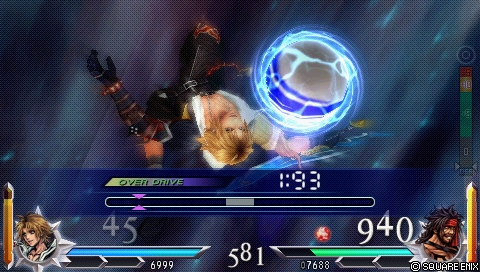
| == EX Burst: Blitz Ace == | | == EX Burst: Blitz Ace == |
| | <img src="https://dissidia.wiki/images/1/16/Ex_burst_tidus.jpeg" style="object-fit: none; object-position: 0% 0%; border:3px solid RGB(105,86,160);"></img> |
| | <div style="clear: both"></div> |
| ''A flurry of attacks leading to a magnificent shot. Watch your timing and press circle when the cursor hits the center.'' | | ''A flurry of attacks leading to a magnificent shot. Watch your timing and press circle when the cursor hits the center.'' |
|
| |
|
| Line 619: |
Line 675: |
| }} | | }} |
|
| |
|
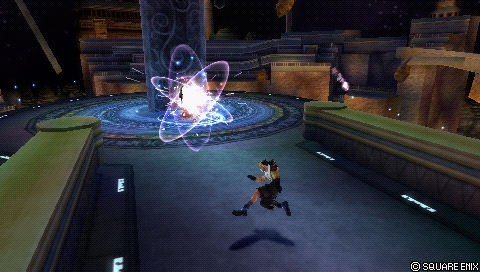
| Blitz Ace is one of the weakest and most damaging EX Bursts in the game depending on how much health Tidus has left. More health is better and at full health the 2x damage multiplier increase to the burst is enough to push the damage ahead of the competition. Most of the damage comes from the single blitzball shot that demands a precise input when the motion is temporarily frozen in time, so achieving [[Bravery_(Dissidia_012)#Bravery_Break|'''bravery break''']] before then is usually not very feasible. | | Blitz Ace is one of the weakest and most damaging EX Bursts in the game depending on how much health Tidus has left. More health is better and at full health, the 2x damage multiplier increase to the burst is enough to push the damage ahead of the competition. Most of the damage comes from the single blitzball shot that demands a precise input when the motion is temporarily frozen in time, so achieving [[Bravery_(Dissidia_012)#Bravery_Break|'''bravery break''']] before then is usually not very feasible. |
|
| |
|
| [[Abilities_(Dissidia_012)#Support_Abilities-0|'''Auto EX Command Ω''']] support ability can be used to ignore the timing aspect entirely at the cost of 20 CP. This can be a good use of capacity points in rulesets where spare points are common such as [[Japan_Ranked_(DDFF)|'''Japan Ranked''']], but it also works reliably in battles with high latency internet connections. | | [[Abilities_(Dissidia_012)#Support_Abilities-0|'''Auto EX Command Ω''']] support ability can be used to ignore the timing aspect entirely at the cost of 20 CP. This can be a good use of capacity points in rulesets where spare points are common such as [[Japan_Ranked_(DDFF)|'''Japan Ranked''']], but it also works reliably in battles with high latency internet connections. |
| Line 672: |
Line 728: |
| Most attacks leave Tidus airborne, which allow him to call Aerith for Seal Evil combos. This includes grounded versions of Hop Step, Stick & Move, Cut & Run, Dart & Weave and Energy Rain. | | Most attacks leave Tidus airborne, which allow him to call Aerith for Seal Evil combos. This includes grounded versions of Hop Step, Stick & Move, Cut & Run, Dart & Weave and Energy Rain. |
|
| |
|
| Cut & Run (midair) > Quick Hit is a common, relatively high power assist combo ender for Tidus. That will be listed in the following combos most of the time. Other enders may be prioritized depending on the situation, such as Jecht Shot to avoid LV2 Assist Change stagger or Slice and Dice to confuse Assist Change retaliation attempts. | | Cut & Run (midair) > Quick Hit is a common, relatively high power assist combo ender for Tidus. That will be listed in the following combos most of the time. Any combo with "(behind opponent)" can do more damage if you have Sneak Attack extra ability equipped. Other enders may be prioritized depending on the situation, such as Jecht Shot to avoid LV2 Assist Change stagger or Slice and Dice to confuse Assist Change retaliation attempts. |
|
| |
|
| {| class="wikitable sortable" | | {| class="wikitable sortable" |
| Line 688: |
Line 744: |
| |Aerith > Chase HP > HP dodged > air jump (behind opponent) > Cut & Run > Quick Hit || 55-61 + HP WR (7, 13, 2x2~2x5, 24, 1x4, 3 + HP WR) || 195 (90, 15, 90) || If the opponent dodges the chase HP, this generates more EX and still lets Tidus follow up with more bravery damage. But ''only'' if it's evaded this way; Opting to eat the chase HP can end the combo early without wall rush. || [https://www.youtube.com/watch?v=oDOs-TVaqYg&t=136 '''Video'''] | | |Aerith > Chase HP > HP dodged > air jump (behind opponent) > Cut & Run > Quick Hit || 55-61 + HP WR (7, 13, 2x2~2x5, 24, 1x4, 3 + HP WR) || 195 (90, 15, 90) || If the opponent dodges the chase HP, this generates more EX and still lets Tidus follow up with more bravery damage. But ''only'' if it's evaded this way; Opting to eat the chase HP can end the combo early without wall rush. || [https://www.youtube.com/watch?v=oDOs-TVaqYg&t=136 '''Video'''] |
| |- | | |- |
| |rowspan="2"|Full Slide (2 parts) || -- || 19~25 (2x3~2x6, 5, 8) || 27 || Mid-stage combo starter, also works with Aerith assist when clashed with reduced damage. The further Tidus is from opponent, the less damage Full Slide will do on hit. || -- | | |rowspan="2"|Full Slide (2 parts) || -- || 19~25 (2x3~2x6, 5, 8) || 27 || Mid-stage combo starter, also works with Aerith assist after clashing with an attack. The further Tidus is from opponent, the less damage Full Slide will do on hit. || -- |
| |- | | |- |
| |Aerith > DC > Free Air Dash > Cut & Run > Quick Hit || 54~66 + HP WR (2x3~2x6, 5, 8, 2x2~2x5, 24, 1x4, 3 + HP WR) || 120 (30, 90) || Reliable wall-less combo. If ceiling is closer than wall, you can opt for Jech Shot ender instead for wall rush damage. || [https://www.youtube.com/watch?v=oDOs-TVaqYg&t=75 '''Video'''] | | |Aerith > DC > Free Air Dash > Cut & Run > Quick Hit || 54~66 + HP WR (2x3~2x6, 5, 8, 2x2~2x5, 24, 1x4, 3 + HP WR) || 120 (30, 90) || Reliable wall-less combo. If ceiling is closer than wall, you can opt for Jecht Shot ender instead for wall rush damage. || [https://www.youtube.com/watch?v=oDOs-TVaqYg&t=75 '''Video'''] |
| |- | | |- |
| |rowspan="2"|Full Slide (Wall Rush) || -- || 40 + WR (2x6, 5, 8, 15) || 30 || -- || -- | | |rowspan="2"|Full Slide (Wall Rush) || -- || 40 + WR (2x6, 5, 8, 15) || 30 || -- || -- |
| Line 734: |
Line 790: |
|
| |
|
| <tabber> | | <tabber> |
| | |-|Hybrid (Damage)= |
| | {{Build |
| | |hp=10299 |
| | |cp=450 |
| | |brv=917 |
| | |atk=181 |
| | |def=182 |
| | |luk=60 |
| | |booster=x8.2 |
| | |setbonus=Seal of Lufenia |
| | |ast=Aerith |
| | |wpn=World Champion |
| | |hand=Lufenian Dirk {{equip}} |
| | |head=Lufenian Headband |
| | |armor=Lufenian Vest |
| | |acc1={{accbas}} Hyper Ring |
| | |acc2={{accbas}} Muscle Belt |
| | |acc3={{accbas}} Dismay Shock |
| | |acc4={{accboo}} Large Gap in HP |
| | |acc5={{accboo}} Summon Unused |
| | |acc6={{accboo}} Pre-EX Mode |
| | |acc7={{accboo}} Pre-EX Revenge |
| | |acc8={{accboo}} Aerial |
| | |acc9={{accboo}} After 30 Seconds |
| | |acc10={{accboo}} Opponent Summon Unused |
| | |summon=Scarmiglione |
| | |dataBRV= |
| | {{Build-AttackData |
| | |brv1-g=Hop Step |
| | |branch-1gbrv= |
| | |branch-1ghp= |
| | |brv2-g= |
| | |branch-2gbrv= |
| | |branch-2ghp= |
| | |brv3-g= |
| | |branch-3gbrv= |
| | |branch-3ghp= |
| | |brv1-a=Full Slide |
| | |branch-1abrv= |
| | |branch-1ahp= |
| | |brv2-a=Hop Step |
| | |branch-2abrv= |
| | |branch-2ahp= |
| | |brv3-a=Cut & Run (midair) |
| | |branch-3abrv= |
| | |branch-3ahp=Quick Hit F |
| | }} |
| | | dataHP = |
| | {{Build-AttackDataHP |
| | |hp1-g= |
| | |hp2-g= |
| | |hp3-g= |
| | |hp1-a=Slice & Dice |
| | |hp2-a=Energy Rain |
| | |hp3-a=Jecht Shot |
| | }} |
| | }} |
| | |
| | == Basic Abilities == |
| | {{Build-Ability |
| | |action= |
| | {{Build-AbilitySet |
| | |1=Ground Evasion}} |
| | {{Build-AbilitySet |
| | |1=Midair Evasion}} |
| | {{Build-AbilitySet |
| | |1=Ground Block}} |
| | {{Build-AbilitySet |
| | |1=Midair Block}} |
| | {{Build-AbilitySet |
| | |1=Aerial Recovery}} |
| | {{Build-AbilitySet |
| | |1=Recovery Attack}} |
| | {{Build-AbilitySet |
| | |1=Controlled Recovery}} |
| | {{Build-AbilitySet |
| | |1=Wall Jump}} |
| | {{Build-AbilitySet |
| | |1=Free Air Dash}} |
| | {{Build-AbilitySet |
| | |1=Reverse Ground Dash}} |
| | {{Build-AbilitySet |
| | |1=Multi Air Slide}} |
| | {{Build-AbilitySet |
| | |1=Free Air Dash Boost}} |
| | {{Build-AbilitySet |
| | |1=Assist Gauge Up Dash}} |
| | {{Build-AbilitySet |
| | |1=Speed Boost++}} |
| | {{Build-AbilitySet |
| | |1=Jump Boost+}} |
| | {{Build-AbilitySet |
| | |1=Jump Times Boost++}} |
| | {{Build-AbilitySet |
| | |1=Ground Evasion Boost}} |
| | {{Build-AbilitySet |
| | |1=Midair Evasion Boost}} |
| | {{Build-AbilitySet |
| | |1=Evasion Boost}} |
| | {{Build-AbilitySet |
| | |1=Descent Speed Boost}} |
| | |support= |
| | {{Build-AbilitySet |
| | |1=Always Target Indicator}} |
| | {{Build-AbilitySet |
| | |1=EX Core Lock On}} |
| | {{Build-AbilitySet |
| | |1=Assist Lock On}} |
| | |extra= |
| | {{Build-AbilitySet |
| | |1=Precision Jump}} |
| | {{Build-AbilitySet |
| | |1=Precision Evasion}} |
| | {{Build-AbilitySet |
| | |1=Sneak Attack}} |
| | {{Build-AbilitySet |
| | |1=Disable Counterattack}} |
| | {{Build-AbilitySet |
| | |1=EXP to HP}} |
| | |cp=420 / 450 |
| | }} |
| | |
| | {| class="wikitable" |
| | !scope="row" 3 colspan="3" | Basic Abilities |
| | |- |
| | !Actions !! Support !! Extra |
| | |- |
| | |Ground Evasion || Always Target Indicator || Precision Jump |
| | |- |
| | |Midair Evasion || EX Core Lock On || Precision Evasion |
| | |- |
| | |Ground Block || rowspan="18"|Assist Lock On || Sneak Attack |
| | |- |
| | |Midair Block || Disable Counterattack |
| | |- |
| | |Aerial Recovery || rowspan="16"|EXP to HP |
| | |- |
| | |Recovery Attack |
| | |- |
| | |Controlled Recovery |
| | |- |
| | |Wall Jump |
| | |- |
| | |Free Air Dash |
| | |- |
| | |Reverse Ground Dash |
| | |- |
| | |Multi Air Slide |
| | |- |
| | |Free Air Dash Boost |
| | |- |
| | |Assist Gauge Up Dash |
| | |- |
| | |Speed Boost++ |
| | |- |
| | |Jump Boost+ |
| | |- |
| | |Jump Times Boost++ |
| | |- |
| | |Ground Evasion Boost |
| | |- |
| | |Midair Evasion Boost |
| | |- |
| | |Evasion Boost |
| | |- |
| | |Descent Speed Boost |
| | |} |
| | |
| | = Build Overview = |
| | |
| | A general purpose damage build. The high maximum booster multiplier provides consistent value for majority of the match. Reverse Ground Dash is an effective way to defend and build assist gauge at the same time for Tidus, but might take a moment to get used to. Lufenian Dirk requires doing the CP equip glitch with Thief's Gear extra ability. Be sure to take advantage of Tidus' fast running speed, multiple air jumps and Sneak Attack critical hits. |
| | |
| | == CP Allocation == |
| | |
| | 30 CP is available for two more grounded bravery attacks, one ground dodge bravery + Quick Hit or extra abilities. Any abilities that exceed 30CP such as extra ability Riposte will require raising the maximum CP via Hero's Essence special accessory {{accsp}}. |
| | |
| | == Substitutes == |
| | |
| | {| class="wikitable" |
| | |+colspan="3"|Substitutes |
| | ! Equipment !! Replacement !! Notes |
| | |- |
| | | After 30 Seconds {{accboo}} || |
| | * Winged Boots {{accsp}} |
| | * Hero's Essence {{accsp}} |
| | * Battle Hammer {{accbas}} |
| | || The 1.2x booster accessory decreases damage and EX depletion slightly, but may be changed at the player's discretion for reduced banish trap damage, increased CP or assist depletion respectively. |
| | |- |
| | | Opponent Summon Unused {{accboo}} || Winged Boots {{accsp}} / Hero's Essence {{accsp}} / Battle Hammer {{accbas}} || If the player believes the opponent will not have a summon equipped, they may change this booster specifically instead. |
| | |} |
| | |
| | = Attacks = |
| | Tidus' core loadout is somewhat compact and aerial focused, which he then expands appropriately with dodge attacks and ground attacks. |
| | |
| | == Staple == |
| | These attacks are recommended regardless of matchup, stage or player preference. |
| | |
| | {|class="wikitable" |
| | ! scope="row" colspan="2" | Bravery attacks |
| | |- |
| | ! scope="col" | Ground |
| | ! scope="col" | Aerial |
| | |- |
| | |Hop Step || Hop Step |
| | |- |
| | |Full Slide |
| | |- |
| | ! scope="row" colspan="2" | HP attacks |
| | |- |
| | ! scope="col" | Ground |
| | ! scope="col" | Aerial |
| | |- |
| | |rowspan="2"| -- || Slice & Dice |
| | |- |
| | | Jecht Shot |
| | |- |
| | |} |
| | |
| | '''Hop Step''': Key poke, punishment (dodge, block, whiff). |
| | |
| | '''Full Slide''': Midair conversions with Aerith assist, primary punisher move after a successful [[Blodge|'''blodge''']] and occasionally used as a dodge punisher with Aerith. |
| | |
| | '''Slice & Dice''': One of the safer attacks against LV1 Assist Change, can setup clashes or mid range punishes with Aerith assist. |
| | |
| | '''Jecht Shot''': Avoids stagger against LV2 Assist Change, usually an assist combo ender with high wall rush potential. |
| | |
| | == Flexible == |
| | These attacks are great to have, but can be swapped or removed depending on matchup, stage or player preference. |
| | |
| | Tidus has a handful of useful attacks for situational use, particularly on the ground. Cut & Run is one of Tidus' more consistent dodge attacks, but other dodge attacks work well in specific matchups. Here are some recommendations: |
| | |
| | Stick & Move: {{012fir}}, {{012lag}}, {{012ter}}, {{012ulti}} and {{012emp}}. |
| | |
| | Dart & Weave: {{012seph}} |
| | |
| | Cut & Run: Other characters. |
| | |
| | {|class="wikitable" |
| | ! scope="row" colspan="2" | Bravery attacks |
| | |- |
| | ! scope="col" | Ground |
| | ! scope="col" | Aerial |
| | |- |
| | |- |
| | |Sonic Buster || Cut & Run |
| | |- |
| | |Sphere Shot ||rowspan="4"|Stick & Move |
| | |- |
| | |Stick & Move |
| | |- |
| | |Dart & Weave |
| | |- |
| | |Cut & Run |
| | |- |
| | ! scope="row" colspan="2" | HP attacks |
| | |- |
| | ! scope="col" | Ground |
| | ! scope="col" | Aerial |
| | |- |
| | |Energy Rain|| Energy Rain |
| | |- |
| | |Quick Hit (from dodge attack) || Quick Hit (from dodge attack) |
| | |} |
| | |
| | '''Sonic Buster''': A mixup for Sphere Shot and Reverse Ground Dash (when used with spot dashes), combos into Aerith. |
| | |
| | '''Sphere Shot''': Poke through The Emperor's traps and contest blocks and slower attacks from a dodge's distance. |
| | |
| | '''[Dodge Attack], Quick Hit''': As per matchup recommendations. If you equip a dodge attack, it is also recommended to equip Quick Hit for solo HP damage. |
| | |
| | '''Energy Rain''': Same speed as Slice & Dice, but with slight upward movement on startup. If the opponent doesn't stagger the initial kick with LV2 Assist Change, this can be harder to punish afterwards. |
| | |
| | == Avoid == |
| | Generally not recommended due to being outclassed by other attacks or having little to no distinct utility. |
| | |
| | {|class="wikitable" |
| | ! scope="row" colspan="2" | Bravery attacks |
| | |- |
| | ! scope="col" | Ground |
| | ! scope="col" | Aerial |
| | |- |
| | |- |
| | | -- || Wither Shot |
| | |- |
| | ! scope="row" colspan="2" | HP attacks |
| | |- |
| | ! scope="col" | Ground |
| | ! scope="col" | Aerial |
| | |- |
| | | Spiral Cut || -- |
| | |- |
| | |} |
| | |
| | '''Wither Shot''': Low priority, low threat, low reward on hit and requires a different assist from Aerith for more substantial reward. |
| | |
| | '''Spiral Cut''': Tidus is stuck on the ground in a long animation with disproportionate risk / reward. |
| | |
| | |
| |-|Bravery Boost on Dodge= | | |-|Bravery Boost on Dodge= |
| | |
| {{Build | | {{Build |
| |hp=9972 | | |hp=9972 |
| Line 761: |
Line 1,116: |
| |summon=Rubicante | | |summon=Rubicante |
| }} | | }} |
| Dedicated bravery boost on dodge.
| |
|
| |
|
| Recommended against [[The Emperor (Dissidia 012)|'''The Emperor''']], this build will provide bravery every time Tidus dodges an attack or a projectile with invincibility. If Aerial booster is not active, max booster value is x9.3.
| | {|class="wikitable" style="display: inline-table; margin-right: 50px; |
| | ! scope="row" colspan="2" | Bravery attacks |
| | |- |
| | ! scope="col" | Ground |
| | ! scope="col" | Aerial |
| | |- |
| | |- |
| | |Hop Step || Full Slide |
| | |- |
| | |rowspan="2"| Sphere Shot || Hop Step |
| | |- |
| | |Stick & Move (midair) |
| | |- |
| | ! scope="row" colspan="2" | HP attacks |
| | |- |
| | ! scope="col" | Ground |
| | ! scope="col" | Aerial |
| | |- |
| | |rowspan="3"| -- || Slice & Dice |
| | |- |
| | |Jecht Shot |
| | |- |
| | |Quick Hit E (from Stick & Move) |
| | |} |
|
| |
|
| Substitutes:
| | {| class="wikitable" |
| Few adjustments can be made to use this build against characters with less reliance on zoning.
| | !scope="row" 3 colspan="3" | Basic Abilities |
| | |- |
| | !Actions !! Support !! Extra |
| | |- |
| | |Ground Evasion || Always Target Indicator || Precision Jump |
| | |- |
| | |Midair Evasion || EX Core Lock On || Precision Evasion |
| | |- |
| | |Ground Block || rowspan="17"|Assist Lock On || Sneak Attack |
| | |- |
| | |Midair Block || Disable Counterattack |
| | |- |
| | |Aerial Recovery || rowspan="15"|EXP to HP |
| | |- |
| | |Recovery Attack |
| | |- |
| | |Controlled Recovery |
| | |- |
| | |Wall Jump |
| | |- |
| | |Free Air Dash |
| | |- |
| | |Reverse Ground Dash |
| | |- |
| | |Multi Air Slide |
| | |- |
| | |Free Air Dash Boost |
| | |- |
| | |Assist Gauge Up Dash |
| | |- |
| | |Jump Boost+ |
| | |- |
| | |Jump Times Boost++ |
| | |- |
| | |Ground Evasion Boost |
| | |- |
| | |Midair Evasion Boost |
| | |- |
| | |Evasion Boost |
| | |- |
| | |Descent Speed Boost |
| | |} |
| | |
| | = Build Overview = |
| | |
| | Dedicated bravery boost on dodge, this is recommended against The Emperor. The idea with this build is to dodge through projectiles (and close range attacks) and then eventually land an HP with Aerith assist (Holy or trading favorably otherwise with Seal Evil or Planet Protector) for a decisive one-hit kill. This build assumes the opponent utilises Side by Side {{accsp}}, which provides a consistent 1.3x booster in Opponent Empty EX Gauge. If Aerial booster is not active, max booster value is x9.3. |
|
| |
|
| Booster accessory: Empty EX Gauge for Dismay Shock if opponent is not using Side by Side.
| | Sphere Shot is equipped to disrupt Emperor's actions inside traps (usually Thunder Crest). |
|
| |
|
| A hybrid variant of this build adjusts accessories. | | A hybrid variant of this build adjusts accessories for raw damage and EX depletion. |
| === Hybrid variant === | | |
| <div class="toccolours mw-collapsible mw-collapsed overflow:auto;"> <div class="mw-collapsible-content">
| | == CP Allocation == |
| | |
| | 60 CP is available extra abilities or a grounded dodge attack. Extra abilities Achy+, Counterattack and Back to the Wall are decent, but may not yield much return on investment as this build relies on Tidus avoiding damage for bravery. Master Guardsman for +1000 max HP increases survivability for 35 CP. |
| | |
| | == Substitutes == |
| | |
| | {| class="wikitable" |
| | |+colspan="3"|Substitutes |
| | ! Equipment !! Replacement !! Notes |
| | |- |
| | | Opponent Empty EX Gauge {{accboo}} || Large Gap in HP {{accboo}} |
| | || If the player believes the opponent will not lock their EX gauge with Side by Side, this is a good alternative. A powerful 1.5x booster for when either player is leading by at least 3000 HP. Good if Tidus is falling behind or getting an early lead. |
| | |} |
| | |
| | = Attacks = |
| | Tidus' core loadout is very similiar to the hybrid one, with the addition of Sphere Shot. If he is not fighting The Emperor or Ultimecia, it is still recommended to adjust appropriately with other attacks. |
| | |
| | == Staple == |
| | These attacks are recommended regardless of matchup, stage or player preference. |
| | |
| | {|class="wikitable" |
| | ! scope="row" colspan="2" | Bravery attacks |
| | |- |
| | ! scope="col" | Ground |
| | ! scope="col" | Aerial |
| | |- |
| | |Hop Step || Hop Step |
| | |- |
| | |Sphere Shot || Full Slide |
| | |- |
| | ! scope="row" colspan="2" | HP attacks |
| | |- |
| | ! scope="col" | Ground |
| | ! scope="col" | Aerial |
| | |- |
| | |rowspan="2"| -- || Slice & Dice |
| | |- |
| | | Jecht Shot |
| | |- |
| | |} |
| | |
| | '''Hop Step''': Key poke, punishment (dodge, block, whiff). Can avoid Dreary Cell on hit, but assist followups are inconsistent. |
| | |
| | '''Full Slide''': Midair conversions with Aerith assist, primary punisher move after a successful [[Blodge|'''blodge''']] and occasionally used as a dodge punisher with Aerith. |
| | |
| | '''Slice & Dice''': One of the safer attacks against LV1 Assist Change, can setup clashes or mid range punishes with Aerith assist. Also reflects Emperor's Flares. |
| | |
| | '''Jecht Shot''': A hard callout tool. Avoids stagger against LV2 Assist Change, usually an assist combo ender with high wall rush potential. |
| | |
| | == Flexible == |
| | These attacks are great to have, but can be swapped or removed depending on matchup, stage or player preference. |
| | |
| | Tidus doesn't have as much flexibility in the context of the mage matchups, but Sephiroth may warrant Dart & Weave instead. |
| | |
| | {|class="wikitable" |
| | ! scope="row" colspan="2" | Bravery attacks |
| | |- |
| | ! scope="col" | Ground |
| | ! scope="col" | Aerial |
| | |- |
| | |- |
| | |Sonic Buster || rowspan="3"|Dart & Weave |
| | |- |
| | |Dart & Weave |
| | |- |
| | |Cut & Run |
| | |- |
| | ! scope="row" colspan="2" | HP attacks |
| | |- |
| | ! scope="col" | Ground |
| | ! scope="col" | Aerial |
| | |- |
| | |Energy Rain|| Energy Rain |
| | |- |
| | |Quick Hit (from dodge attack) || Quick Hit (from dodge attack) |
| | |} |
| | |
| | '''Sonic Buster''': A mixup for Sphere Shot and Reverse Ground Dash (when used with spot dashes), combos into Aerith. |
| | |
| | '''Sphere Shot''': Poke through The Emperor's traps and contest blocks and slower attacks from a dodge's distance. |
| | |
| | '''[Dodge Attack], Quick Hit''': As per matchup recommendations. If you equip a dodge attack, it is also recommended to equip Quick Hit for solo HP damage. Note that for Dart & Weave, Tidus can do the dodge cancel Hop Step combo and call an assist instead. If D&W is equipped on the ground, equipping Quick Hit for it is not a necessity. |
| | |
| | '''Energy Rain''': Same speed as Slice & Dice, shorter range overall. Can be used to reflect Emperor's Flares. If the opponent doesn't stagger the initial kick with LV2 Assist Change, this can be harder to punish afterwards. |
| | |
| | == Avoid == |
| | Generally not recommended due to being outclassed by other attacks or having little to no distinct utility. |
| | |
| | {|class="wikitable" |
| | ! scope="row" colspan="2" | Bravery attacks |
| | |- |
| | ! scope="col" | Ground |
| | ! scope="col" | Aerial |
| | |- |
| | |- |
| | | -- || Wither Shot |
| | |- |
| | ! scope="row" colspan="2" | HP attacks |
| | |- |
| | ! scope="col" | Ground |
| | ! scope="col" | Aerial |
| | |- |
| | | Spiral Cut || -- |
| | |- |
| | |} |
| | |
| | '''Wither Shot''': Low priority, low threat, low reward on hit and requires a different assist from Aerith for more substantial reward. |
| | |
| | '''Spiral Cut''': Tidus is stuck on the ground in a long animation with disproportionate risk / reward. Against The Emperor he is more likely to flip his way into Thunder Crest with this move, which is ill-advised. And against Ultimecia or Sephiroth, this might not connect at all when they're airborne. |
| | |
| | |-|Bravery Boost on Dodge (Hybrid)= |
| {{Build | | {{Build |
| |hp=9972 | | |hp=9972 |
| Line 796: |
Line 1,328: |
| |acc8={{accboo}} Pre-EX Revenge | | |acc8={{accboo}} Pre-EX Revenge |
| |acc9={{accboo}} Aerial | | |acc9={{accboo}} Aerial |
| |acc10={{accboo}} Summon Unused | | |acc10={{accboo}} Opponent Summon Unused |
| |summon=Rubicante | | |summon=Rubicante |
| }} | | }} |
|
| |
|
| Without Aerial, max booster value is x5.9. Without Large Gap in HP and Aerial, max booster value is x3.9. | | {|class="wikitable" style="display: inline-table; margin-right: 50px; |
| </div></div>
| | ! scope="row" colspan="2" | Bravery attacks |
| | |- |
| | ! scope="col" | Ground |
| | ! scope="col" | Aerial |
| | |- |
| | |- |
| | |rowspan="3"|Hop Step || Full Slide |
| | |- |
| | |Hop Step |
| | |- |
| | |Dart & Weave (midair) |
| | |- |
| | ! scope="row" colspan="2" | HP attacks |
| | |- |
| | ! scope="col" | Ground |
| | ! scope="col" | Aerial |
| | |- |
| | |rowspan="3"| -- || Slice & Dice |
| | |- |
| | |Jecht Shot |
| | |- |
| | |Quick Hit E (from Dart & Weave) |
| | |} |
| | |
| | {| class="wikitable" |
| | !scope="row" 3 colspan="3" | Basic Abilities |
| | |- |
| | !Actions !! Support !! Extra |
| | |- |
| | |Ground Evasion || Always Target Indicator || Precision Jump |
| | |- |
| | |Midair Evasion || EX Core Lock On || Precision Evasion |
| | |- |
| | |Ground Block || rowspan="17"|Assist Lock On || Sneak Attack |
| | |- |
| | |Midair Block || Disable Counterattack |
| | |- |
| | |Aerial Recovery || rowspan="15"|EXP to HP |
| | |- |
| | |Recovery Attack |
| | |- |
| | |Controlled Recovery |
| | |- |
| | |Wall Jump |
| | |- |
| | |Free Air Dash |
| | |- |
| | |Reverse Ground Dash |
| | |- |
| | |Multi Air Slide |
| | |- |
| | |Free Air Dash Boost |
| | |- |
| | |Assist Gauge Up Dash |
| | |- |
| | |Jump Boost+ |
| | |- |
| | |Jump Times Boost++ |
| | |- |
| | |Ground Evasion Boost |
| | |- |
| | |Midair Evasion Boost |
| | |- |
| | |Evasion Boost |
| | |- |
| | |Descent Speed Boost |
| | |} |
| | |
| | = Build Overview = |
| | |
| | This is a slightly modified Bravery Boost on Dodge build. The bravery boost is lowered in exchange for higher physical damage and EX depletion. Against Sephiroth this can be a good alternative as this disincentivizes Shadow Flare use and subsequently create opportunities to close the gap and chip away at him directly. |
| | |
| | Without Aerial, max booster value is x5.9. Without Large Gap in HP and Aerial, max booster value is x3.9. Both Sephiroth and Tidus can fight comfortably in the air though. |
| | |
| | == CP Allocation == |
| | |
| | 75 CP is available extra abilities or a grounded dodge attack. Extra abilities Achy+, Counterattack and Back to the Wall are decent, but as this build generates bravery from successful dodges, your mileage may vary. Master Guardsman for +1000 max HP increases survivability for 35 CP and can be a serviceable, general purpose CP investment. |
| | |
| | == Substitutes == |
|
| |
|
| |-|Hybrid (Damage)= | | {| class="wikitable" |
| {{Build | | |+colspan="3"|Substitutes |
| |hp=10299 | | ! Equipment !! Replacement !! Notes |
| |cp=450 | | |- |
| |brv=917 | | | Opponent Summon Unused {{accboo}} || |
| |atk=181 | | * Battle Hammer {{accbas}} |
| |def=182 | | * After 30 Seconds {{accboo}} |
| |luk=60 | | || If the player believes the opponent will not equip a summon, they can treat it as an expendable slot for another booster accessory, assist depletion or whatever else strikes their fancy. |
| |booster=x8.2 | | |} |
| |setbonus=Seal of Lufenia | | |
| |ast=Aerith | | = Attacks = |
| |wpn=World Champion | | Not much changes compared to the other builds. Hop Step, Full Slide and Slice & Dice are all present an accounted for as usual. |
| |hand=Lufenian Dirk | | |
| |head=Lufenian Headband | | == Staple == |
| |armor=Lufenian Vest | | These attacks are recommended regardless of matchup, stage or player preference. |
| |acc1={{accbas}} Hyper Ring | | |
| |acc2={{accbas}} Muscle Belt | | {|class="wikitable" |
| |acc3={{accbas}} Dismay Shock | | ! scope="row" colspan="2" | Bravery attacks |
| |acc4={{accboo}} Large Gap in HP | | |- |
| |acc5={{accboo}} Summon Unused | | ! scope="col" | Ground |
| |acc6={{accboo}} Pre-EX Mode | | ! scope="col" | Aerial |
| |acc7={{accboo}} Pre-EX Revenge | | |- |
| |acc8={{accboo}} Aerial | | |rowspan="2"|Hop Step || Hop Step |
| |acc9={{accboo}} After 30 Seconds | | |- |
| |acc10={{accboo}} Opponent Summon Unused | | |Full Slide |
| |summon=Scarmiglione | | |- |
| }} | | ! scope="row" colspan="2" | HP attacks |
| CP Glitch Thief's Gear.
| | |- |
| | ! scope="col" | Ground |
| | ! scope="col" | Aerial |
| | |- |
| | |rowspan="2"| -- || Slice & Dice |
| | |- |
| | | Jecht Shot |
| | |- |
| | |} |
| | |
| | '''Hop Step''': Key poke, punishment (dodge, block, whiff). |
| | |
| | '''Full Slide''': Midair conversions with Aerith assist, primary punisher move after a successful [[Blodge|'''blodge''']] and occasionally used as a dodge punisher with Aerith. |
| | |
| | '''Slice & Dice''': One of the safer attacks against LV1 Assist Change, can setup clashes or mid range punishes with Aerith assist. |
| | |
| | '''Jecht Shot''': A hard callout tool. Avoids stagger against LV2 Assist Change, usually an assist combo ender with high wall rush potential. |
| | |
| | == Flexible == |
| | These attacks are great to have, but can be swapped or removed depending on matchup, stage or player preference. |
| | |
| | Sphere Shot isn't a must-have. But if Sephiroth is pursuing a reverse ground dashing Tidus, it can be a useful mixup tool or even as a hard-read for staggering his whiffed Sudden Cruelty from a distance. |
| | |
| | {|class="wikitable" |
| | ! scope="row" colspan="2" | Bravery attacks |
| | |- |
| | ! scope="col" | Ground |
| | ! scope="col" | Aerial |
| | |- |
| | |Sphere Shot || rowspan="4"|Cut & Run |
| | |- |
| | |Sonic Buster |
| | |- |
| | |Dart & Weave |
| | |- |
| | |Cut & Run |
| | |- |
| | ! scope="row" colspan="2" | HP attacks |
| | |- |
| | ! scope="col" | Ground |
| | ! scope="col" | Aerial |
| | |- |
| | |Energy Rain|| Energy Rain |
| | |- |
| | |Quick Hit (from dodge attack) || Quick Hit (from dodge attack) |
| | |} |
| | |
| | '''Sonic Buster''': A mixup for Sphere Shot and Reverse Ground Dash (when used with spot dashes), combos into Aerith. |
| | |
| | '''Sphere Shot''': Contest blocks and slower attacks from a dodge's distance for a stagger or some bravery damage. |
| | |
| | '''[Dodge Attack], Quick Hit''': As per matchup recommendations. If you equip a dodge attack, it is also recommended to equip Quick Hit for solo HP damage. Note that for Dart & Weave, Tidus can do the dodge cancel Hop Step combo and call an assist instead. If D&W is equipped on the ground, equipping Quick Hit for it is not a necessity. |
| | |
| | '''Energy Rain''': Same speed as Slice & Dice, shorter range overall. If the opponent doesn't stagger the initial kick with LV2 Assist Change, this can be harder to punish afterwards. |
| | |
| | == Avoid == |
| | Generally not recommended due to being outclassed by other attacks or having little to no distinct utility. |
| | |
| | {|class="wikitable" |
| | ! scope="row" colspan="2" | Bravery attacks |
| | |- |
| | ! scope="col" | Ground |
| | ! scope="col" | Aerial |
| | |- |
| | |- |
| | | -- || Wither Shot |
| | |- |
| | ! scope="row" colspan="2" | HP attacks |
| | |- |
| | ! scope="col" | Ground |
| | ! scope="col" | Aerial |
| | |- |
| | | Spiral Cut || -- |
| | |- |
| | |} |
|
| |
|
| A general purpose damage build. Boosters scale well with advantage and consistent aerial play. x3.0 before aerial or Large Gap in HP activate. x4.6 with aerial. x5.5 with aerial + After 30 seconds. And finally, x8.2 when all boosters are active.
| | '''Wither Shot''': Low priority, low threat, low reward on hit and requires a different assist from Aerith for more substantial reward. |
|
| |
|
| Substitutes
| | '''Spiral Cut''': Tidus is stuck on the ground in a long animation with disproportionate risk / reward. Once again, not recommended. |
| Basic accessory: Dismay Shock to Empty EX Gauge (vs. Side by Side, boosts damage even further)
| |
| Booster accessory: After 30 Seconds to BRV > Base Value
| |
|
| |
|
| </tabber> | | </tabber> |
| Line 878: |
Line 1,560: |
| Tidus is one of the established viable assists in competitive play. He is not a universally effective assist in the way that Kuja is, but what he brings to the table is nothing to sneeze at. Tidus' bravery assists provide a combination of easier whiff punishes in terms of frame data and extended ground combos, while his air HP can be used in chase sequences to set up inescapable damage. Ground HP can harass for a good few seconds if the opponent doesn't jump out of the way, but your mileage may vary. | | Tidus is one of the established viable assists in competitive play. He is not a universally effective assist in the way that Kuja is, but what he brings to the table is nothing to sneeze at. Tidus' bravery assists provide a combination of easier whiff punishes in terms of frame data and extended ground combos, while his air HP can be used in chase sequences to set up inescapable damage. Ground HP can harass for a good few seconds if the opponent doesn't jump out of the way, but your mileage may vary. |
|
| |
|
| '''Sonic Buster''' is slow not unlike Kuja's Snatch Blow, but it is one of the two grounded BRV assists in the game that can end with a ground wall rush. That's great news for Jecht, but also anyone else with an elaborate combo game like {{012cec}}, Cloud and {{012squ}}. Its tracking and holding potential is weaker overall though compared to Kuja, as Tidus moves the opponent around rapidly. Even the first two charges lift on hit and the knockback that occurs from the finishing kick is of good distance and high speed. The lack of tracking isn't a huge issue, but filler hits aren't really possible like with Kuja and Sephiroth assists. Instead, all the additional damage is often back-loaded to the wall rush and that is where the character's combo potential determines the mileage they'll get out of this move. Positioning with dashes and [[Abilities_(Dissidia_012)|'''Multi Air Slide''']] may be necessary to make the most of it.
| | === Sonic Buster === |
| | Sonic Buster is slow not unlike Kuja's Snatch Blow, but it is one of the two grounded BRV assists in the game that can end with a ground wall rush. That's great news for Jecht, but also anyone else with an elaborate combo game like {{012cec}}, Cloud and {{012squ}}. Its tracking and holding potential is weaker compared to Kuja though. The first two charges lift on hit and the knockback from the finishing kick is of good distance and high speed. The lack of tracking isn't a huge issue, but filler hits aren't feasible like with Kuja and Sephiroth assists. Instead, all the additional damage is often back-loaded to the wall rush. That is where the character's combo potential determines the mileage they'll get out of this move. Positioning with dashes and [[Abilities_(Dissidia_012)|'''Multi Air Slide''']] may be necessary to make the most of it. |
| | |
| | === Hop Step === |
| | Hop Step is a great move all on its own and the same is true for the assist. It retains the lightning fast startup which is great for whiff punishes in general. The movement and overall short duration leave ''very'' little time to Assist Change and lock him. Hop Step also provides '''[[Assist_(Dissidia_012)#Assist_Chase|Assist Chase]]''' on hit for reliable follow-ups. However, the bravery damage is pretty low and the time opponent spends in hit stun is brief. This means that interim hits are not possible during Hop Step either. Shorter hit stun also means Tidus assist won't always trade favorably if both players get hit by assists. Follow-ups may not be possible or worse, the player character gets combo'd anyway. |
|
| |
|
| '''Hop Step''' is a great move all on it's own and the same is true for the assist. It retains the lightning fast startup which is great for whiff punishes in general. The movement and overall short duration leave ''very'' little time to Assist Change and lock him and it provides [[Assist_(Dissidia_012)#Assist_Chase|'''Assist Chase''']] on hit for reliable followups. However, the bravery damage is pretty low and the time opponent spends in hit stun is ultimately rather brief. This means that interim hits are not possible during Hop Step either and trading blows with opponent's assist (both assists landed hits) may lock the player out of a followup or worse, they still get combo'd anyway. Another detail worth mentioning is Hop Step's range - When Tidus performs Hop Step, he does not exert much forward movement during startup, nor is the hitbox large. Kuja, Sephiroth and Jecht assists all exhibit these qualities to some extent which give them an advantage in conversions and whiff punishes. So when it comes to timing Tidus assist, calling him slightly later than usual can make a difference as that lets him spawn closer to the opponent. The reach is still shorter than the aforementioned assists though. At the end of the day, Hop Step is a reliable assist move, though it is not necessarily optimal for a lot of characters.
| | Another detail worth mentioning is Hop Step's range - When Tidus performs Hop Step, he does not exert much forward movement during startup. The hitbox is not large either. Kuja, Sephiroth and Jecht assists all exhibit these qualities to some extent which give them an advantage in conversions and whiff punishes. So when it comes to timing Tidus assist, calling him slightly later than usual can make a difference, as that lets him spawn closer to the opponent. The reach is still shorter than the aforementioned assists though. At the end of the day, Hop Step is a reliable assist move, though it is not necessarily optimal for a lot of characters. |
|
| |
|
| '''Spiral Cut''' is a grounded homing combo attack that ends with Assist Chase. Tidus is stuck on the ground the whole time. This is not usually worth the assist gauge, but players who are willing to bet on a misjudged reaction or capitalising on a dodge may find success at times.
| | === Spiral Cut === |
| | Spiral Cut is a grounded homing combo attack that ends with Assist Chase. Tidus is stuck on the ground the whole time. This is not usually worth the assist gauge, but players who are willing to bet on a misjudged reaction or capitalise on a dodge may find success at times. |
|
| |
|
| '''Slice & Dice''' is significantly slower to start than Spiral Cut and does not stay on the field nearly as long (on whiff), but it is not entirely without merit either. Slice & Dice has more tracking than Hop Step to help with interruptions and charge has enough reach to catch opponents during Chase. As long as the preceding attack does not have obscenely high knockback, it is possible to initiate Chase, perform an HP attack and have Tidus do the rest if the opponent dodged the first HP. On the off chance that both HPs connect and send the opponent flying, Slice & Dice homes in on the opponent very aggressively for long distances. And because this ''also'' yields Assist Chase, it pretty much guarantees a followup of some sort.
| | === Slice and Dice === |
| | Slice and Dice is significantly slower to start than Spiral Cut and does not stay on the field nearly as long (on whiff), but it is not entirely without merit either. Slice & Dice has more tracking than Hop Step to help with interruptions and charge has enough reach to catch opponents during Chase. As long as the preceding attack does not have obscenely high knockback, it is possible to initiate Chase, perform an HP attack and have Tidus do the rest if the opponent dodged the first HP. On the off chance that both HPs connect and send the opponent flying, Slice & Dice homes in on the opponent very aggressively for long distances. And because this ''also'' yields Assist Chase, it pretty much guarantees a followup of some sort. |
|
| |
|
| Tidus assist excels in many important areas, but in terms of damage potential he tends to fall behind in comparison to other competitive assists. He also doesn't have Ranged priority moves, which is a common detriment for assist characters. That being said, Assist Chase is surprisingly rare among air BRV assists, which helps keep Tidus assist afloat in the competition. But this is not always enough, his other attacks have to be of some value to the player (character) for him to truly shine. | | === Conclusion === |
| | Tidus assist excels in many important areas, but in terms of damage potential he tends to fall behind in comparison to other competitive assists. He also doesn't have Ranged priority moves, which is a common detriment for assist characters. That being said, Assist Chase is surprisingly rare among air BRV assists, which helps keep Tidus assist afloat in the competition. But this is not always enough. His other attacks have to be of some value to the player (character) for him to truly shine. |
|
| |
|
| == Assists == | | == Assists == |
| Line 902: |
Line 1,591: |
| Kuja assist is a staple pick in competitive Dissidia 012, with consistent followups, fast air bravery, good holding potential on the ground and just overall solid bravery damage and meter depletion on hit. Compared to Aerith, Kuja can whiff punish more reliably with Strike Energy BRV while still enabling followups for Tidus' HPs and dodge attacks. The long hit stun also helps him in situations where assists trade blows on player characters. The upward knockback on Strike Energy also helps facilitate ceiling wall rushes with Jecht Shot. And if Sphere Shot manages to stagger the opponent, Kuja can be called for an assist combo. This is easier to do on reaction if the opponent is airborne, as Kuja's Snatch Blow is significantly slower to come out. EX Revenge checkmates can also be circumvented this way, but only if opponent commits to blocking or whiffing at a bad time. It goes without saying that wall rush conversions are also practical. | | Kuja assist is a staple pick in competitive Dissidia 012, with consistent followups, fast air bravery, good holding potential on the ground and just overall solid bravery damage and meter depletion on hit. Compared to Aerith, Kuja can whiff punish more reliably with Strike Energy BRV while still enabling followups for Tidus' HPs and dodge attacks. The long hit stun also helps him in situations where assists trade blows on player characters. The upward knockback on Strike Energy also helps facilitate ceiling wall rushes with Jecht Shot. And if Sphere Shot manages to stagger the opponent, Kuja can be called for an assist combo. This is easier to do on reaction if the opponent is airborne, as Kuja's Snatch Blow is significantly slower to come out. EX Revenge checkmates can also be circumvented this way, but only if opponent commits to blocking or whiffing at a bad time. It goes without saying that wall rush conversions are also practical. |
|
| |
|
| Hot Step conversions become more difficult to perform on average, as Kuja must be called during the first hit instead of completing the attack first. This is true of most assists in the game, but it does mean that Tidus players have to be much more vigilant about timing the assist and finishing Hop Step. With walls, Tidus can push the opponent into them, call Kuja and initiate Chase to collect EX Force and follow up similiar to Aerith. But this is usually only possible when near a wall and outside of that, Kuja makes it more difficult to grab all the EX effectively from Hop Step without increased EX intake range and Tenacious Attacker {{accsp}}. | | Hot Step conversions become more difficult to perform on average, as Kuja must be called during the first hit instead of completing the attack first. This is true of most assists in the game, but it does mean that Tidus players have to be much more vigilant about timing the assist and finishing Hop Step. With walls, Tidus can push the opponent into them, call Kuja and initiate Chase to collect EX Force and follow up similiar to Aerith. But this is usually only possible when near a wall. Outside of that, Kuja makes it more difficult to grab all the EX effectively from Hop Step without increased EX intake range and Tenacious Attacker {{accsp}}. |
|
| |
|
| When using assist to boost Tidus' vertical tracking during certain attacks, Kuja will spawn near the opponent and attempt to attack with a flurry of blows. Connecting Stick & Move, Cut & Run or Slice & Dice in this way will usually cause Kuja to whiff (before or on hit), but Full Slide -a staple air bravery- can still work favorably. And if Tidus clashes, Kuja is in good position to follow up. The lack of ranged priority on Kuja's bravery assists means he is vulnerable to LV2 Assist Change staggers, but if the player is willing to spend both assist bars, Kuja's Force Symphony assist can help brute force HP damage during Hop Step chase sequences. | | When using assist to boost Tidus' vertical tracking during certain attacks, Kuja will spawn near the opponent and attempt to attack with a flurry of blows. Connecting Stick & Move, Cut & Run or Slice & Dice in this way will usually cause Kuja to whiff (before or on hit), but Full Slide -a staple air bravery- can still work favorably. And if Tidus clashes, Kuja is in good position to follow up. The lack of ranged priority on Kuja's bravery assists means he is vulnerable to LV2 Assist Change staggers, but if the player is willing to spend both assist bars, Kuja's Force Symphony assist can help brute force HP damage during Hop Step chase sequences. |
| Line 918: |
Line 1,607: |
| Onion Knight's braveries have slightly worse range than Kuja assist. Blizzard's range and shorter combo duration make assist combo confirms and whiff punishes a bit harder, and it cannot be used as a dodge punish. Much like Kuja's Strike Energy assist, Turbo-Hit is vulnerable to post-Assist Change punishes. Onion Knight aggressively pursues the opponent on hit, so when timed appropriately, Onion Knight is left much closer to the opponent for an [[Assist_(Dissidia_012)#Assist_Lock|'''Assist Lock''']]. | | Onion Knight's braveries have slightly worse range than Kuja assist. Blizzard's range and shorter combo duration make assist combo confirms and whiff punishes a bit harder, and it cannot be used as a dodge punish. Much like Kuja's Strike Energy assist, Turbo-Hit is vulnerable to post-Assist Change punishes. Onion Knight aggressively pursues the opponent on hit, so when timed appropriately, Onion Knight is left much closer to the opponent for an [[Assist_(Dissidia_012)#Assist_Lock|'''Assist Lock''']]. |
|
| |
|
| While Onion Knight assist can convert off of Jecht Shot without walls, this can be tricky to do and is still lower damage than Kuja without a wall rush.
| | Tidus can convert off of Turbo-Hit with Jecht Shot without walls, but this is lower damage than Kuja conversions without a wall rush and more difficult to do. The timing is strict, but the idea is to do Jecht Shot in the middle of Onion Knight's attacks and have him knockback cancel the 2nd shot. |
| </tabber> | | </tabber> |
|
| |
|
.jpeg)


 Hyper Ring
 Large Gap in HP
 .
.