Golbez's attacks have two parts. The close-range attack and a projectile with longer reach. The hit reaction and damage output can change depending on which part of the attack hits first. Generally speaking hitting the close-range attack leads most damage and various follow-ups, but blocking them staggers Golbez.
=== Ground ===
=== Ground ===
Line 78:
Line 80:
[[File:Brv_golbez_rising_wave_3.jpeg|thumb|Press Circle {{pspcir}} to push the opponent into the wave.]]
[[File:Brv_golbez_rising_wave_3.jpeg|thumb|Press Circle {{pspcir}} to push the opponent into the wave.]]
Rising Wave is used for its unblockable priority projectile. It can stop dashes and break through all blocks, and combos into Cosmic Ray HP link even from afar. If Rising Wave hits from afar, Golbez has to hold Square {{pspsqu}} and release to close the gap. When used together as a {{keyword|mixup|mixup=1}} with Glare Hand, Golbez can control the pace of grounded fights pretty effectively. It can even catch opponents grabbing EX Cores if they're not careful.
|-|Glare Hand=
|-|Glare Hand=
Line 113:
Line 117:
[[File:Brv_golbez_glare_hand_4.jpeg|thumb|... and release Circle {{pspcir}} once Golbez is close!]]
[[File:Brv_golbez_glare_hand_4.jpeg|thumb|... and release Circle {{pspcir}} once Golbez is close!]]
Glare Hand is Golbez's main {{keyword|poke|poke=1}} against grounded opponents and low-altitude aerial opponents. Its overall speed, reach and HP link to Cosmic Ray forms the core of grounded Golbez play.
Glare Hand's magic swipe can {{keyword|punish|punish=1}} dodges, {{keyword|whiffs|whiff=1}} and dash {{keyword|startups|startup=1}} if they're above Golbez. Because it pulls opponents in, it effectively gives Golbez an HP link regardless of where it hits. If Glare Hand hits in close-range, Golbez has to hold Square {{pspsqu}} and release to close the gap for Cosmic Ray.
Despite being noted as a poke here, it should not be used recklessly or repeatedly without reason. The {{keyword|recovery|recovery=1}} is not as short as other pokes. Watch out for opponents moving around Glare Hand's max range. They can dash past (or through) the magic projectile and force Golbez into a defensive mixup situation in the blink of an eye, if their timing is on point.
|-|Attack System (ground)=
|-|Attack System (ground)=
Line 133:
Line 143:
[[File:Brv_golbez_attack_system_g_2.jpeg|thumb]]
[[File:Brv_golbez_attack_system_g_2.jpeg|thumb]]
* Golbez is in a grounded state during this attack
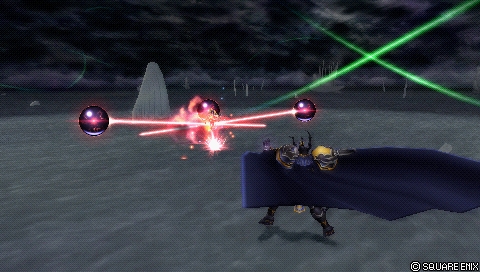
Attack System is used as a secondary ranged tool. If the match's pace is slow, it can be mixed in with Glare Hand against grounded opponents. This lets Golbez fill assist gauge a bit faster (since '''[[Assist_Gauge_Charge#Assist_Gauge_Charge_(Attack)|it's often a fresh move]]''').
The magic shots have enough {{keyword|hit stun|hitstun=1}} to start assist combos, or even solo combos if the position allows it. The problem is that their {{keyword|tracking|tracking=1}} is inconsistent, and completely linear once fired. This issue is slightly alleviated against big bodies, such as {{012gar}} and {{012fc}}. If the opponent dodges early, the shots can find their mark that way. Unfortunately the close-range strike does not guarantee magic shot combos, though.
Watch out for fast ground assists, such as {{012jec}} and {{012seph}}. Golbez has no protection beyond the initial close-range strike, so the long animation leaves him vulnerable to counterattacks.
</tabber>
</tabber>
Line 177:
Line 195:
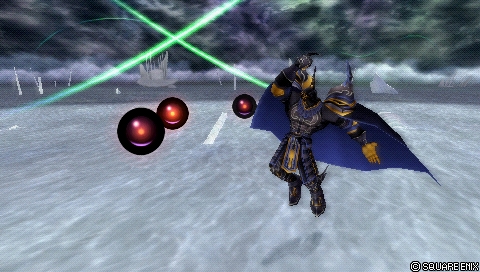
[[File:Brv_golbez_gravity_force_4.jpeg|thumb|Gravity sphere always sends downwards at the end.]]
[[File:Brv_golbez_gravity_force_4.jpeg|thumb|Gravity sphere always sends downwards at the end.]]
* Golbez can move with analog stick {{pspana}} during {{keyword|startup|startup=1}}
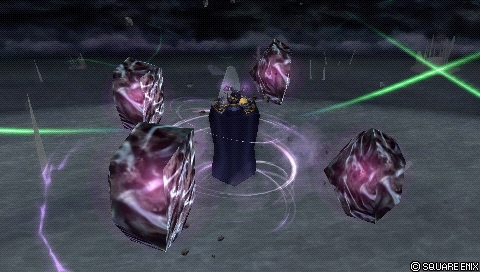
Gravity Force is a high commitment attack, typically used in combos. It is Golbez's highest damaging bravery attack, particularly if it hits in close-range. This is useful for block stagger critical hits, and Kuja assist combos at the ceiling. The downward Wall Rush can start assist combos, too. Golbez warps towards the opponent after firing the sphere, which has medium travel distance regardless of angle. The warp attack knocks opponents into the sphere, which can create solo combos. With '''[[Special_Effects_(Dissidia_012)#Adamant_Chains|Adamant Chains air dodge distance boost]]''', Golbez can even use Gravity Force's initial movement as a budget double dodge. This should be reserved for emergencies though...
... because Gravity Force is a telegraphed attack with long {{keyword|startup|startup=1}}, long animation lock and the sphere's lackluster vertical reach. Although Gravity Forces beats blocks, it is too slow to be used as an effective {{keyword|mixup|mixup=1}} against them. Golbez is briefly vulnerable to attacks after he finishes warping, and he cannot {{keyword|cancel|cancel=1}} the warp to stay safe. Gravity Force looks complicated at first glance, but as opponents learn to create distance and dodge through the warp attack, it becomes much less threatening.
|-|Gravity System=
|-|Gravity System=
Line 198:
Line 222:
[[File:Brv_golbez_gravity_system_3.jpeg|thumb|Press Circle {{pspcir}} again to finish with an explosion.]]
[[File:Brv_golbez_gravity_system_3.jpeg|thumb|Press Circle {{pspcir}} again to finish with an explosion.]]
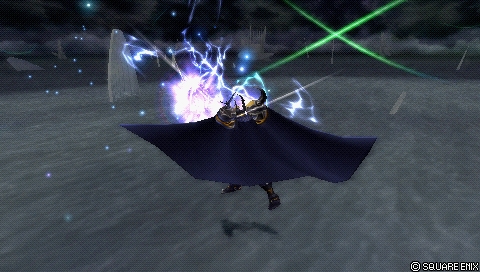
Gravity System is one of Golbez's main air braveries. It's used as an anti-ground attack, and after LV2 Assist Change staggers for guaranteed damage. Golbez can use jumps and Gravity System in tandem to confuse grounded opponents and attack when they least expect it, or if they make a mistake. If the opponent is trying to block the close strike, Golbez can attack early from a short distance, and try to catch the block {{keyword|recovery|recovery=1}} with the laser.
Gravity System comes out quickly and {{keyword|tracks|tracking=1}} downward well. Its {{keyword|whiff|whiff=1}} {{keyword|recovery|recovery=1}} is quite long though, so Golbez is vulnerable to attacks if he misses.
|-|Float System=
|-|Float System=
Line 219:
Line 247:
[[File:Brv_golbez_float_system_3.jpeg|thumb|Press Circle {{pspcir}} again to finish with an explosion.]]
[[File:Brv_golbez_float_system_3.jpeg|thumb|Press Circle {{pspcir}} again to finish with an explosion.]]
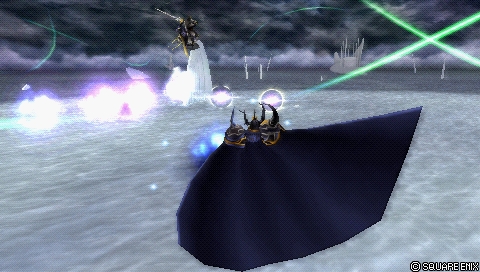
Float System is another important bravery for Golbez. Its upward {{keyword|tracking|tracking=1}} is useful for contesting aerial characters, and punishing nearby air dodges from ground level after jumping first. If the opponent is trying to block the close strike, Golbez can attack early from a short distance, and try to catch the block {{keyword|recovery|recovery=1}} with the laser.
Similar to Gravity System, Float System comes out quickly and has long {{keyword|recovery|recovery=1}}. Missing it leaves Golbez vulnerable to counterattacks, but it's a risk he may have to take eventually. Opponents often retreat to the air if their assist gauge is depleted or locked. Eventually Golbez may find himself with full assist gauge and nothing else to do. That's where Float System can help with creating offense, even if it is risky to do.
|-|Attack System (midair)=
|-|Attack System (midair)=
Line 238:
Line 270:
[[File:Brv_golbez_attack_system_a_2.jpeg|thumb|]]
[[File:Brv_golbez_attack_system_a_2.jpeg|thumb|]]
Attack System's air version functions similarly to the ground version. The long {{keyword|recovery|recovery=1}} makes Golbez vulnerable to {{keyword|whiff punishes|whiffpunish=1}} all around, including air assists. Because of the long animation, lackluster projectile {{keyword|tracking|tracking=1}} and inconsistent reward, aerial Attack System is not used often. If the opponent is not punishing Golbez for using it though, it can be used occasionally, similar to the ground version.
Golbez is a defensive ground-oriented fighter, who executes strikes and projectiles simultaneously. His strategy revolves around controlling space between close-range and midrange. Rising Wave and Glare Hand form the foundation here, with each hit leading to the Cosmic Ray HP link. If the opponent tries to approach head-on, Nightglow HP attack protects Golbez from immediate danger and leads to ceiling assist combos in many stages. Due to the ground attack speed, the abundance of HP links and strong synergy with Side by Side builds, Golbez commands respect in grounded fights.
Historically Golbez has been ranked around mid tier in competitive play. His ground game and high momentum from each hit has earned him a reputation as an explosive character who rewards patience. Patience is important, because Golbez has to contend with risky air combat. The air HP links may come out quickly, but his aerial attacks all suffer from long recovery frames. This makes him more vulnerable to whiff punishes overall. His midrange tools are weaker by comparison, whether it’s in speed, tracking or priority. Because Golbez cannot enforce ground combat with just his ground attacks, his success hinges on turtling with Ground Dash for assist gauge, making good reads and punishing mistakes as they come up. Golbez does not fill assist gauge that quickly with whiffs due to medium-to-long dodge cancel recovery, and his EX generation is severely outclassed by Side by Side builds. Despite these shortcomings, Golbez is capable of fighting plenty of characters in the roster, even if it takes time to reap the rewards.
Strengths
Weaknesses
Ground Space Control - Rising Wave and Glare Hand cover Golbez's lateral range quickly compared to other characters. Effective for both reactive and preemptive play.
Nightglow - A fast HP attack that protects Golbez with high priority hitboxes and leads to ceiling assist combos in many stages. A strong self-defense tool.
Side by Side - As an HP linker, Golbez gets assist gauge quickly with every HP link or Nightglow he connects. This, along with high base bravery builds greatly amplify his reward on hit.
Invincible Air Jumps - Golbez is briefly invincible whenever he jumps in the air, creating safer movement against melee characters.
Committal Air Combat - All air attacks are either telegraphed or have long recovery, regardless of startup speed.
Forcing Ground Combat - Golbez has to deal with halo camping, which he cannot stop safely or consistently. Black Fang forces a Bravery Break, but it's only during EX mode, which compromises his Side by Side synergy.
Slow Meter Gain - Outside of Side by Side, Golbez fills assist and EX gauges rather slowly. Attacks have medium / long recovery, so repeating them for gauge is slower on average. Most attacks have low EX generation, and are outclassed by reward from HP links and Side by Side.
Bravery Attacks
Golbez's attacks have two parts. The close-range attack and a projectile with longer reach. The hit reaction and damage output can change depending on which part of the attack hits first. Generally speaking hitting the close-range attack leads most damage and various follow-ups, but blocking them staggers Golbez.
[Close~Mid] Uppercut & magic. Change combo with button hold.
Unlocked at level 1
Mastered at 70 AP
Rising Wave (Far)Press Circle to push the opponent into the wave.
Rising Wave is used for its unblockable priority projectile. It can stop dashes and break through all blocks, and combos into Cosmic Ray HP link even from afar. If Rising Wave hits from afar, Golbez has to hold Square and release to close the gap. When used together as a mixup with Glare Hand, Golbez can control the pace of grounded fights pretty effectively. It can even catch opponents grabbing EX Cores if they're not careful.
[Close~Mid] Swipe and magic. Change combo with button hold.
Unlocked at level 13
Mastered at 40 AP
Glare Hand's far wave pulls opponents in.Hold Circle to follow after a close hit...... and release Circle once Golbez is close!
Glare Hand is Golbez's main poke against grounded opponents and low-altitude aerial opponents. Its overall speed, reach and HP link to Cosmic Ray forms the core of grounded Golbez play.
Glare Hand's magic swipe can punish dodges, whiffs and dash startups if they're above Golbez. Because it pulls opponents in, it effectively gives Golbez an HP link regardless of where it hits. If Glare Hand hits in close-range, Golbez has to hold Square and release to close the gap for Cosmic Ray.
Despite being noted as a poke here, it should not be used recklessly or repeatedly without reason. The recovery is not as short as other pokes. Watch out for opponents moving around Glare Hand's max range. They can dash past (or through) the magic projectile and force Golbez into a defensive mixup situation in the blink of an eye, if their timing is on point.
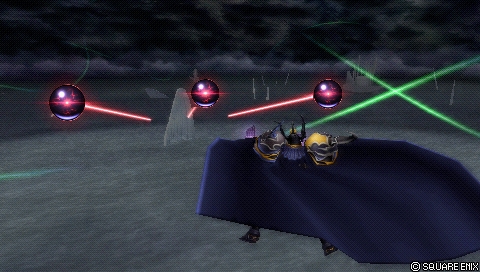
[Close~Long] Direct strike while magic bit fires on foe.
Unlocked at level 1
Mastered at 120 AP
Golbez is in a grounded state during this attack
Attack System is used as a secondary ranged tool. If the match's pace is slow, it can be mixed in with Glare Hand against grounded opponents. This lets Golbez fill assist gauge a bit faster (since it's often a fresh move).
The magic shots have enough hit stun to start assist combos, or even solo combos if the position allows it. The problem is that their tracking is inconsistent, and completely linear once fired. This issue is slightly alleviated against big bodies, such as Garland and Feral Chaos. If the opponent dodges early, the shots can find their mark that way. Unfortunately the close-range strike does not guarantee magic shot combos, though.
Watch out for fast ground assists, such as Jecht and Sephiroth. Golbez has no protection beyond the initial close-range strike, so the long animation leaves him vulnerable to counterattacks.
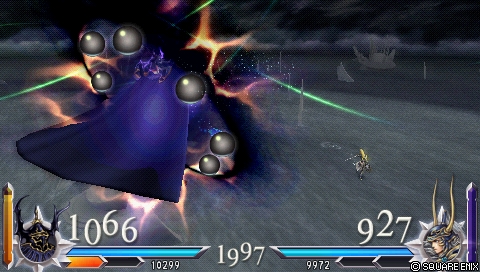
[Close~Long] Warp & attack with gravity sphere. Can be aimed.
Unlocked at level
Mastered at AP
(1) Golbez takes aim. "No escape!"
(2) The sphere is fired. Move behind in close range. Knocks towards sphere afterwards.
(3) The sphere inflicts multiple hits, then sends down.
Golbez knocks the opponent towards the sphere even if they are below it.Gravity sphere always sends downwards at the end.
Golbez can move with analog stick during startup
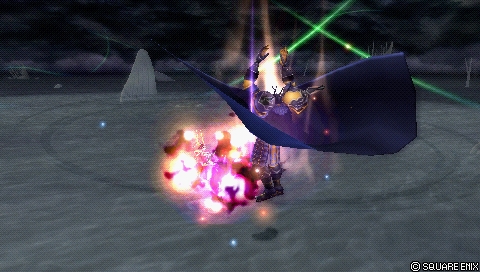
Gravity Force is a high commitment attack, typically used in combos. It is Golbez's highest damaging bravery attack, particularly if it hits in close-range. This is useful for block stagger critical hits, and Kuja assist combos at the ceiling. The downward Wall Rush can start assist combos, too. Golbez warps towards the opponent after firing the sphere, which has medium travel distance regardless of angle. The warp attack knocks opponents into the sphere, which can create solo combos. With Adamant Chains air dodge distance boost, Golbez can even use Gravity Force's initial movement as a budget double dodge. This should be reserved for emergencies though...
... because Gravity Force is a telegraphed attack with long startup, long animation lock and the sphere's lackluster vertical reach. Although Gravity Forces beats blocks, it is too slow to be used as an effective mixup against them. Golbez is briefly vulnerable to attacks after he finishes warping, and he cannot cancel the warp to stay safe. Gravity Force looks complicated at first glance, but as opponents learn to create distance and dodge through the warp attack, it becomes much less threatening.
[Close~Mid] Direct strike plus laser. Strong downwards homing.
Unlocked at level 28
Mastered at 50 AP
Press Circle to follow up with a projectile.Press Circle again to finish with an explosion.
Gravity System is one of Golbez's main air braveries. It's used as an anti-ground attack, and after LV2 Assist Change staggers for guaranteed damage. Golbez can use jumps and Gravity System in tandem to confuse grounded opponents and attack when they least expect it, or if they make a mistake. If the opponent is trying to block the close strike, Golbez can attack early from a short distance, and try to catch the block recovery with the laser.
Gravity System comes out quickly and tracks downward well. Its whiffrecovery is quite long though, so Golbez is vulnerable to attacks if he misses.
[Close~Mid] Direct strike plus laser. Strong upwards homing.
Unlocked at level 22
Mastered at 60 AP
Press Circle to follow up with a projectile.Press Circle again to finish with an explosion.
Float System is another important bravery for Golbez. Its upward tracking is useful for contesting aerial characters, and punishing nearby air dodges from ground level after jumping first. If the opponent is trying to block the close strike, Golbez can attack early from a short distance, and try to catch the block recovery with the laser.
Similar to Gravity System, Float System comes out quickly and has long recovery. Missing it leaves Golbez vulnerable to counterattacks, but it's a risk he may have to take eventually. Opponents often retreat to the air if their assist gauge is depleted or locked. Eventually Golbez may find himself with full assist gauge and nothing else to do. That's where Float System can help with creating offense, even if it is risky to do.
[Close~Long] Direct strike while magic bit fires on foe.
Unlocked at level 1
Mastered at 120 AP
Attack System's air version functions similarly to the ground version. The long recovery makes Golbez vulnerable to whiff punishes all around, including air assists. Because of the long animation, lackluster projectile tracking and inconsistent reward, aerial Attack System is not used often. If the opponent is not punishing Golbez for using it though, it can be used occasionally, similar to the ground version.
HP Attacks
All Cosmic Ray HP attacks share the same attack data despite branching from different bravery attacks.
 - As an
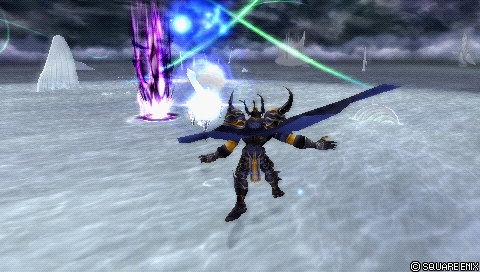


 Sniper Eye
 BRV = 0