Cloud of Darkness is defensive fighter who operates between close range and midrange. Each bravery attack serves as a moving stance, with 3 different attacks depending on the input timing. This lets Cloud of Darkness play a reactive play style. It can occupy space with mid priority attacks on the ground, or deliver a flurry of blows. Various HP attacks are available for combos and neutral situations. Anti-Air Particle Beam for solo HP combos, Aura Ball for stalling, and the distinct Wrath Particle Beam command block for stopping aggressive opponents.
Despite low base ATK stat, Cloud of Darkness benefits from damage builds and Side by Side builds alike. It also has a unique synergy with a Mindbreak build for ludicrous amounts of bravery, even if it’s a bit gimmicky.
Historically Cloud of Darkness has been considered one of the weakest characters in competitive play. The main reason stems from bravery attacks; Cloud of Darkness must complete the 3-step stance before it can dodge. That means each bravery attack is an exceptionally long commitment, which makes it difficult to apply pressure and fill assist gauge quickly. Slower assist gain via whiffs is a notable issue for momentum (see Cecil and Kefka). Most third-stage bravery followups don’t offer notable properties to offset their startup time, either. Air braveries in particular offer little protection against rushdown, while being blockable. Getting high reward in punish situations often requires assist, wall and / or ground, which Cloud of Darkness cannot enforce very easily, quickly or safely. Slow mobility also means Cloud of Darkness fights an uphill battle against defensive opponents, who outpace it for EX Cores and assist gauge.
Cloud of Darkness can thrive just outside poking range as the defender, but it doesn't have many notable strengths to compensate for its drawbacks. Minimizing risk and staying ahead in competition can prove very challenging at higher levels of play.
Strengths
Weaknesses
Command Block - Wrath Particle Beam is one of the safer command blocks in the game, very useful for self defense after air dodges and stopping aggressive opponents.
Glide - Cloud of Darkness can move during bravery attacks, which make it a little safer to whiff and respond to situations.
High Commitment Bravery Attacks - Bravery attack animations are long, which causes several drawbacks. They are more telegraphed, vulnerable to (advancing) blocks, cause more risk due to long recovery, have inconsistent combo opportunities despite the long startup, and more.
Assist Gain on Whiff - Assist gauge cannot be filled quickly by just throwing out attacks. This makes it much harder to utilize an important resource for damage, and create comebacks.
Anti-Air Issues - Cloud of Darkness has incentive to fight on the ground, but it is difficult to stop opponents from hovering above it. Slow startup, high commitment, blind spots and unreliable hitboxes contribute to this. Tentacle of Pain (1) also has lackluster assist conversions despite being the fastest option.
Anti-Turtling - Opponents can run away and outpace Cloud of Darkness for EX Cores and assist gauge over time. Relatively slow mobility, telegraphed HP attacks with long recovery and lackluster long range provocation tools make it difficult to open up defensive players first.
Range Dilemma - Cloud of Darkness can fight more safely just outside close range, when opponents are trying to attack. However, the fastest bravery punish tools require being in close range. This can make it harder for Cloud of Darkness to act as an attacker or do abare; Small initial hitboxes on BRV stances, limited mixup potential and the risk associated with long whiffrecovery afterwards.
High Capacity Point Cost - A full attack loadout has a higher baseline cost, which makes it harder to fit all extra abilities.
Bravery Attacks
All bravery attack starters share the following properties:
Cloud of Darkness' bravery attacks start with a 3-step stance. Three tentacle swipes are performed during this stance. The followup changes depending on when Circle was pressed. For example, press Circle after the first swipe for Followup 1, or after third swipe for Followup 3. Cloud of Darkness can move in different directions during this stance, which can create distance or increase the effective range.
Swipe 1
Swipe 2
Swipe 3
The attack ends automatically after the third swipe. Cloud of Darkness can only dodge at this point in the attack animation. This applies to all of Cloud of Darkness' bravery attacks. Also, all three swipes combo into each other if Cloud of Darkness moves towards the opponent during the swipes.
Omni-range tentacle attack. Change combo with input timing.
Unlocked at level 1
Mastered at 120 AP
Followup 1 (3 Bites) "Devour!"
Followup 2 (Push) "Attack!"
Followup 3 (Bolt) "Bite!"
Pain 1 (3 Bites)
This serves the role of a quick combo string if Cloud of Darkness cannot afford to wait for anything else. It has plenty of hit stun and nice 90 EX, but assist combos are not practical without walls or preemptive assist calls.
Pain 2 (Push)
A midrange attack. If the opponent is pushing for offense (e.g. looking for Pain 3 Bolt), this can blow them away. It's low priority so it can be blocked, but the range and speed is enough to catch opponents off guard occasionally. The base damage is quite high, and the Wall Rush leads to assist combos.
Pain 3 (Bolt)
Bolt is used as a combo starter and occasionally as a midrange punish tool. The initial swipes combo into the bolts, which leads to either air braveries or Anti-Air Particle Beam. Pain 3 has enough hit stun to combo into assists as well, so if the opponent misses or dodges at a bad time, Cloud of Darkness can still get notable reward from this. Keep an eye on when the opponent dodges near the ground, as landing lag could leave them vulnerable to this attack.
Omni-range tentacle attack. Change combo with input timing.
Unlocked at level 13
Mastered at 120 AP
Followup 1 (Sweep) "Go!"
Followup 2 (Spin) "Surrender!"
Followup 3 (Orb) "Repent!"
Tentacle of Spite has some of the more useful mid priority moves, which can be used in neutral. Mix this up with Tentacle of Pain to make it harder for opponents to approach when they go for it.
Spite 1
Wide sweep, a quick "get off me" attack. Wall Rush leads to assist combos. The neat thing here is that even if the opponent has Auto Recovery support ability equipped, Spite 1 can force a ground Wall Rush reaction. That means assist combos are possible on flat ground even if walls are far away.
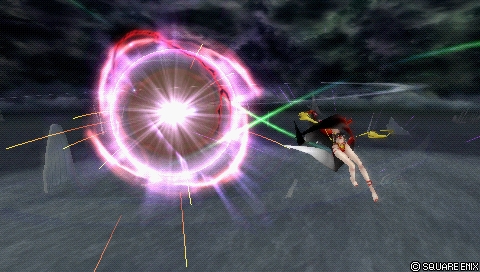
Spite 2
A useful mid priority self defense tool, and assist combo starter. If the opponent is getting too comfortable blocking or attacking into Cloud of Darkness, this can keep them in check. Cloud of Darkness can call assist for a combo, but it should move away from opponent, so they don't get knocked away.
After Spite 2 sends flying, it will enter a recovery period. The red electric visuals stay on, but Cloud of Darkness is vulnerable during this time. Since this attack stays active for a moment, opponents can prepare for a counterattack if it misses. Watch out for that.
Spite 2 also has a moderate strength vacuum effect. This is both a good and a bad thing; It increases its effective range and it becomes harder for opponents to whiff punish. However, it's also harder to make the last hit miss for assist combos (compared to Suffering 2). The last hit can also miss unintentionally if the opponent is being hit at the top of Spite 2's hitbox.
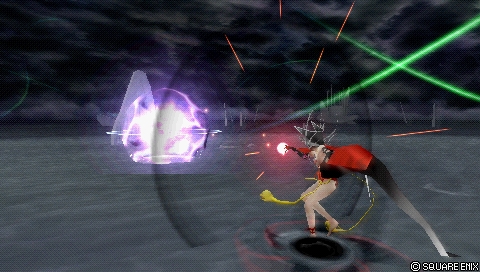
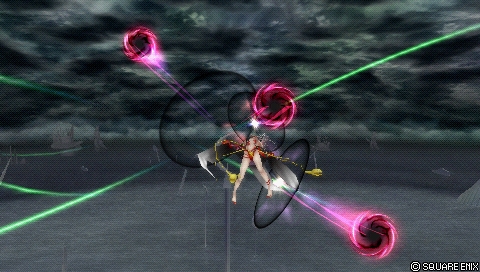
Spite 3
This is one of Cloud of Darkness' stronger ground braveries. Spite 3 is a homing orb that drags the opponent upwards on hit. The Ranged Mid priority and medium travel speed make it useful for occupying space and supporting offensive approaches. It staggers regular blocks, which leaves opponents wide open to attacks. On hit, it holds the opponent long enough for assist combos as well.
Spite 3 has a notable blind spot above Cloud of Darkness, because it always moves forward first, before realigning rather slowly. Watch out for opponents hovering in front Cloud of Darkness, as Spite 3 cannot anti-air at a 45° degree angle immediately. The projectile can also miss if the opponent is moving at a high enough speed.
Despite being capable of inflicting 6 hits, the upward knockback and relative travel speed often results in 4-5 hits instead. Spite 3 is also prone to dropping the opponent if it hits extended limbs.
Omni-range tentacle attack. Change combo with input timing.
Unlocked at level 1
Mastered at 120 AP
Followup 1 (Thrust) "Go!"
Followup 2 (360°) "Thrash about!"
Followup 3 (2 Balls) "Assault!"
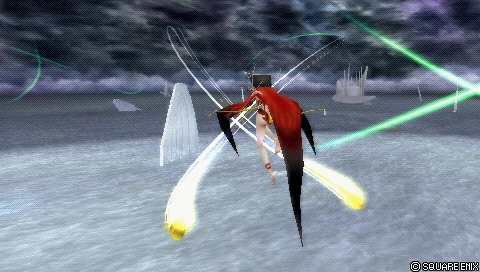
Suffering 1 (Thrust)
A quick thrust with high vertical tracking. Recommended for creating distance and punishing opponents near walls. It has enough hit stun to combo into Aerith assist anywhere with Chase. However, other assists (Kuja, Jecht) usually require ceiling / corner, which have more situational and demanding requirements. Suffering 1 also works as a damaging combo filler move during Exdeath air BRV assist.
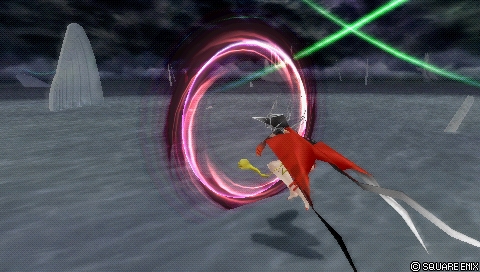
Suffering 2 (360°)
Notorious for its surrounding reach, telegraphed animation and vulnerability to blocks. Works as a punish tool in close range (e.g. after block staggers), and occasionally as a surprise attack against players misjudging their positioning in the front or above. Suffering 2 holds long enough for midscreen assist combos. Just make sure to move away from the opponent after using assist, so Cloud of Darkness does not push the opponent away.
Suffering 3 (2 Balls)
A relatively safe option against blocks at mid range. The projectiles don't have much tracking or hit stun, but if both connect at mid range, they can combo into assists. Long range snipes are difficult, but can be attempted once in a while to catch reckless opponents. Against characters such as The Emperor and Ultimecia, Suffering 3 can be fired against walls, reflected back and thus use as a tool for activating Wrath Particle Beam.
Gliding with analog stick is worth noting here: Aggressive opponents may attempt to approach and block early. The glide's movement allows Cloud of Darkness to avoid the block and potentially hit the projectiles while they're stuck in recovery. It's the kind of move that can play off of Cloud of Darkness' weakness as a high commitment attacker. Be careful against opponents who are willing to Free Air Dash deeper though, as the projectiles lose to dashes and may put Cloud of Darkness in a high pressure situation afterwards.
Omni-range tentacle attack. Change combo with input timing.
Unlocked at level 27
Mastered at 120 AP
Followup 1 (2 Hits) "Devour!"
Followup 2 (Vertical) "Attack!"
Followup 3 (Projectiles) "Assault!"
Scorn 1 (2 Hits)
A quick 2-hit jab. Recommended for pushing opponents away, whiff punishing reckless attacks. The Wall Rush can lead to assist combos, making it particularly useful if the opponent gets blocked near walls.
Scorn 2 (Vertical)
Long reaching attack that goes up or down depending on the opponent's position. For example, if the opponent is above Cloud of Darkness, Scorn 2 goes up. This is useful for catching the opponent's blind spots and punishing grounded attacks with longer recovery, such as Cloud's Cross-slash. Scorn 2 Wall Rushes whether it hits up or down, which can lead to assist combos.
The further Cloud of Darkness is, the easier it is to react and block this attack specifically. Cloud of Darkness does not have an aerial mid priority move to use as a mixup, so exercise caution when using this.
Scorn 3 (Projectiles)
This is occasionally used to pressure opponents below Cloud of Darkness. If multiple projectiles hit, Cloud of Darkness can attempt to Free Air Dash, and combo into other attacks afterwards. It can be challenging to block all the projectiles, but they do lose to dashes, so be careful. Similar to Suffering 3, when used sparingly, Scorn 3 can be a relatively low risk option.
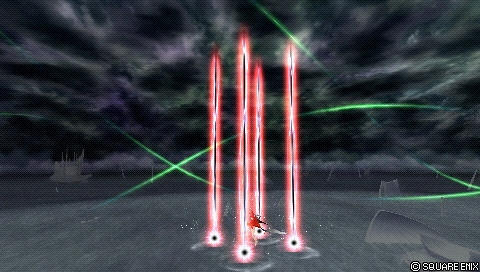
[Close] Fire columns of darkness around self. Short range, fast deployment.
Unlocked at level
Mastered at AP
Anti-Air is used in solo combos after Pain 3 (Bolts), after block staggers, and to occasionally threaten airborne opponents. The beams stay active for a moment, which can also catch nearby air dodges. Cloud of Darkness does not move far, which makes it harder to hit this move even after blocking attacks. However, on hit it leads to consistent assist combos anywhere. Because of this, it's also pretty rewarding as a solo combo ender with Side by Side builds.
Cloud of Darkness is considered grounded while using Anti-Air. It has enough recovery that even Kuja BRV assist can punish afterwards, so exercise caution when using Anti-Air Particle Beam.
[Long] Fire wall of force straight ahead. Great vs. flank attacks.
Unlocked at level
Mastered at AP
Wide-Angle Particle Beam is a 1-hit HP that has few different functions: The wide hitbox makes it lenient for finishing assist combos from various positions. The startup is quite slow, but Wide-Angle can also catch ground dodges if the opponent is auto piloting them.
Wide-Angle also has unique synergy with Mindbreak builds; The long travel distance makes it effective for destroying stage elements in World of Darkness and Pandaemonium - Top Floor. That means Cloud of Darkness can accumulate bravery quickly just by hitting pillars etc. with Wide-Angle Particle Beam.
This attack has fairly long recovery after firing, so Cloud of Darkness is vulnerable to dodge > counter attacks and assist punishes.
[Long] Fire force bursts at foe. Slow start, homes for long time.
Unlocked at level
Mastered at AP
Long-Range Particle Beam covers most of Order's Sanctuary's length.
Long-Range Particle Beam is used as a secondary zoning tool in neutral. The startup is quite slow, but gliding with analog stick can make it safer against ground assist attacks. Once Long-Range Particle Beam is fired, it stays active for a long time. It has tall hitboxes and medium tracking, so opponents must dodge through all the beams to be safe. All of the beams can hit separately, but facilitating even a second HP hit is not seen often.
Long-Range Particle Beam has enough recovery to be vulnerable to counterattacks. However, it's just short enough to avoid slower ground BRV assists such as Kuja and Tidus. That means Long-Range Particle Beam is safer to use on average if assists don't interrupt it early, or if the opponent is not close enough to dodge through and retaliate.
[Block] Create force shield. If block succeeds, attacks HP.
Unlocked at level
Mastered at AP
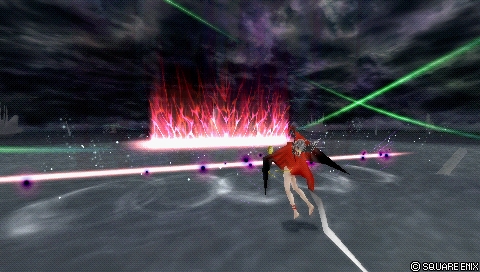
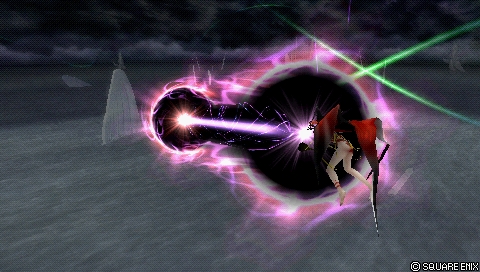
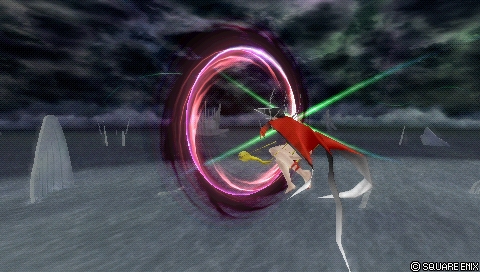
Wrath can block attacks...... and spawns a multi-hit beam at the opponent's location when succeeds. Staggers low / mid priority melee attacks.
Wrath Particle Beam is Cloud of Darkness' signature command block. It is used to for self-defense after dodging or in neutral against aggressive opponents. Wrath staggers dashes, as well as melee bravery attacks with low AND mid priority (e.g. Squall Heel Crush).
After a successful counter, Cloud of Darkness spawns a beam at the opponent's location. The beam deals HP damage at the end, and it has enough hit stun to start assist combos afterwards. The instant block timing out of dodges and the threat of solo HP damage make it effective for instilling respect in close-range characters.
Wrath can counter projectiles as well (e.g. Squall Fire Barret), but it is not as effective by comparison. Countering a projectile does not stagger the opponent, so they can often dodge the delayed beam spawn on reaction. Cloud of Darkness is also briefly vulnerable to assists after firing the beam, so it's not very effective as an anti-zoning tool.
The block duration is also fairly short, so proper timing (and confidence) is required to defend successfully with this. If the opponent catches on to Cloud of Darkness' timing, it can lead to setbacks and even full Assist Charge if this is used at low health.
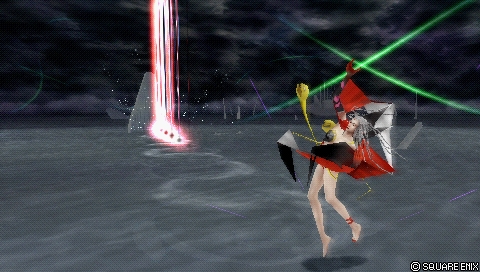
[Close] Detonated force sphere. Charge to create multiple balls; can aim with the analog stick.
Unlocked at level
Mastered at AP
When charging, hitbox appears in 3 frames after button release.
Up to 5 Aura Balls can be out when Square is held.All Aura Balls detonate at once when Square is released.
Aura Ball is typically used as a passive self-defense tool. It can fill assist gauge more safely (not quickly) thanks to the coverage it provides. Aura Ball is quite slow to start, but Cloud of Darkness can move towards them () as they are fired. The HP explosions activate quickly on button release, so if things look bad, Cloud of Darkness can react in the blink of an eye. Even if Cloud of Darkness gets hit during this move, Aura Ball still explodes.
Aura Ball explosions have a large enough hitbox and long active frames to stop assist punishes. Cloud of Darkness' dodge cancelrecovery is also relatively short. That means opponents are hard pressed to punish Cloud of Darkness by the time it would be safe to do so. All these properties make Aura Ball a relatively safe attack to use, but it relies on opponents approaching Cloud of Darkness.
When casting multiple Aura Balls, watch out for projectiles such as Sephiroth's Shadow Flare Gilgamesh's Electrocute. Aura Ball cannot hurt opponents who are not close to them. Disjointed mid range attacks, such as Garland's Chain Cast can also blow through, so prepare to dodge or use assist if necessary.
[Mid] Fire huge particle beam. Very accurate and powerful.
Unlocked at level
Mastered at AP
0-form is one of Cloud of Darkness' staple air HP attacks. It's useful as an assist combo ender and block stagger counter. It tracks horizontally and diagonally, and stays active long enough to even catch air dodges within range. 0-form has very high knockback, which makes it more likely to Wall Rush for extra damage (or assist combos if possible). High reward on hit, but also high risk if it misses due to long recovery. It is also quite slow to start, so it is not as effective for catching blocks as it could be.
[Long] Salvo of force bursts. Ends if they hit the ground.
Unlocked at level
Mastered at AP
Projectiles pursue the opponent briefly afterwards.
Projectiles can hit early in front of Cloud of Darkness
Can move around with analog stick until projectiles come out
Fusillade Particle Beam is similar to Long-Range Particle Beam in that it's used as a secondary pressure tool in neutral. It's generally pretty slow, but it can force a dodge (or other defensive actions) against passive opponents in midrange.
The projectiles become active as soon as they're fired, protecting Cloud of Darkness from the front. Then they move a certain distance away from it before they start homing in on the opponent. The exact dodge timing can appear vague to opponents, as the projectiles hit at slightly different timings, and from different angles. After Cloud of Darkness dodges, the projectiles can still inflict damage for a short period of time. So if the opponent fails to interrupt Fusillade in time, it can make it harder to survive unscathed.
Cloud of Darkness can move until the projectiles have been fired, which can make it marginally safer against approaching opponents. It is generally unsafe to use if the opponent is willing to interrupt with assist, though. Watch out for aggressive opponents who may try to dash and interrupt Fusillade before the projectiles even come out.
[Block] Create force of shield. If block succeeds, attacks HP.
Unlocked at level
Mastered at AP
Wrath also works on projectiles, e.g. Red Fang. Ground and midair versions can do this.
Wrath's aerial version is highly recommended for its defensive capabilities. It acts the same way as the ground version; Instant guard, short duration, spawns a beam at the opponent's location if it blocks something. Since competitive Dissidia 012 is often focused on aerial combat, this version of Wrath is a very valuable self-defense tool against aggressive opponents.
Wrath blocks instantly, so it can be used after air dodges to make dodging much safer than normally possible. This can cause hesitation in melee characters, since they can get punished for trying to dash in and push their attack. Aerial Wrath still leads to assist combos, but it also does not yield consistent reward against projectiles. Cloud of Darkness is briefly vulnerable to assist attacks after firing the beam, so be careful when countering projectiles.
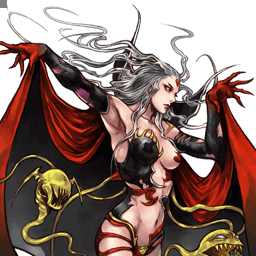
EX Mode: Flood of Darkness!
Effects:
Regen
Critical Boost
Null Particle Beam
Cloud of Darkness' EX Mode has a couple notable traits for neutral and niche combo purposes. EX Modes are often reserved for guaranteeing victory with an assist combo, so Cloud of Darkness may not benefit from the unique ability much on average.
To make matters worse, Cloud of Darkness is not efficient at filling EX gauge. Most of its attacks don't provide EX, and EX Core races are often challenging due to slower dash speed and commitment to long attack animations. That's not to say Cloud of Darkness' EX Mode is useless, but it is certainly held back by a number of factors from reaching its full potential.
Null Particle Beam
[Always active while in EX Mode] The recovery time after all attacks can be cancelled by performing an HP attack.
Null Particle Beam has some utility in neutral. Instead of dodging after an attack, an HP attack can be done instead. This has a couple use cases. The most notable one is safer whiffs: Attacks are safer to throw out in neutral, because Wrath Particle Beam can be used quickly to guard against incoming attacks. This works for both bravery attacks and HP attacks alike.
This ability also affects Cloud of Darkness' combo potential in a couple ways. Pain 3 (Bolts) > Anti-Air Particle Beam solo combo becomes a bit more lenient to do, since Anti-Air comes out earlier. It is also possible to combo Pain 1 (3 Bites) into Anti-Air Particle Beam if the opponent is at a corner. [1] This is not that practical, but possible regardless. Jecht assist and small stages (e.g. M. S. Prima Vista) can help with that.
Null Particle Beam also allows more frequent use of other HP attacks to fill the stage, such as Wide-Angle and Aura Ball. Even Wrath can be used more frequently within a short period of time.
There is no apparent upper limit for chaining HP attacks after an attack's recovery. As long as EX Mode is active, Cloud of Darkness can cancel into another HP attack. Please note that if an HP attack hits, repeated Square inputs can accidentally activate EX Burst early.
EX Burst: Ultra Particle Beam
A particle beam that leaves only dust in its wake. Fill the gauge by pressing circle. Release when it reaches 120%.
Base Damage (Initial)
Base Damage (Remainder)
Type
2 x 4 (8)
7 x 14 (106 total)
Magical
Ultra Particle Beam requires holding Circle until the gauge reaches 120 %. The gauge fills more slowly as it reaches maximum value, so prepare to release Circle quickly once it does. The execution is similar to Exdeath's EX Burst.
The bravery damage is not that high due to low base damage on the initial hits. Even so, it is effective for finishing a match if a Wall Rush assist combo left at low health / bravery.
Combos
Cloud of Darkness has a handful of combo routes both solo and with assist. Solo combos get more situational and difficult pretty quickly, but assists can help set them up.
This section does not show all combos right now. They will be listed more thoroughly on a separate combo page in the future.
Solo
The most practical solo combo route usually involves Tentacle of Pain 3 (Bolts), followed by Spite 3 (Orb).
The damage values assume that any preceding tentacle hits connected.
Condition
Combo
Base Damage
EX
Notes
BRV Starter Ground Solo BRV to HP Combo Recommended!
Tentacle of Pain 3 (Bolts) > Anti-Air Particle Beam
42 + HP
114
Base Damage (Breakdown): 7, 7, 7 > 12 (Bolts) > 9 + HP
Opponent Assist (Comrade's Vow): ???
EX Force (Breakdown): 9, 9, 9 > 0 > 87
This is the most common solo combo Cloud of Darkness can do in competitive matches. There is just enough hit stun to connect Anti-Air Particle Beam after the bolts. Occasionally it may miss with repeated button presses, because there is no input buffer to help with Anti-Air. However, if Cloud of Darkness is slightly late, the opponent still has to dodge with precise timing to escape. This can give a little of bit of leniency against human opponents.
After Anti-Air connects, assists can also follow up. Jecht BRV assist can even set up this combo again.
Projectile Starter Ground, Midrange / Long range BRV Damage
Tentacle of Spite 3 (Orb) > DC > Free Air Dash > Spite 3 HIT > Tentacle of Suffering 2 (360°)
60-94
108
Base Damage (Breakdown): 6-40 > 7, 7 > 40
Opponent Assist (Comrade's Vow): ???
EX Force (Breakdown): 9, 9 > 90
Spite 3 drags the opponent upwards with multiple hits, which gives enough time to Free Air Dash and use air braveries. Spite 3 must be done from medium / long range, so Cloud of Darkness has enough time to become actionable. Then if Spite 3 hits, Cloud of Darkness is in good position to combo afterwards.
Both Tentacle of Suffering and Tentacle of Scorn work here, but mileage will vary depending on the followup.
BRV Starter Ground, Corner, EX Mode EX Mode BRV to HP
Tentacle of Spite 1 (3 Hits) > Anti-Air Particle Beam
This combo is not that practical for its steep requirements, but it's a combo that Cloud of Darkness could not do otherwise. Corner cuts the knockback, and the EX mode ability lets Cloud of Darkness chain into an HP attack during recovery, making this combo possible.
The base damage is not much higher than Pain 3 > Anti-Air Particle Beam, but EX mode's higher critical hit rate can increase the damage. It also produce more EX Force than usual.
Assist (Jecht)
Practical assist combos usually start with any wall rush, Spite 2 (Spin), Spite 3 (Orb), Suffering 2 (360°) and Scorn 2 (Vertical).
Cloud of Darkness can be built for damage either via high base bravery or high ATK and HP Wall Rush. The following build can be used either for long-term EX gauge, or burst damage with Side by Side and assist combos.
indicates a "Gear" extra ability or the use of Equip Glitch. The total Capacity Point cost assumes the equip glitch is done.
Actions
Ground Evasion
Midair Evasion
Ground Block
Midair Block
Aerial Recovery
Recovery Attack
Controlled Recovery
Wall Jump
Free Air Dash
Omni Ground Dash+
Multi Air Slide
Free Air Dash Boost
Assist Gauge Up Dash
Ground Evasion Boost
Midair Evasion Boost
Evasion Boost
Descent Speed Boost
Support
Always Target Indicator
EX Core Lock On
Auto Assist Lock On
Extra
Precision Evasion
EXP to HP
Machinery
CP
440 / 450
The booster multiplier is x3.5 when all boosters are active except BRV = 0.
This is a damage build that focuses on high HP damage with Wall Rush. If Cloud of Darkness starts an assist combo with an HP attack, it can easily do 3000+ HP damage in total. And because the damage comes from the naturally high bravery, there is no need to worry about the opponent's DEF stat reducing damage that much.
This build is recommended against Side by Side users who don't contest for EX, such as Firion, Onion Knight and Golbez.
This build makes use of Cloud of Darkness' (CoD) unique LV100 weapon Everdark for its bravery recovery. This creates room for other options, notably base bravery, HP Wall Rush damage and meter depletion. The booster accessories lean into this, with BRV = 0 being a standout pick; It affects both Sniper Eye and Dismay Shock whenever an HP attack Wall Rushes (e.g 0-form Particle Beam). Miracle Shoes and Maximillian make up for the max HP reduction from Chainsaw and Thornlet .
Skilled opponents often defend and build resources before approaching CoD. Although it is risky, getting damage early as an attacker can prove beneficial.
For a Side by Side variant, replace First to Victory with Side by Side. That makes reads with HP attacks more rewarding, but disables EX gauge and EX absorption entirely. Empty EX Gauge booster becomes available with this, and may be used to replace any booster accessory at player's discretion, such as Summon Unused .


 Sniper Eye
 Large Gap in HP
 Blue Gem