| Damage multiplier | Startup frame | Type | Priority | EX Force | Effects | CP (Mastered) |
|---|---|---|---|---|---|---|
| 20 | 19F | Physical | Melee Low | 0 | Wall Rush | 30 (15) |
Muggshotter (talk | contribs) |
Muggshotter (talk | contribs) (Added portrait) |
||
| (10 intermediate revisions by the same user not shown) | |||
| Line 1: | Line 1: | ||
[[Category:Dissidia 012 Final Fantasy]] | [[Category:Dissidia 012 Final Fantasy]] | ||
{{012CharNav | |||
|icon=https://resources.dissidia.wiki/ddff/chara-icon/ddff-icon-kain.png | |||
|general=[[Kain Highwind (Dissidia_012)|'''General''']] | |||
|matchups=Matchups | |||
|resources=Resources | |||
|starter=Starter Guide | |||
|strategy=Strategy | |||
}} | |||
{{CharacterInfo | {{CharacterInfo | ||
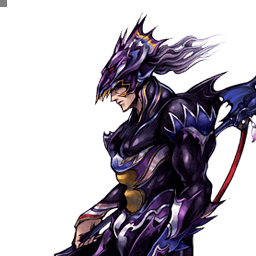
|portrait=https://resources.dissidia.wiki/ddff/portraits/ddff-port-kain.png | |||
|name=Kain Highwind (カイン・ハイウインド) | |name=Kain Highwind (カイン・ハイウインド) | ||
|origin=Final Fantasy IV | |origin=Final Fantasy IV | ||
|weapon=Daggers, Greatswords, Katanas, Spears, Swords | |weapon=Daggers, Greatswords, Katanas, Spears, Swords | ||
|armor=Shields, Gauntlets, Large Shields, Helms, Light Armor, Heavy Armor | |armor=Shields, Gauntlets, Large Shields,<br>Helms, Light Armor, Heavy Armor | ||
|atk=110 (Average) | |atk=110 (Average) | ||
|def=111 (Average) | |def=111 (Average) | ||
| Line 12: | Line 21: | ||
|fall=67 (Fast) | |fall=67 (Fast) | ||
|fallr=16 (Very Fast) | |fallr=16 (Very Fast) | ||
|exclusives=Black Dragon Spear, Holy Dragon Spear, Abel's Lance, Highwind | |exclusives=Black Dragon Spear, Holy Dragon Spear,<br>Abel's Lance, Highwind | ||
}} | }} | ||
| Line 42: | Line 51: | ||
|-|Lance Burst= | |-|Lance Burst= | ||
{{AbilityInfo | {{AbilityInfo | ||
|damage= | |damage=2 x 6, 5, 15 (32) | ||
|startup=29F | |startup=29F | ||
|type=Physical | |type=Physical | ||
| Line 73: | Line 82: | ||
|-|Lance Barrage= | |-|Lance Barrage= | ||
{{AbilityInfo | {{AbilityInfo | ||
|damage=7, 8 + | |damage=7, 8 + 2 x 4, 12/15 (35/30) | ||
|startup=19F | |startup=19F | ||
|type=Physical | |type=Physical | ||
| Line 85: | Line 94: | ||
|-|Celestial Shooter= | |-|Celestial Shooter= | ||
{{AbilityInfo | {{AbilityInfo | ||
|damage= | |damage=2 x 4, 7 + 4, 4, 5, 12/15 (40/30) | ||
|startup=21F | |startup=21F | ||
|type=Physical | |type=Physical | ||
| Line 97: | Line 106: | ||
|-|Crashing Dive= | |-|Crashing Dive= | ||
{{AbilityInfo | {{AbilityInfo | ||
|damage= | |damage=1 x 7, 8 + 1x7, 6, 12/15 (40/30) | ||
|startup=21F | |startup=21F | ||
|type=Physical | |type=Physical | ||
| Line 130: | Line 139: | ||
{{AbilityInfo | {{AbilityInfo | ||
|damage= | |damage=2 x N | ||
|startup=See table below | |startup=See table below | ||
|type=Physical | |type=Physical | ||
| Line 161: | Line 170: | ||
|-|Dragon's Fang= | |-|Dragon's Fang= | ||
{{AbilityInfo | {{AbilityInfo | ||
|damage= | |damage=- | ||
|startup=41F | |startup=41F | ||
|type= | |type=- | ||
|priority=Melee High | |priority=Melee High | ||
|ex=0 | |ex=0 | ||
| Line 178: | Line 187: | ||
|-|Rising Drive= | |-|Rising Drive= | ||
{{AbilityInfo | {{AbilityInfo | ||
|damage= | |damage=2 x 32 (64) | ||
|startup=49F | |startup=49F | ||
|type=Physical | |type=Physical | ||
| Line 190: | Line 199: | ||
|-|Sky Rave= | |-|Sky Rave= | ||
{{AbilityInfo | {{AbilityInfo | ||
|damage= | |damage=2 x 37 (74) | ||
|startup=49F | |startup=49F | ||
|type=Physical | |type=Physical | ||
| Line 202: | Line 211: | ||
|-|Dragon's Fang (midair)= | |-|Dragon's Fang (midair)= | ||
{{AbilityInfo | {{AbilityInfo | ||
|damage= | |damage=- | ||
|startup=41F | |startup=41F | ||
|type= | |type=- | ||
|priority=Melee High | |priority=Melee High | ||
|ex=0 | |ex=0 | ||
| Line 214: | Line 223: | ||
|-|Gungnir= | |-|Gungnir= | ||
{{AbilityInfo | {{AbilityInfo | ||
|damage= | |damage=2 x 30 (60) | ||
|startup=55F | |startup=55F | ||
|type=Physical | |type=Physical | ||
| Line 226: | Line 235: | ||
</tabber> | </tabber> | ||
== EX Mode: Holy Strength == | == EX Mode: Holy Strength! == | ||
Effects: | Effects: | ||
* Regen | * Regen | ||
| Line 243: | Line 252: | ||
|type=Physical | |type=Physical | ||
}} | }} | ||
== Builds == | == Builds == | ||
| Line 274: | Line 268: | ||
|ast=Player Choice | |ast=Player Choice | ||
|wpn=Highwind | |wpn=Highwind | ||
|hand=Lufenian Dirk | |hand=Lufenian Dirk ([[CP_Glitch_(Dissidia_012)|'''CP Glitch''']]) | ||
|head=Lufenian Headband | |head=Lufenian Headband ([[CP_Glitch_(Dissidia_012)|'''CP Glitch''']]) | ||
|armor=Lufenian Vest | |armor=Lufenian Vest | ||
|acc1={{accbas}} Hyper Ring | |acc1={{accbas}} Hyper Ring | ||
| Line 289: | Line 283: | ||
|summon=Rubicante | |summon=Rubicante | ||
}} | }} | ||
A high damage build utilising bravery damage and wall rush for small stages with low ceiling. The maximum booster value of x7.4 activates with ''both'' Large Gap in HP and BRV = 0. x5.3 when Large Gap in HP is in effect, but not BRV = 0. | A high damage build utilising bravery damage and wall rush for small stages with low ceiling. The maximum booster value of x7.4 activates with ''both'' Large Gap in HP and BRV = 0. x5.3 when Large Gap in HP is in effect, but not BRV = 0. | ||
| Line 308: | Line 301: | ||
|ast=Player Choice | |ast=Player Choice | ||
|wpn=Heaven's Cloud | |wpn=Heaven's Cloud | ||
|hand=Lufenian Dirk | |hand=Lufenian Dirk ([[CP_Glitch_(Dissidia_012)|'''CP Glitch''']]) | ||
|head=Lufenian Hairpin | |head=Lufenian Hairpin ([[CP_Glitch_(Dissidia_012)|'''CP Glitch''']]) | ||
|armor=Lufenian Vest | |armor=Lufenian Vest | ||
|acc1={{accbas}} Muscle Belt | |acc1={{accbas}} Muscle Belt | ||
| Line 323: | Line 316: | ||
|summon=Rubicante | |summon=Rubicante | ||
}} | }} | ||
A damage build without sacrificing EX absorption. Recommended for medium to large stages. x2.3 booster before Large Gap in HP activates. | A damage build without sacrificing EX absorption. Recommended for medium to large stages. x2.3 booster before Large Gap in HP activates. | ||
| Line 333: | Line 324: | ||
If you intend to use Aerith assist, use Cleaver instead. Heaven's Cloud serves well if you are comfortable doing his aerial bravery loops (in the corner). | If you intend to use Aerith assist, use Cleaver instead. Heaven's Cloud serves well if you are comfortable doing his aerial bravery loops (in the corner). | ||
</tabber> | </tabber> | ||
== Assist == | |||
Kain's assist data. | |||
{{012Assist | |||
|type1=BRV | |||
|attack1=Lance Burst | |||
|startup1=29F | |||
|position1=Ground | |||
|spawn1=Opponent | |||
|damage1=2 x 6, 5, 15 (32) | |||
|effect1=Chase | |||
|type2=BRV | |||
|attack2=Crashing Dive | |||
|startup2=21F | |||
|position2=Air | |||
|spawn2=Opponent | |||
|damage2=1 x 7, 8, 1 x 7, 6, 12 (40) | |||
|effect2=Wall Rush | |||
|type3=HP | |||
|attack3=Jump | |||
|startup3=62F | |||
|position3=Ground | |||
|spawn3=Opponent | |||
|damage3=2xN | |||
|effect3=Wall Rush | |||
|type4=HP | |||
|attack4=Dragon's Fang | |||
|startup4=41F | |||
|position4=Air | |||
|spawn4=Opponent | |||
|damage4=- | |||
|effect4=Wall Rush | |||
}} | |||
| General | Matchups | Resources | Starter Guide | Strategy |
|---|
| Info | |
|---|---|
| |
| Name | Kain Highwind (カイン・ハイウインド) |
| Original game | Final Fantasy IV |
| Weapon | Daggers, Greatswords, Katanas, Spears, Swords |
| Armor | Shields, Gauntlets, Large Shields, Helms, Light Armor, Heavy Armor |
| Base ATK (LV100) | 110 (Average) |
| Base DEF (LV100) | 111 (Average) |
| Run Speed | 8 (Below Average) |
| Dash Speed | 81 (Below Average) |
| Fall Speed | 67 (Fast) |
| Fall Speed Ratio After Dodge | 16 (Very Fast) |
| Exclusive weapons | Black Dragon Spear, Holy Dragon Spear, Abel's Lance, Highwind |
| Strengths | Weaknesses |
|---|---|
Kain Highwind is a playable character in Dissidia 012.
| Damage multiplier | Startup frame | Type | Priority | EX Force | Effects | CP (Mastered) |
|---|---|---|---|---|---|---|
| 20 | 19F | Physical | Melee Low | 0 | Wall Rush | 30 (15) |
| Damage multiplier | Startup frame | Type | Priority | EX Force | Effects | CP (Mastered) |
|---|---|---|---|---|---|---|
| 2 x 6, 5, 15 (32) | 29F | Physical | Melee Low | 90 | Chase | 30 (15) |
| Damage multiplier | Startup frame | Type | Priority | EX Force | Effects | CP (Mastered) |
|---|---|---|---|---|---|---|
| 10 | 35F | Physical | Ranged Low | 0 | - | 30 (15) |
[Long] Launch pockets of air at foe to send upwards.
Can solo combo on hit from a distance.
| Damage multiplier | Startup frame | Type | Priority | EX Force | Effects | CP (Mastered) |
|---|---|---|---|---|---|---|
| 7, 8 + 2 x 4, 12/15 (35/30) | 19F | Physical | Melee Low | 30 (Wall Rush) / 90 (Chase) | Chase, Wall Rush | 30 (15) |
| Damage multiplier | Startup frame | Type | Priority | EX Force | Effects | CP (Mastered) |
|---|---|---|---|---|---|---|
| 2 x 4, 7 + 4, 4, 5, 12/15 (40/30) | 21F | Physical | Melee Low | 30 (Wall Rush) / 90 (Chase) | Chase, Wall Rush | 30 (15) |
| Damage multiplier | Startup frame | Type | Priority | EX Force | Effects | CP (Mastered) |
|---|---|---|---|---|---|---|
| 1 x 7, 8 + 1x7, 6, 12/15 (40/30) | 21F | Physical | Melee Low | 30 (Wall Rush) / 90 (Chase) | Chase, Wall Rush | 30 (15) |
| Damage multiplier | Startup frame | Type | Priority | EX Force | Effects | CP (Mastered) |
|---|---|---|---|---|---|---|
| 10 | 35F | Physical | Ranged Low | 0 | - | 30 (15) |
| Damage multiplier | Startup frame | Type | Priority | EX Force | Effects | CP (Mastered) |
|---|---|---|---|---|---|---|
| 2 x N | See table below | Physical | Melee High | 3 each | Wall Rush | 40 (20) |
[Close~Long] Pounce on foe. Charge to change its strength.
| Version | Startup / charge time | Max charge time = 180F | Liftoff | Peak | Landing |
|---|---|---|---|---|---|
| LV1 | 8F | After button release | 7F | 23F~41F | 51F |
| LV2 | 32F | After button release | 9F | 27F~49F | 67F |
| LV3 | 62F | After button release | 9F | 31F~57F | 79F |
| Damage multiplier | Startup frame | Type | Priority | EX Force | Effects | CP (Mastered) |
|---|---|---|---|---|---|---|
| - | 41F | - | Melee High | 0 | Wall Rush | 30 (15) |
| Damage multiplier | Startup frame | Type | Priority | EX Force | Effects | CP (Mastered) |
|---|---|---|---|---|---|---|
| 2 x 32 (64) | 49F | Physical | Melee High | 30 | Wall Rush | 30 (15) |
| Damage multiplier | Startup frame | Type | Priority | EX Force | Effects | CP (Mastered) |
|---|---|---|---|---|---|---|
| 2 x 37 (74) | 49F | Physical | Melee High | 30 | Wall Rush | 30 (15) |
| Damage multiplier | Startup frame | Type | Priority | EX Force | Effects | CP (Mastered) |
|---|---|---|---|---|---|---|
| - | 41F | - | Melee High | 0 | Wall Rush | 30 (15) |
| Damage multiplier | Startup frame | Type | Priority | EX Force | Effects | CP (Mastered) |
|---|---|---|---|---|---|---|
| 2 x 30 (60) | 55F | Physical | Ranged High | 30 | Wall Rush | 30 (15) |
Effects:
[Activate with R + Square] Damage dealt absorbed as HP and immediately recovers spent BRV. Cancel action with Air Dash.
The ultimate dragoon jump. Repeatedly press command displayed on the screen to raise the gauge. The command will change twice at random
| Damage multiplier (initial) | Damage multiplier (rest) | Type |
|---|---|---|
| 20, 10 (30) | 70 (100 total) | Physical |
| Stats | |
|---|---|
| HP | 9971 |
| CP | 450 |
| BRV | 957 |
| ATK | 181 |
| DEF | 182 |
| LUK | 60 |
| Max Booster | x7.4 |
| Equipment | |
|---|---|
| Assist | Player Choice |
| Weapon | Highwind |
| Hand | Lufenian Dirk (CP Glitch) |
| Head | Lufenian Headband (CP Glitch) |
| Body | Lufenian Vest |
| Accessory 1 |  Hyper Ring Hyper Ring
|
| Accessory 2 | Muscle Belt
|
| Accessory 3 | Sniper Eye
|
| Accessory 4 |  Large Gap in HP Large Gap in HP
|
| Accessory 5 | BRV = 0
|
| Accessory 6 | Empty EX Gauge
|
| Accessory 7 | Summon Unused
|
| Accessory 8 | Pre-EX Mode
|
| Accessory 9 | Pre-EX Revenge
|
| Accessory 10 |  Side by Side Side by Side
|
| Summon | Rubicante |
A high damage build utilising bravery damage and wall rush for small stages with low ceiling. The maximum booster value of x7.4 activates with both Large Gap in HP and BRV = 0. x5.3 when Large Gap in HP is in effect, but not BRV = 0.
Substitutes
Basic: Hyper Ring for Battle Hammer (assist depletion) or Dismay Shock (enhanced EX depletion)
| Stats | |
|---|---|
| HP | 9644 |
| CP | 450 |
| BRV | 1075 |
| ATK | 68 |
| DEF | 71 |
| LUK | 60 |
| Max Booster | x3.5 |
| Equipment | |
|---|---|
| Assist | Player Choice |
| Weapon | Heaven's Cloud |
| Hand | Lufenian Dirk (CP Glitch) |
| Head | Lufenian Hairpin (CP Glitch) |
| Body | Lufenian Vest |
| Accessory 1 | Muscle Belt
|
| Accessory 2 | Sniper Eye
|
| Accessory 3 | Dismay Shock
|
| Accessory 4 | Large Gap in HP
|
| Accessory 5 | Summon Unused
|
| Accessory 6 | Pre-EX Mode
|
| Accessory 7 | Pre-EX Revenge
|
| Accessory 8 | Tenacious Attacker
|
| Accessory 9 | Glutton
|
| Accessory 10 | First to Victory
|
| Summon | Rubicante |
A damage build without sacrificing EX absorption. Recommended for medium to large stages. x2.3 booster before Large Gap in HP activates.
Substitutes
Weapon: Cleaver
If you intend to use Aerith assist, use Cleaver instead. Heaven's Cloud serves well if you are comfortable doing his aerial bravery loops (in the corner).Kain's assist data.
| Type | Attack | Startup | Position | Spawn | Damage multiplier | Effects |
|---|---|---|---|---|---|---|
| BRV | Lance Burst | 29F | Ground | Opponent | 2 x 6, 5, 15 (32) | Chase |
| BRV | Crashing Dive | 21F | Air | Opponent | 1 x 7, 8, 1 x 7, 6, 12 (40) | Wall Rush |
| HP | Jump | 62F | Ground | Opponent | 2xN | Wall Rush |
| HP | Dragon's Fang | 41F | Air | Opponent | - | Wall Rush |